Cafesio Theme Settings #
All the theme settings available here under theme settings.
Banner Settings #
There is multiple banner options like page banner, shop page banner etc. You can customize and update under banner settings.
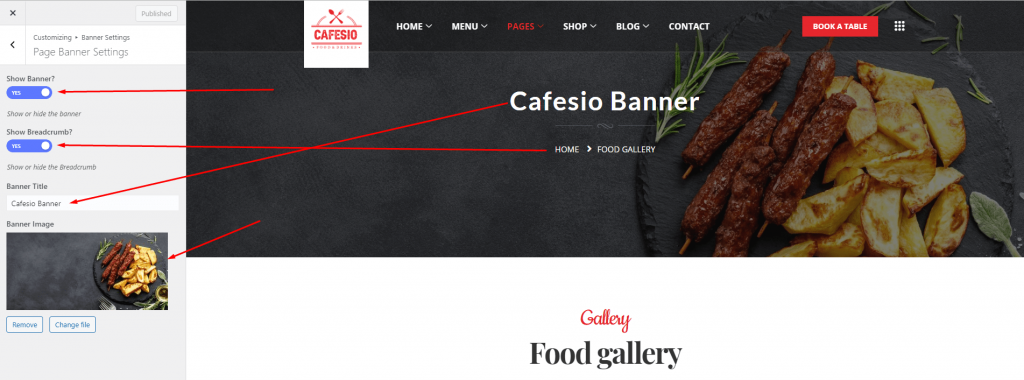
Page Banner Settings #
Go to Appearance -> Theme Settings -> Banner Settings. From ‘Page Banner Settings’ you can show/hide page banner, breadcrumb, custom title, and change banner image. In order to change the banner, click on ‘change file’ and upload a new image.
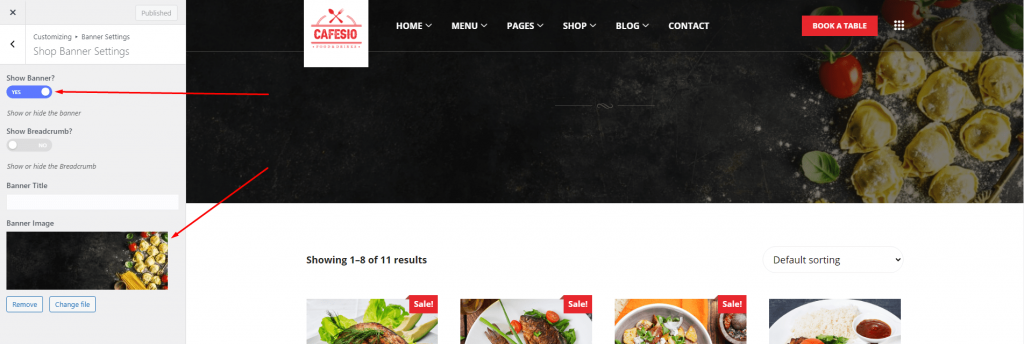
Shop Banner Settings #
From ‘Shop Banner Settings’ you can show/hide shop page banner and breadcrumb. Also, you can set a custom title and change the banner image. In order to change the banner, click on ‘change file’ and upload a new image.
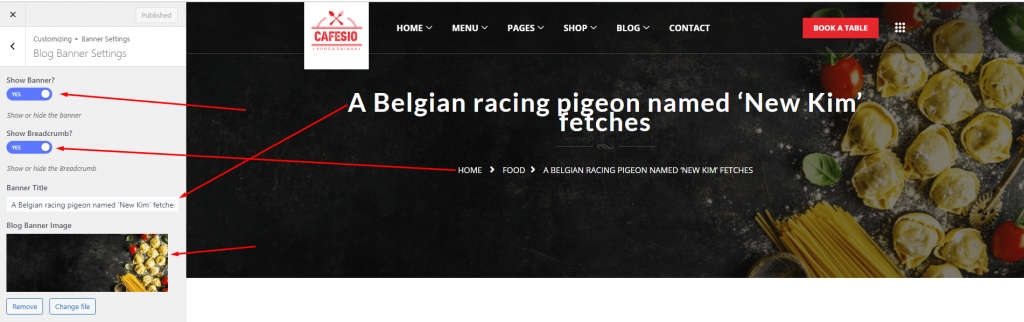
Blog Banner Settings #
From ‘Blog Banner Settings’ you can show/hide blog page banner, breadcrumb, custom title, and change the banner image. To change the banner, click on ‘change file’ and upload a new image.
Blog Settings #
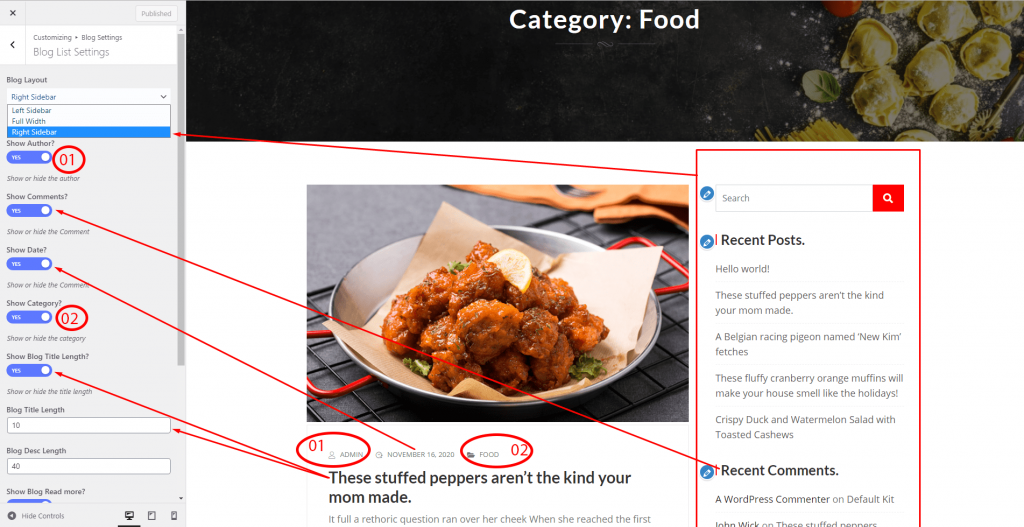
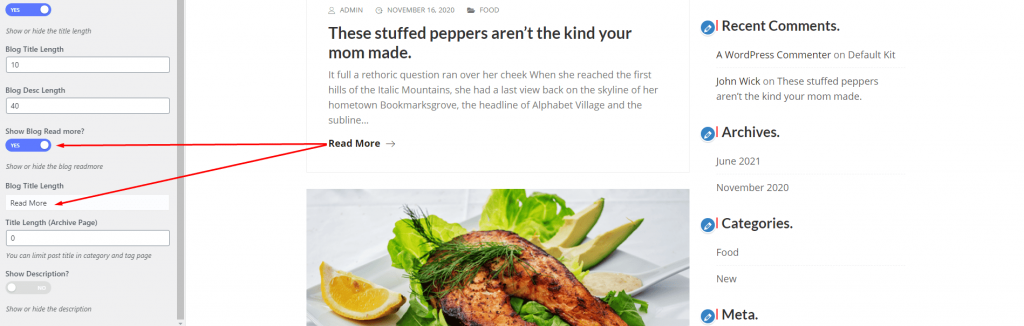
Blog List Settings #
Go to Appearance -> Theme Settings -> Blog Settings. From the blog list settings, you can change blog layout and put sidebar in both left and right side. Also, you can hide sidebar from the page. There is hide/show options for author, date, category, blog title length, description length and read more options. Beside this, you can update read more title.
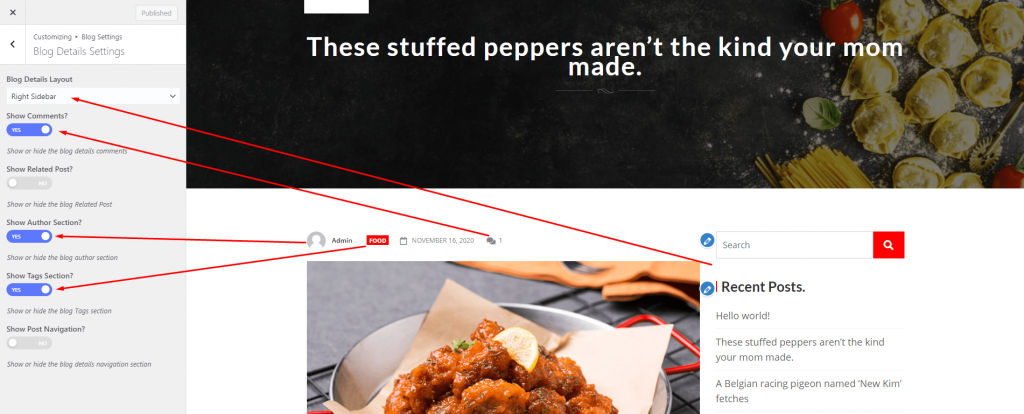
Blog Details Settings #
From the blog details settings, you can show/hide comments, related post, author name and tag section. To change, check the indicator and update as per needed.
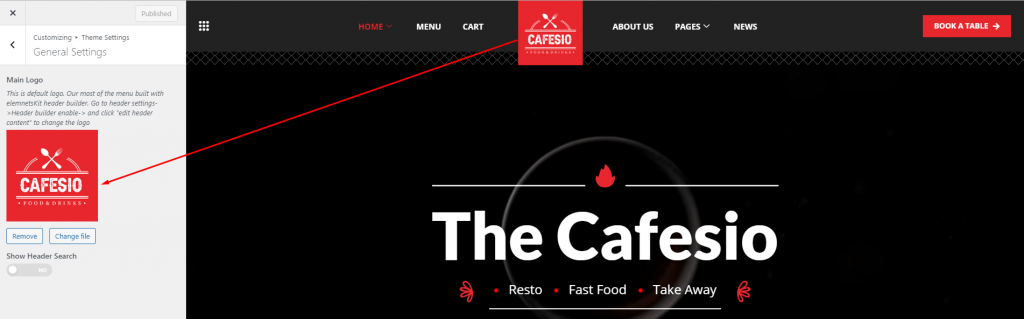
General Settings #
If you want to change the default header logo then go to Appearance -> Theme Settings -> General Settings. Update the logo by clicking change file and publish. Note- We use ElementsKit for header footer builder to build the menu. Go to header settings->Header builder enables -> and click “edit header content” to change the logo. Click here to see the documentation.
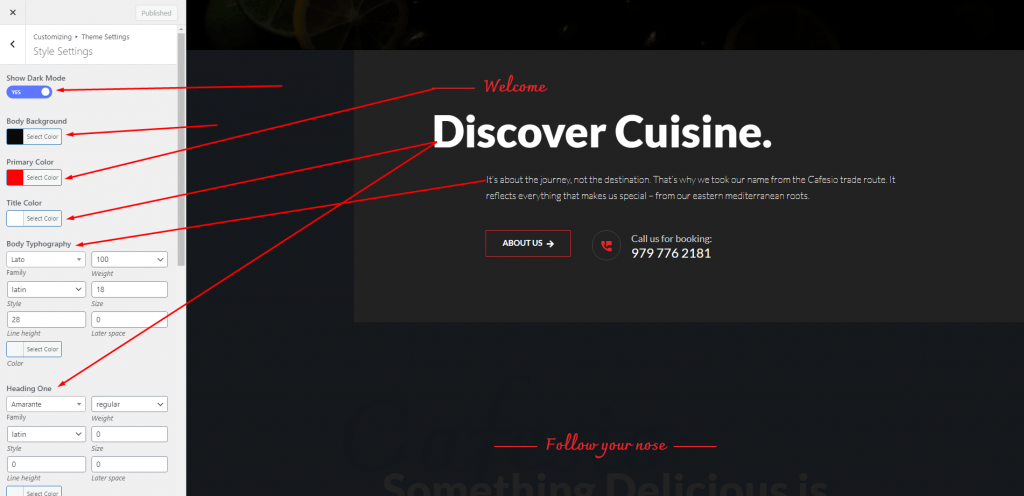
Style Settings #
Go to Appearance -> Theme Settings -> Style Settings. To enable dark mode, click on show dark mood toggle button. In order to change body background color, title color, body typography and other fonts, please check the indicator arrow.
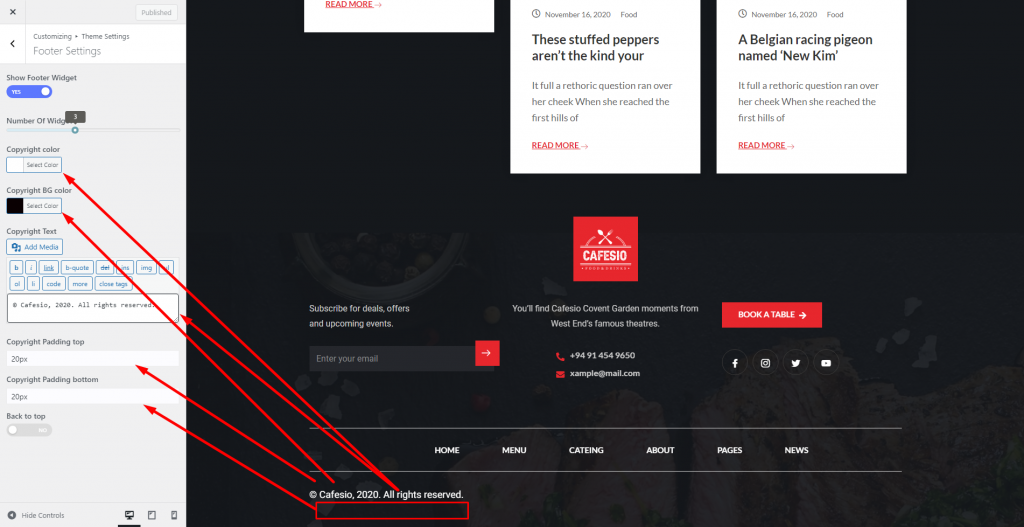
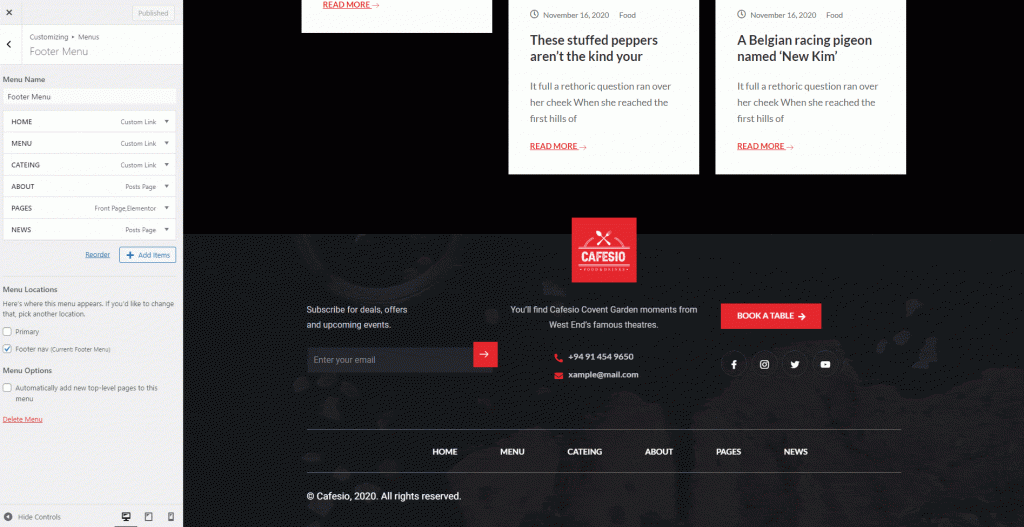
Footer Settings #
Go to Appearance -> Theme Settings -> Footer Settings. To change copyright color, background color and copyright text. Check the indicated arrow. Also, you can add padding on copyright text top and bottom.
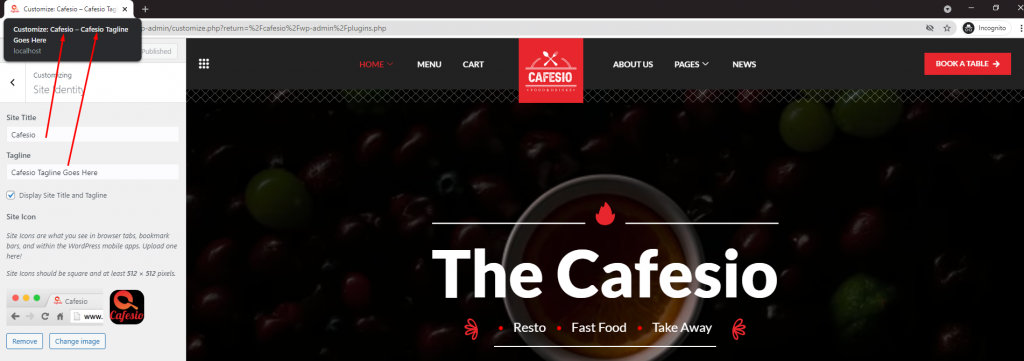
Site Identity #
To change site identity like fav-icon (display at address bar), site title and tagline, Go to Appearance -> Site Identity. Site Icons should be square and at least 512 × 512 pixels.
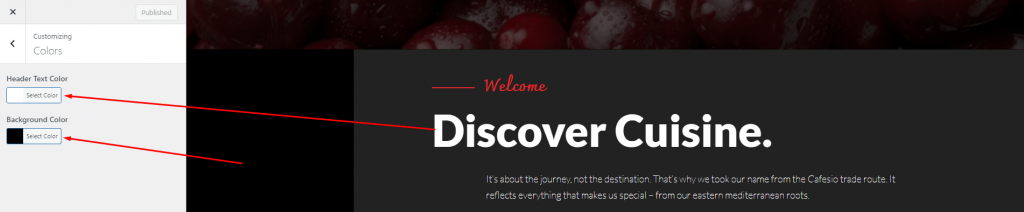
Color Settings #
To change title and background color, go to Appearance -> Color Settings. Then select header text color and background color. Finally publish the changes.
Header Image Settings #
To change the header image, please go to Appearance -> Header Image and upload your banner. The recommended size for a header image is 1000 × 250 pixels.

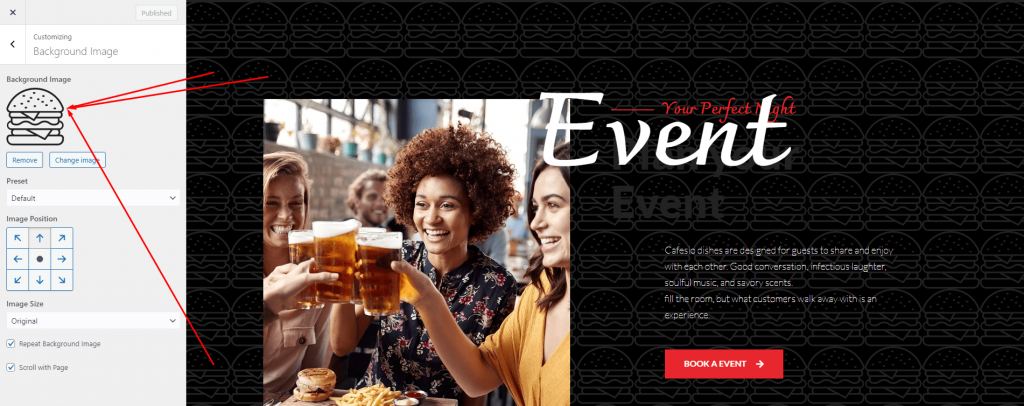
Background Image Settings #
In order to set a background image, please go to Appearance -> Background Image. Upload image from given option and set preset, image position, image size to fit it beautiful.
Menu Settings #
To customize the Cafesio theme menu, we recommended you use the ElementsKit header footer editor. However, you can customize your site menu by following the given instructions. Please go to Appearance -> customize -> Menu. All the pre-defined menu will be available here. Set the menu and add/remove the page, post, link from the menu. After that publish it.
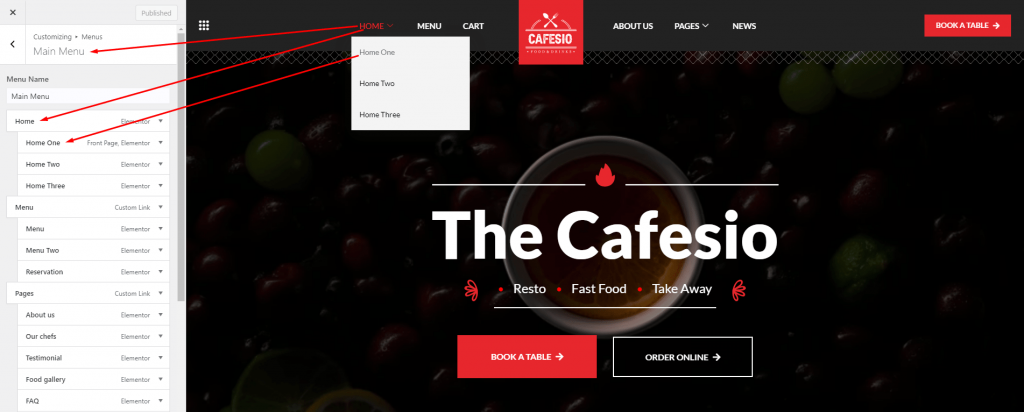
To add new item in menu, click on Add item, then menu item will be appear. You can add new menu or re-order menu item.
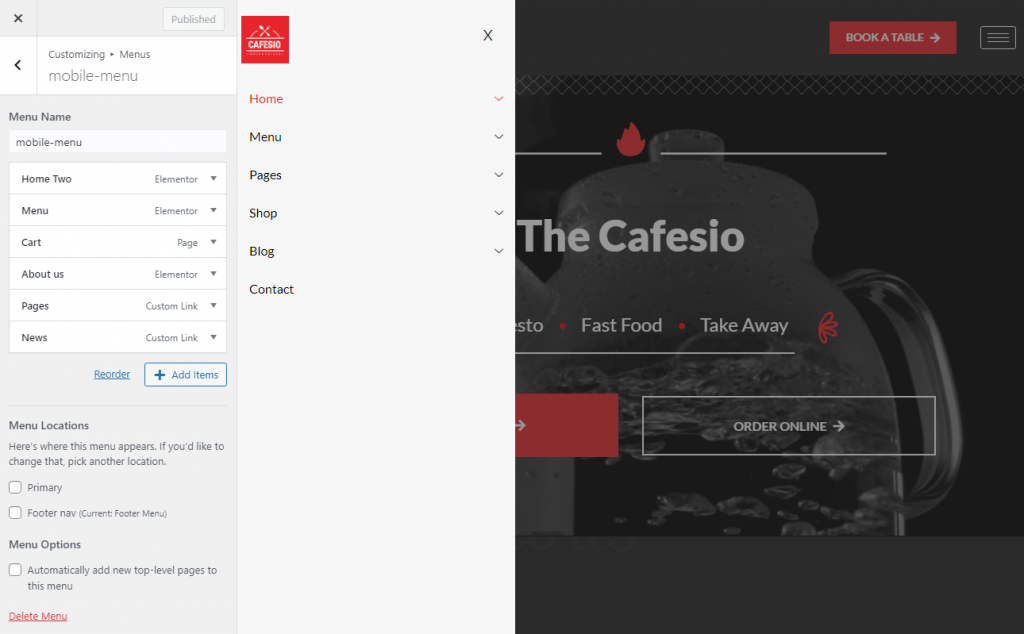
The list will contain a mobile menu for the mobile version of the website. In case if you want to change mobile menu, check and update the menu and publish it.
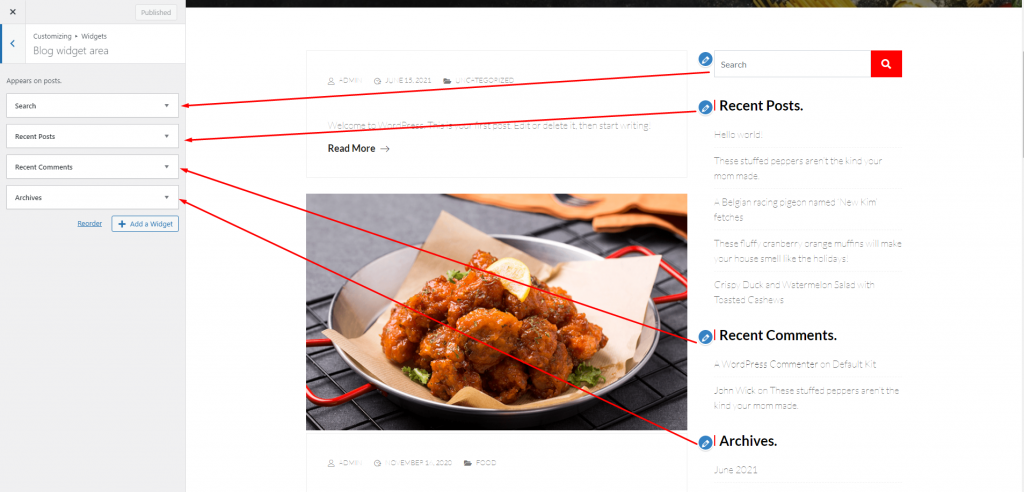
Widgets Settings #
Go to Appearance -> customize -> Blog widget area and click on plus(+) sign to add new widgets or click on re-order for changing the order.
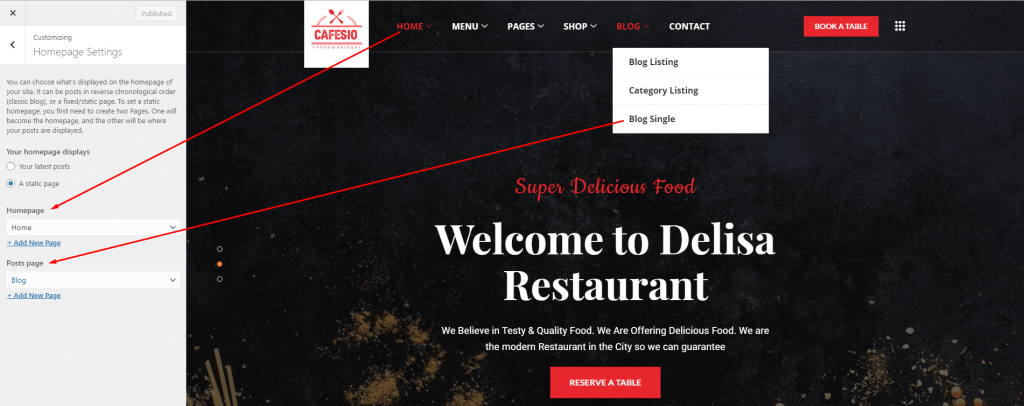
Home Page Settings #
To set home page and post page, go to Appearance -> customize -> Homepage Settings. Home page is the first page that appears in front of visitors during they visit your site. A blog page is the page contain all of your posts from the dashboard.
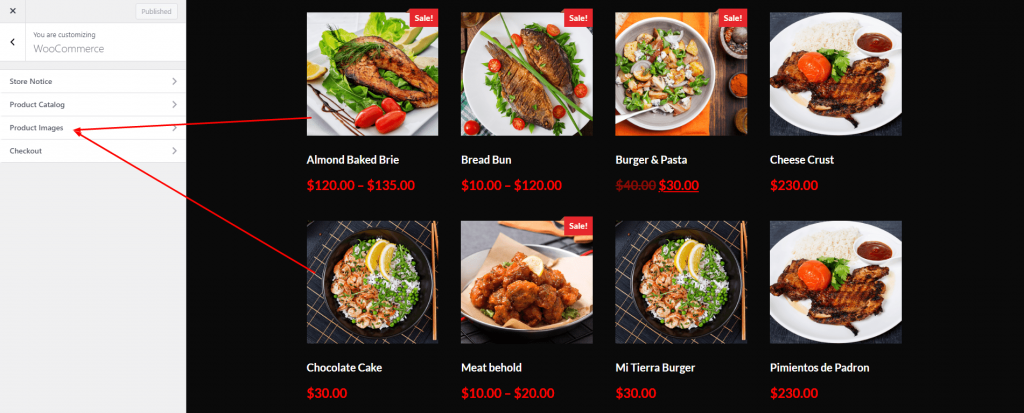
WooCommerce Settings #
To change WooCommerce settings, please go to Appearance -> customize -> WooCommerce. There is store notice, product catalog, product image, and checkout settings available. You can change settings by clicking each menu item. You can define the row and column number for the product.
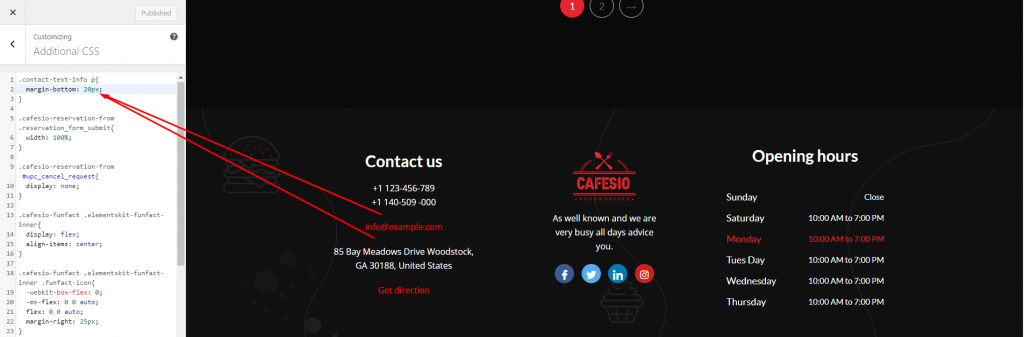
Additional CSS #
If you want to add additional CSS on your site, go to the Appearance -> customize -> Additional CSS. Then inside the input box, add your additional css. And publish the changes before closing the tab.