LearnPress Settings: Create and Manage Courses #
Adding Learnpress to your WordPress Website
Before you start creating awesome courses with our plugin (which is fully compatible with LearnPress), you’d want to add it to your WordPress site.
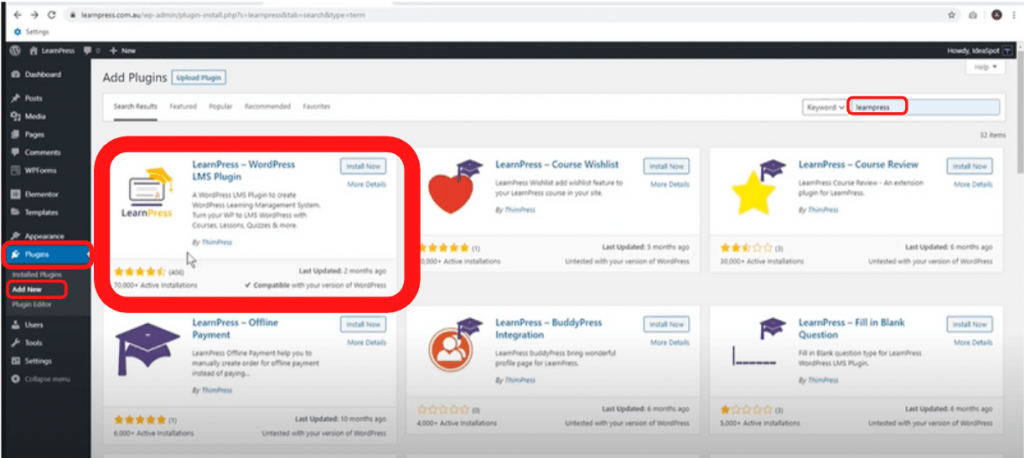
- First of all, choose ‘Plugins’ from your WordPress Dashboard.
- Under that, you will find ‘Add New’. Click on it.
- Then you will be taken to the Add Plugins page.
- On the right-hand side, type ‘LearnPress’
- You should see it pop up as the very first (please consult the above image for help).
- Press the ‘Install Now’ Button.
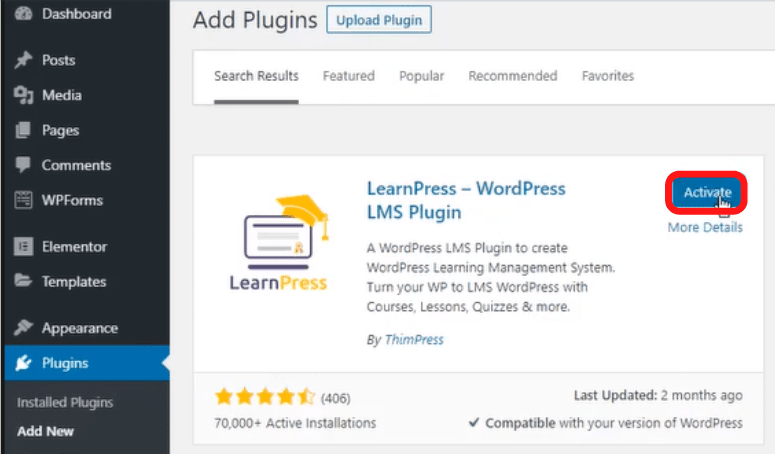
Once you press the install button, LearnPress will start the installation process. Once the plugin is installed.
Click on the ‘Activate Button’
You now have LearnPress installed on your WordPress site. You should now see the setup wizard:
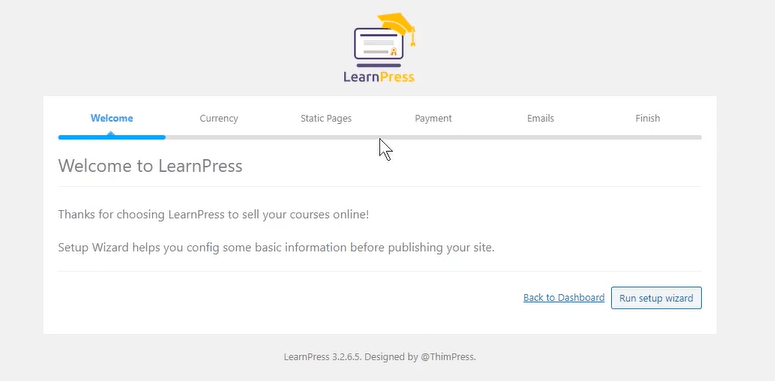
You can choose to run the setup or skip it as per your wish.
Create A Course with LearnPress #
Step 1: Create your First Lesson #
In order to create your first lesson:
- Choose ‘LearnPress’ on your WordPress dashboard.
- After that, go to ‘Courses’.
- You are now in the ‘Edit Course’ where you can play with the options.
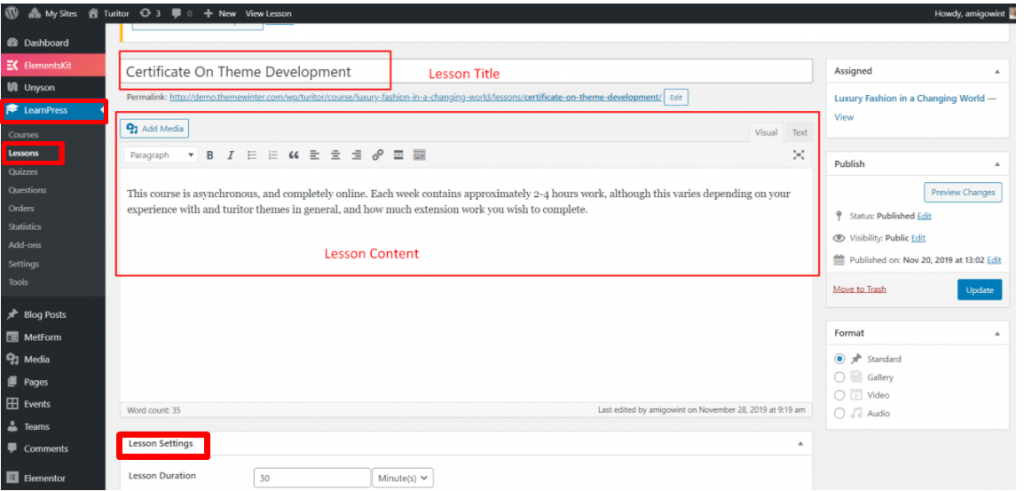
- Add a lesson Title
- Add some Content for your course.
Step 2: Set the Lesson Settings #
Under the ‘Lesson Settings’ tab, you will be able to:
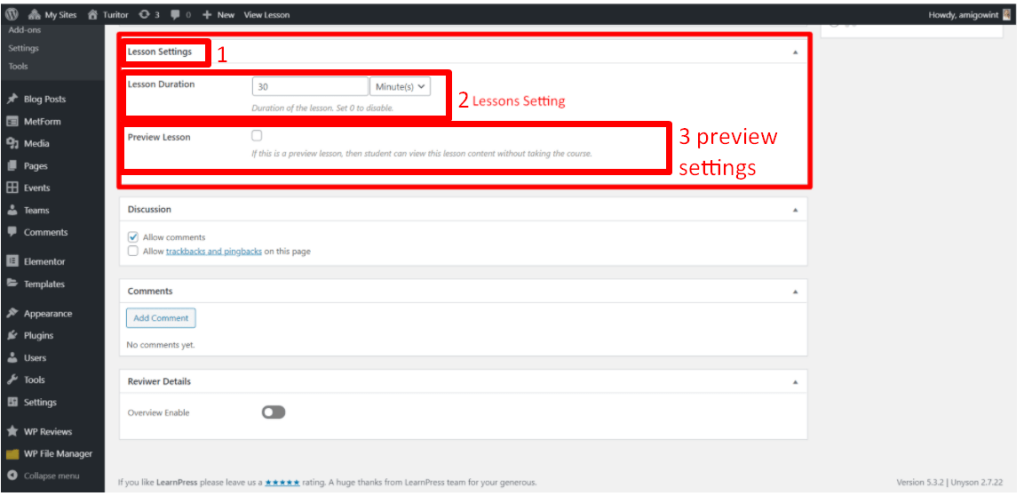
- Set the ‘Lesson’ duration.
- Choose if you want to preview the lesson.
You can create courses in a similar manner. In the next section, we will talk about how to work with the LearnPress Course Settings.
Editing a Course with LearnPress #
We have already seen how to create a course. Now, if you want to edit a course with LearnPress:
- Choose ‘LearnPress’.
- After that, go to ‘Courses’.
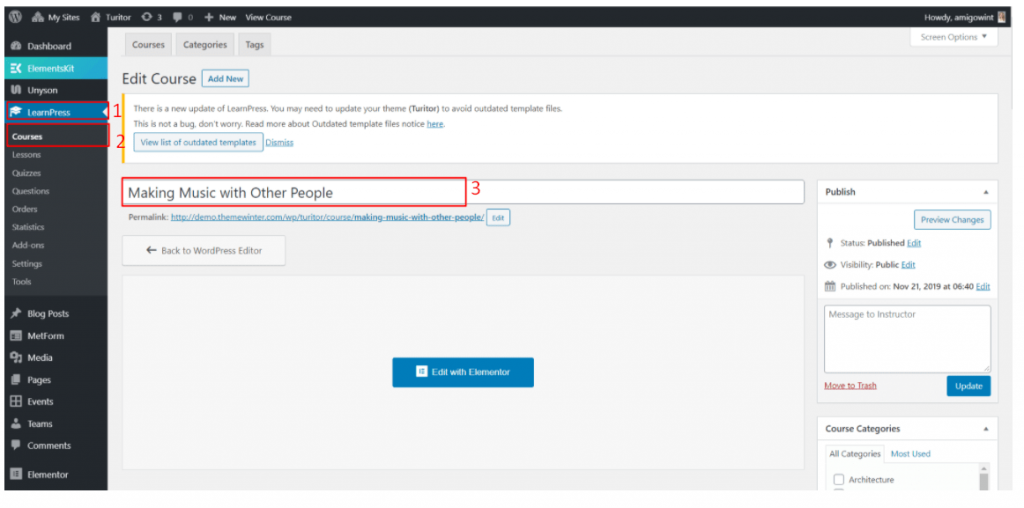
Here you have the option to:
- Add New Course
- Publish, maintain categories, and more.
Curriculum Settings: Working with the ‘Curriculum Tab’ #
The ‘Curriculum’ tab will be under the ‘Courses’ Tab.
- Choose ‘LearnPress’.
- After that, go to ‘Courses’.
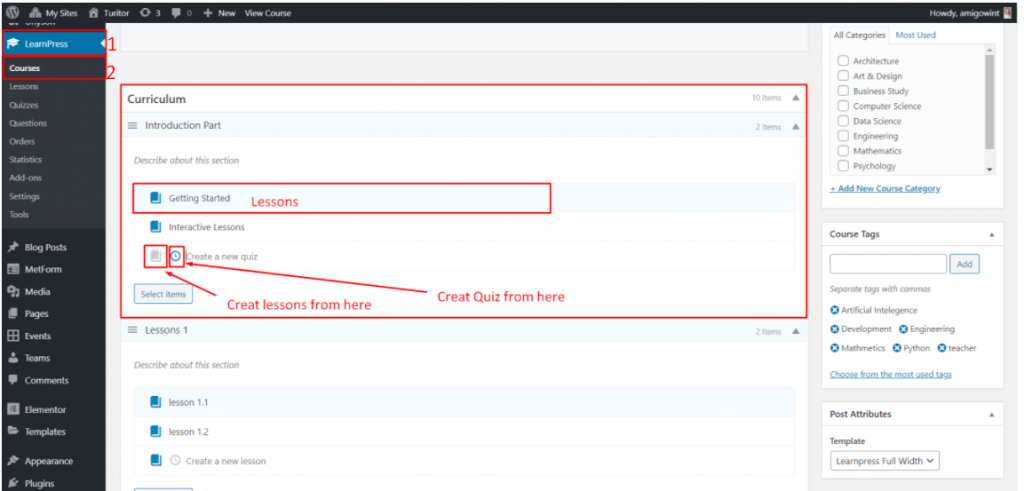
In the ‘Curriculum Tab’ you will find the following options:
- The ‘Getting Started’ Tab will allow you to set lessons for your course.
- You will be able to create quizzes from the ‘Create a new quiz’ tab.
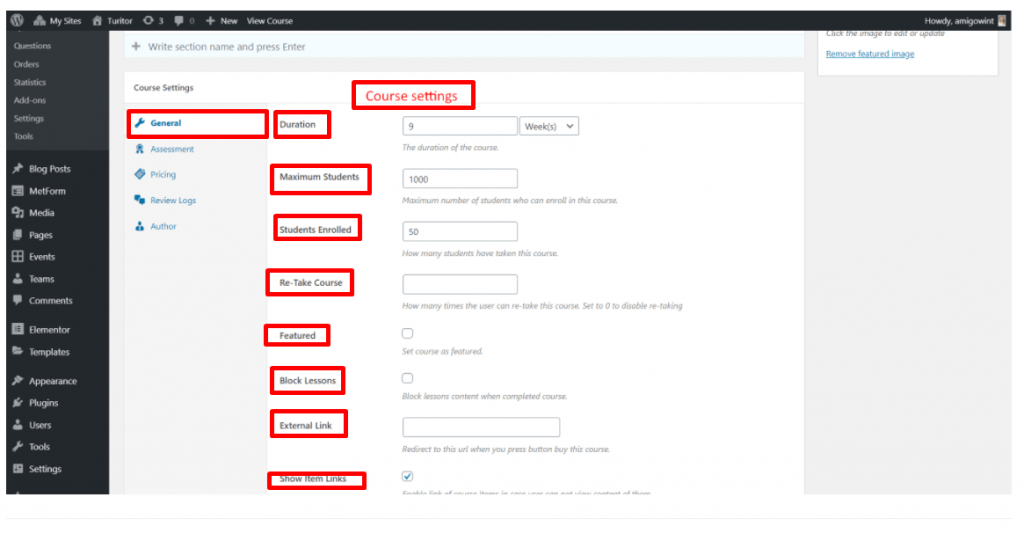
Managing the ‘Course Settings’ #
Inside the ‘Course Settings,’ you can set the course duration, manage the number of students, enable retake options and play with many other settings.
From the Course Settings, you will be able to set your :
- Trending Title and subtitle.
- Trending courses according to popularity.
- The course limit.
- Slider show and many more.
Working with the Layout #
From the ‘Edit Courses’ tab, you can choose to ‘Edit with Elementor’.
- Make sure you are on the ‘Edit Course’ pane.
- Locate ‘Navigate’
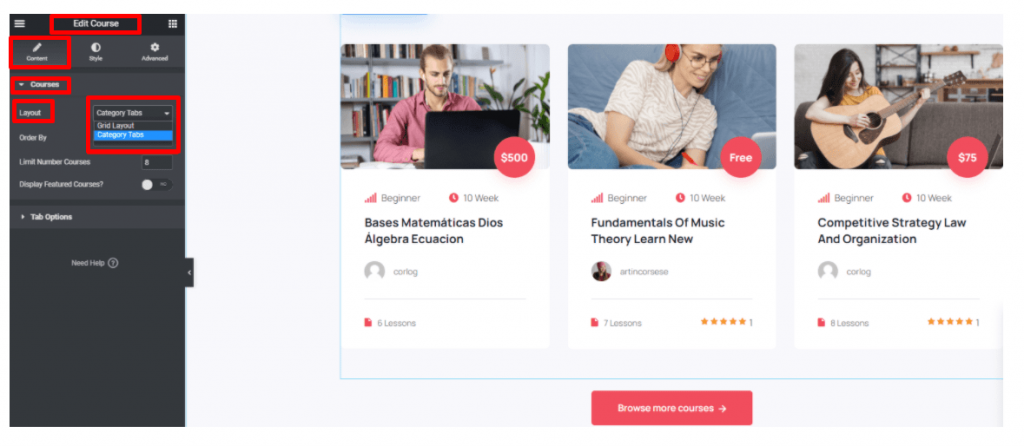
You can choose from two options:
- Grid layout
- Category Tabs
You have the liberty to showcase your courses however you please.
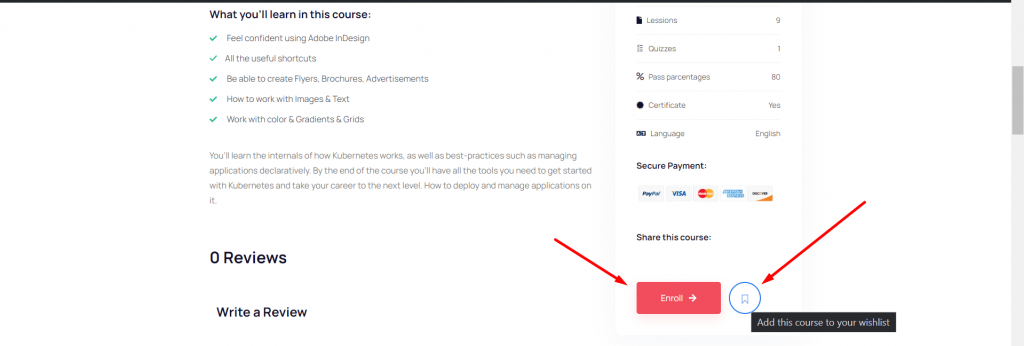
Course Wishlist #
Our theme supports the LearnPress Wishlist Plugin. You can activate it by:
- Going to Plugins
- Search for the LearnPress Wishlist Plugin
- Activate it.
Once you activate it, your sellable courses will have the ‘Add to Wishlist’ button.
Setting quizzes for your course #
Instructors can set quizzes using LearnPress. Students can access these quizzes under the materials of the courses they are taking. You can set quizzes in the following way:
- Go to ‘LearnPress’
- Choose ‘Quizzes’
Once you choose it, it will show you a list of the Quizzes you already have. If you don’t have any quizzes uploaded, then you can choose ‘Add New’.
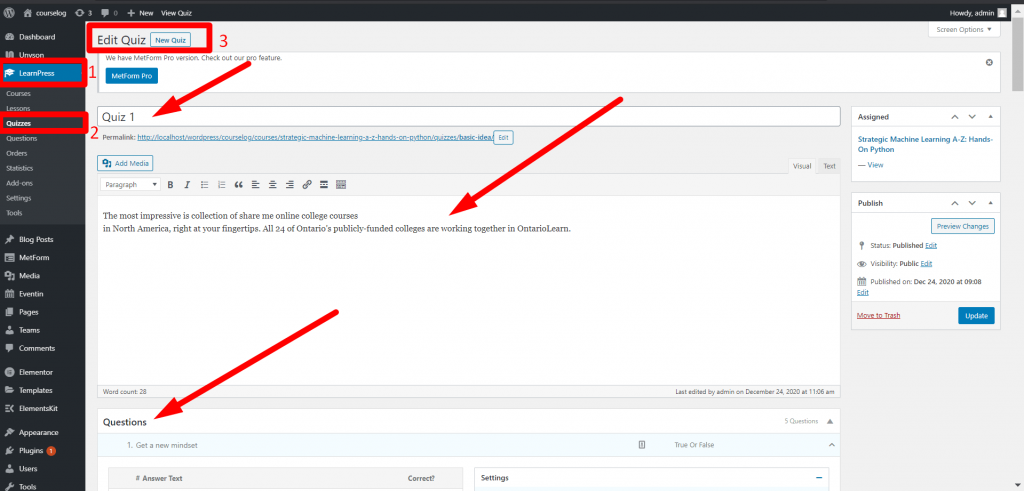
You can now add quizzes to your courses.
Also, you can add questions individually.
Assigning an Instructor #
With the Courselog theme, you will be able to create instructors for your courses easily.
- First of all, go to ‘Users’ on your WordPress Dashboard.
- In the Username box, you can add a username.
- Find the ‘Role’ tab. From here, you can assign the role of the instructor.
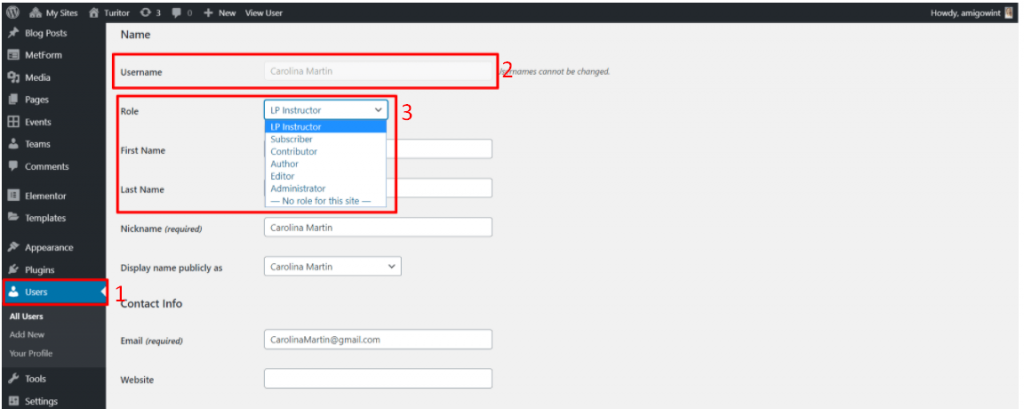
From the ‘Role’ tab you can assign the instructor role with ease.
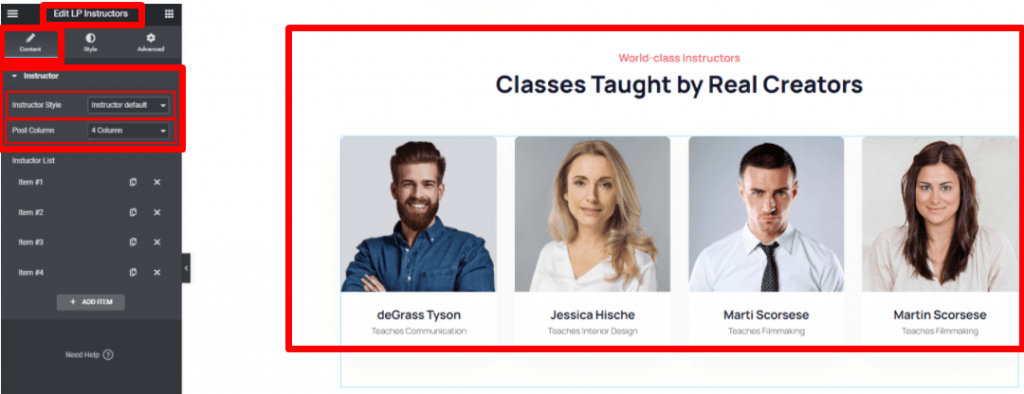
Instructor Showcasing #
You can also edit the style of how the instructors are shown from the LP Instructors pane with Courselog.
Course SetupHere is a short video about the process of creating course using LearnPress LMS including the other settings.
Learnpress Payment method #
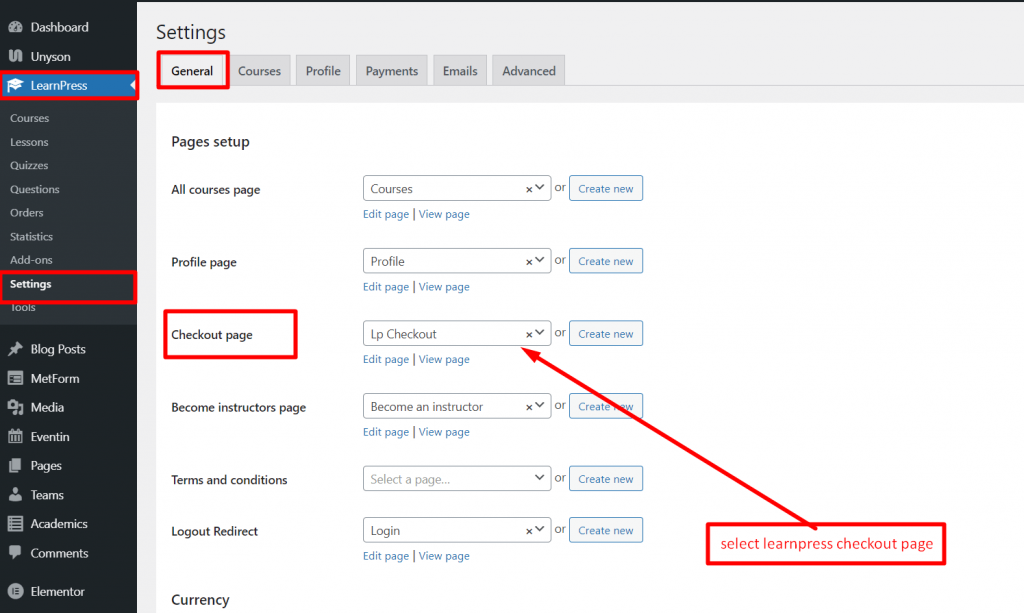
In Learnpress, there has PaPal Payment method by default. For enabling the checkout page, Navigate to Dashboard> Learnpress> Settings> General and select Learnpress checkout page> Save changes.
Learnpress don’t support WooCommerce directly. If you want to use WooCommerce payment getway in Learnpress, you need to use Learnpress WooCommerce Payment Getway Add-ons.
Here is the link for Learnpress WooCommerce Payment Getway Add-ons:


