Accessing the editor #
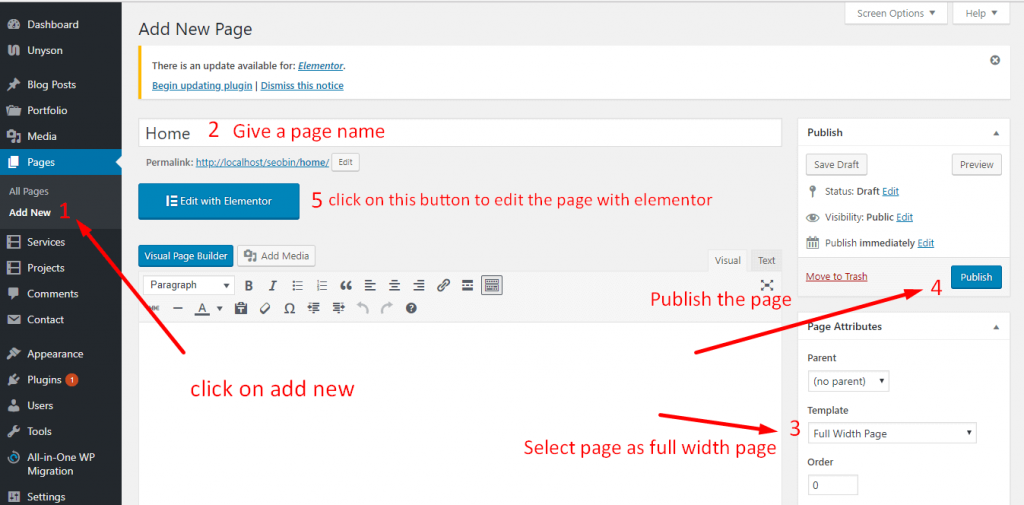
To start working with Elementor, go to the WordPress dashboard. Then, add a new page by clicking on Pages > Add New. Then, create a new page and save it with the ‘full width’ template and then click on the ‘Edit with Elementor’ button.
Create Elementor Page #
Elementor UI: Getting to know the interface #
The Elementor page builder includes these main areas:
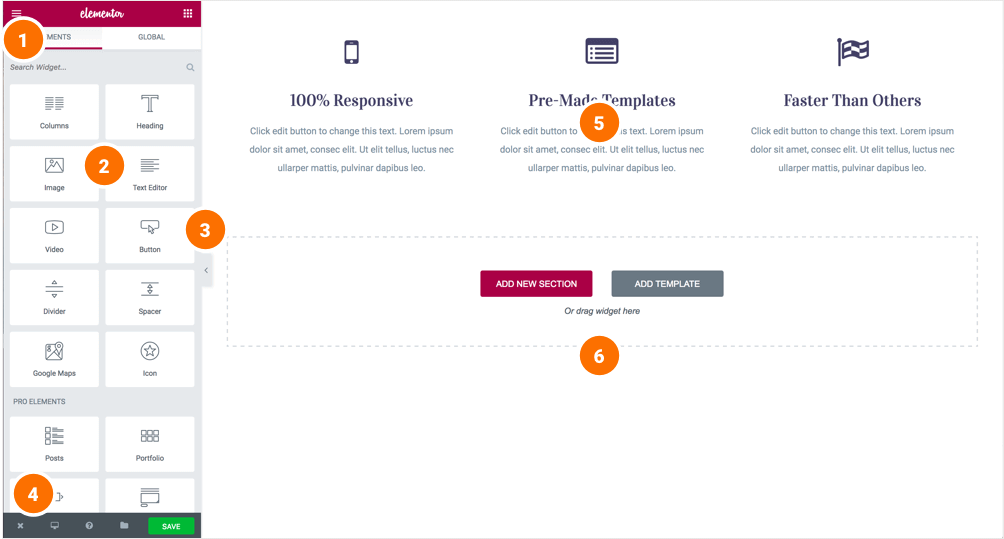
1. Panel (Top): Use the search field to find a widget.
2. Widgets / Widget Settings: Choose a widget and configure it.
3. Preview Button: Enables you to preview the page. Once clicked it hides/shows the panel.
4. Panel (Bottom): View page, Go back to Dashboard or Save the page.
5. Content Area: Drag & drop widgets and design your page.
6. Add New Section / Add Template: Choose between creating a new section or inserting an existing template.
Creating your section #
A section is the most basic element that you can work with. It’s the building block of every page. A section can be set as full width and spread all over the screen, or receive the content area width (by default).
After you create a section you can drag and drop a widget inside. You can also divide each section to few columns. Every page you create can contain as many sections as you want. You can drag a section above or under another one to relocate it.
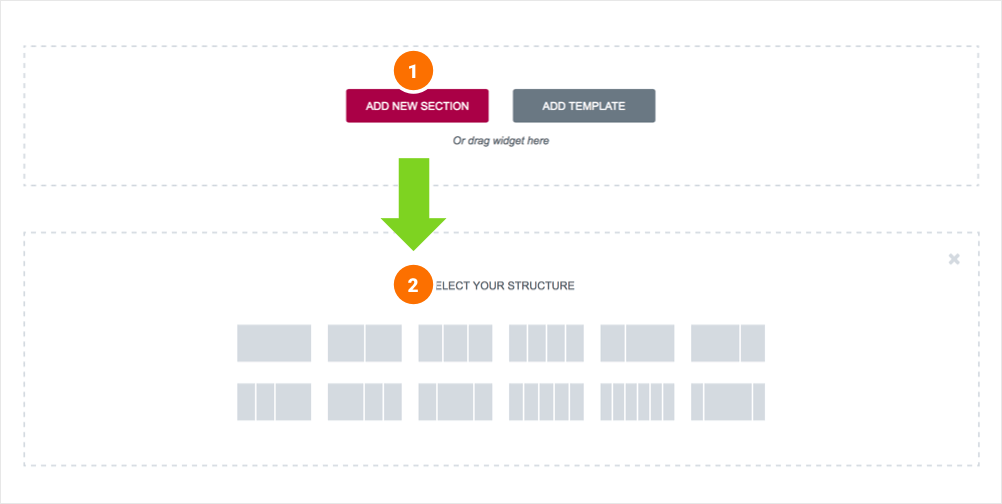
- Add New Section: Click this button to create a new section or simply drag a widget from the panel and drop it in the content area.
- Select Yout Structure: Choose a structure for your section (Later, you can edit the exact width of every column).
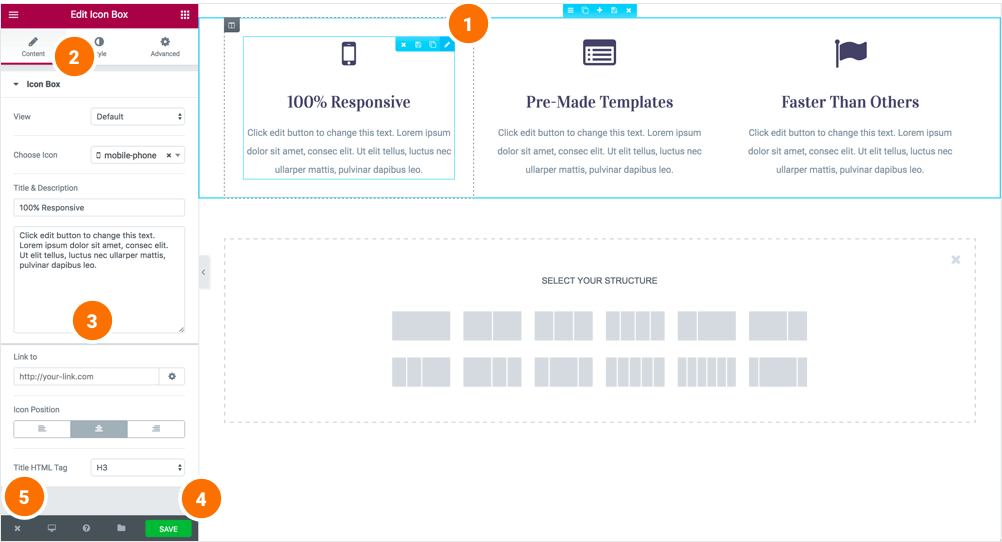
Inserting a widget #
Click the content to edit, duplicate or delete a widget. You can also save it as a Global Widget. Add Widget: Drag a widget from the left panel and drop it into a column.
1. To edit a widget, click the pencil icon.
2. On the Panel header, you can choose to edit the widget’s content and style.
3. Every widget has a different setting.
4. You can save your current changes at any stage.
5. When you have finished designing, click the ‘X’ button at the bottom panel and view the page.