Working with the Page Builder: Editing with Elementor #
In order to work with the Visual Page Builder, you will need to:
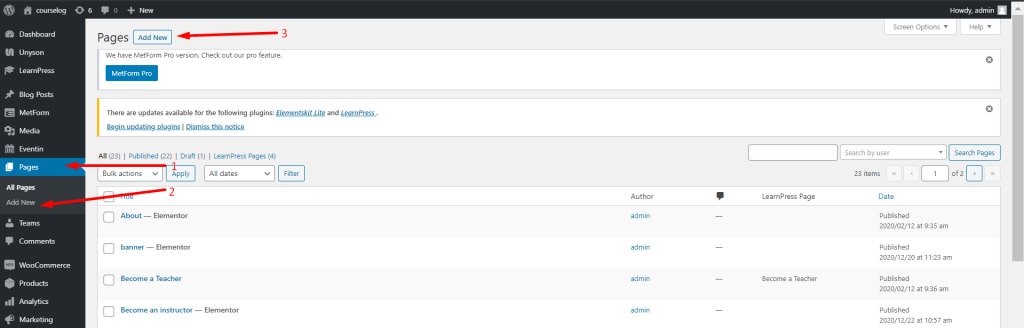
- Go to ‘Pages’ on your WordPress Dashboard.
- Select ‘Add New’
Once you have done this, you will be taken to the following page.
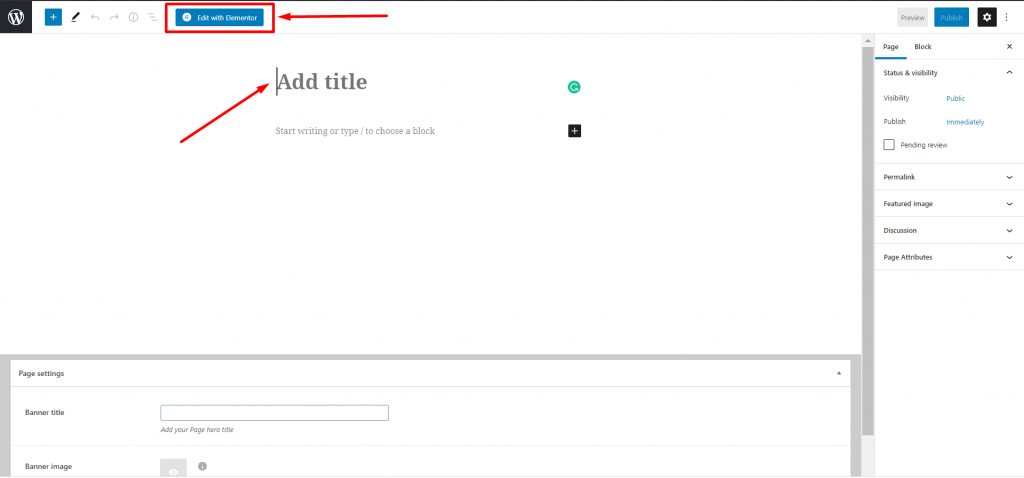
You can choose to add a title to the page. Or you can do it with the Elementor. For now, choose ‘Edit with Elementor’.
Once you are here, it will take you to the following page:
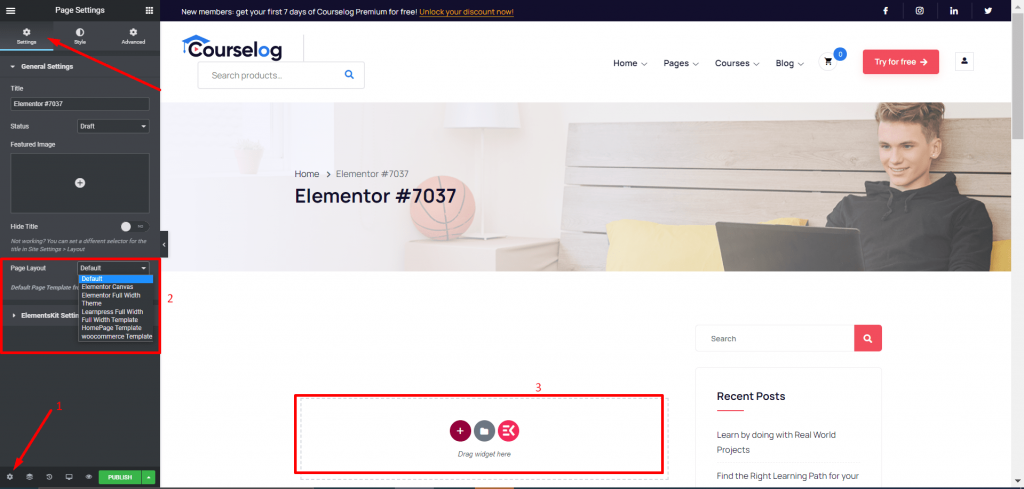
You can click on the ‘Settings’ wheel at the very bottom. From there, you can change:
- The page layout.
- Or add an Element inside the page.
Elementor UI: Getting to know the interface #
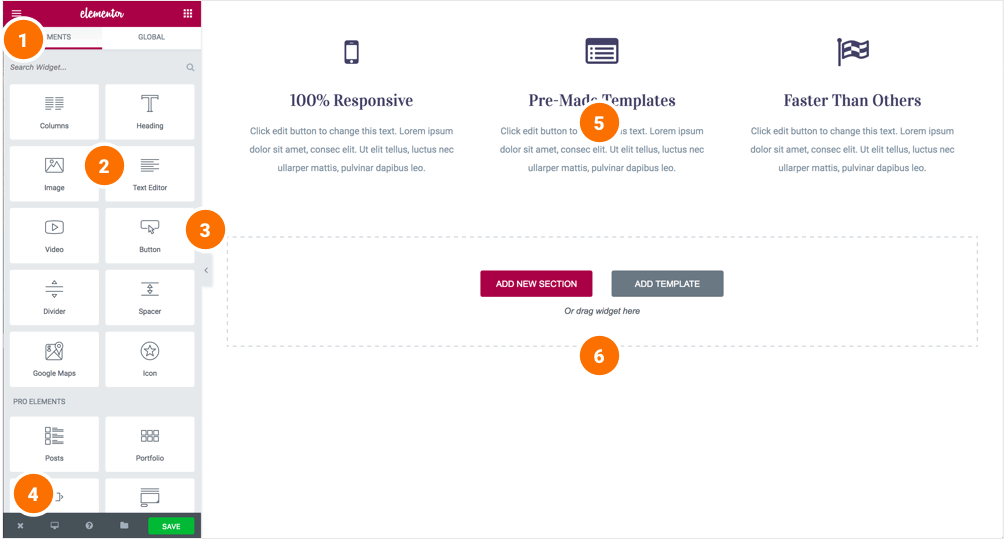
The Elementor page builder includes these main areas:
1. Panel (Top): Use the search field to find a widget.
2. Widgets / Widget Settings: Choose a widget and configure it.
3. Preview Button: Enables you to preview the page. Once clicked it hides/shows the panel.
4. Panel (Bottom): View page, Go back to Dashboard or Save the page.
5. Content Area: Drag & drop widgets and design your page.
6. Add New Section / Add Template: Choose between creating a new section or inserting an existing template.
Creating New Sections #
Here’s a quick video on how to create sections in an Elementor page.
After you create a section you can drag and drop a widget inside. You can also divide each section into few columns. Every page you create can contain as many sections as you want. You can drag a section above or under another one to relocate it.
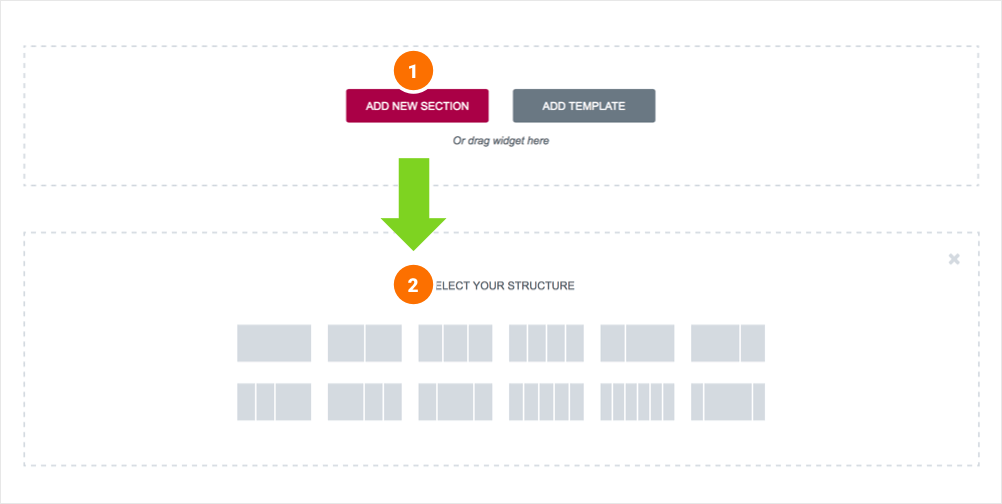
- Add New Section: Click this button to create a new section or simply drag a widget from the panel and drop it in the content area.
- Select Your Structure: Choose a structure for your section (Later, you can edit the exact width of every column).
Inserting a widget #
Click the content to edit, duplicate or delete a widget. You can also save it as a Global Widget.
Add Widget: #
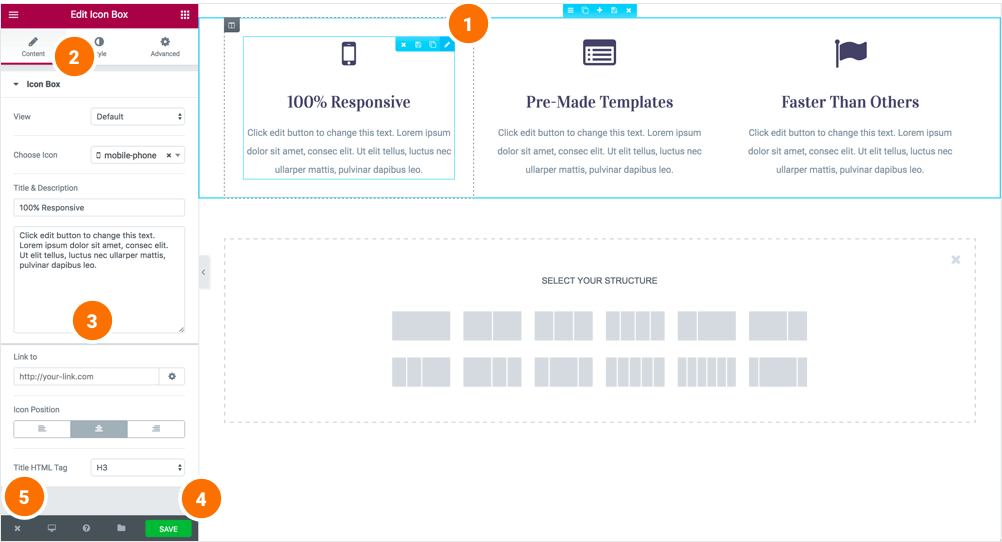
Drag a widget from the left panel and drop it into a column.
1. To edit a widget, click the ‘Pencil icon‘.
2. On the Panel header, you can choose to edit the widget’s content and style.
3. Every widget has a different setting.
4. You can save your current changes at any stage.
5. When you have finished designing, click the ‘X’ button at the bottom panel and view the page.
You can play with these settings to come up with new ideas.


