Thank you for purchasing Tymic – WordPress Appointment Booking Theme. We appreciate your trust and support!
📦 First Steps #
Your download package includes:
- Documentation – A complete guide (you’re reading it now!)
- License – Details about theme licensing
- Sample Data – Importable data to replicate the demo site
- Theme Files – Includes Parent and Child theme for installation
👶 Why Use a Child Theme? #
Tymic includes both a Parent and a Child Theme. We recommend activating the Child Theme to ensure your customizations are safe during future theme updates.
Benefits of Using a Child Theme: #
- Safe Updates: Easily update the parent theme without losing your changes
- Custom Flexibility: Modify only the files and functions you need
- Override Control: Files in the child theme override the parent by default
Setup: #
Upload both the Tymic Parent and Tymic Child themes to /wp-content/themes/, but activate only the Tymic Child theme from Appearance → Themes.
⚙️ Theme Installation #
✅ Server Requirements #
Ensure your server meets the following specifications:
- PHP: 8.0 or higher
- MySQL: 5.0 or higher
- WordPress: 5.0 or higher
- Recommended PHP Settings:
max_execution_time = 600upload_max_filesize = 32Mpost_max_size = 48Mmemory_limit = 700Mmax_input_time = 300max_input_vars = 10000
🧩 Installing the Theme #
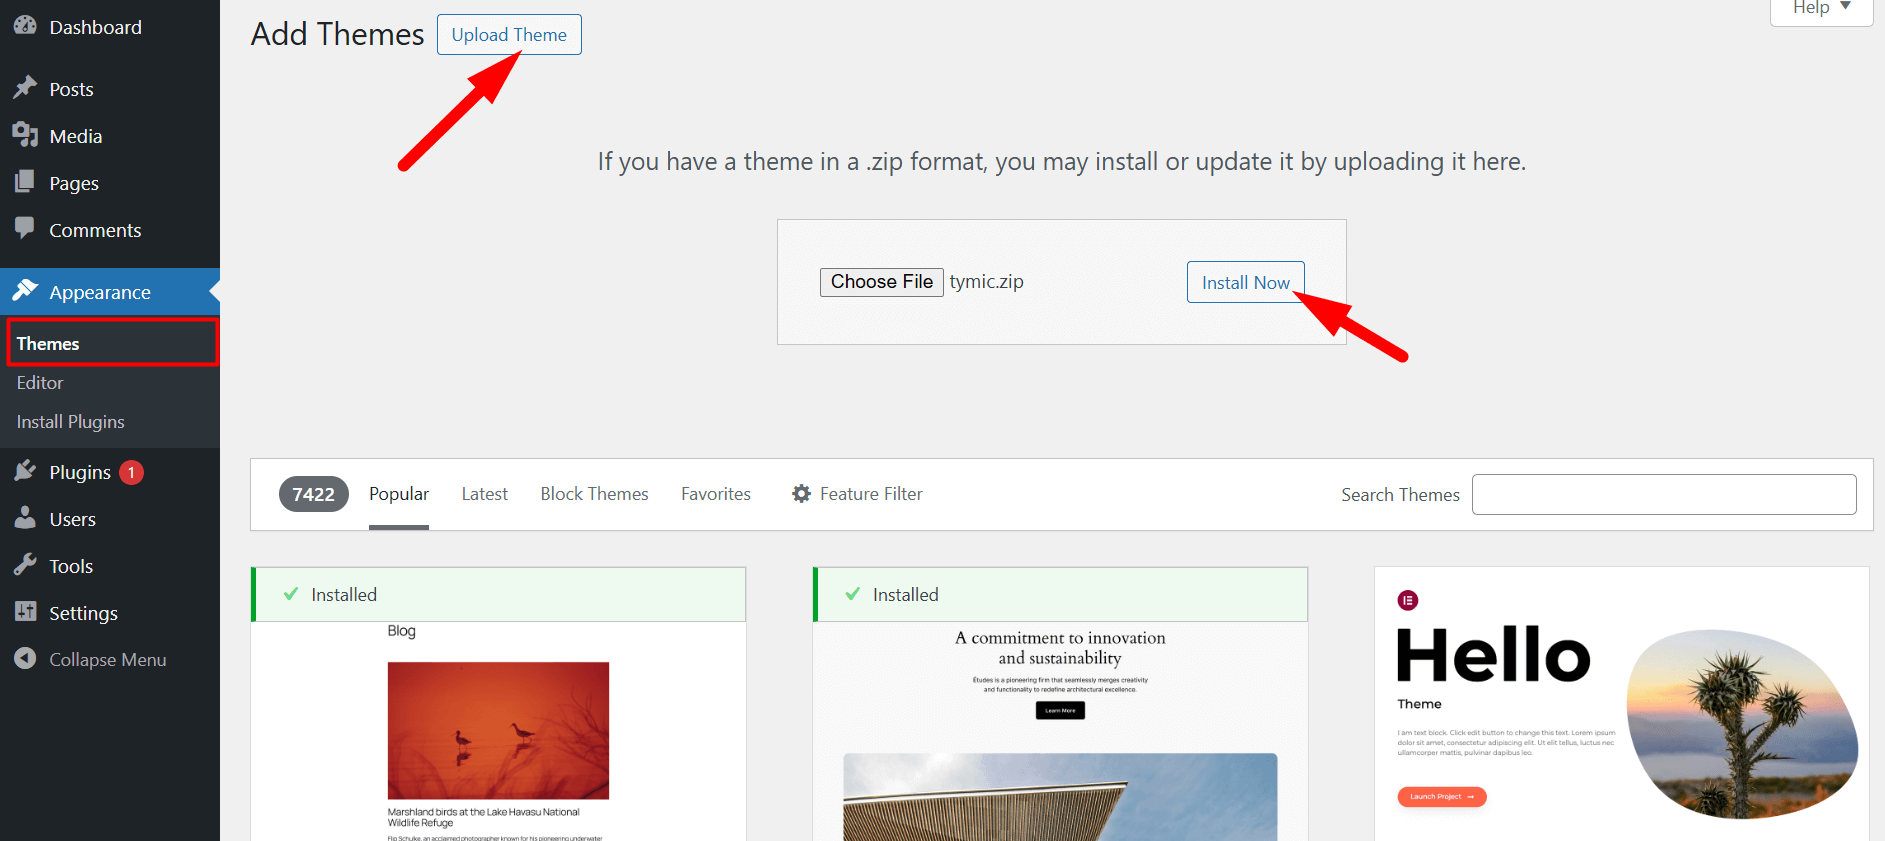
Option 1: WordPress Admin Upload #
- Go to Appearance → Themes → Add New
- Click Upload Theme
- Select
tymic.zip - Click Install Now, then Activate
Option 2: FTP Upload #
- Unzip
tymic.zip - Connect via FTP
- Upload the theme folder to
/wp-content/themes/ - Go to Appearance → Themes in WordPress and activate the theme
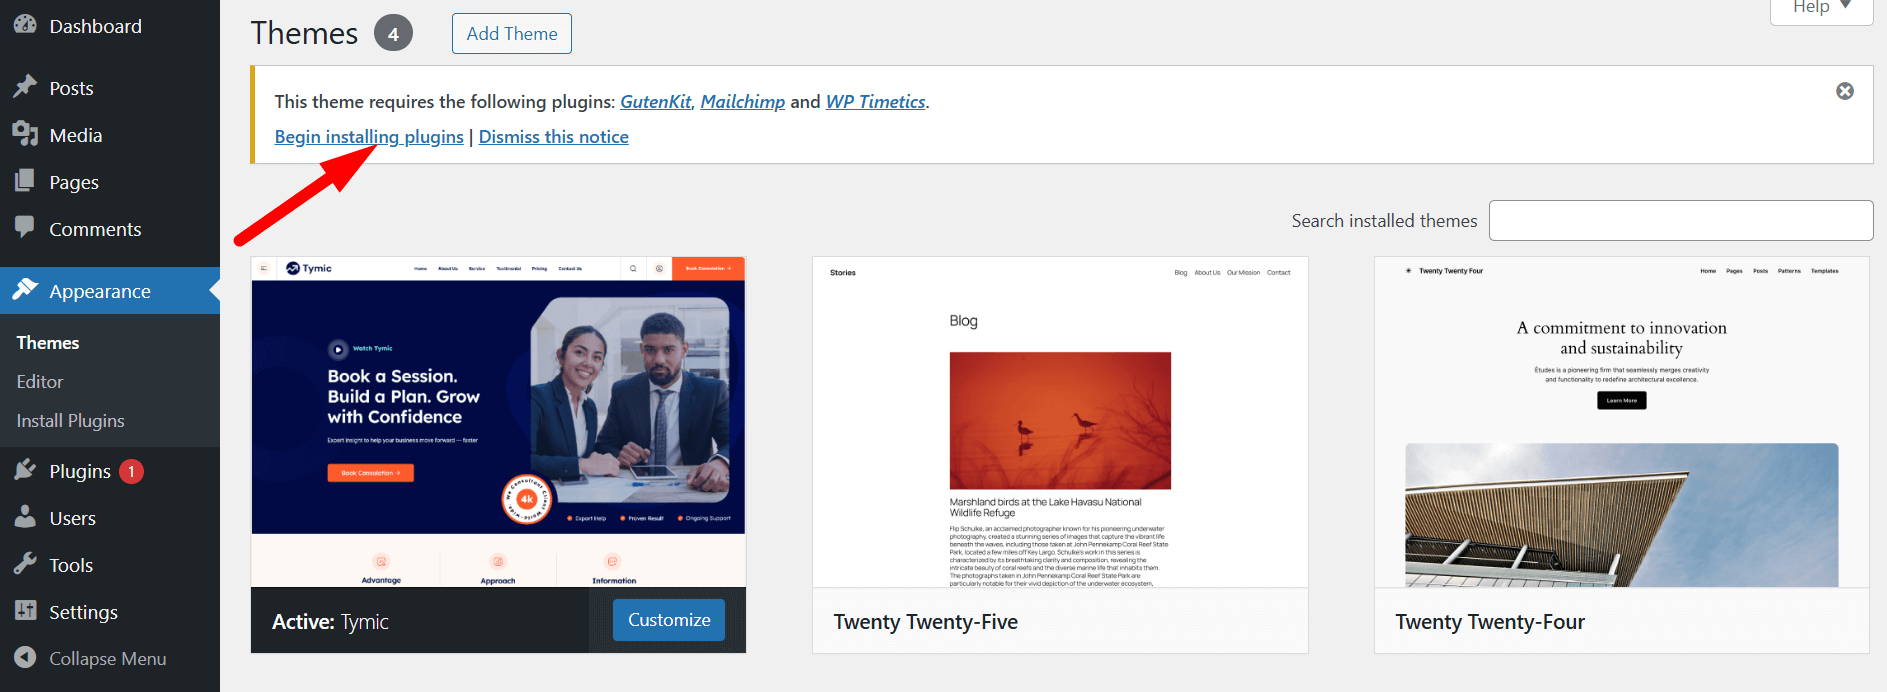
📥 Install Required Plugins #
After activating the Tymic theme, you’ll be prompted to install the necessary plugins.
Required Plugins: #