Thank you for choosing the Exhibz Event WordPress Theme. This guide will help you get started quickly and set up your site in a safe and organized way.
Watch the full installation & setup video below for a complete step-by-step guide
Step 1: Prepare Your WordPress Setup #
Before installing the theme, make sure everything is ready.
- Confirm that WordPress is installed properly
- Download the Exhibz theme package from ThemeForest
- Check the minimum server requirements:
- max_execution_time = 600
- upload_max_filesize = 32M
- post_max_size = 48M
- memory_limit = 700M
- max_input_time = 300
- max_input_vars = 10000
- Make sure file and folder permissions are correct: Files: 644 ,Folders: 755
- Keep your WordPress, PHP and hosting updated
This ensures a smooth installation and prevents common errors.
Step 2: Install the Exhibz Theme #
You can upload the theme either through the WordPress Dashboard or via FTP.
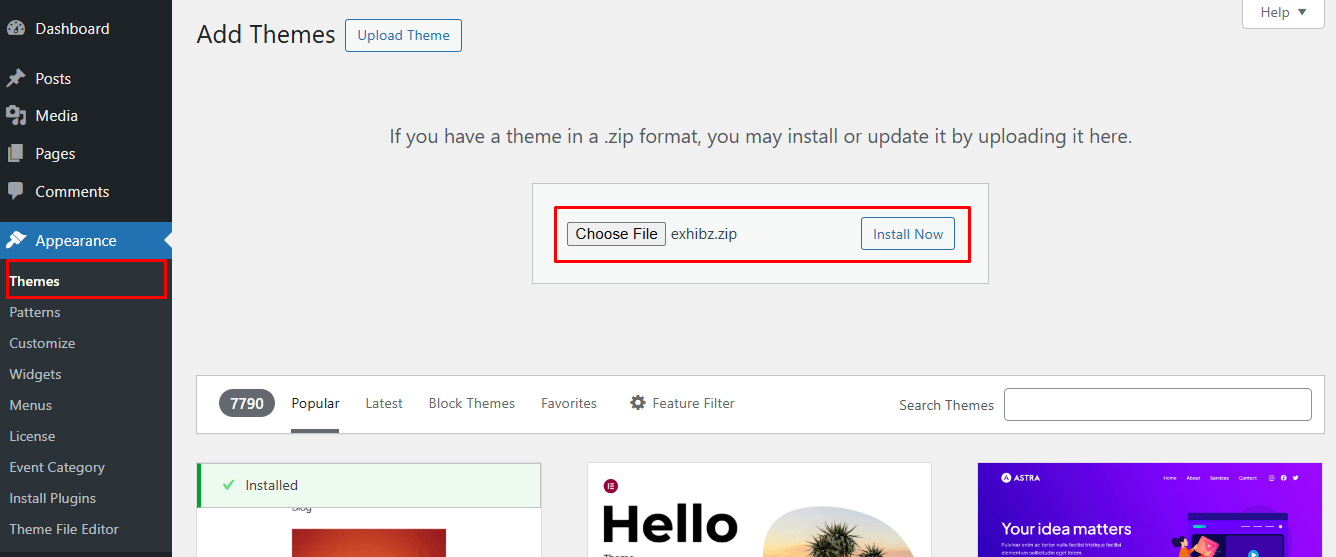
WordPress Dashboard Upload #
• Log in to your WordPress admin panel
• Go to Appearance > Themes
• Click Add New and then Upload Theme
• Select the exhibz.zip file and click Install Now
• After installation, click Activate to enable the theme
FTP Upload #
• Unzip the Exhibz.zip file
• Connect to your hosting using an FTP client
• Navigate to wp-content/themes
• Upload the Exhibz folder
• Log in to WordPress and activate the theme from Appearance > Themes
Note: Always activate the Exhibz Child Theme instead of the parent theme to ensure your customizations are safe during updates. The child theme is included in your theme bundle. Install it following the standard theme installation process.
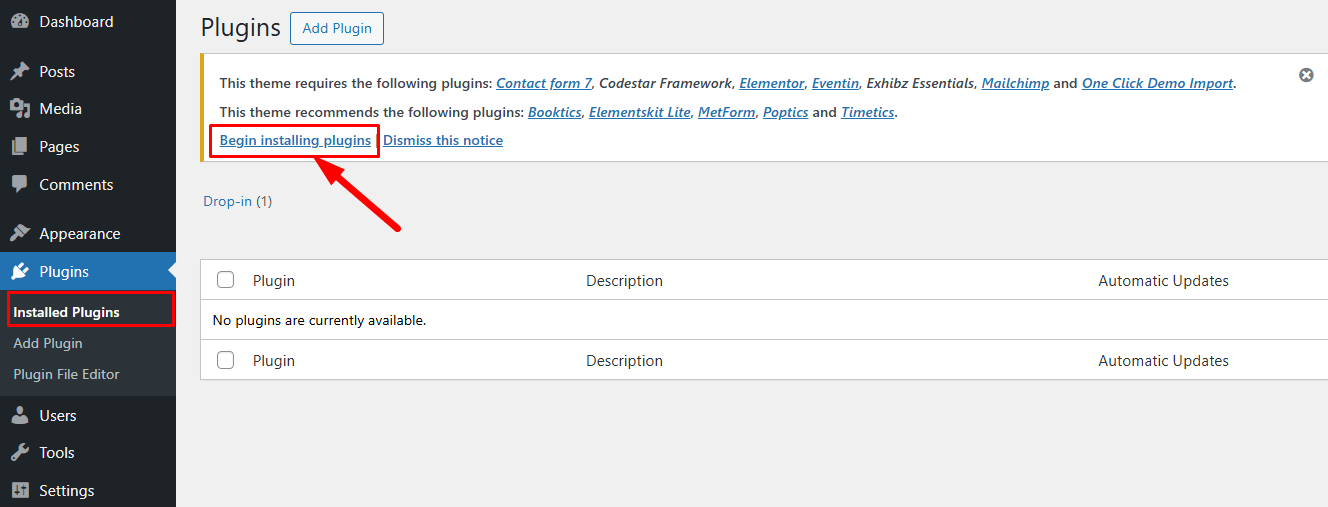
Step 3: Install Required Plugins #
After activating the theme, WordPress will show a message to install the required plugins.
Click “Begin Installing Plugins” and activate them one by one.
These plugins are essential for the Exhibz features to work properly.
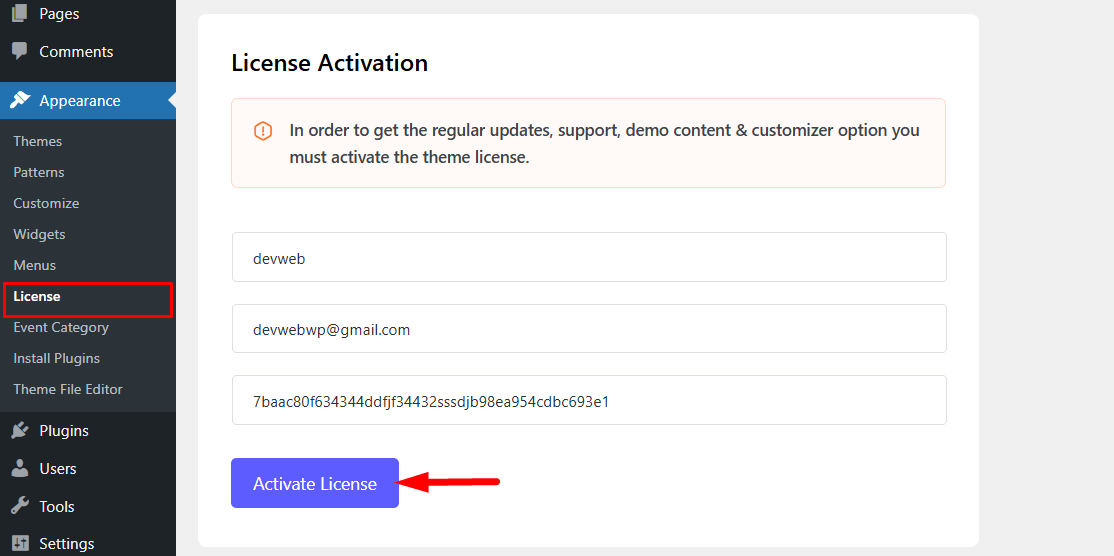
Step 4: License Activation #
After installing the theme and required plugins, you need to activate your license.
Go to Appearance > License in your WordPress dashboard and enter your purchase code or license key. Activating the license ensures that Demo Import is enabled and all theme option settings are fully accessible.
Follow the documentation for more details.
Step 5: Import Demo Data #
You can set up your site like the demo in two ways.
One-Click Demo Import #
Use this option only on a fresh website without existing content.
The importer will automatically load all pages, menus, settings, and widgets.
Navigate to Appearance > Import Demo Data, then select and install the demo content option that best fits your site setup.
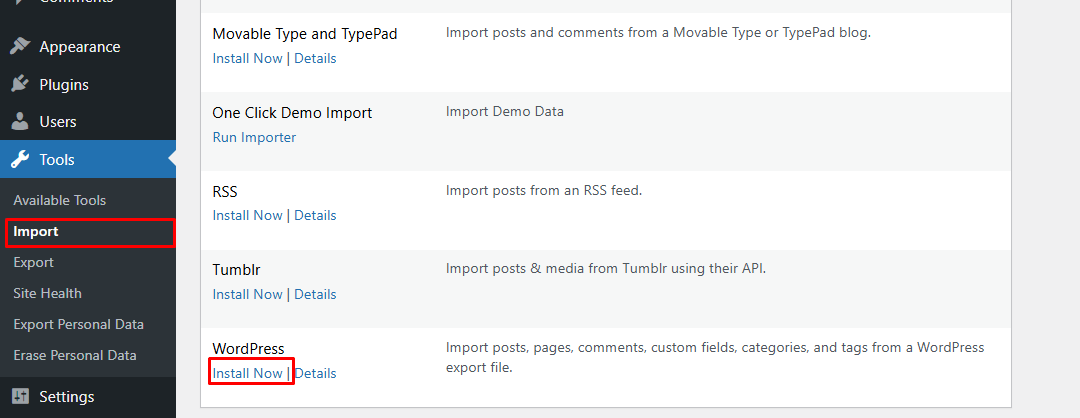
Manual Demo Import #
If you already have content on your site, use manual XML import instead. This avoids overwriting your existing data.
Navigate to Tools > Import in your WordPress dashboard and import the XML file provided with your theme bundle following the standard process.
Step 6: How to Update the Exhibz Theme #
To keep your theme up to date, you have two options: automatic updates via Envato Market or manual updates.
Automatic Updates via Envato Market Plugin #
- Install and configure the Envato Market plugin on your WordPress site.
- Connect the plugin to your Envato account using your username and API key.
- Once connected, you will receive update notifications for the Exhibz theme whenever a new version is released.
- Click the update button in your WordPress dashboard to update the theme automatically.
Manual Updates #
- Download the latest Exhibz theme ZIP from ThemeForest.
- Go to Appearance > Themes and activate any default WordPress theme.
- Upload the new Exhibz theme ZIP to WordPress or via FTP, replacing the old version.
- Activate the updated Exhibz theme.


