To get started, install and activate the Optiontics plugin. Navigate to WP Admin → Add Plugins → Upload Plugin, upload the Optiontics plugin file, and then click Install followed by Activate.
The Optiontics plugin is included with the WPCafe Pro bundle
Step-by-Step Process for Creating Product Add-Ons #
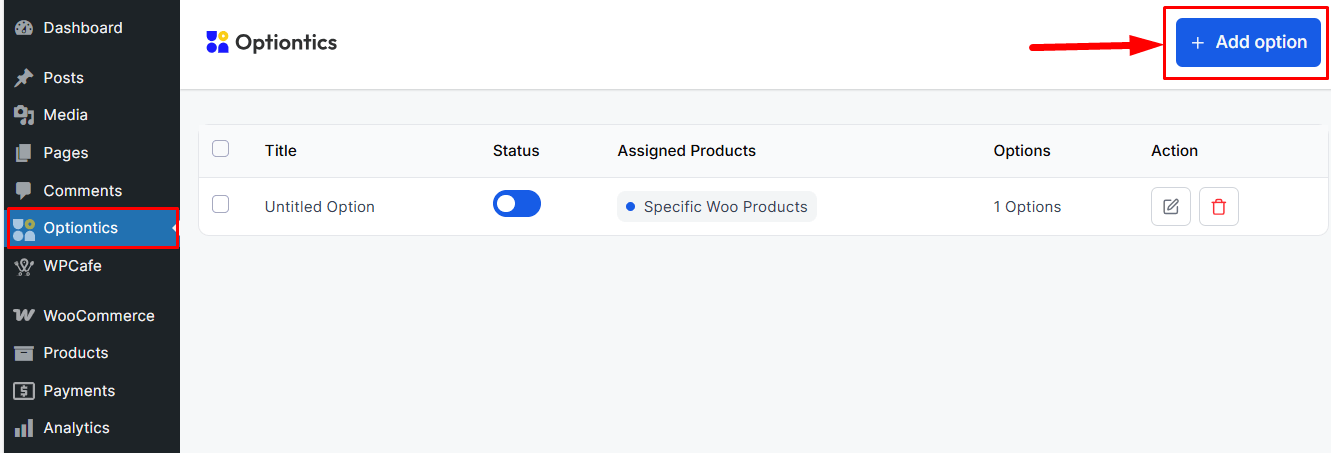
- Go to WP Admin → Optiontics → Add Option to begin creating a new option for products.
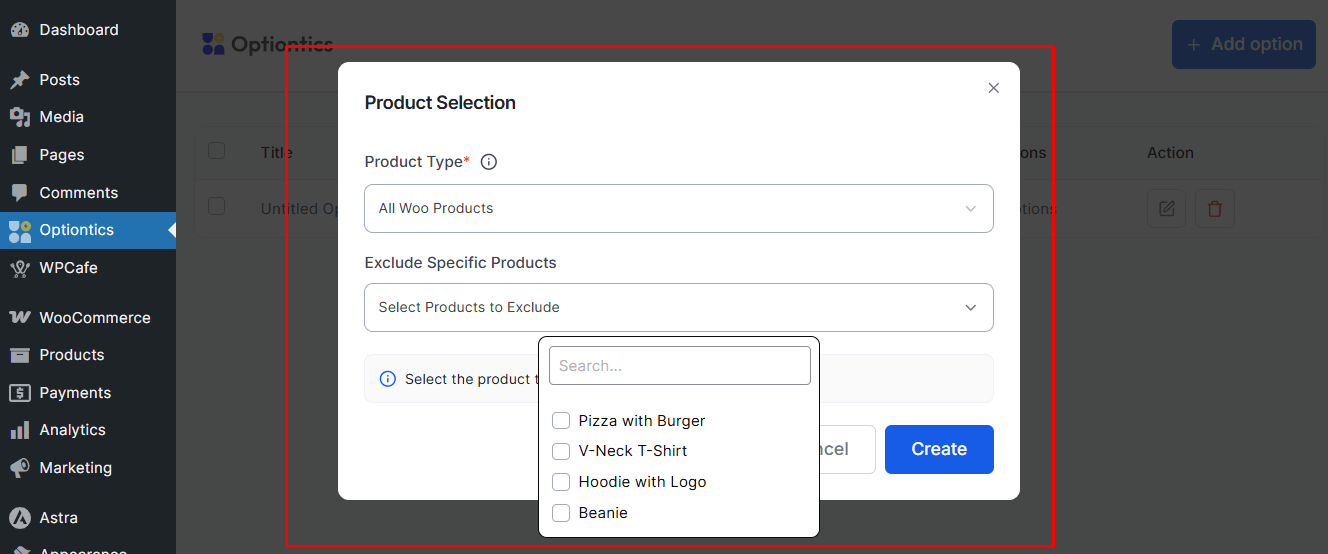
- A popup will appear to choose where the options will apply: All Products, Specific Products, or Specific Categories. Multiple items can be selected. Click Create, and you will be redirected to the Option Editor to build your add-on fields.
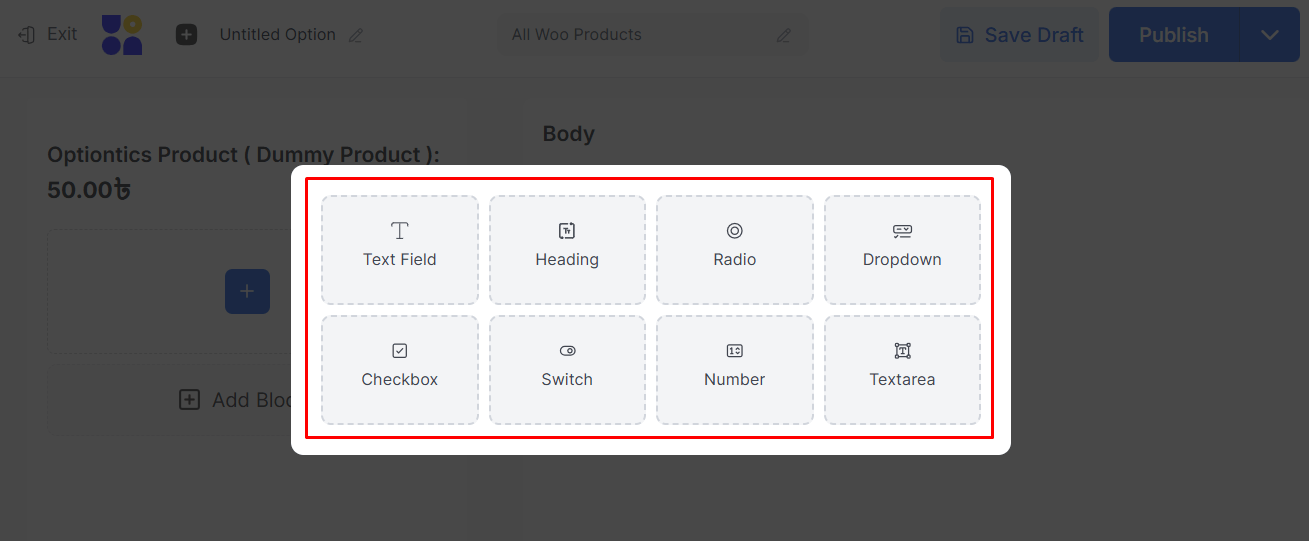
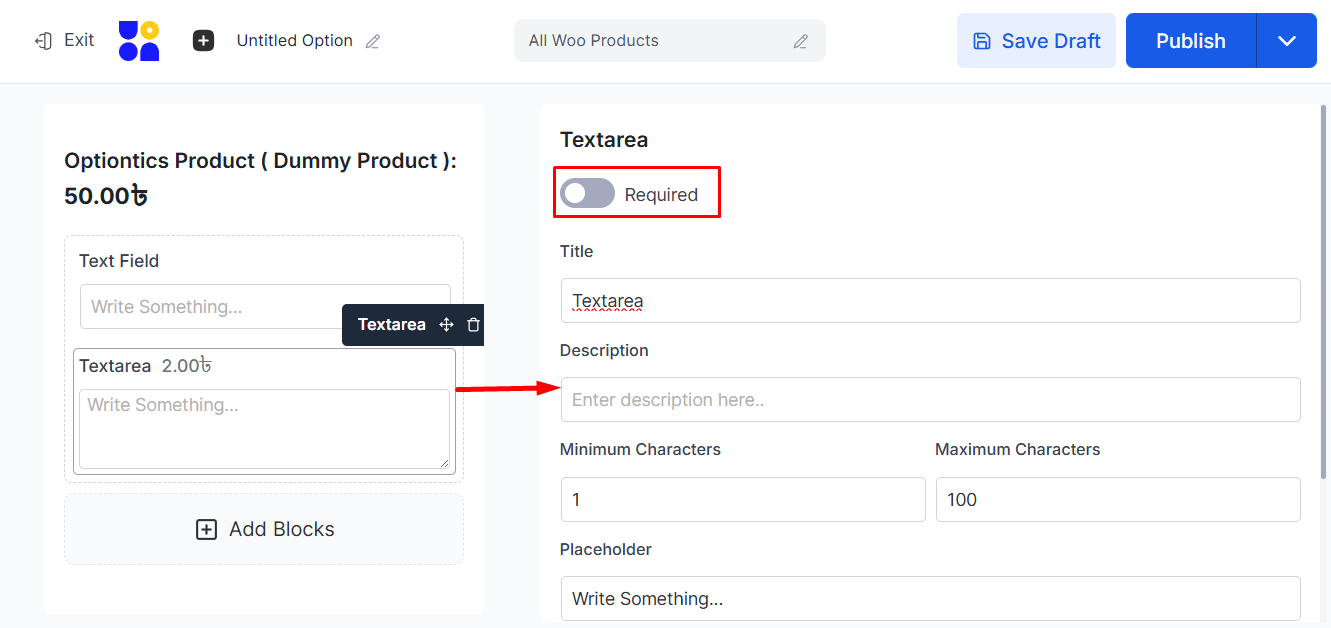
- Use the available field block: Text Field, Heading, Radio, Dropdown, Checkbox, Switch, Number Field, and Textarea. Drag and drop any block to add it to your options for the product.
- Click on any field to customize its settings from the right sidebar. You can adjust the Label, Placeholder, Required/Optional, Default Value, Conditional Logic, Price Add-On, and Field Instructions. Add as many fields as needed.
- Click Publish or Save. The option group becomes active for the selected products. From the main Optiontics menu, you can manage all groups: edit, delete, or rename them at any time.
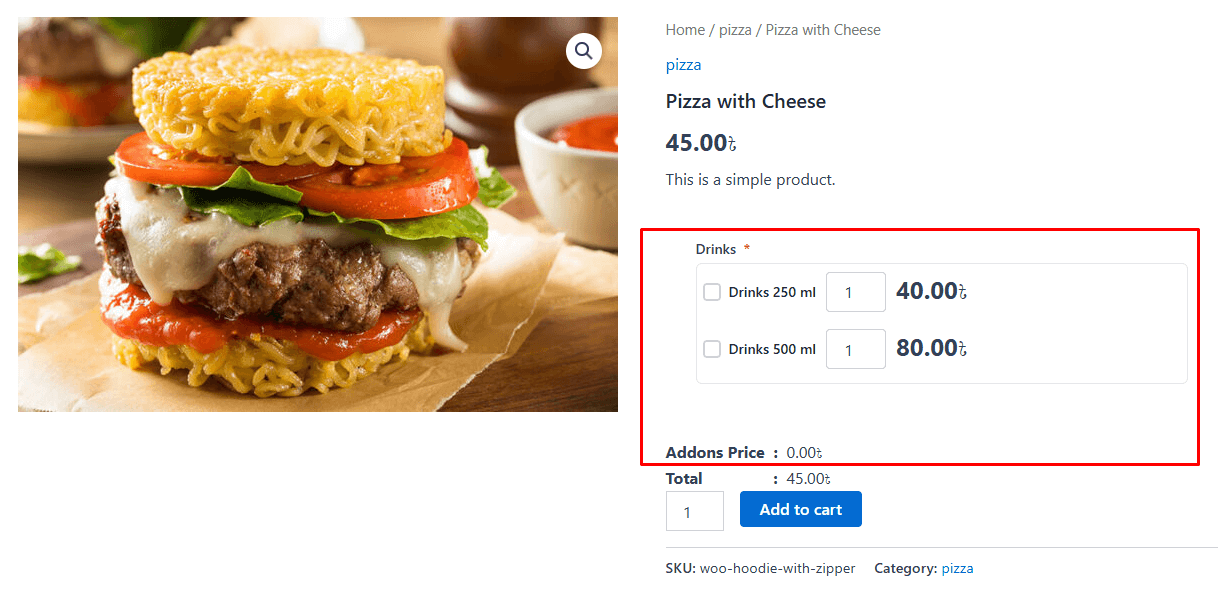
Front-end view: #
When your customer selects a product, they will see the add-ons and options available for that product.