FluentCRM Integration With Eventin (Pro) Event Management Plugin for WordPress #
FluentCRM is a self-hosted email marketing automation plugin for WordPress. This plugin lets you manage your leads and customers, email campaigns, and much more stuff. With the Fluent CRM Integration into WP Eventin, you can get the event attendees’ information such as names, email, and phone into the FluentCRM directly and automated your daily marketing task.
Note: You need FluentCRM Pro and WP Eventin Pro to leverage this feature.
How to Integrate FluentCRM with WP Eventin #
Follow the 6 steps described below to integrate FluentCRM with WP Eventiin.
Step 1: Create a New Contact List in FluentCRM #
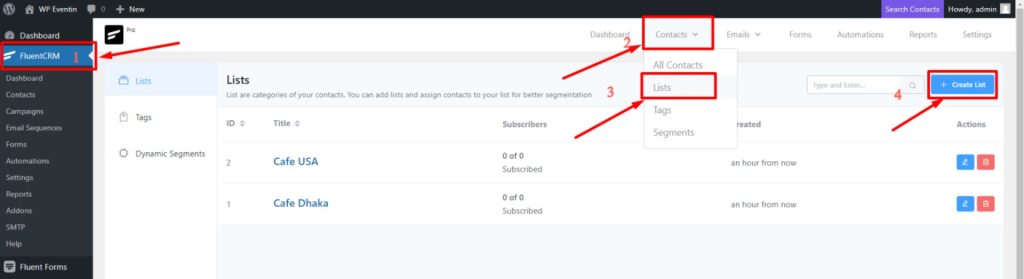
For this navigate to FluentCRM dashboard, then on the top menu hover on the Contacts, once you see the dropdown menu click on Lists. Once you go to the lists page, click on the + Create List button.
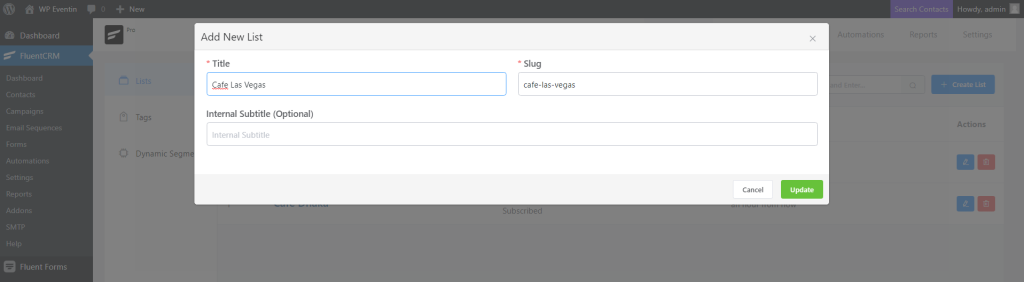
Now give a title, the system will automatically take the title as a slug. Internal Subtitle is optional, you can provide it if you want. After filling out the information click on Confirm.
Step 2: Generate and Copy Incoming Webhooks #
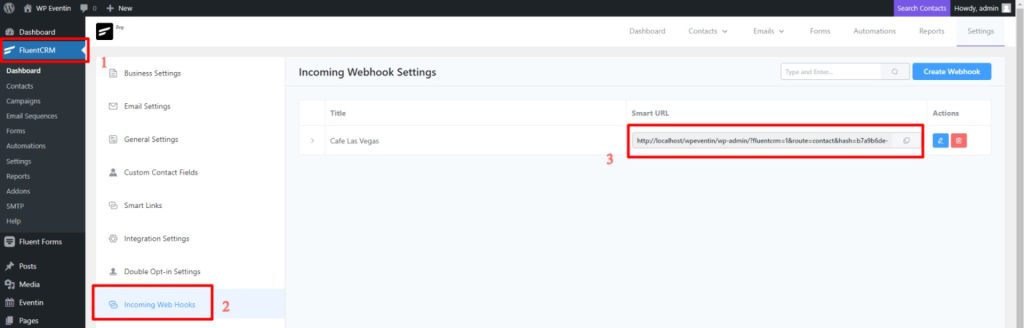
Now from the FluentCRM menu, navigate to Settings ⇒ Incoming WebHooks and from the top right side, click on Create Webhook. A pop-up will show up as the new webhook creation option. Here you will need to submit multiple information like name, list which you want to connect with WP Eventin, tags and Status of incoming data. Once you are done then click on the Create button.

Now, you will see the Webhook URL in your fluentCRM dashboard under Incoming Webhooks. Copy the URL for future uses.
Step 3: Paste Webhook into WP Eventin #
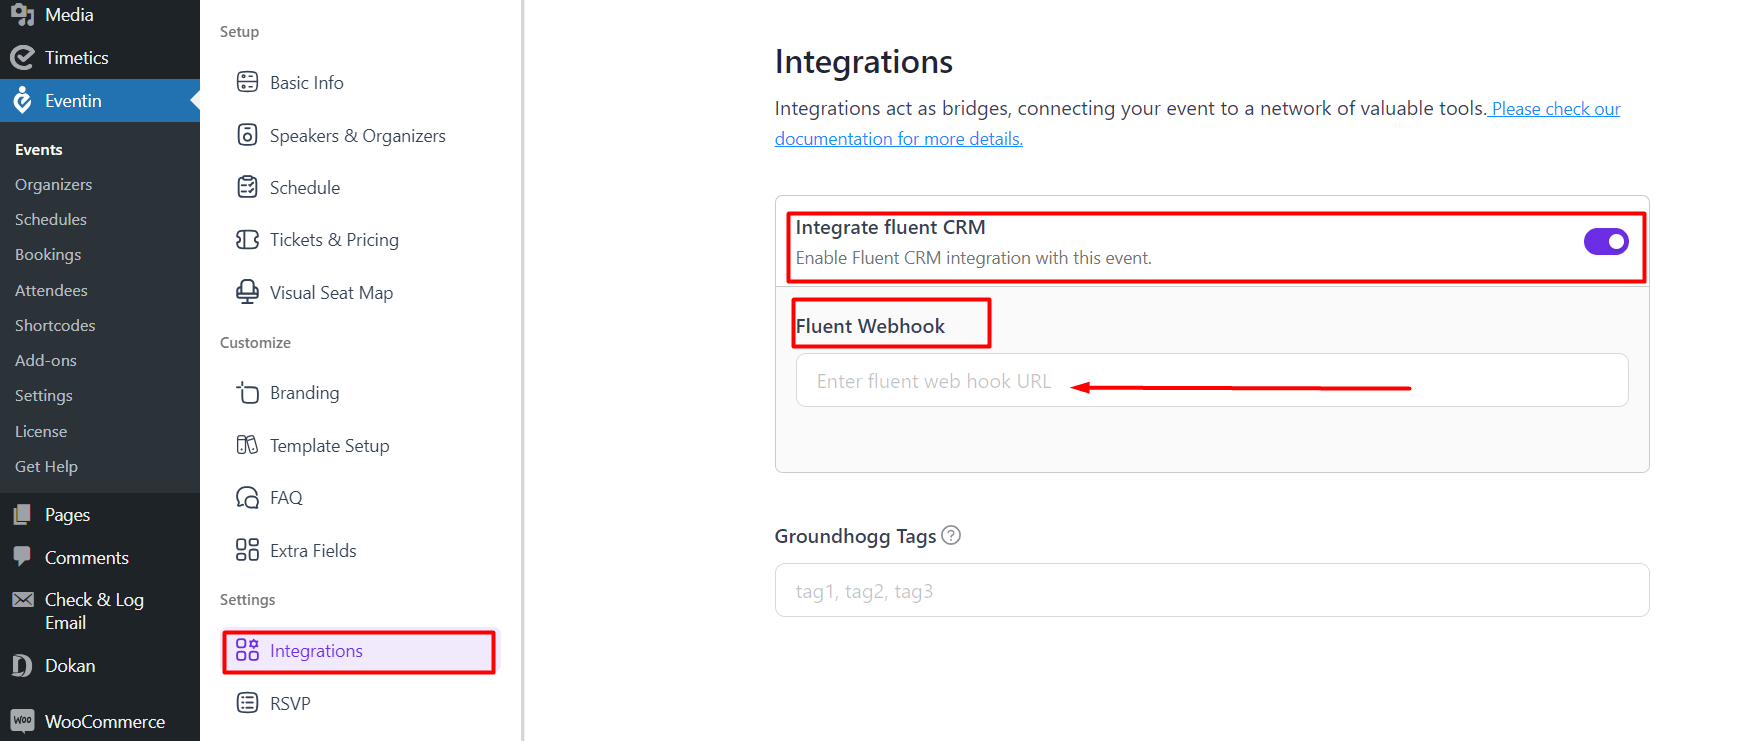
Go to WP Eventin, edit the event which you want to integrate with fluenctCRM. Under the Settings -> Integrations menu, the CRM option is available. Click on the toggle switch and it will bring Webhook adding options. Now paste the Webhook that you copied in step 2. Now, save/update the event.
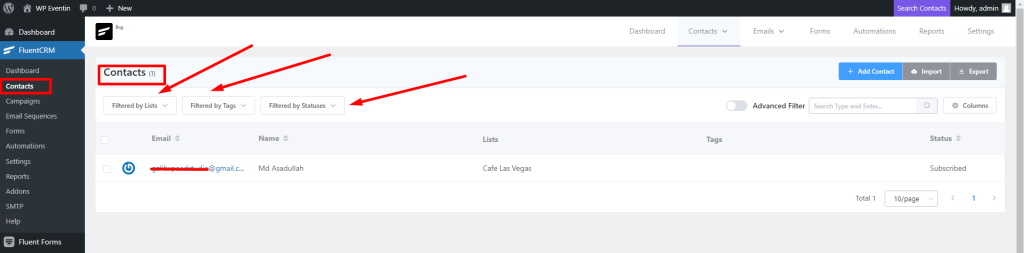
Step 4: Contact Details #
Now, go to the fluentCRM and check the contact list. You will see all the contact details. You can also short the contacts by filtering options.
Attendee Support in FluentCRM #
You can receive attendee information by registering and sending it to FluentCRM for a future campaign. You will need to follow three simple steps to receive attendee data into FluentCRM. Assuming you already know how to create a webhook in FluentCRM. In case you don’t, no worries. Please scroll up and read the upper documentation about creating a webhook.
Enable attendee registration
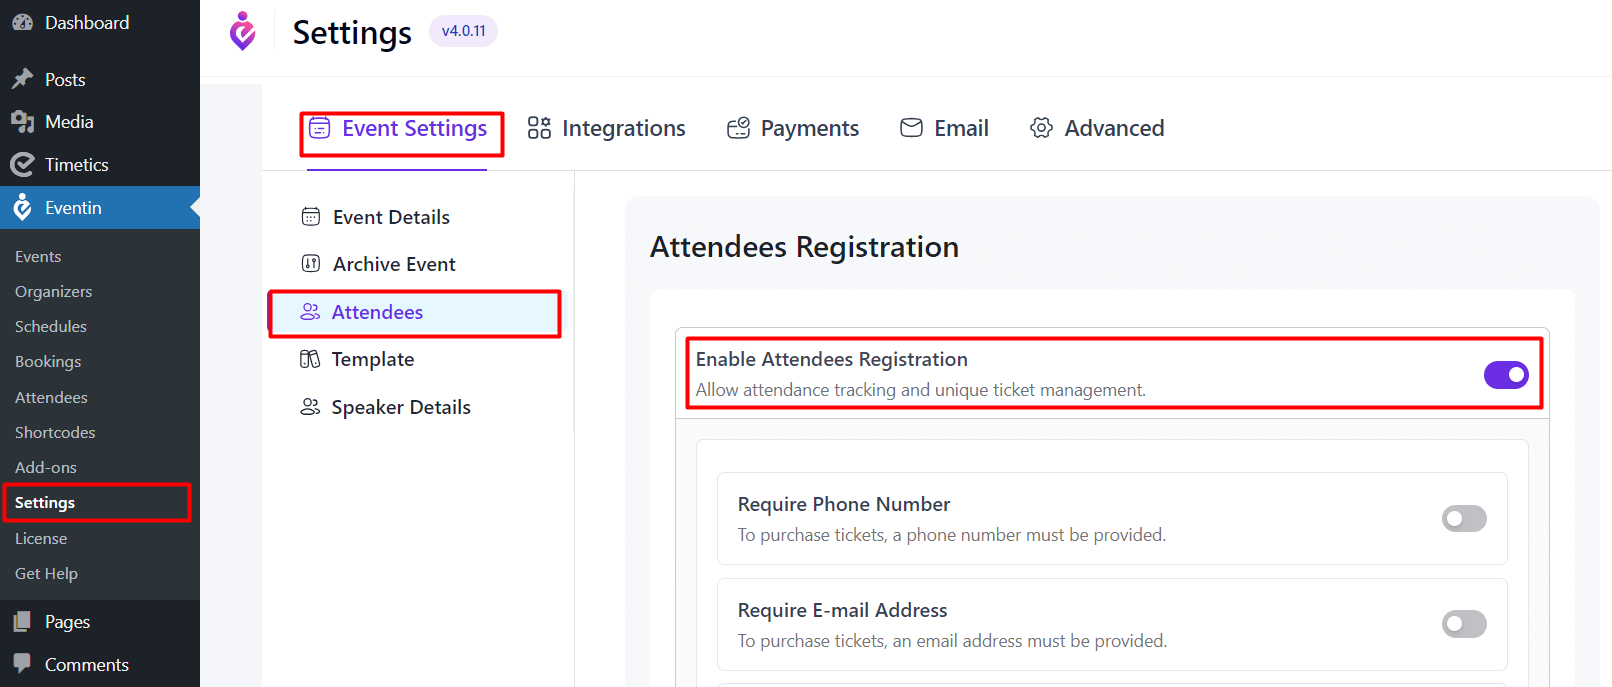
Now, if anyone purchases tickets through that event, you will receive the attendee’s email in your Fluent\CRM.


