Visual Seat Map in Eventin Event Management plugin for WordPress #
Managing seating arrangements for events can be challenging, especially when transparency and customization are important. The Visual Seat Map feature in the Eventin Event Management plugin, when integrated with WP Timetics, allows you to create and manage seat layouts directly from your WordPress dashboard.
With this feature, you can visually design seating arrangements, assign ticket variations to seats, and allow attendees to select their preferred seats during booking. Whether you’re organizing concerts, conferences, or workshops, it improves both the admin workflow and the attendee experience.
Required Plugins #
To get full access to the visual seat map functionality, you’ll need to install and activate the following plugins:
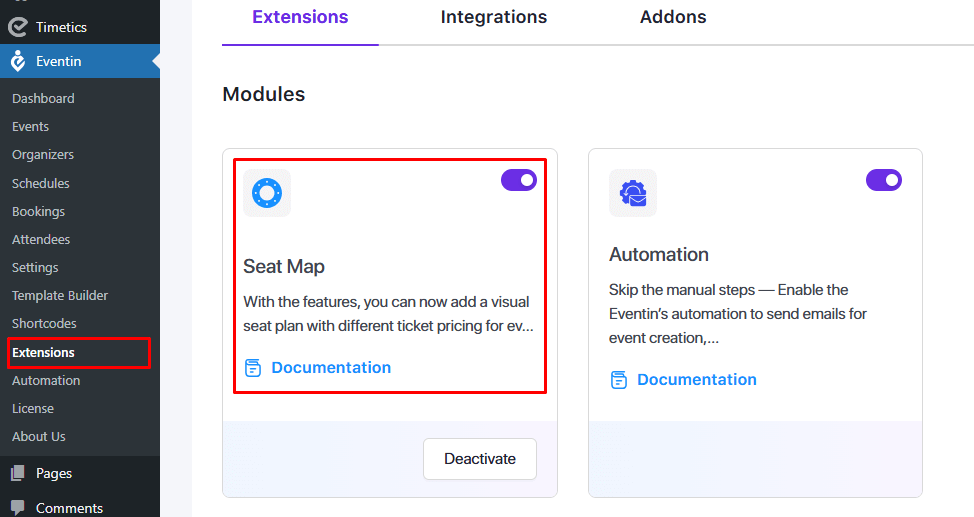
Enable Seat Map Add-on #
After activating the plugins, go to: Dashboard → Eventin → Extensions. Find the Seat Map Integration option and ensure it is enabled. This feature is enabled by default, but you can disable it if needed.
Create an Event with a Seat Map #
- First, create an event by navigating to: Eventin → Events → Add New.
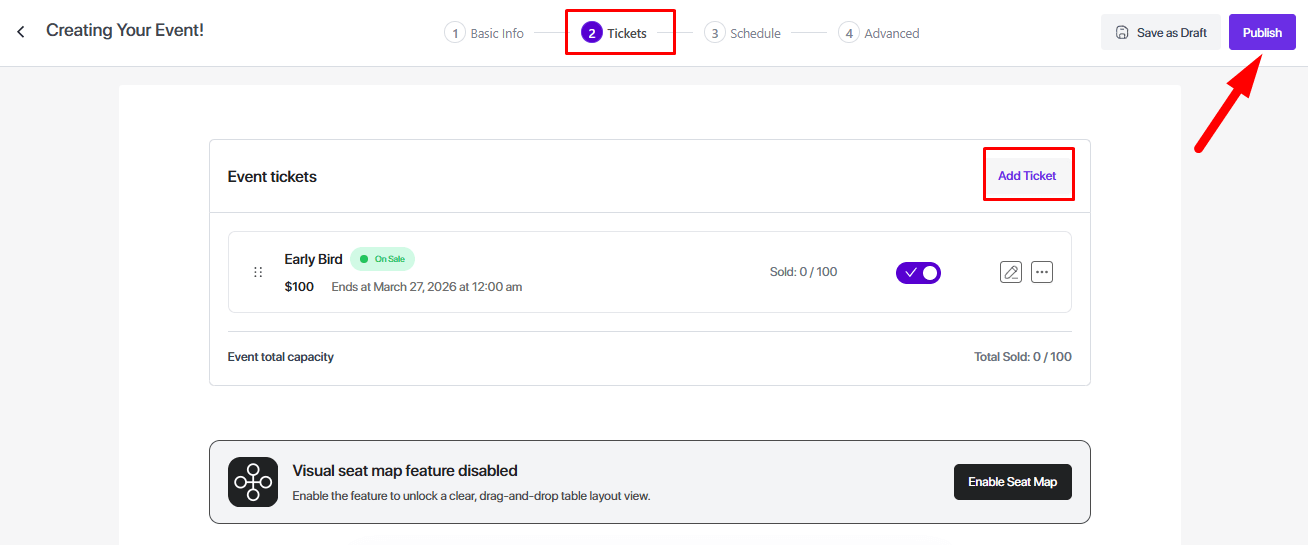
- After creating the event, add your tickets (multi-tier tickets can also be created).
- Publish or update the event.
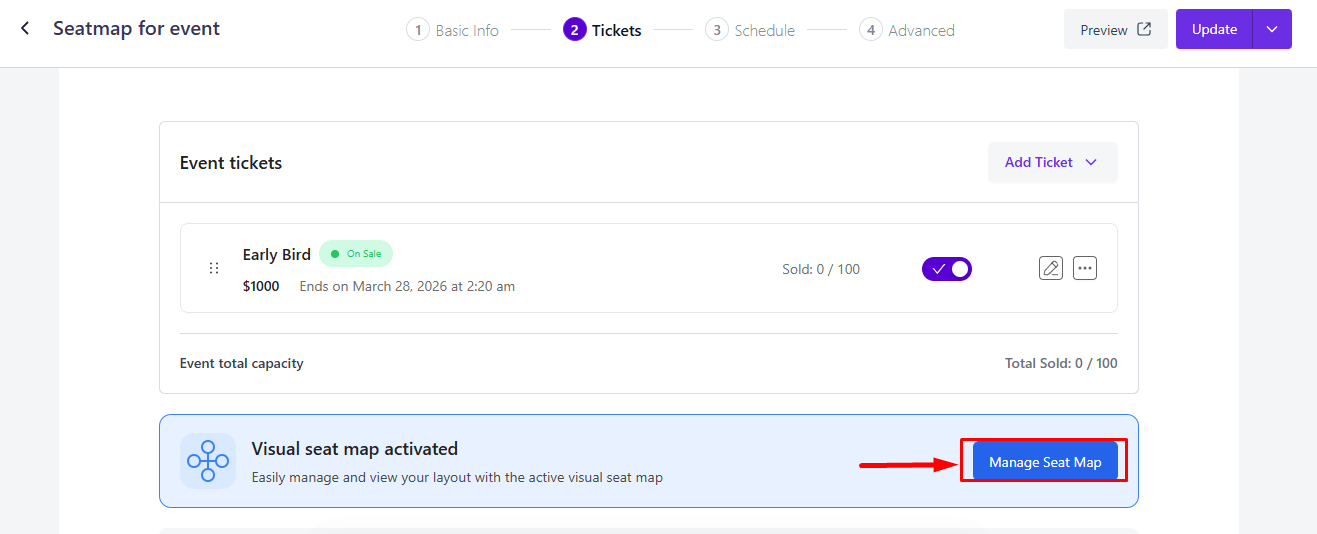
- Once the event is saved, the Manage Seat Map option will appear.
Note: Ticket variations are required. Without them, the seat map cannot be generated.
Now, click on “Manage Seat Map” to open the Seat Map Canvas, where you can design your seating layout.
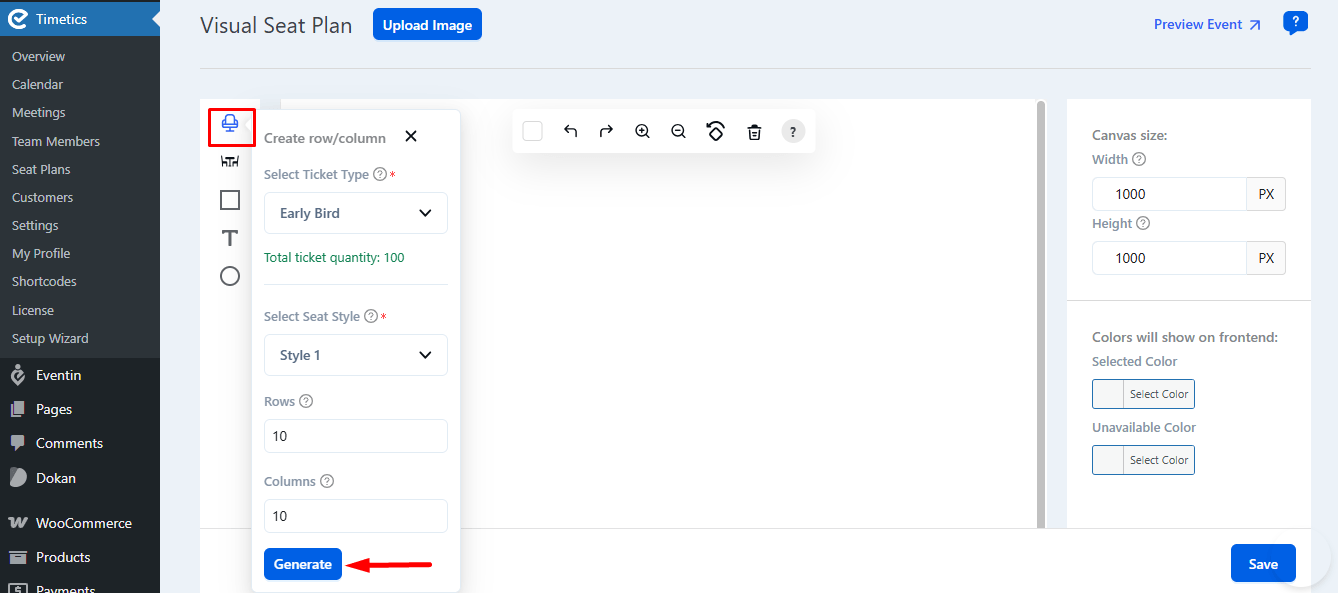
Generate Seats #
Click the Generate Seat icon → select the ticket variation type → set the rows and columns → click Generate.
Seats will automatically appear on the canvas, and you can rearrange them as needed.
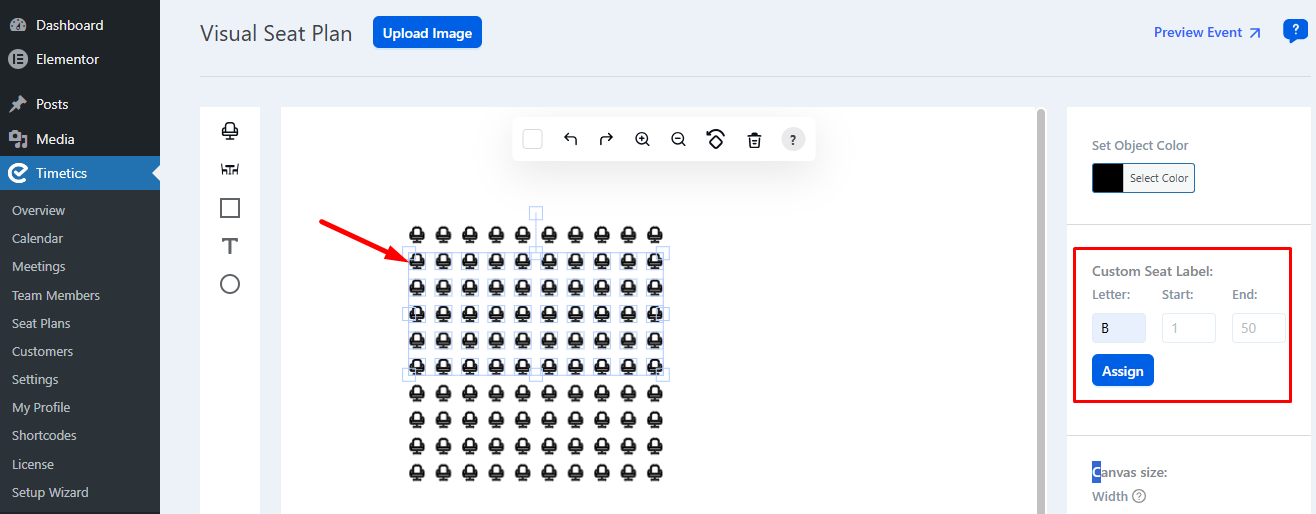
Customize the Seat Layout #
You can improve the seat map layout using additional elements such as:
- Rectangle or Circle shapes for stages, tables, or sections
- Text fields to label rows, sections, or special areas
These tools help create a more organized and clear seating plan.
Style settings #
Please follow the “DOCUMENTATION” for changing the style of your seat map.
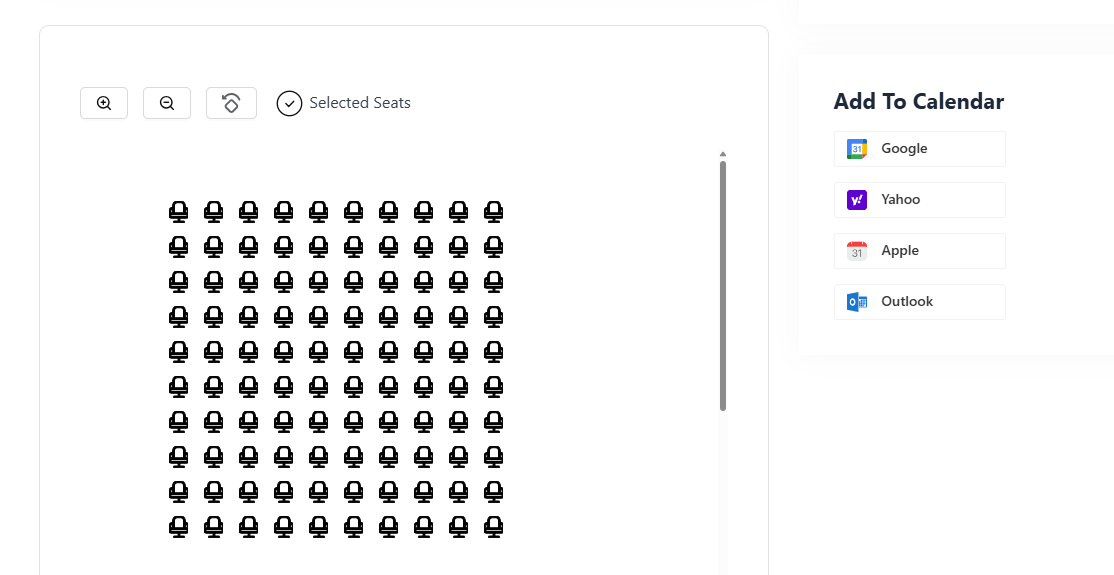
Front-End View #
On the front end, attendees will see an interactive seat map while booking tickets. They can simply:
- Select their preferred seats
- Click Buy Ticket
- Complete the booking process
FAQs #
1. Why can’t I generate seats?
Seats cannot be generated if ticket variations are not added. Always create ticket variations before opening the seat map canvas.
2. Can I reuse the same seat map for multiple events?
No. Seat maps are event-specific, so you need to create a separate seat map for each event.
3. Can I customize or disable the seat map?
Yes. You can customize shapes, colors, and labels from the canvas, and disable the feature anytime from Eventin → Extensions if it is not required.
Conclusion #
The Visual Seat Map feature, powered by WP Timetics and Eventin, makes event seat management easier and more interactive. It allows organizers to design seating layouts visually while giving attendees the flexibility to choose their preferred seats during booking.


