General Settings for Reservation
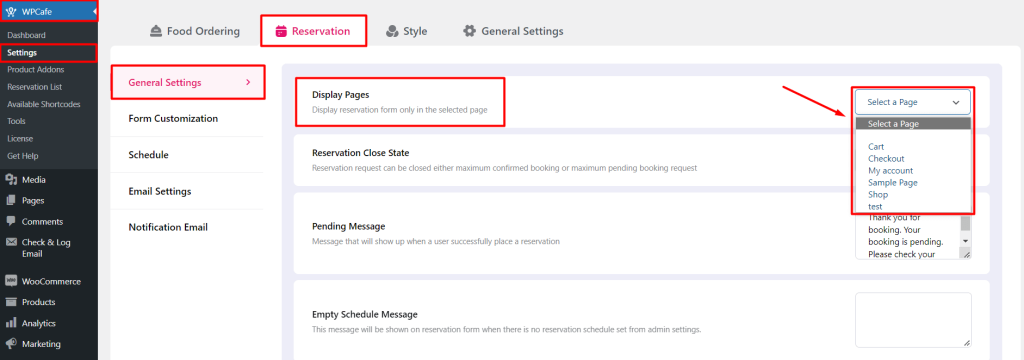
Display Pages(Pro) #
You can set the form display page from WpCafe settings. Go to WpCafe -> Settings -> Reservation -> General Settings . Under this tab, you will get the ‘Display Page’ option. Click on the dropdown and select the page. Don’t forget to click on ‘Save Changes’ from the bottom of the page. If you do not find the page, check whether the page is published or not from all page options. If not, publish the page and refresh it. Note- This feature is available in WPCafe PRO only.
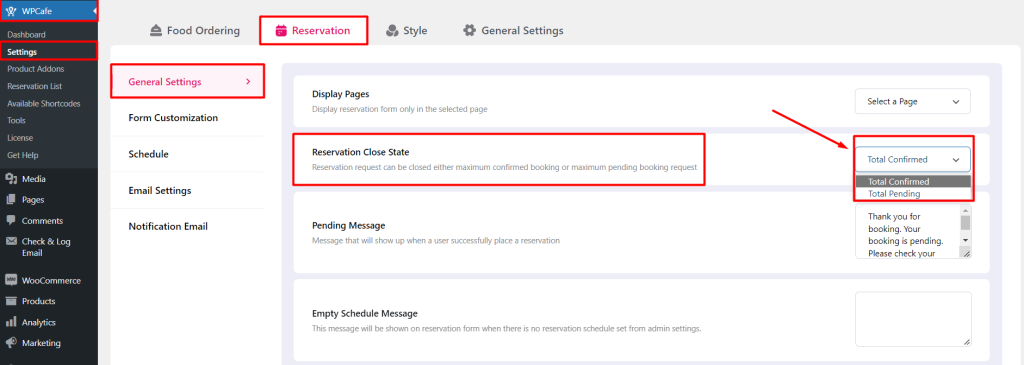
Reservation Close State (PRO) #
When do you want to stop taking new orders? Is it based on the total confirm the order or total pending order? It’s up to you. WPCafe provides both options and you can set it from the WpCafe settings. Go to WpCafe -> Settings -> Reservation -> General Settings. Under this tab, you will get the ‘Reservation close state’. Click on the dropdown and select the options. Don’t forget to click on ‘Save Changes’ from the bottom of the page. Note- This feature is available in WPCafe PRO only.
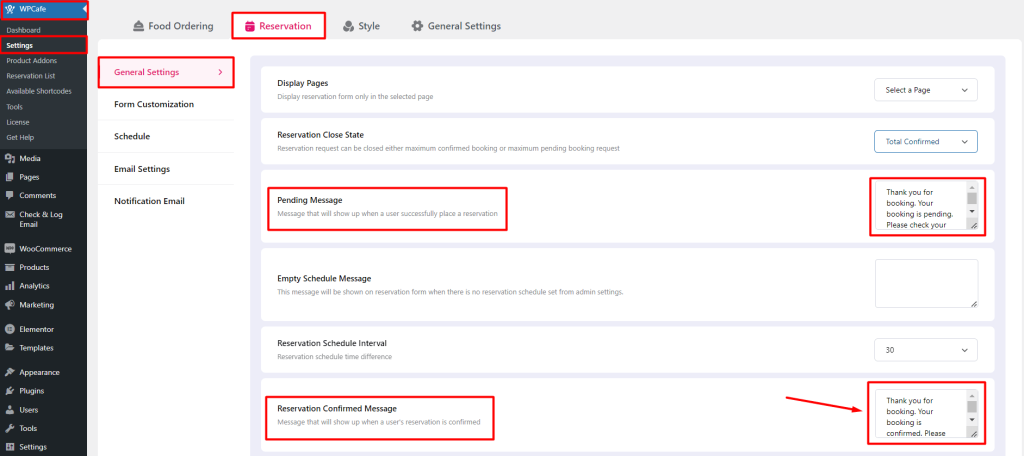
Pending Message on Reservation #
Showing a beautiful message on a successful reservation is always positive for all the business. You can add a custom message for the customers. To set the text, go to WpCafe -> Settings -> Reservation -> General Settings. Set the message from the input box and then save changes.
Reservation Confirmed Message #
You can display a professional massage on the reservation confirmation page. To set the text, go to WpCafe -> Settings -> Reservation -> General Settings -> Reservation confirmed message -> Set the message from the input box and then save changes.
Settings for pending and confirmed messages for reservation.
Empty Schedule Message #
You can set the empty schedule message body from WpCafe -> Settings -> Reservation ->General Settings -> Empty Schedule Message. This message will be shown on the reservation form when there is no reservation schedule set from admin settings.
Frontend view:
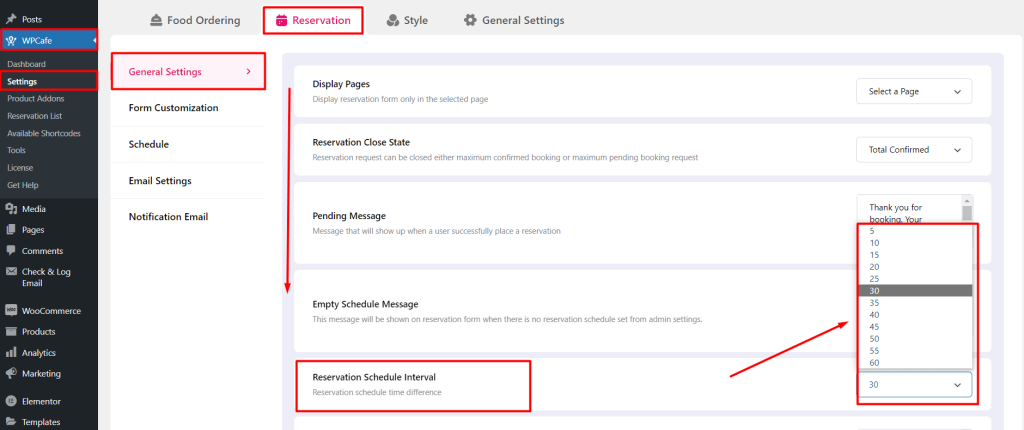
Reservation Schedule Interval #
You can set the reservation schedule interval from WpCafe -> Settings -> Reservation ->General Settings -> Reservation Schedule Interval.
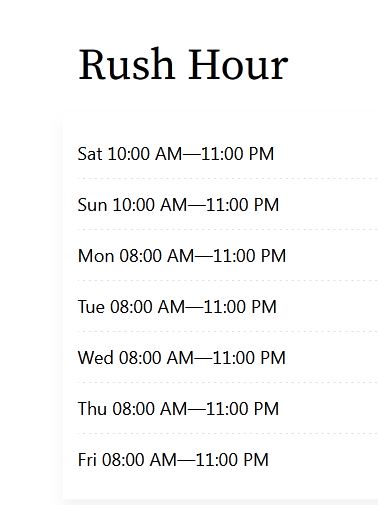
Business hour label #
Based on the type of food you serve and your target customers, you may have a single business hour schedule or multiple schedules. The business hour label will help you get conversions from visitors. With WPCafe, you can set the ‘Business hour label’ on your restaurant website. To set a business hour to follow 3 simple steps,
Set your schedule #
You can set both a single and multi-schedule for your restaurant. Check our documentation for setting up restaurant schedules.
Set the label #
Once you are happy with the schedule, now it’s time to set the label. Go to WpCafe -> Settings -> Reservation ->General Settings -> Business hour label. After that, write the label inside the given input box and save the changes.

Frontend view for the business hour:
Note- ‘Business hour label’ is a premium feature. If you use WPCafe for free, you will not be able to use the feature.


