WooCommerce coupon code using WP Eventin Event plugin for WordPress #
Woocommerce coupons allow access to special discounts for WooCommerce events. You can boost your event ticket sales by offering early registrations, promoting group purchases, and rewarding loyalty points through WooCommerce coupons.
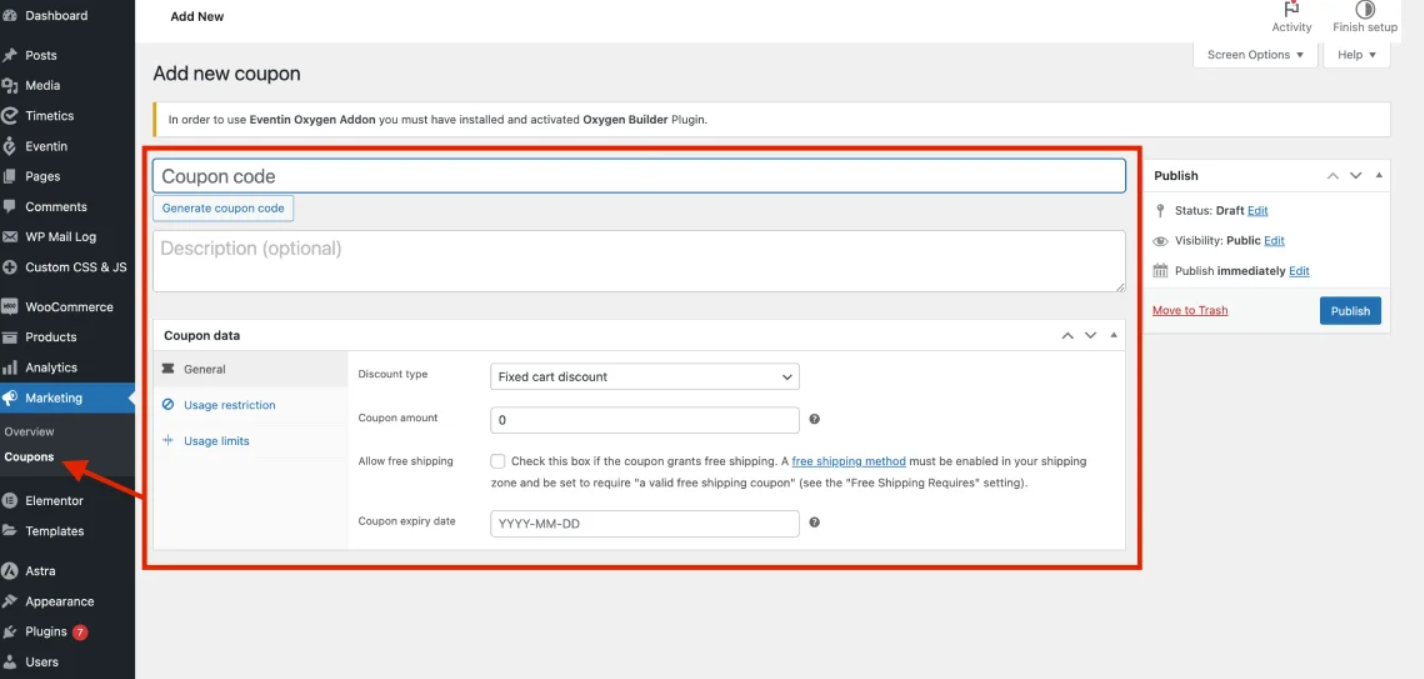
This can be done using WooCommerce Coupon option so make sure WooCommerce is installed on your site. From your left sidebar admin dashboard, go to Marketing > Coupons then Add coupon to start creating your first coupon. Guests can apply them on the Cart page and Checkout page.
Create Coupon and Add Details #
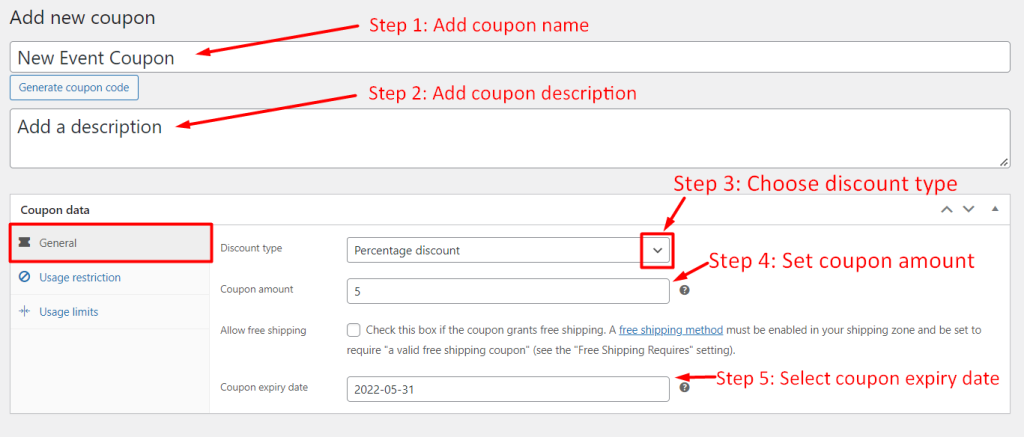
Add your coupon details from the General settings tab. Here you will find the following options:
- Coupon Name: Add a new coupon name i.e. New Event Coupon.
- Add a description: You can also add a coupon description. (Optional)
- Discount Type: Select a discount type for coupon. (Percentage discount, Fixed cart discount, Fixed product discount)
- Coupon expiry date: Choose a date when coupon will expire. (Optional)
Add Coupons to Events #
Click on Usage Restriction to show the settings for adding tickets to event. Set the following details:
- Minimum/Maximum spend: Set the minimum or maximum spending amount to restrict users from adding coupons beyond these limits. (Optional)
- Select Eventin Events: Choose which events you want this coupon to be applicable to.

Set Coupon Usage Limits #
You can set the number of coupons that can be applied for selected events. Go to Usage Limits and edit the following:
- Usage limit per coupon – Total number of times this coupon can be added. (Optional)
- Usage limit per user – Maximum number of times a user can. (Optional)

Final Output #
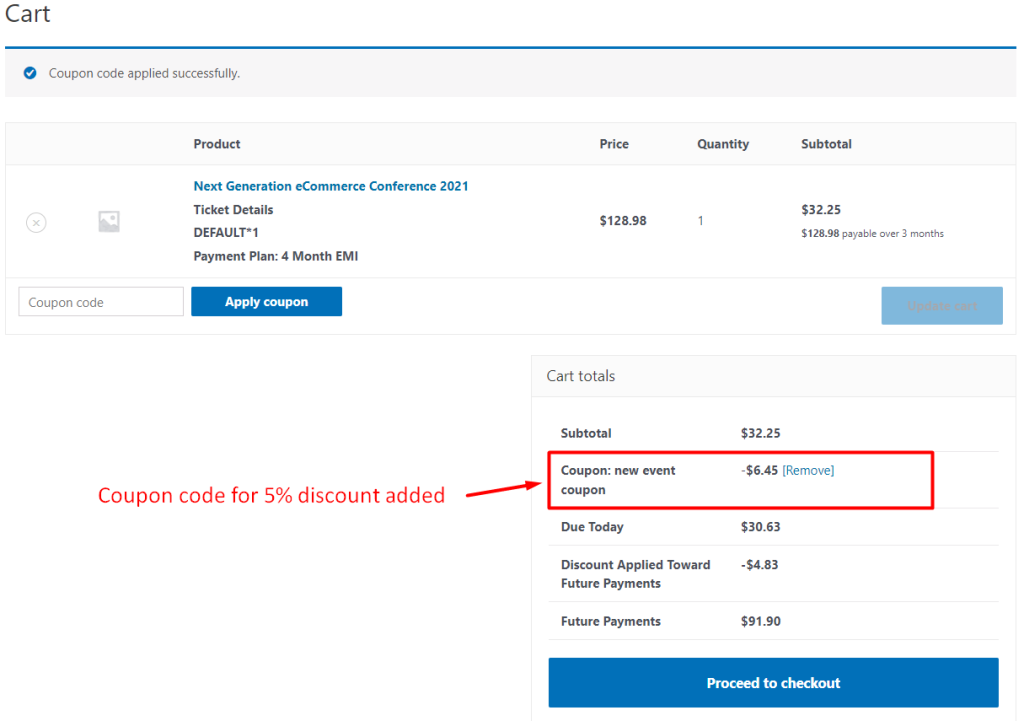
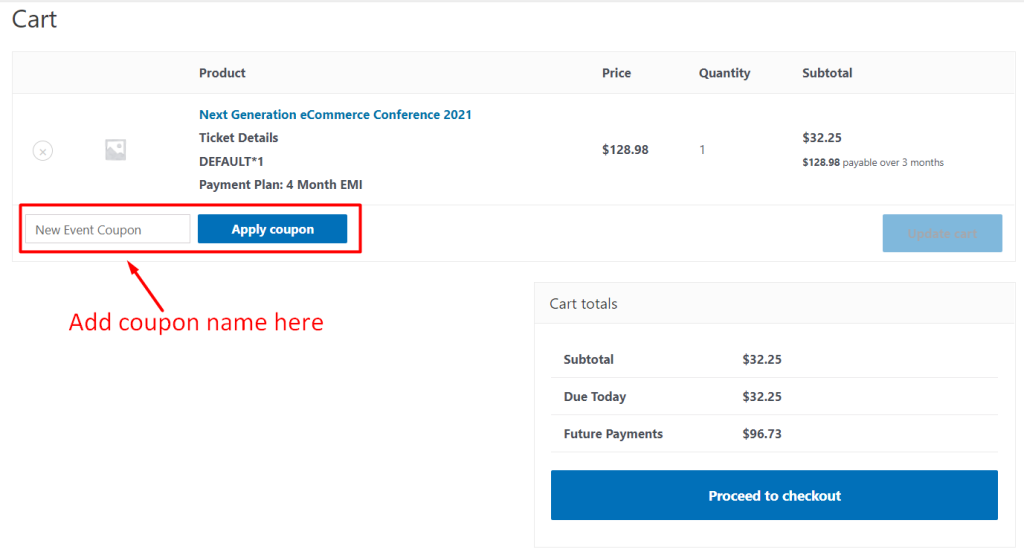
After setting up your coupon, guests can apply them on Cart page and Checkout page. An Apply coupon field will be added where guests can input the coupon name and apply it.
Here is an example of applying Percentage discount of 5% coupon for an event in the frontend. You can also choose other discount type like Fixed cart discount or Fixed product discount.