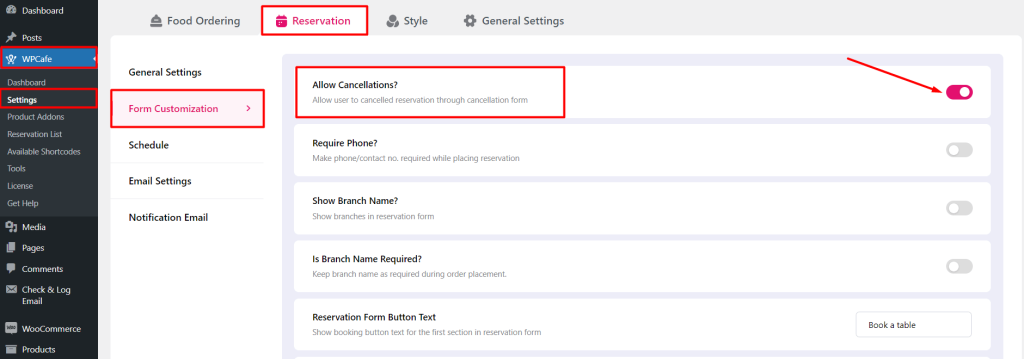
Allow Cancellations #
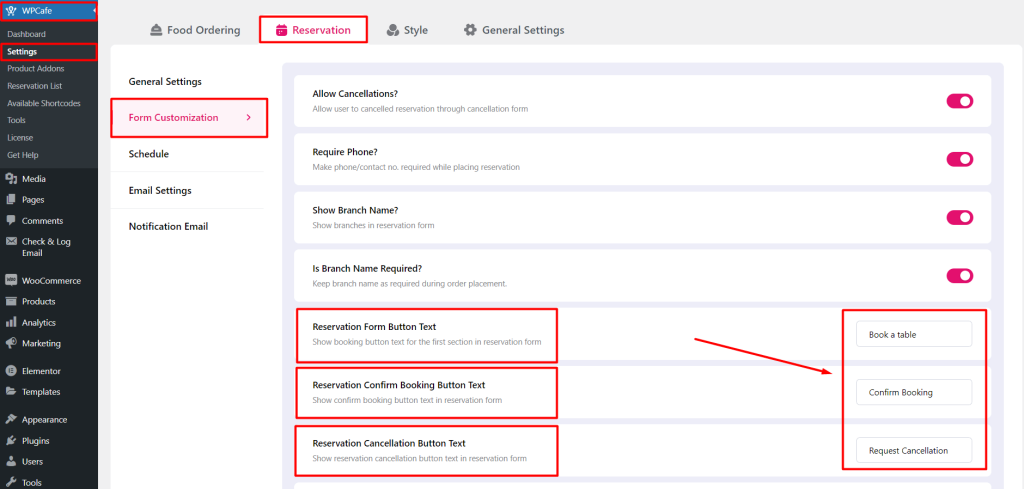
In WPCafe, there is an option to add the Cancellation button in the Reservation Form. The user can cancel their reservation through the reservation form. For enabling the cancellation button, go to the WPcafe -> Settings -> Reservation -> Form Customization and enable “Allow Cancellations?” option.
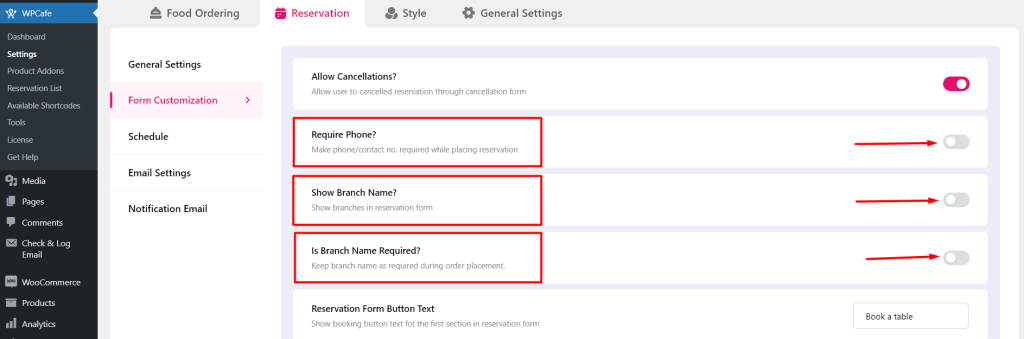
Show Multiple Branches and Required fields #
If you have multiple branches in your restaurant, you can show all of your branches on the reservation form. And your customer will be able to select a branch during the restaurant reservation. You can keep the branch selection both flexible and required. You can set location from WooCommerce settings. You can also keep the phone n fields required for the reservation form.
- Require Phone: WPCafe -> Settings-> Reservation -> Form Customization -> Require Phone-> Yes (Click on toggle) -> Save Changes.
- Show Branch Name: WPCafe -> Settings-> Reservation -> Form Customization -> Show Branch Name -> Yes (Click on toggle) -> Save Changes.
- Is Branch Name Required: WPCafe -> Settings-> Reservation -> Form Customization -> Is Branch Name Require-> Yes (Click on toggle) -> Save Changes.
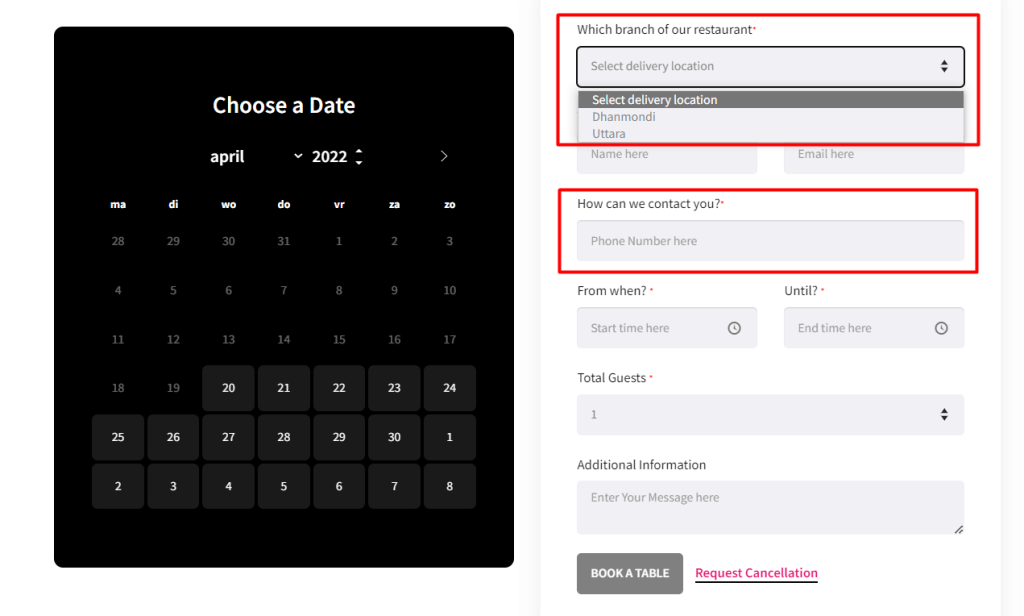
Frontend Look: Once you click on save changes, your frontend looks like the following screenshot.
Reservation Booking/Cancellation Button Text(PRO) #
You can change/update the text of the reservation button, Reservation confirms button and reservation cancellation button. This is one of the unique flexibility that WPCafe is offering you. To change the text, check the following settings key.
- Change Reservation Booking Button Text: Go to WPCafe -> Settings-> Reservation -> Form Customization-> Insert Reservation Form Button Text.
- Change Reservation Confirm Booking Button Text: Go to WPCafe -> Settings-> Reservation -> Form Customization -> Insert Reservation Confirm Booking Button Text.
- Change Reservation Cancellation Button Text: Go to WPCafe -> Settings-> Reservation -> Form Customization -> Insert Reservation Cancellation Button Text.
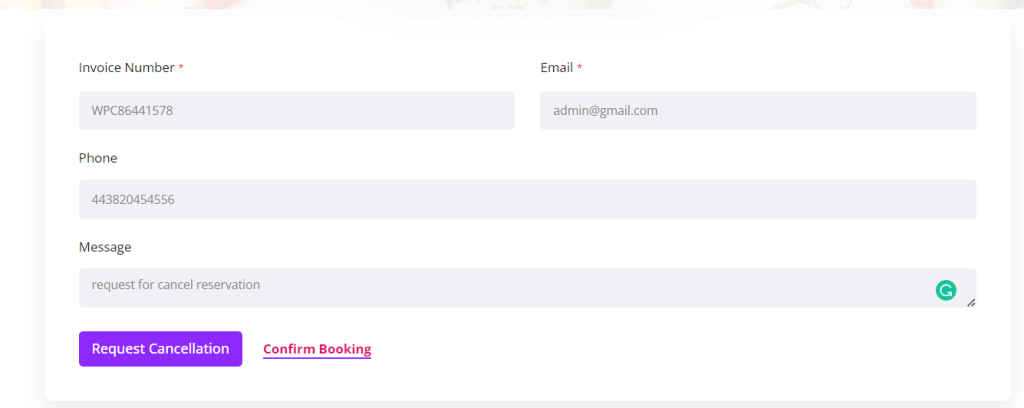
Frontend Look: Once you click on save changes, your frontend looks like the following screenshot.
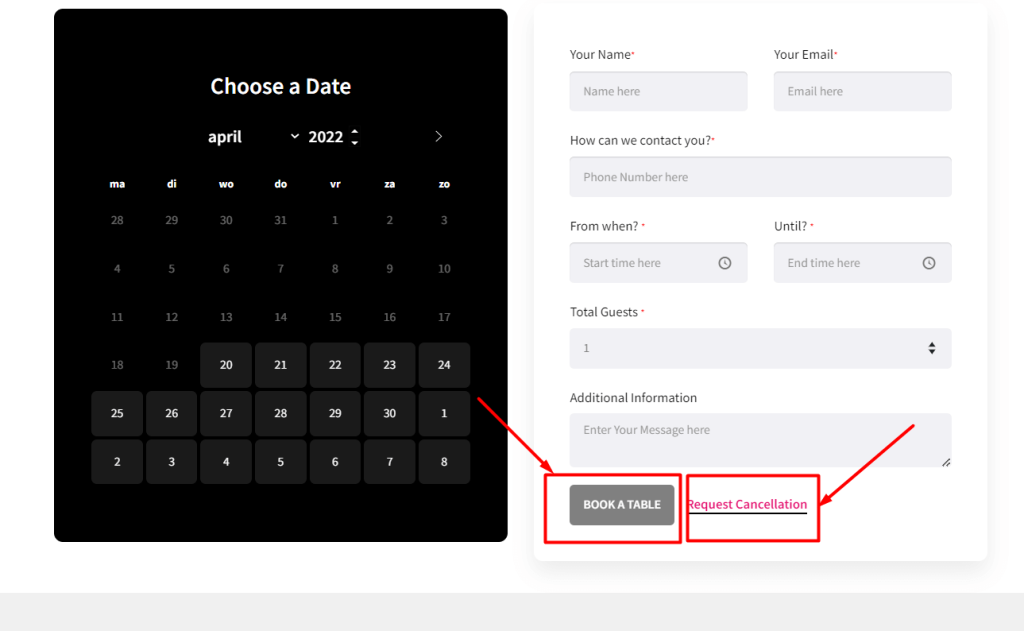
To cancel the reservation, click on the Request Cancellation button.
Reservation Starting Time Field (PRO) #
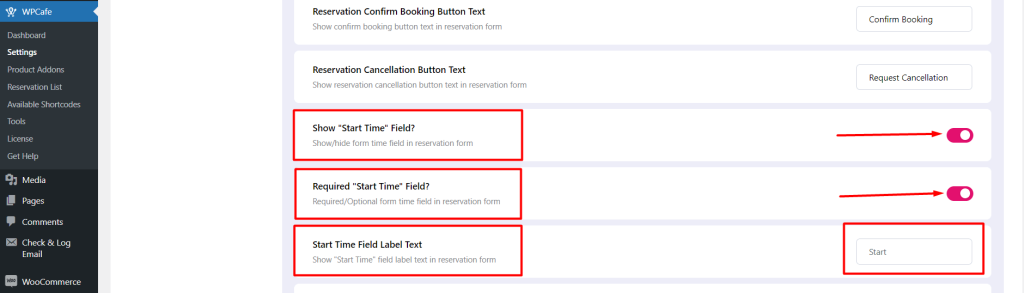
You can show reservation starting time, keep it flexible or mandatory for the order. Besides this, you can change the label text of ‘Form Field’. All the options are in your hand. Please check the following settings key and update as per your needs.
- Show “Start Time” Field Settings: Go to WPCafe -> Settings-> Reservation -> Form Customization -> Show “Start Time” Field -> Save changes.
- Required ‘Start Time’ Field Settings: Go to WPCafe -> Settings-> Reservation -> Form Customization-> Required ‘Start Time’ Field -> Save changes.
- Start ‘Time Field’ Label Settings: Go to WPCafe -> Settings-> Reservation -> Form Customization -> Start ‘Time Field’ Label -> Save changes.
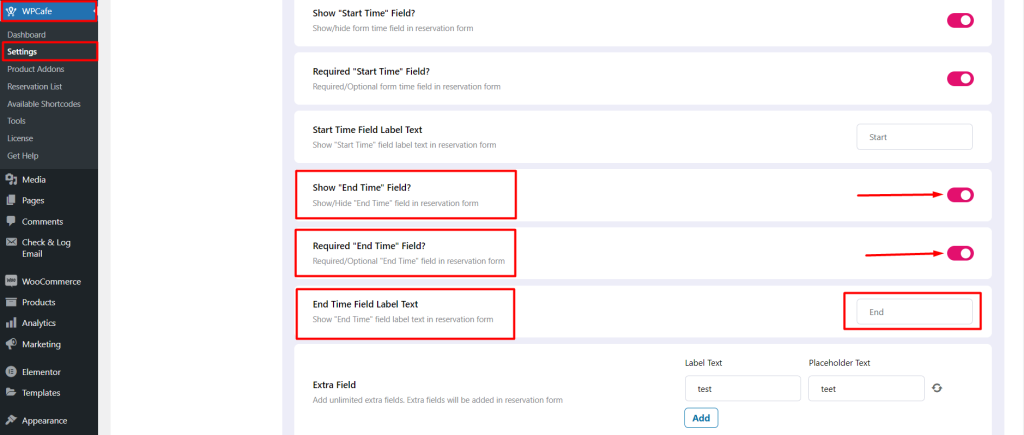
Reservation Ending Time Field(PRO) #
You can show reservation ending time, keep it wish-base or mandatory for the order, and change the label text of ‘To Field’. All the options are in your hand. Please check the following settings key and update as per your needs.
- Show “End Time” Field Settings: Go to WPCafe -> Settings-> Reservation -> Form Customization-> Show “Start Time” Field -> Save changes.
- Required ‘End Time’ Field Settings: Go to WPCafe -> Settings-> Reservation -> Form Customization -> Required ‘Start Time’ Field -> Save changes.
- End ‘Time Field’ Label Settings: Go to WPCafe -> Settings-> Reservation -> Form Customization -> Start ‘Time Field’ Label -> Save changes.
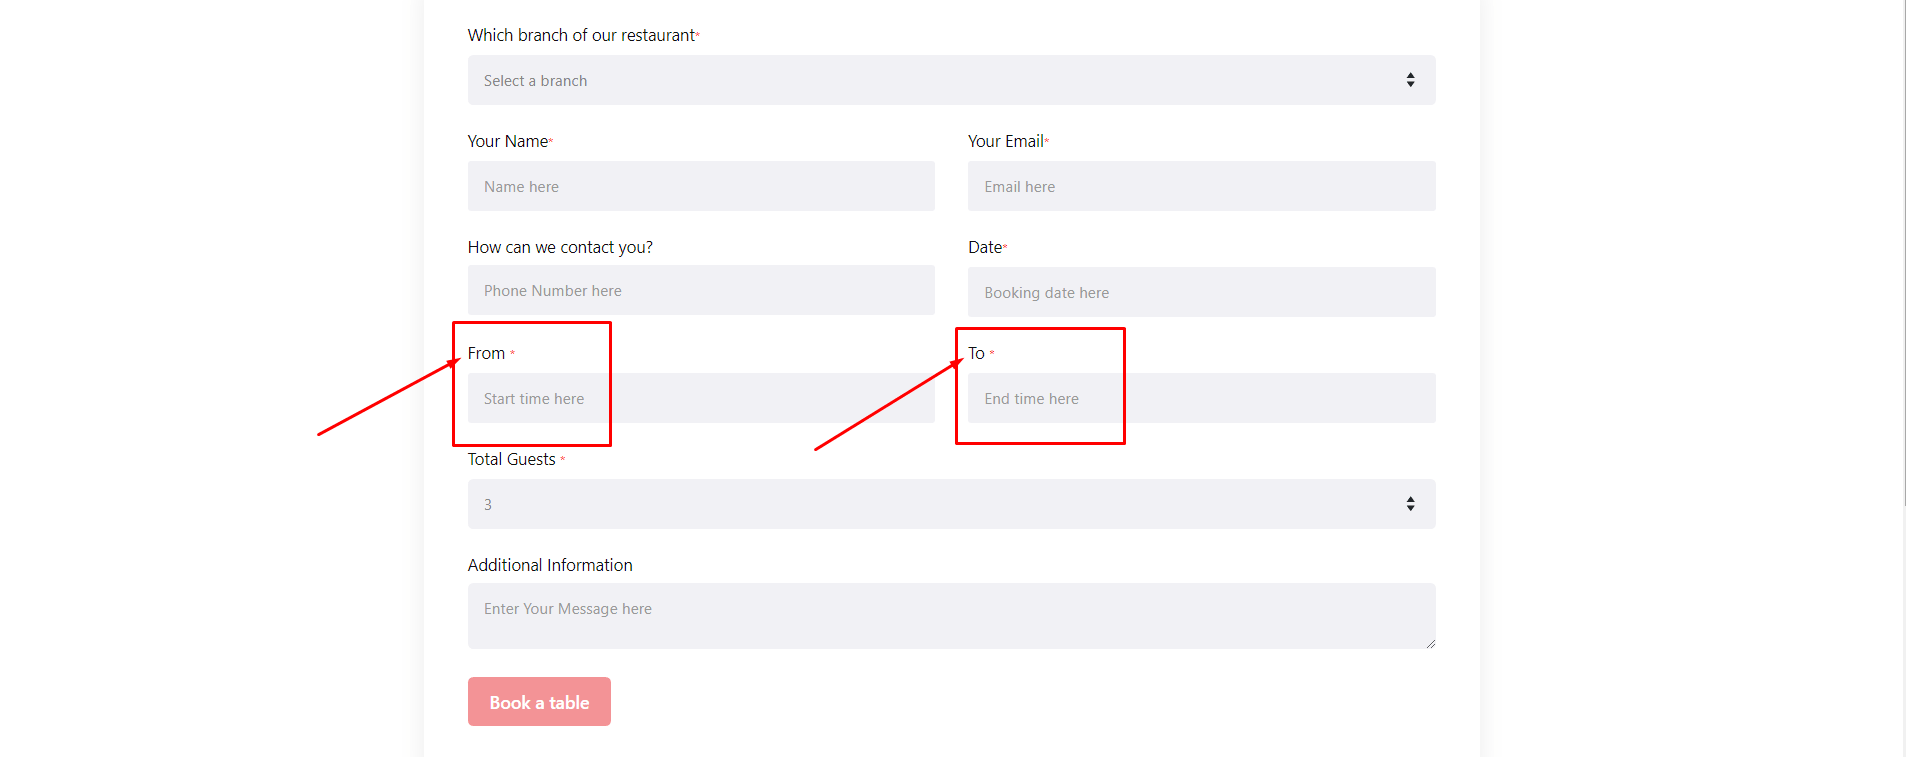
Frontend Look: Your form will look like the following screenshot from the frontend.
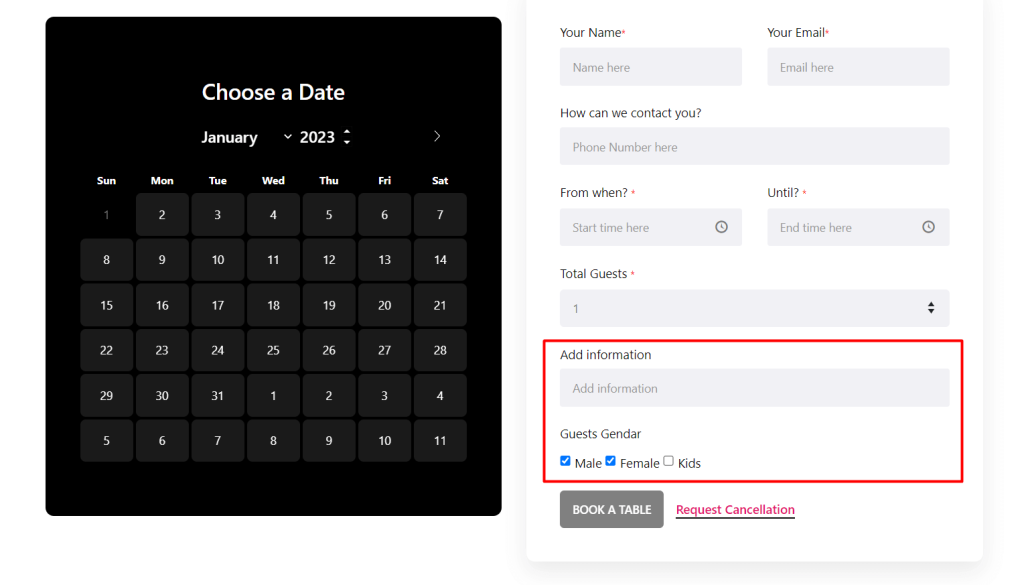
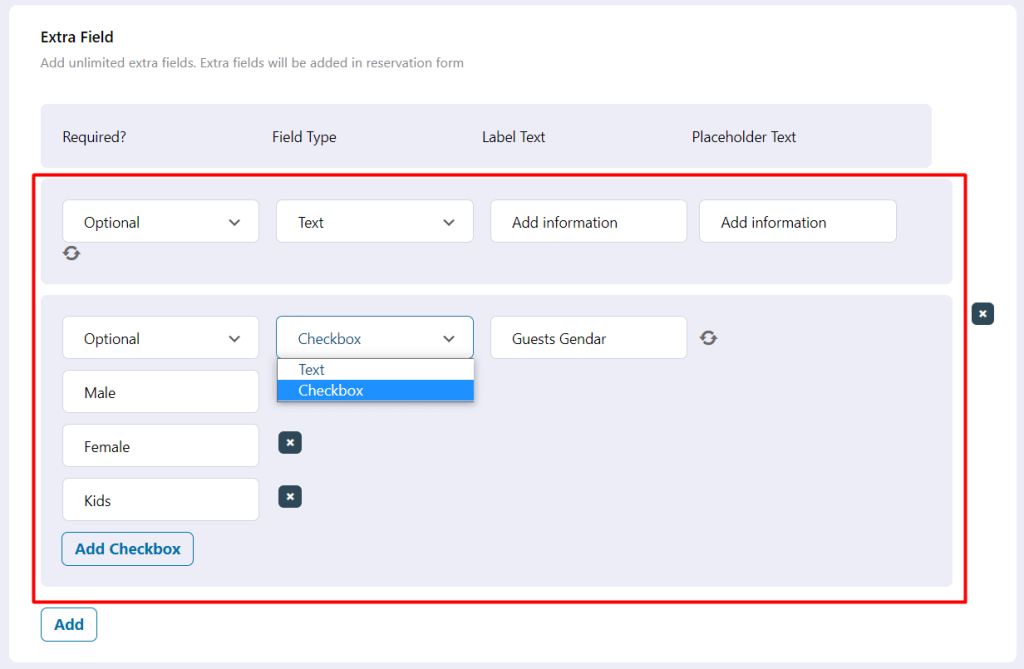
Add Extra Field(PRO) #
If you want to display an extra input field in the reservation form or if you want to take extra information from the users then you can use the ‘Extra Field’ option. If you add any extra custom field, it will display at the bottom of the reservation form. You can add multiple custom fields to your reservation form.
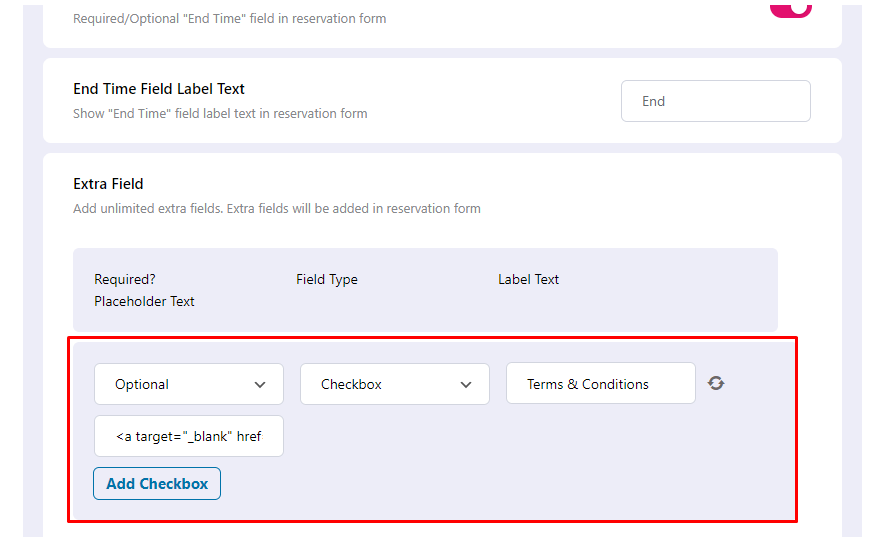
Add Extra Field in Reservation Form: Go to WpCafe -> Settings-> Reservation -> Form Customization-> Extra field. Here you can see the two types (Text and Checkbox) for adding reservation extra fields. You can add more than one extra field by clicking the “Add” button.
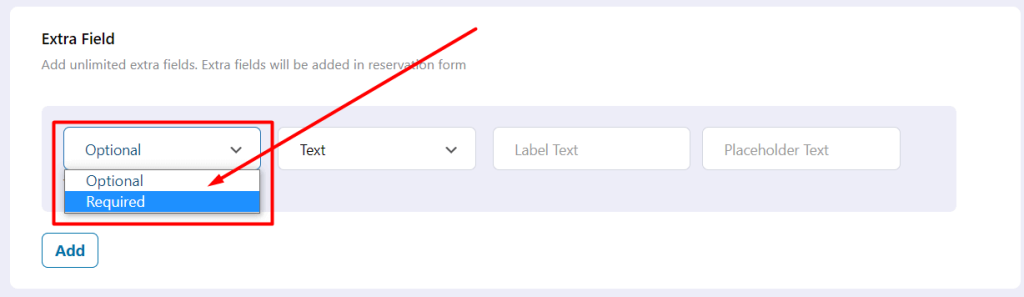
You can also make the extra fields required or optional on the reservation form.
You can also add “Terms & Conditions” with links on the reservation form.
Frontend Look: If you add an extra field, it will be displayed like the following screenshot.