Zapier is an online platform that helps you automate workflows. You can connect the apps and the services you use for the automation. Get automated WPCafe submitted information through the Zapier webhook. This is an easy step. Let’s see how you can connect Zapier with WPCafe.
Get Webhook URL #
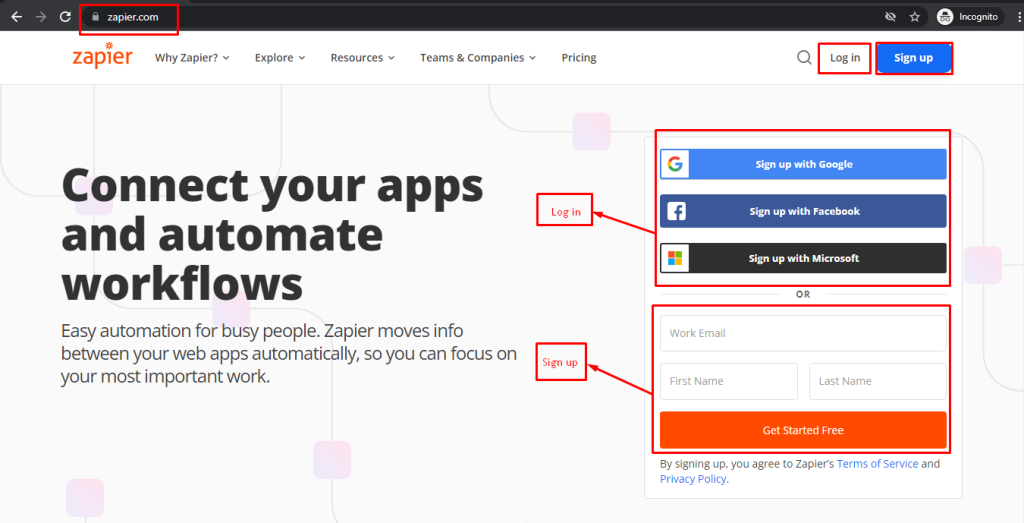
Step 01: Go to https://zapier.com. If you are a new user, create a Zapier account manually and log in to the system. You can also log in with Google, Facebook or Microsoft accounts.
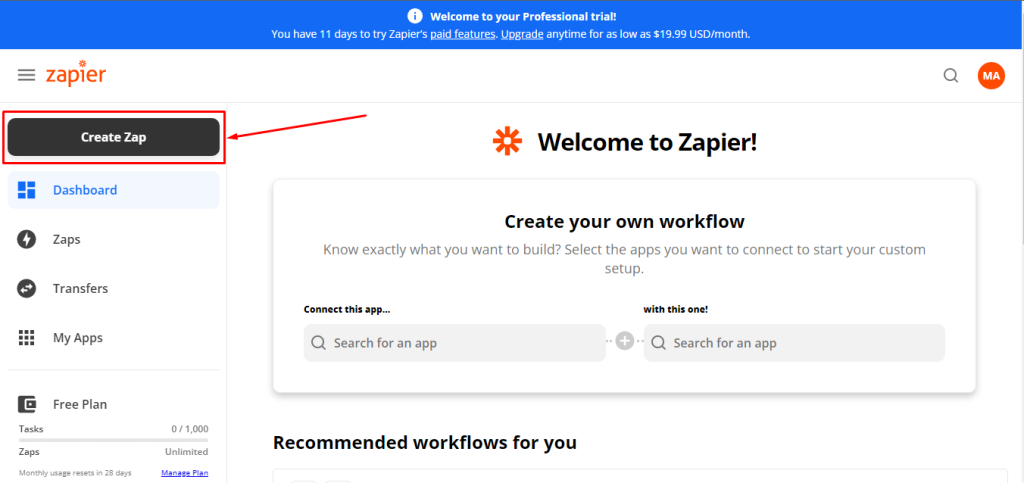
Step 02: Click on “Make A ZAP” from the left side top area. It will drive you to the next screen.
Step 03: Click on Webhook

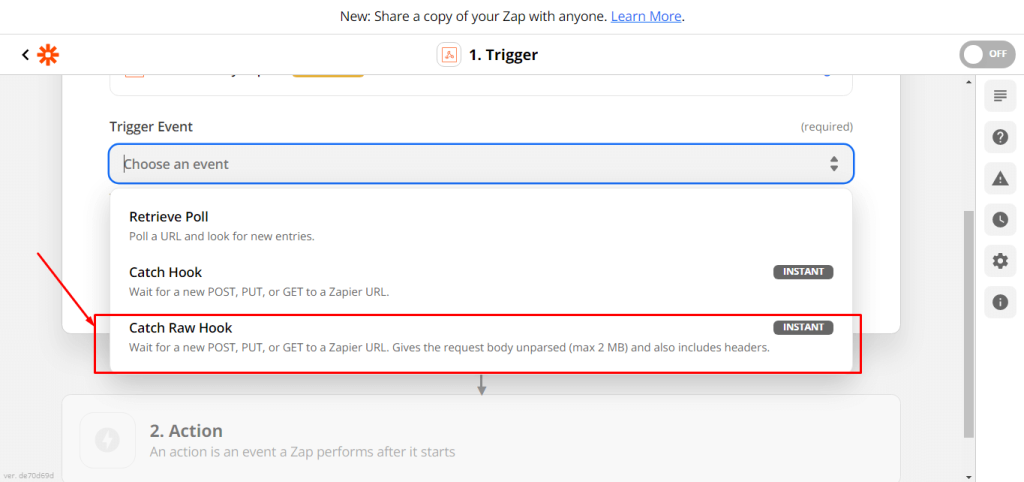
Step 04: Click on the Event from and the Drop-down will show up. Then select the “Catch Row Hook”.
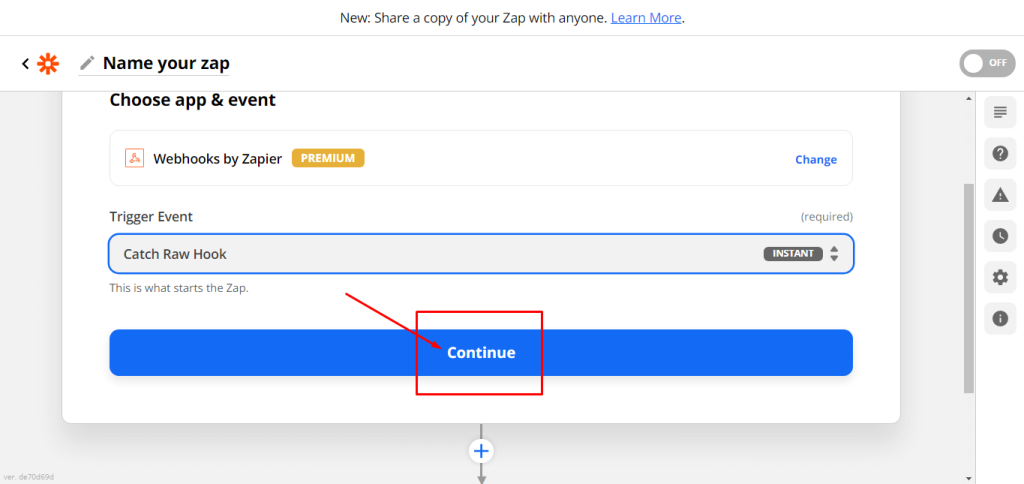
Step 05: Click on Continue, and it will take you to the final stage of these settings.
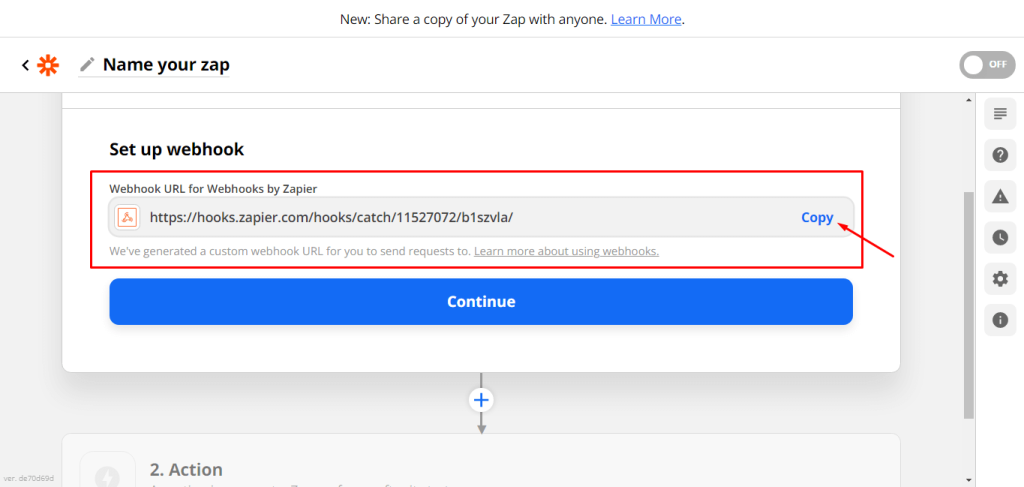
Step 06: Now, copy the URL and click on continue. You are done with these steps.
Integrate Zapier into WPCafe #
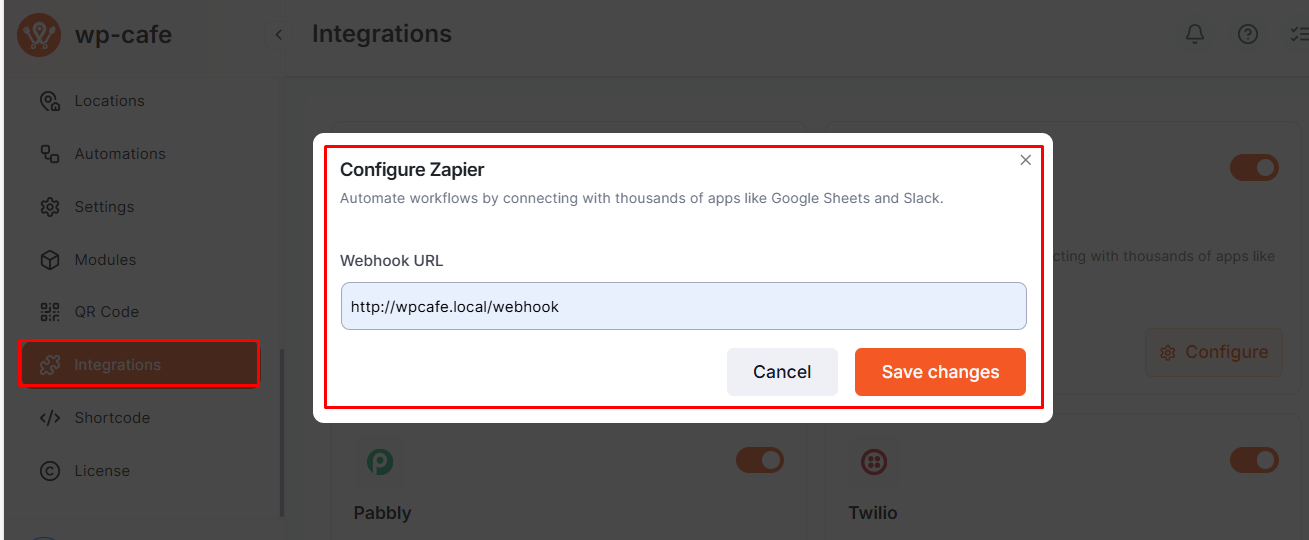
Go to WPCafe → Settings & Tools → Integrations and enable Zapier. Then paste the webhook URL generated from your webhook account and save the settings.
Once saved, your WPCafe site will be successfully connected with Zapier.
You can now create a reservation form, collect user data, and access this data directly from Zapier.
Test your Trigger #
Go to your Zapier Webhook -> Click on Test trigger
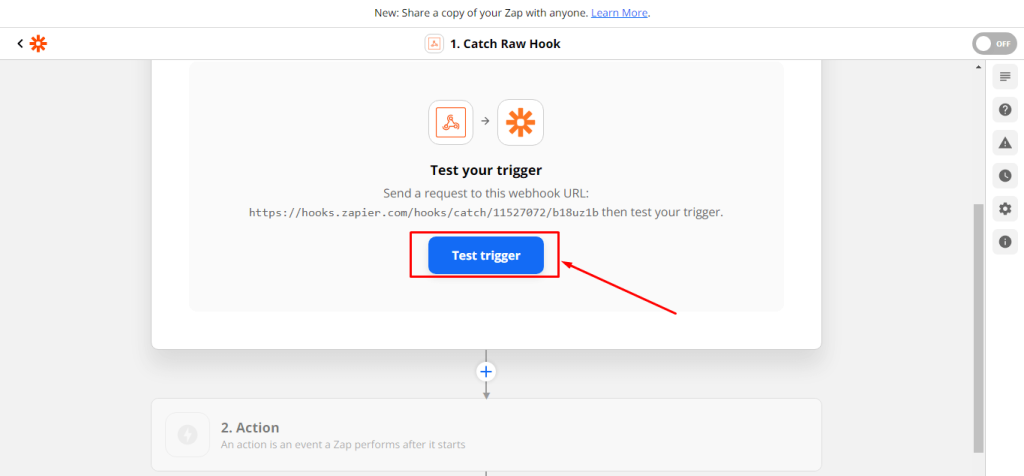
You can see your user-submitted information showing accordingly.

Zapier WooCommerce Integration #
With the Zapier WooCommerce integration, you can unlock more features on your website. Please check the documentation to know how to integrate Zapier into WooCommerce.
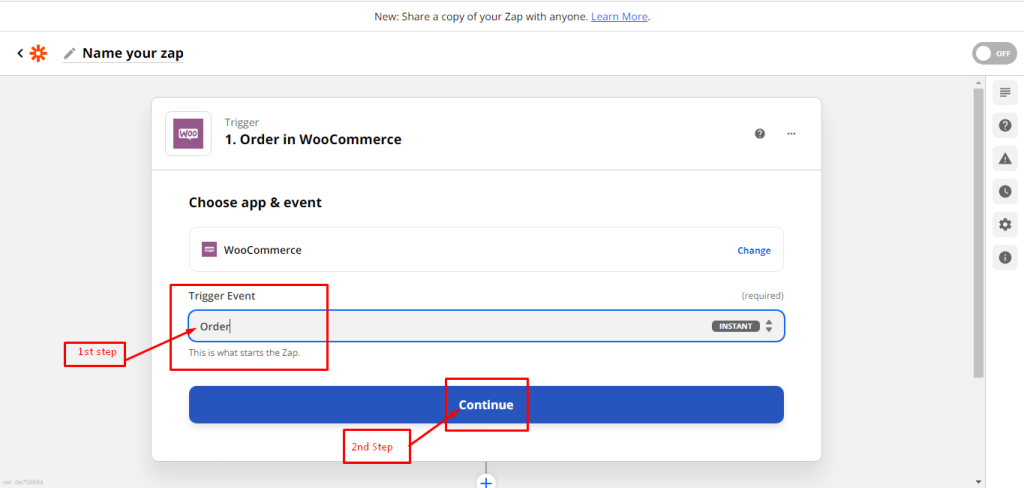
Since WPCafe uses WooCommerce for Food Ordering, connect WooCommerce with Zapier to get Food Order details. Go to the Zapier dashboard and create a New ZAP and choose WooCommerce as the App.
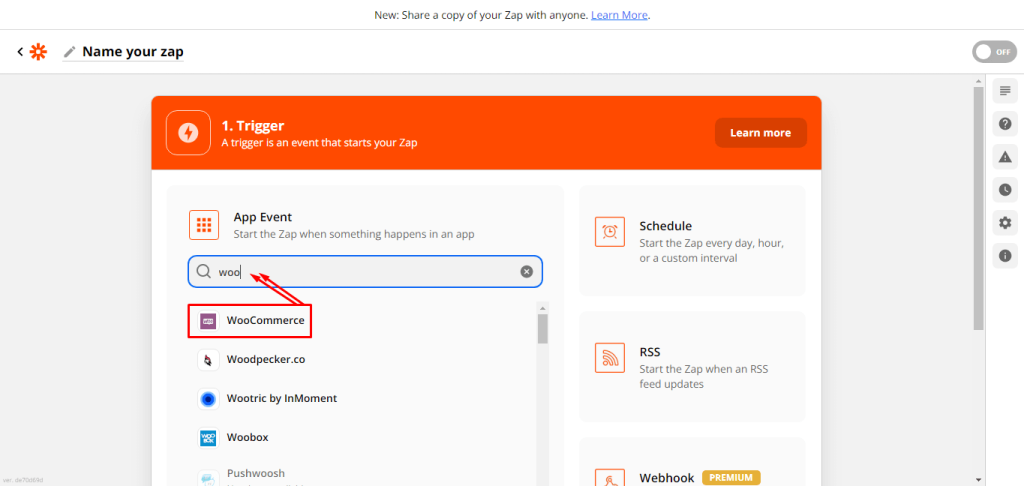
Now, click on the dropdown on the box under “Tigger Box” and select “Order”. After that, select the “Continue” button.
Finally, you will get WooCommerce connecting options.

Now, here you will need to purchase the “WooCommerce Zapier“ plugin. And the rest of the steps are available on the plugin page. You can see details by clicking the following button.


