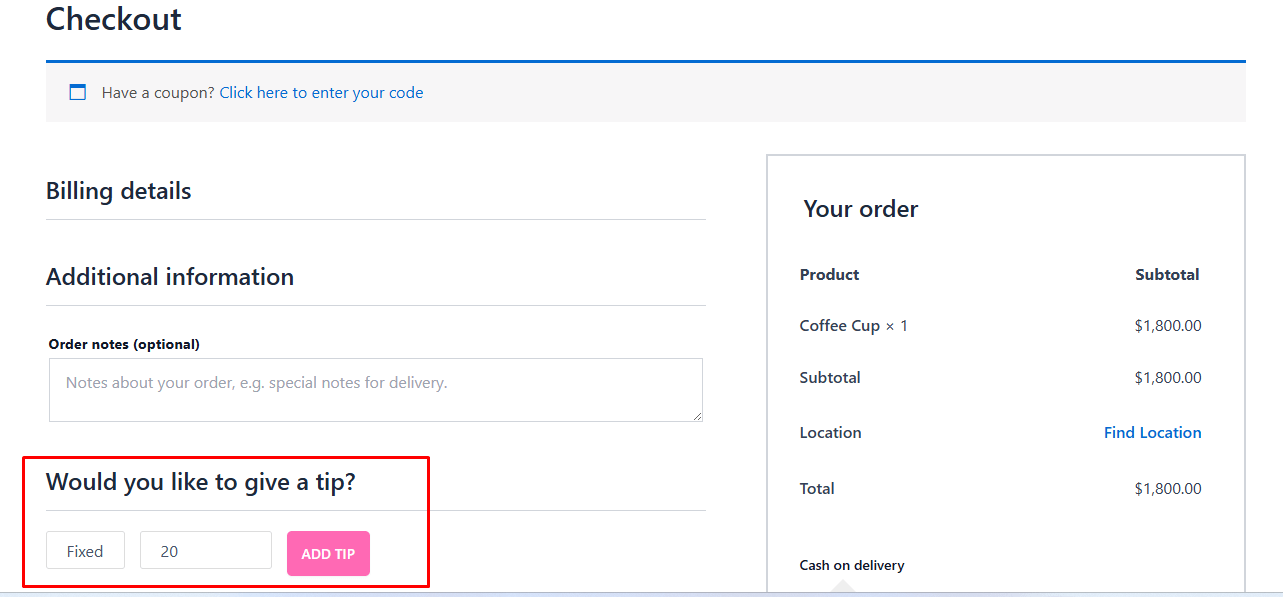
Adding a tipping option allows your customers to show appreciation for your staff and service. By enabling tipping, customers can contribute extra during checkout, either as a fixed amount or a percentage of their order total, helping enhance customer satisfaction and reward your team.
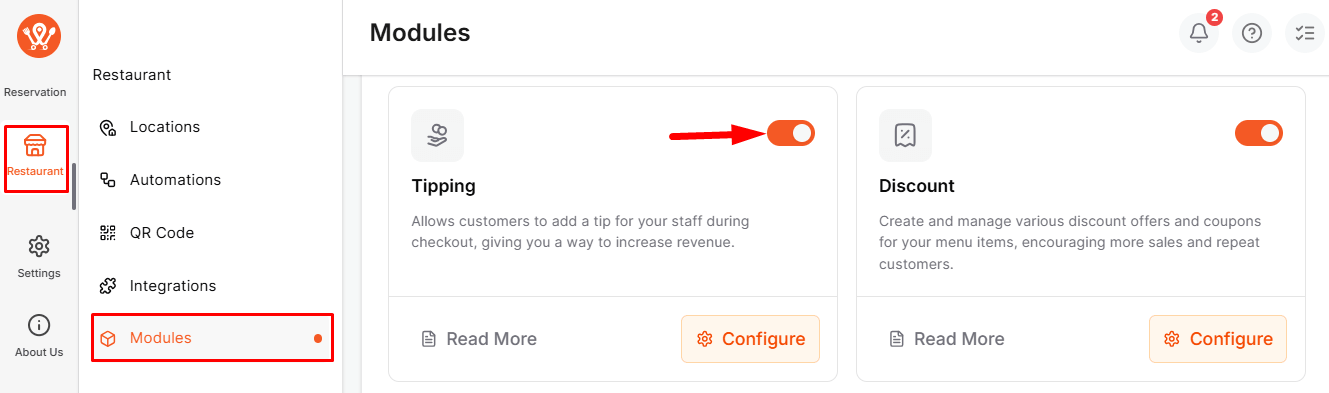
How to Enable #
Go to WPCafe → Restaurant → Modules, then turn on the Tipping module.
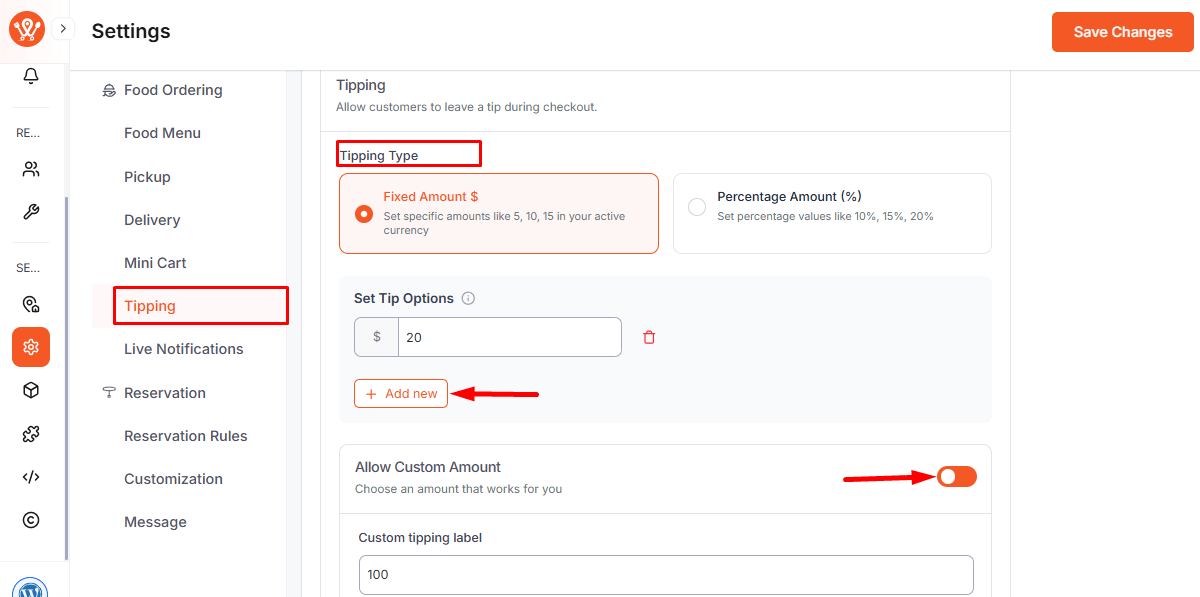
Settings #
After enabling the module, go to Settings → Tipping.
- Allow Tipping: Let customers add a tip during checkout.
- Fixed Amount ($): Add preset options (e.g., $5, $10, $15).
- Percentage (%): Set values like 10%, 15%, 20%.
- Allow Custom Amount: Let customers enter any amount.
Tip Visibility #
- Customers: See tip on Cart and Checkout pages.
- Admin: View tip details in WooCommerce Order Details.