QR codes provide a quick and convenient way for your customers to view your restaurant’s food menu using their smartphones. By generating QR codes for each table or menu page, you can improve customer experience and reduce physical contact.
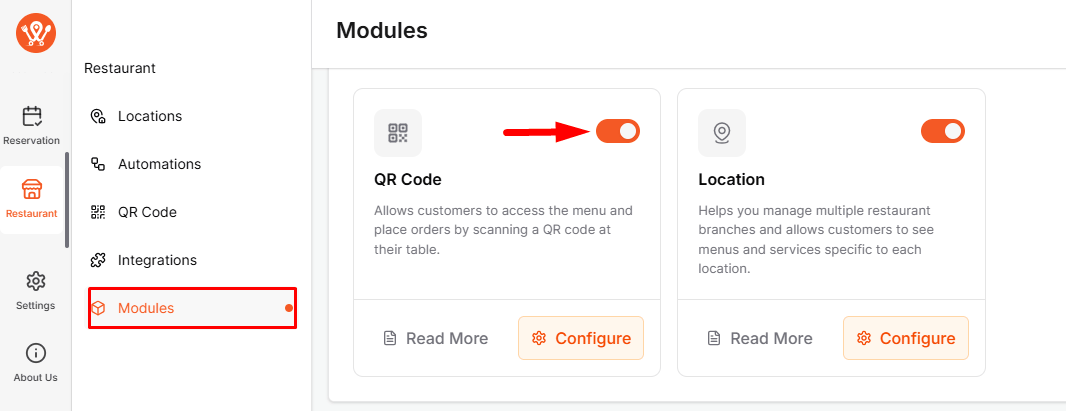
Enable the QR Code Module #
To generate a QR code, the first requirement is to enable the QR Code module. Go to WPCafe → Restaurant → Modules and switch on the QR Code module.
Create a New QR Code #
Go to WPCafe → Restaurant → QR Code Menu, then click the Create QR Code button. After that, provide the following information:
- Enter the Table Name and Page URL where your Food Menu is displayed.
- The QR code will automatically generate on the right sidebar, and you can download it if needed and click the Create QR Code button.
- You will see the full QR code list under the QR Menu section, where you can edit, delete, print, or download any QR code.
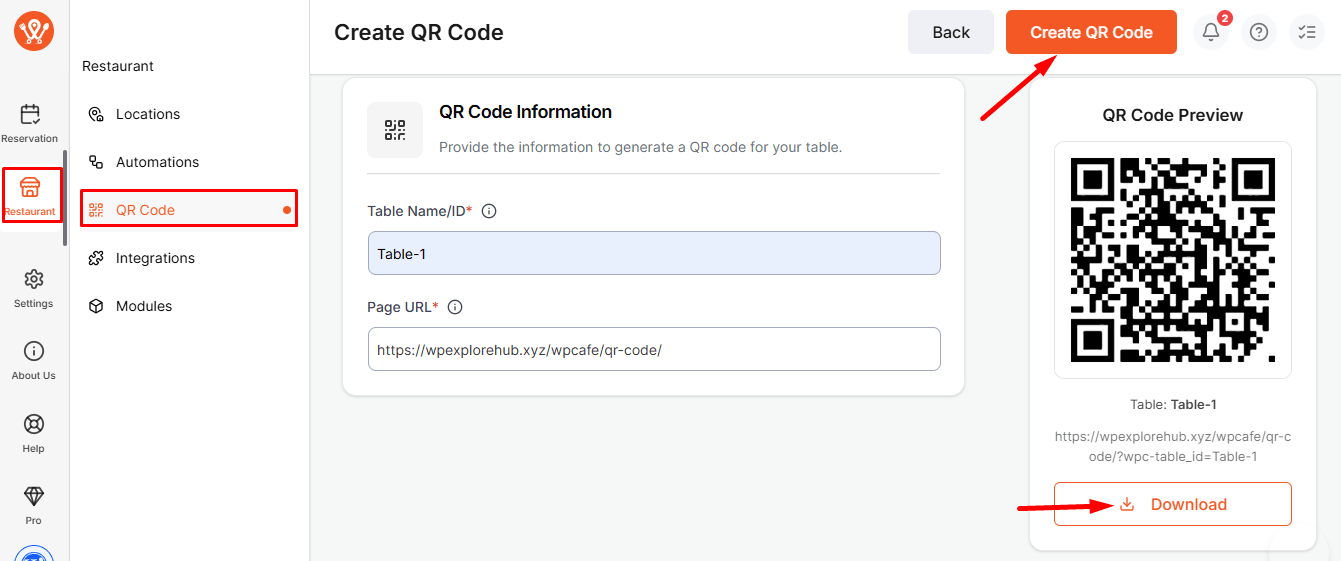
After downloading the QR code, place it manually on your restaurant tables. When customers scan the QR code, it will open the exact page you provided during setup. They will be redirected to the specified URL automatically.
FAQ #
Q1: Can I generate QR codes for multiple tables at once?
A1: Yes, you can create QR codes for different tables by repeating the QR code creation process for each table.
Q2: Can the QR code link be updated later?
A2: Yes, you can edit the QR code from the QR Menu list and update the URL without creating a new code.
Q3: Do customers need an app to scan the QR code?
A3: No, most smartphones have built-in QR code scanning capabilities through the camera or a QR code reader app.
Conclusion #
Generating QR codes for your food menu using WPCafe is simple and efficient. It allows your customers to access menus digitally, improving convenience and hygiene while giving you the flexibility to manage and update QR codes easily.


