At Eventin, you can use “Stripe” as your payment gateway and sell tickets.
How to Get Secret and Publishable Key #
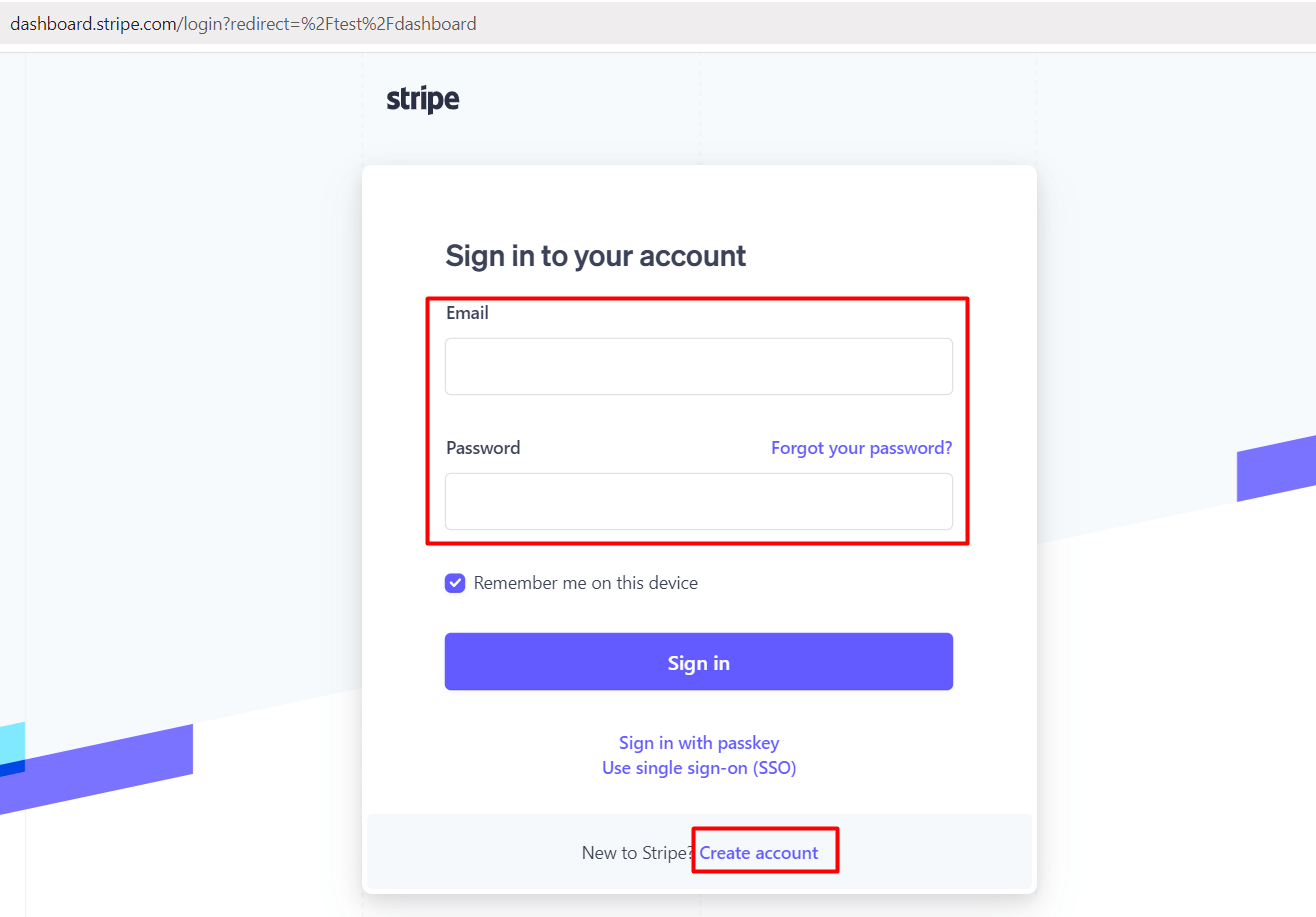
- Go to the Stripe Dashboard and log in. If you don’t have an account, then create an account first.
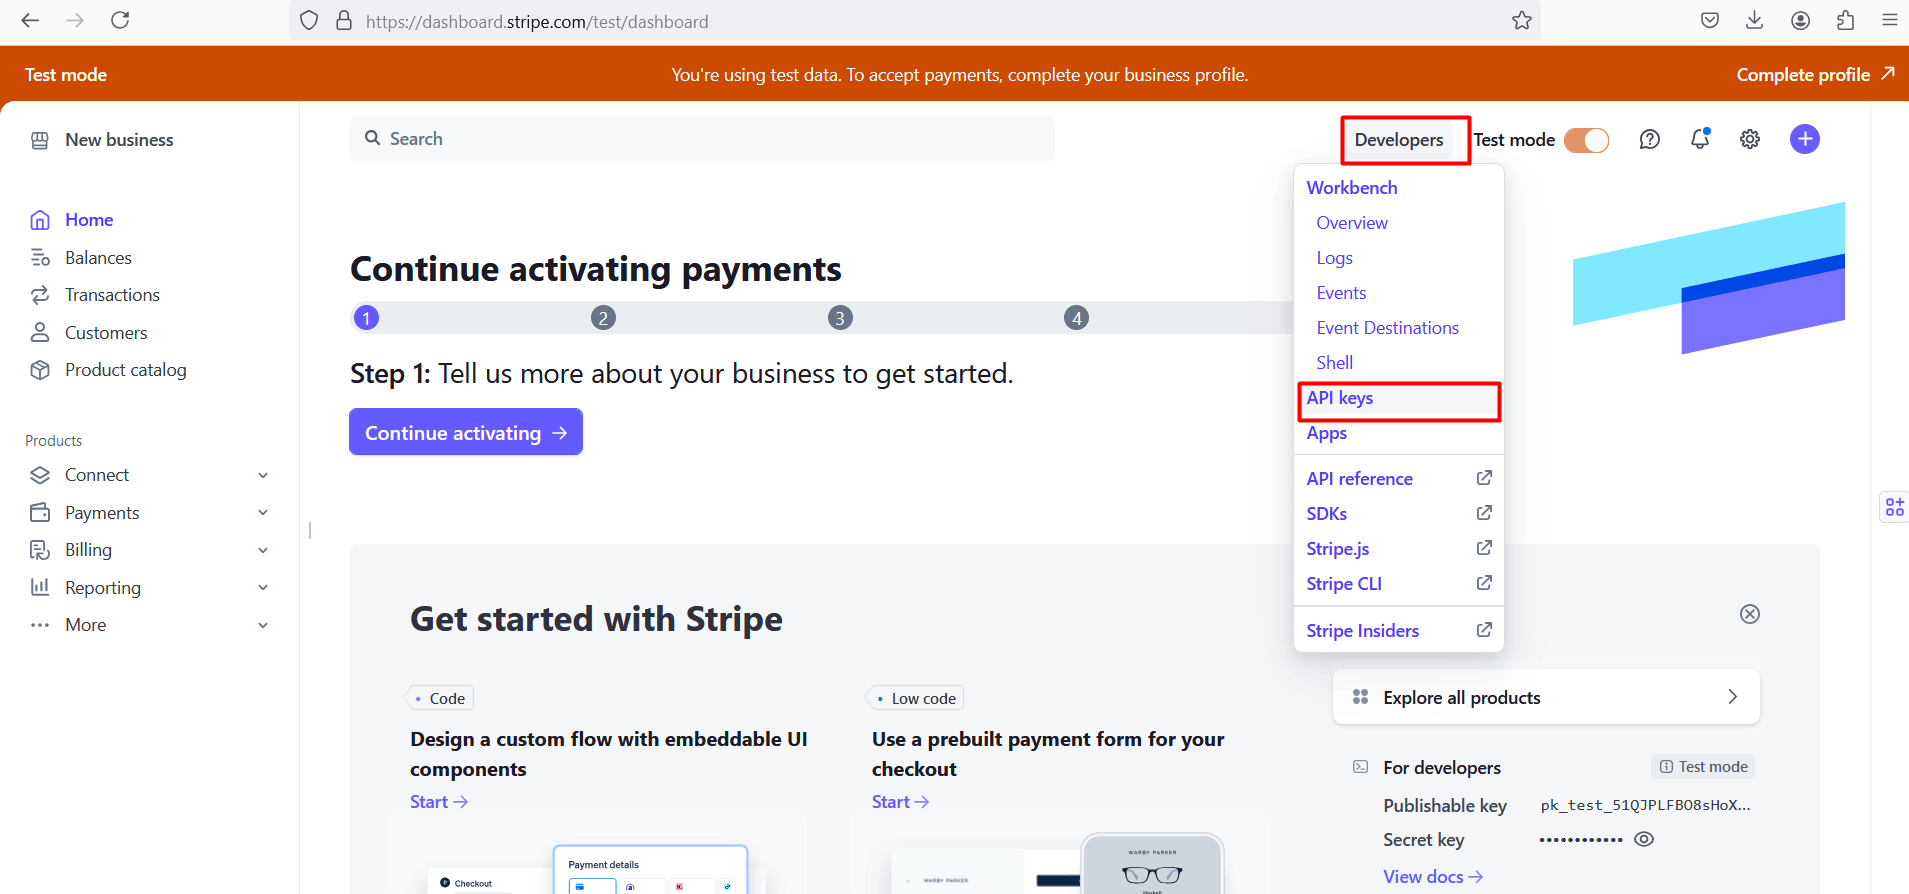
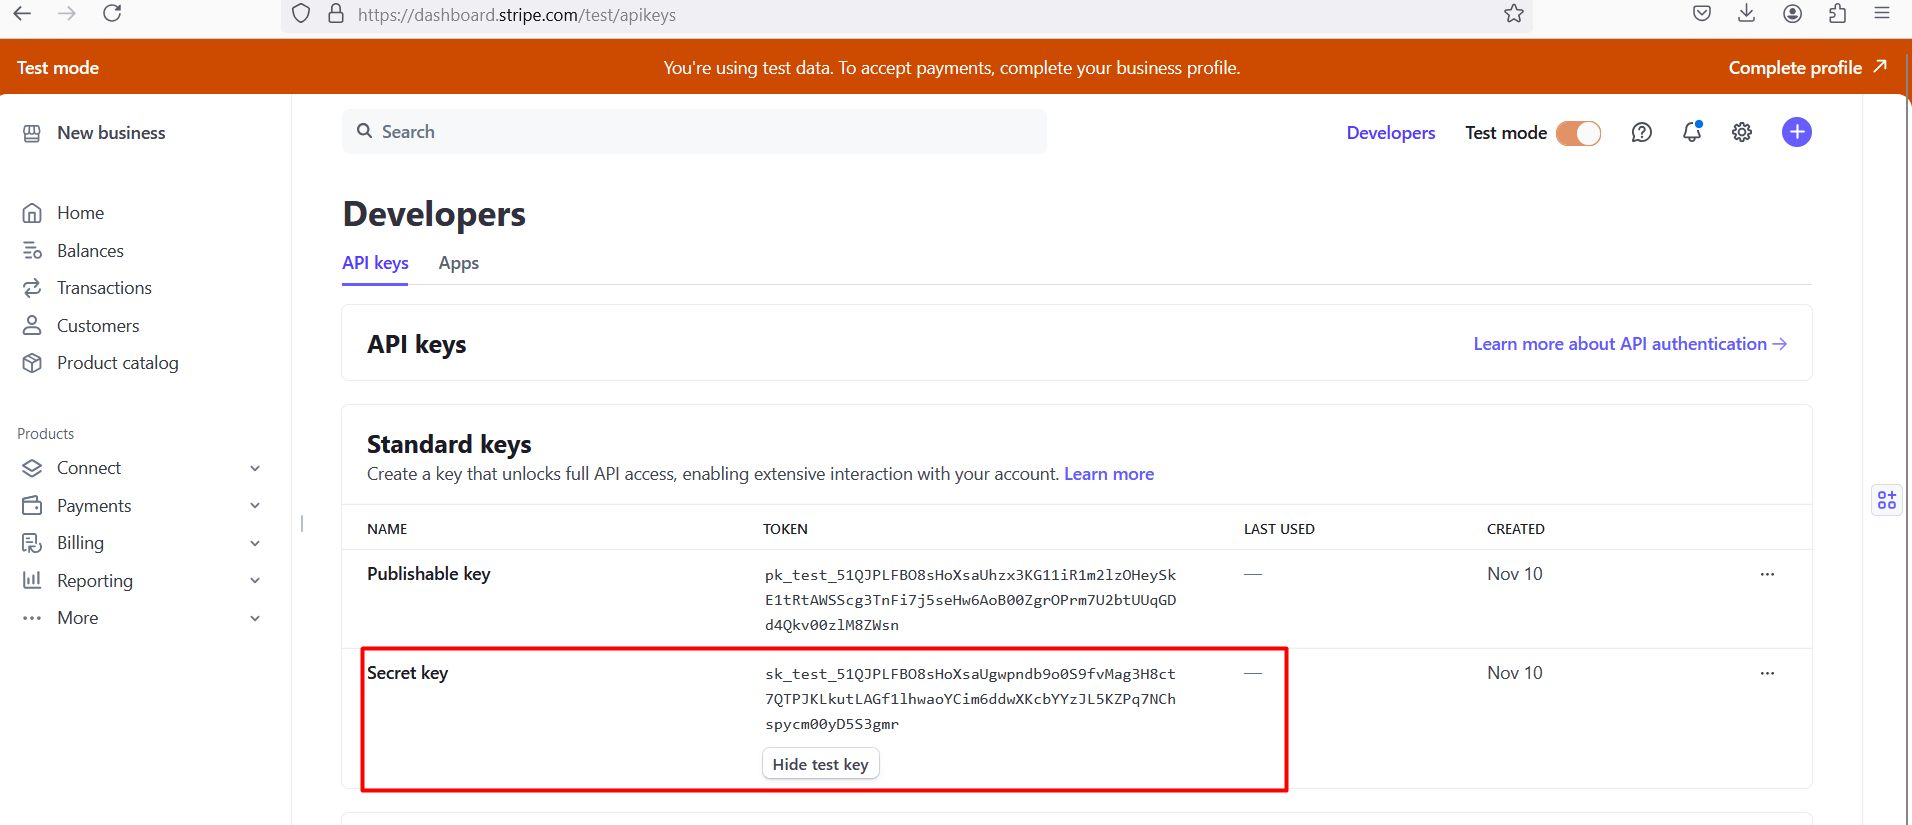
- On the Dashboard, click on Developers Menu-> API Keys.
- You’ll see the Test API Keys.
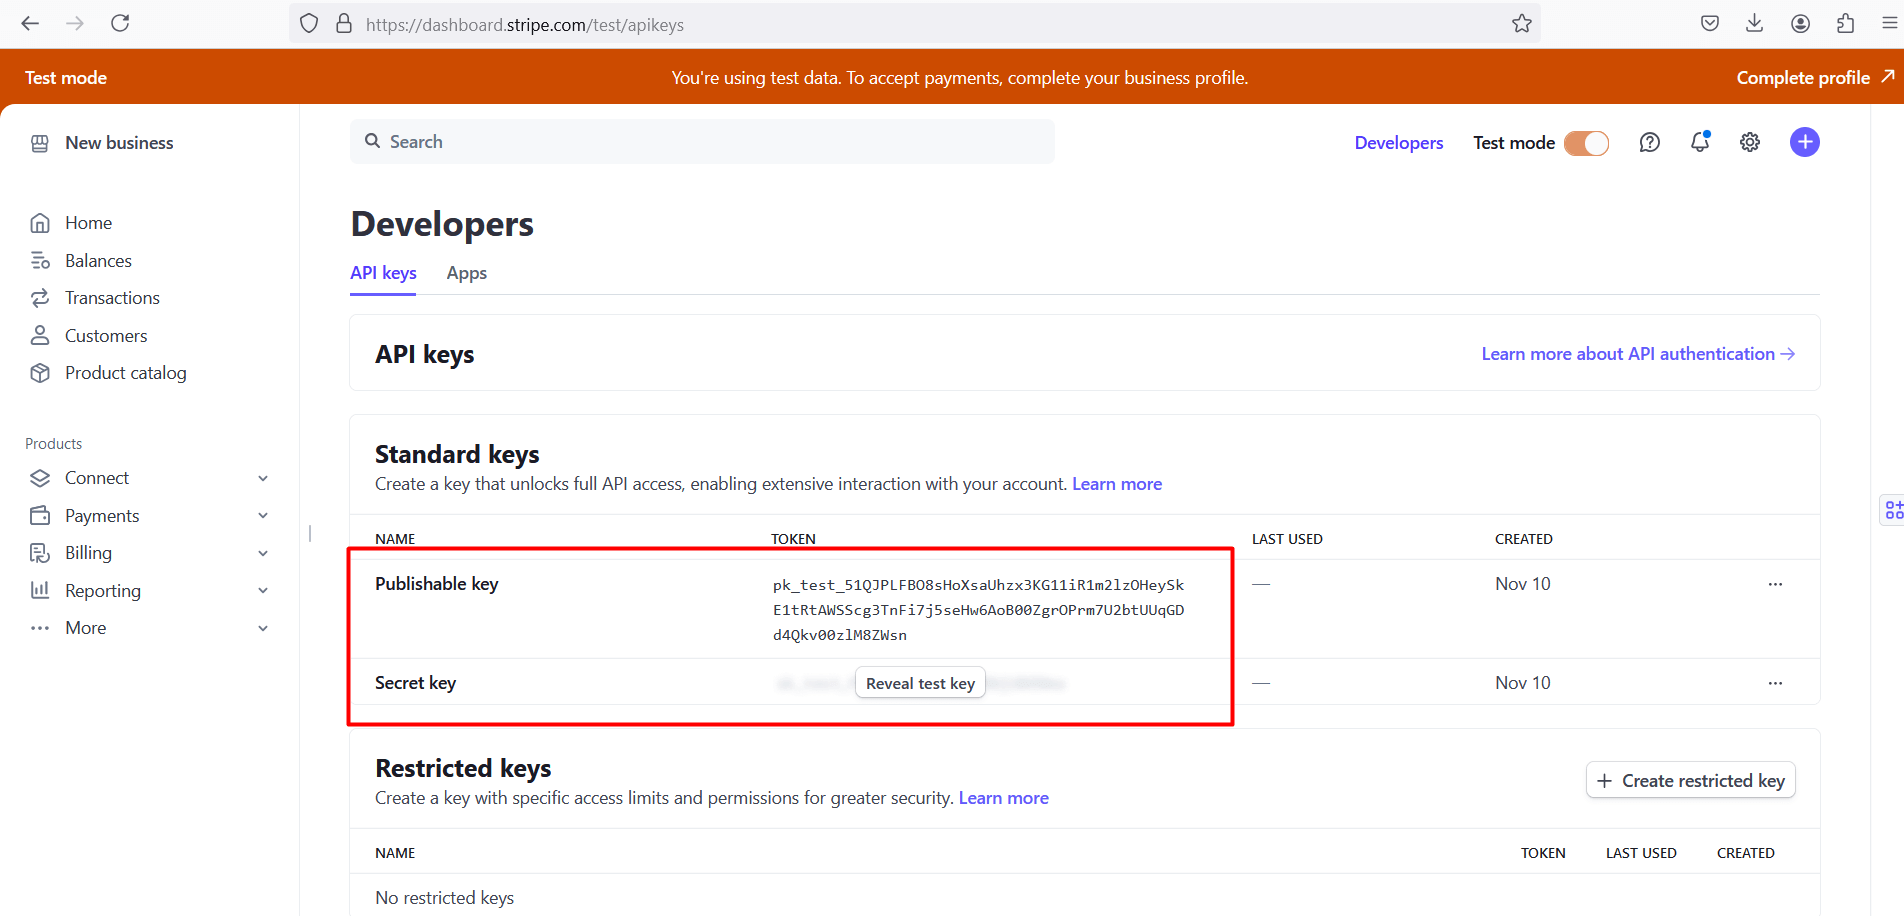
- Click Reveal to see the full keys and copy them.
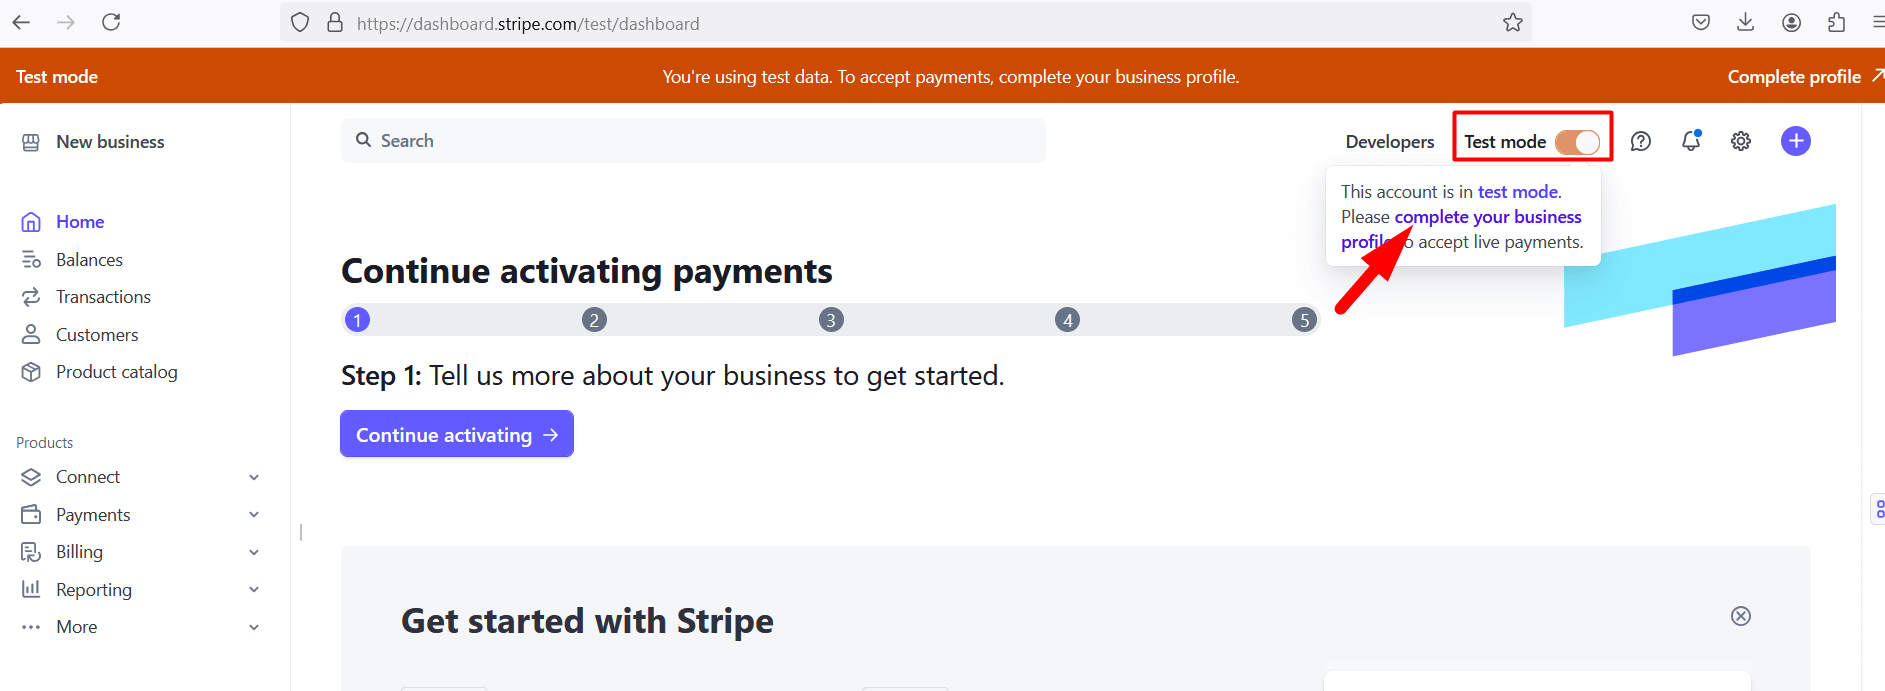
- If you want to use the key for Live Payment, you must configure your business information from this LINK. After that, you can enable Live Mode from the top-right corner of your Stripe Dashboard. Once in Live Mode, you’ll see your Live API Keys.
How to Enable Stripe from Eventin #
In order to enable Stripe, log in to your WordPress admin panel and go to the Eventin dashboard. Then click on the settings and under the Payments tab, you will get the payment method menu. Click on the payment method menu and enable Stripe. You can not enable both WooCommerce and Stripe together.
- Settings Key: Eventin -> Settings ->Payments -> Payment Method and enable Stripe.
You are fine to go with the Stripe enable toggle button. Add the Public Key and Secret Key. Once done, save the changes.
Here’s a quick VIDEO to help you set it up.

Users View for Stripe Payment #
After the saved changes to Stripe payment integration, users will see different views for the payment options. While purchasing the tickets, they will see the name and email form on top of the ticket information. And in the next step, after filling up the purchasing information, a pop-up will open for payment.
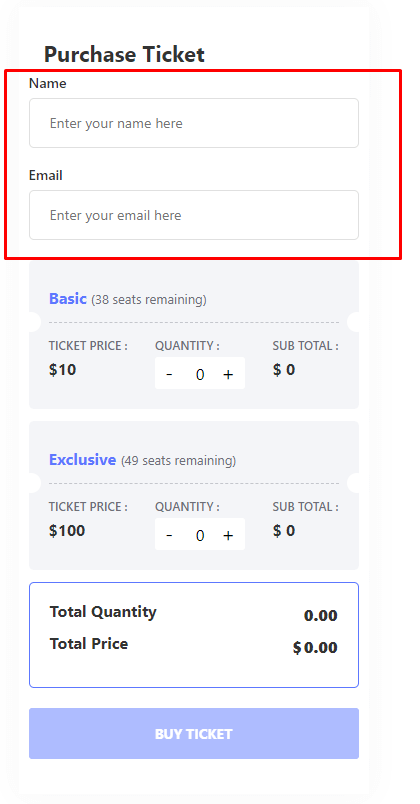
This time, the purchaser will not drive to the checkout page. And for the successful payment, they will be driven to the thank you page.
Stripe Order Details #
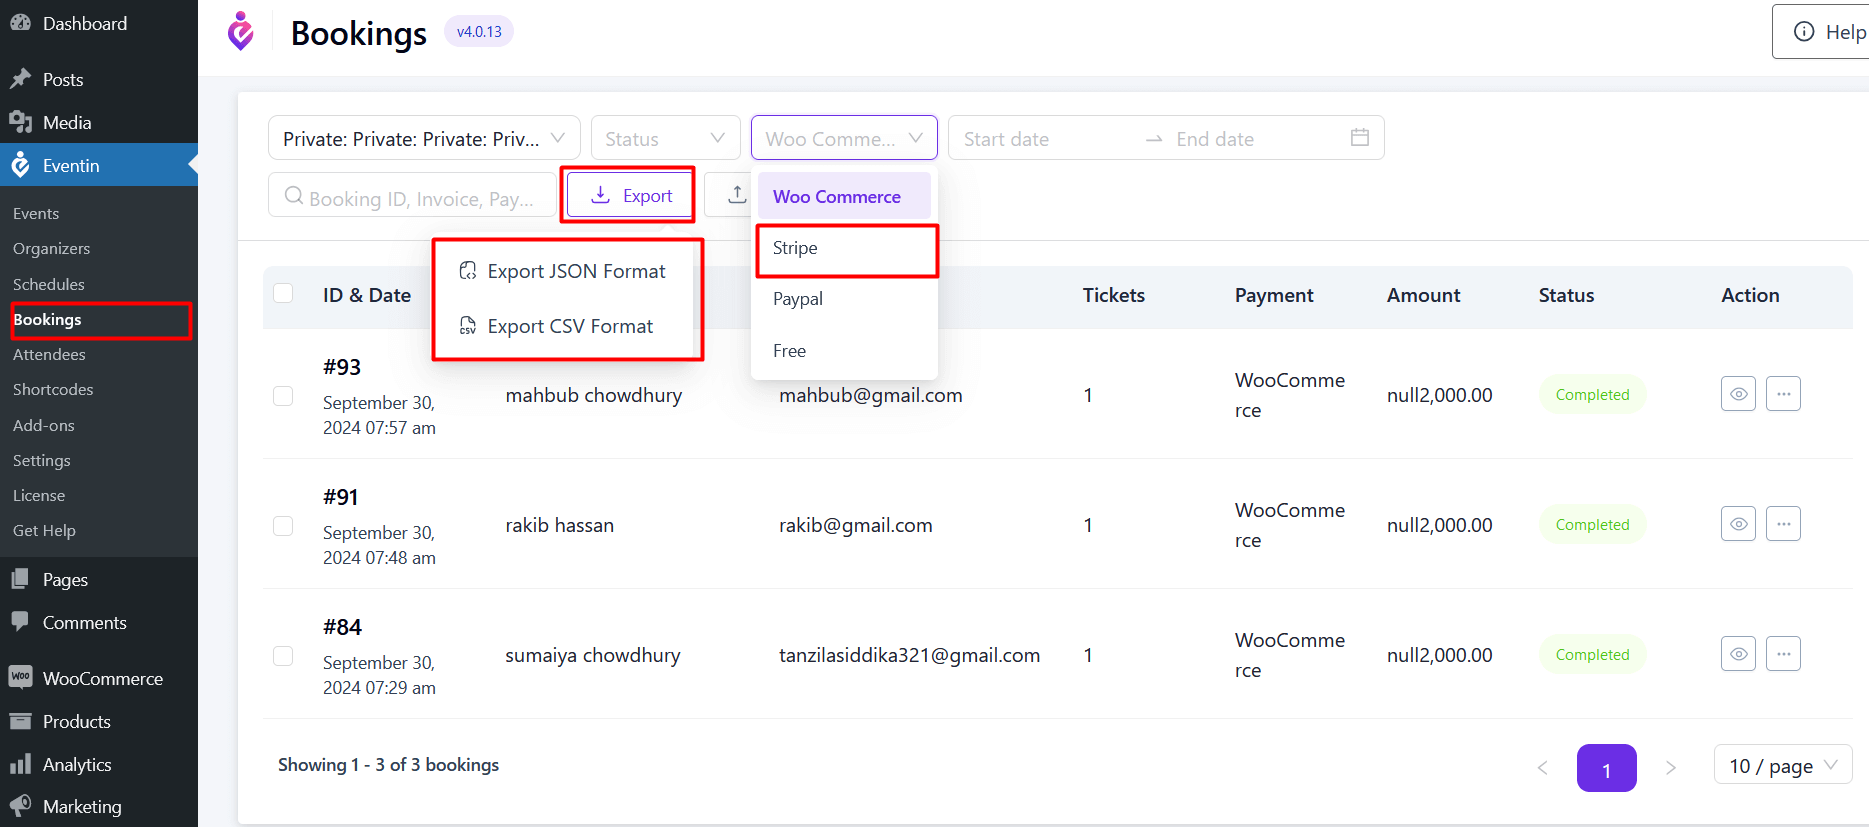
You can see all the Stripe payment orders from Eventin -> Booking -> Select Stripe.
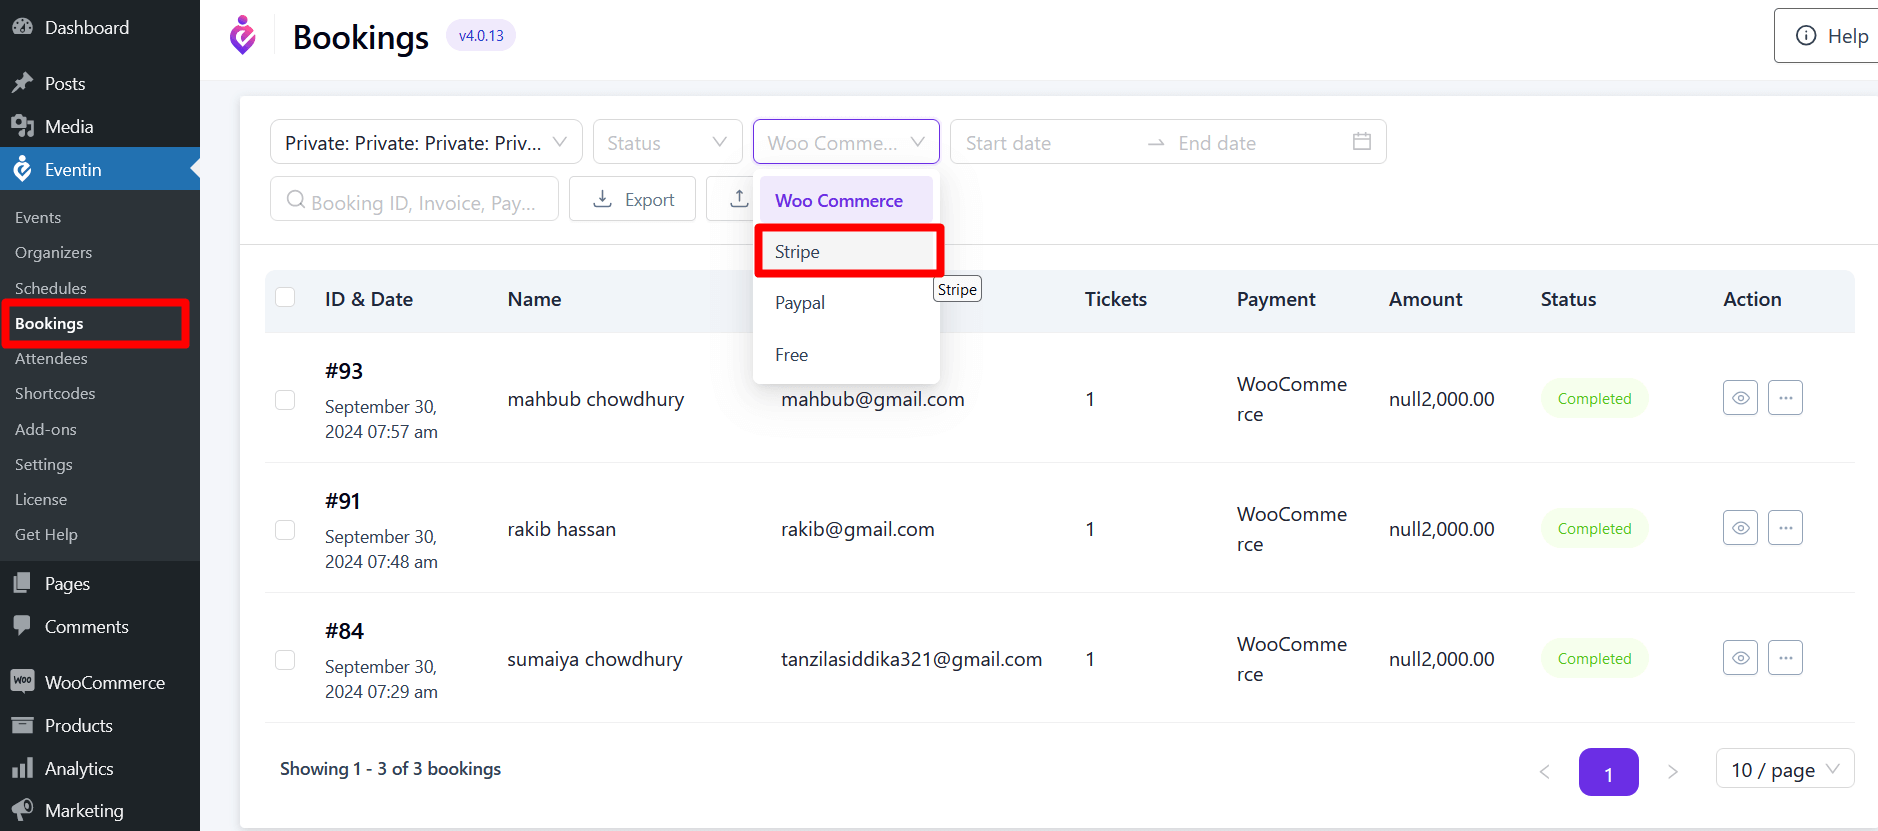
You can also export/import all the bookings in JSON and CSV format.