The Visual Table Layout feature in WPCafe allows restaurant owners to design, customize, and manage their table arrangements clearly and interactively. With this tool, you can easily add tables, define seating capacities, style them, and integrate the layout with your reservation system. This ensures an organized, visually appealing setup for both staff and online visitors, simplifying the booking process.
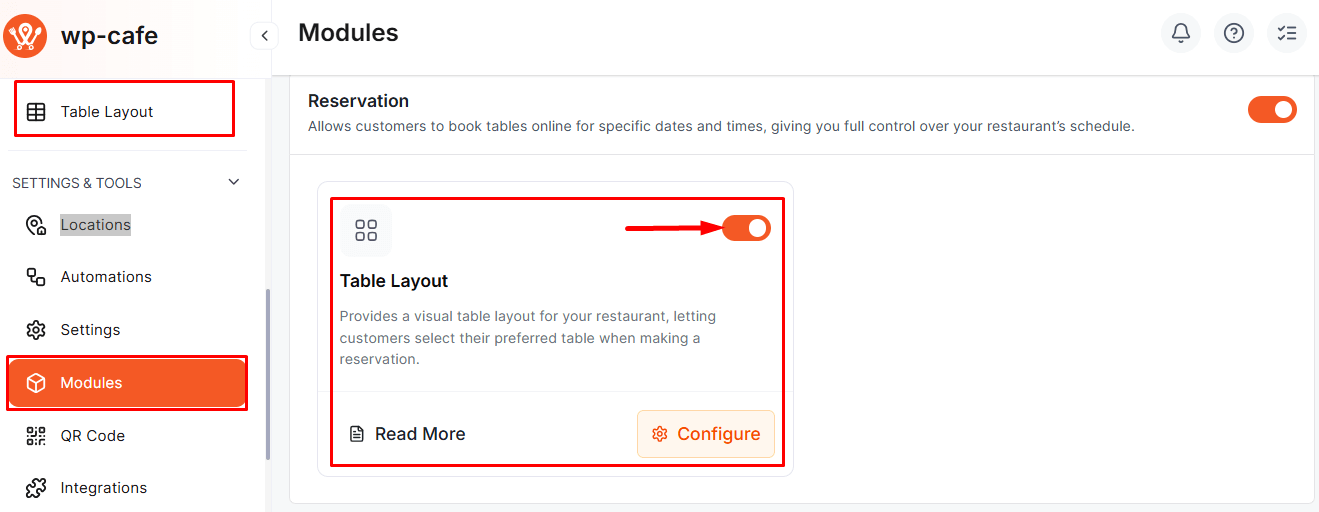
How to Enable #
Go to WPCafe → Settings & Tools → Modules, then turn on the Table Layout module.
Steps to Configure: #
Go to Dashboard → WPCafe → Settings → Reservation Rules → Visual Table Layout and click on Configure button.

Layout Editor Overview: #
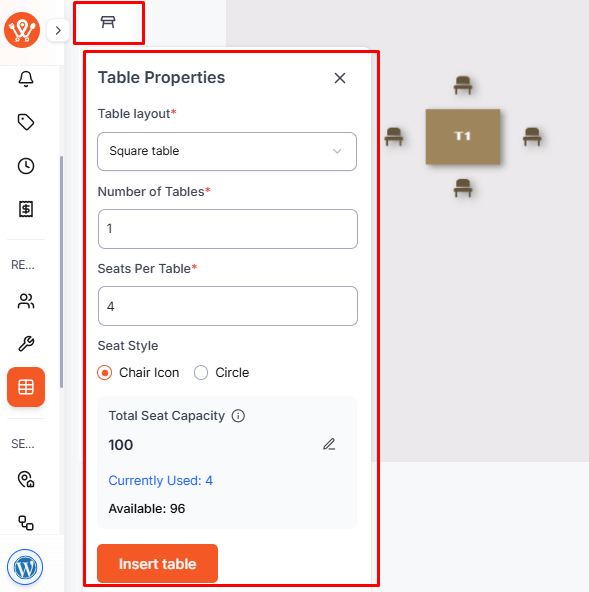
- Left Sidebar (Table Properties):
- Table Layout: Choose the shape of the table (e.g., square, round).
- Number of Tables: Set how many tables of this type to add.
- Seats Per Table: Define the number of seats per table.
- Seat Style: Choose between Chair Icon or Circle.
- Total Seat Capacity: Displays total available seats and currently used seats.
- Click Insert Table to add the table to your layout.
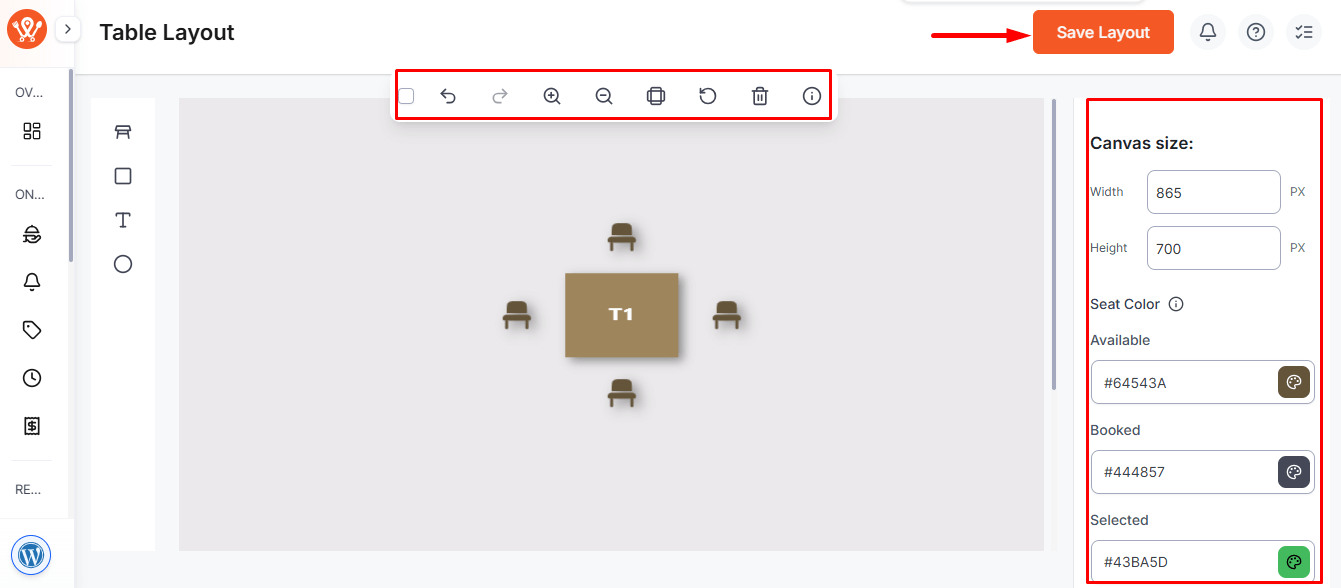
- Canvas Area (Center):
- Drag and position tables.
- Use the top toolbar to undo, redo, zoom, copy, rotate, or delete tables.
- Right Sidebar (Style & Canvas Settings):
- Canvas Size: Set the width and height of the layout canvas.
- Seat Colors: Customize colors for available, booked, and selected seats.
- Room Background Image: Add a background image if needed.
After arranging and styling your tables, click Save Layout (top-right) to apply changes.
Reservation Form Integration: #
- Go to Settings → Reservation → Form Customizations. Create your reservation form according to your needs.
Enable the “Select Table” field, this is required to display the table layout on the form.
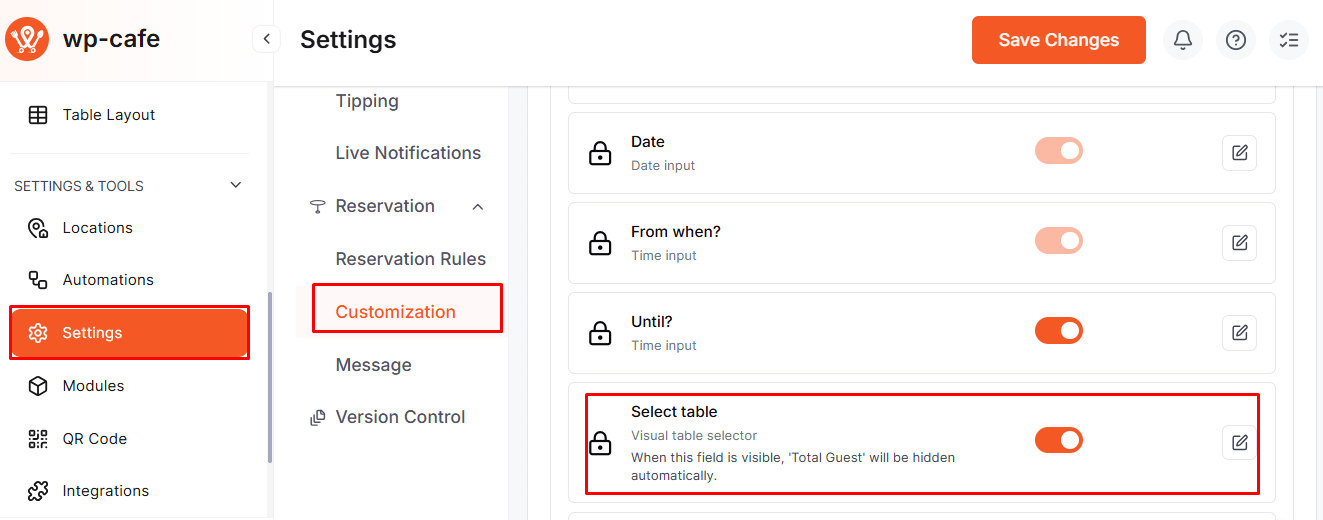
- The reservation form will now display the table layout. Visitors can view available tables, select seats, and complete bookings directly from the form.
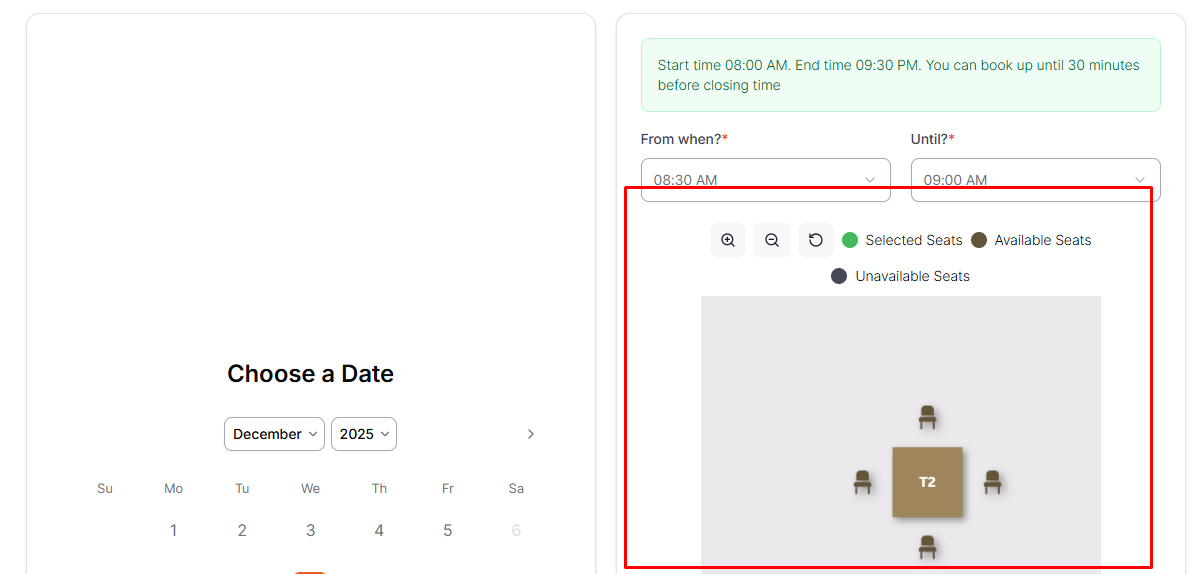
This setup ensures that your table arrangement is both visually appealing and fully functional for online reservations.
FAQ #
Q1: Can I add different table shapes in the same layout?
Yes, you can mix and match square, round, or other table shapes on the same canvas.
Q2: How do I update a table after inserting it?
Select the table on the canvas, then modify its properties from the left sidebar.
Q3: Can I change seat colors later?
Yes, seat colors for available, booked, and selected seats can be updated anytime from the right sidebar.
Q4: Will my reservations reflect the new layout automatically?
Yes, once you save the layout and integrate it with the reservation form, the updated table arrangement will be visible to visitors.
Q5: Can I upload a background image for the dining area?
Yes, the right sidebar allows you to set a custom background image to match your restaurant’s floor plan.
Conclusion #
The Visual Table Layout tool provides a seamless way to manage your restaurant’s seating arrangements. By using this feature, you can improve the customer experience, simplify staff operations, and ensure your online reservation system reflects the actual seating capacity in real time.


