The Eventin plugin offers a powerful and flexible certification feature that allows you to create personalized certificates for event attendees. The certificate information is dynamically pulled through a shortcode, enabling easy integration with your event pages.
- The attendee information comes dynamically through a shortcode.
- You can create different templates for different events
- You can design the template according to your choice.
- You can create a template using Gutenberg Block, Elementor editor or Eventin Template Builder.
Important Note:
- The certificate build is the pro feature, so you must activate the pro plugin for using this feature.
- You have to select the Eventin template as a page template. Otherwise, certificate functionalities will not work.
- The email for the certification will send to the purchaser’s email address, not the attendee’s email address.
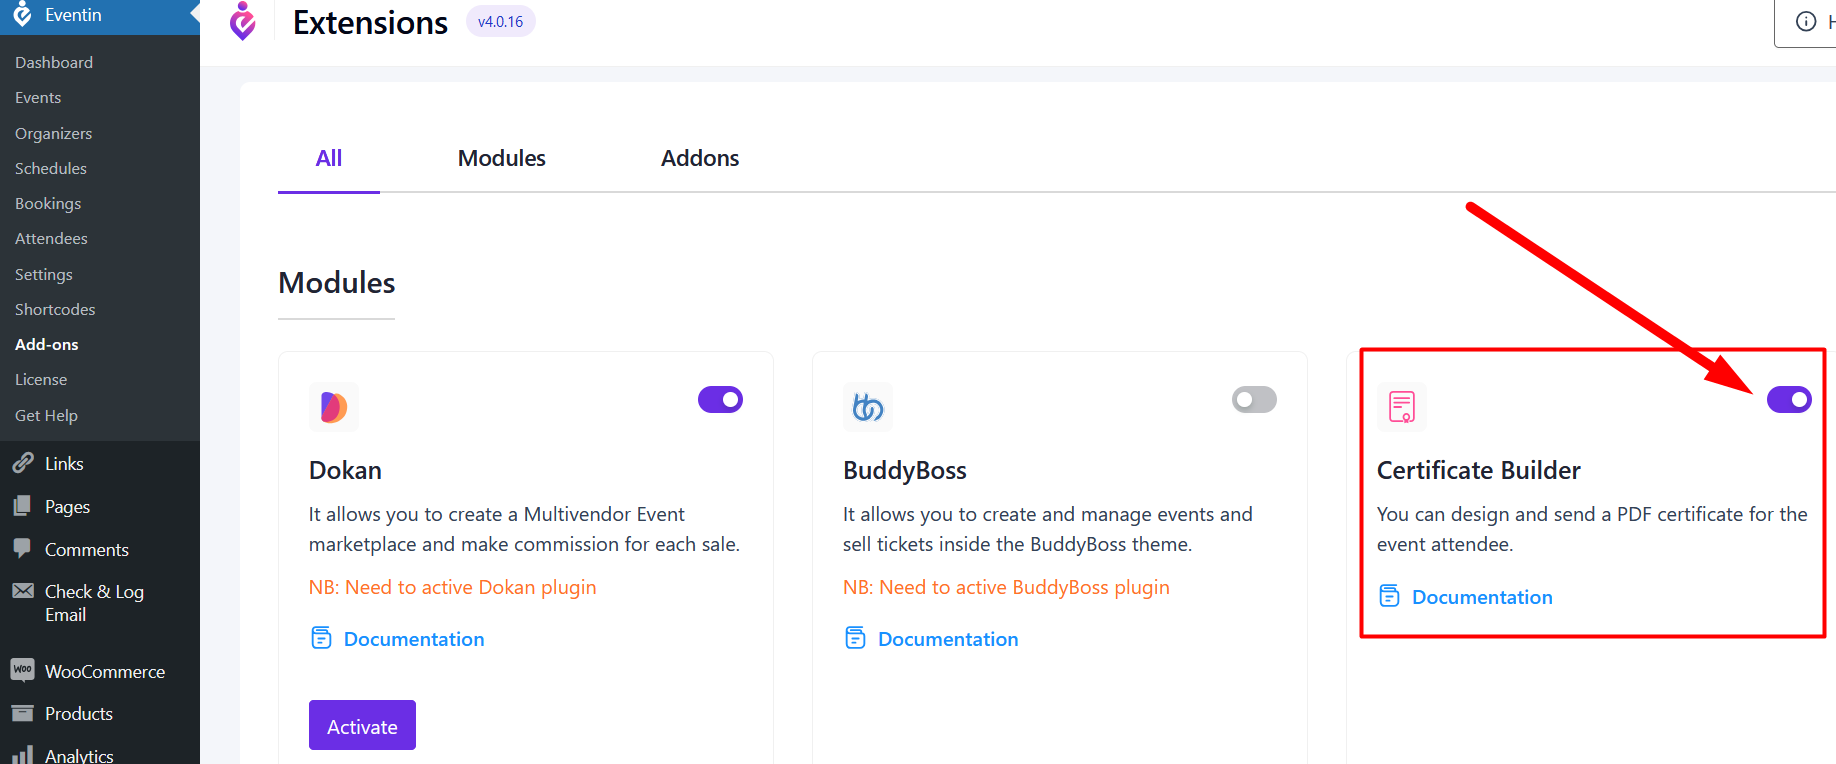
Enable Add-ons #
To enable the certificate template feature, please go to Eventin → Add-ons and enable the Certificate Builder option.
How to Create Template for Event Certificates #
A certificate builder for event certificates enables efficient, customizable, and professional certificate creation, saving time while ensuring a consistent and polished look.
To create a template for a certificate, go to Eventin > Template builder.
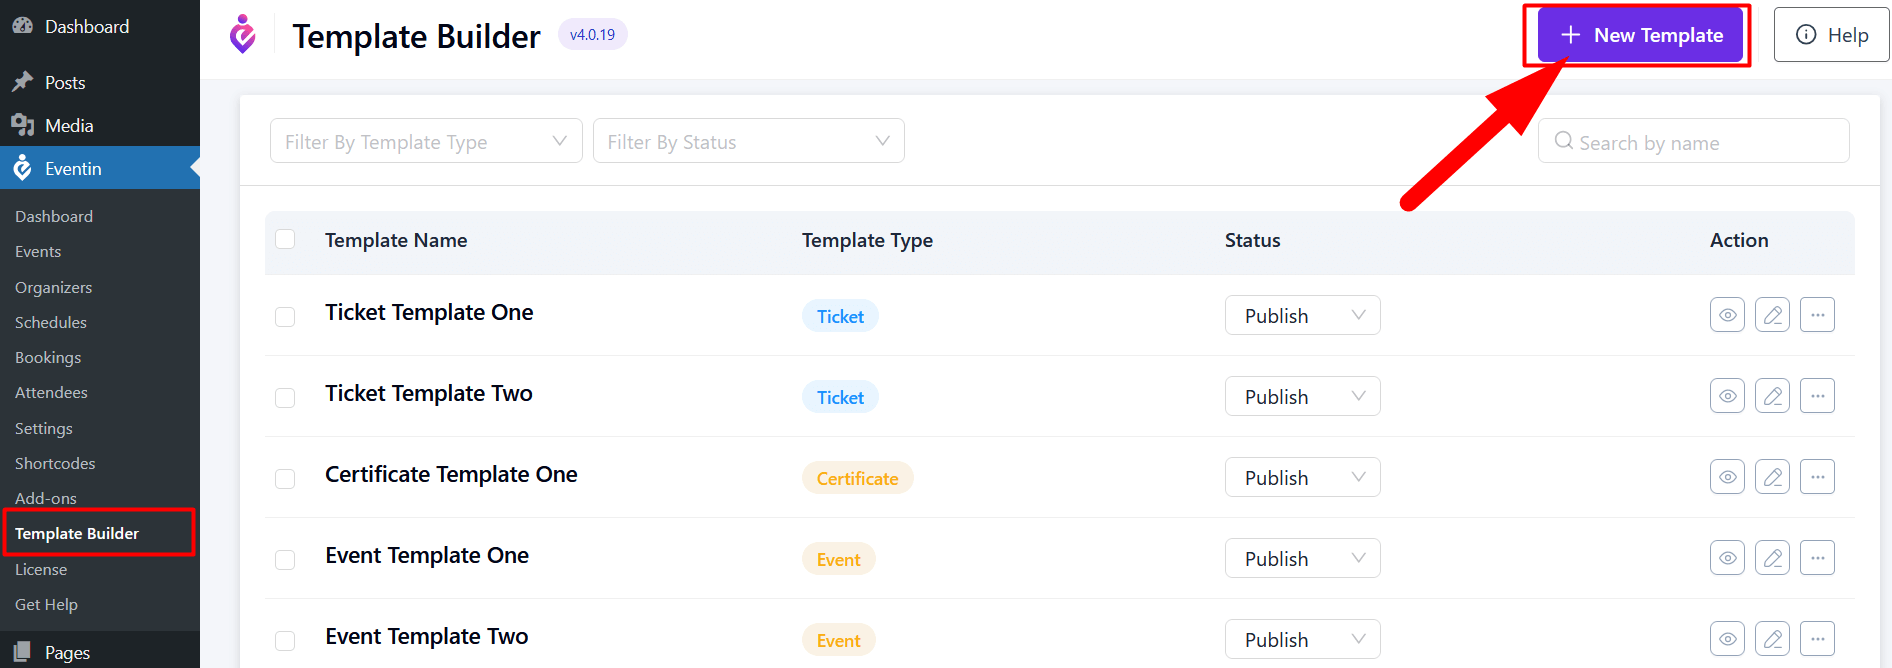
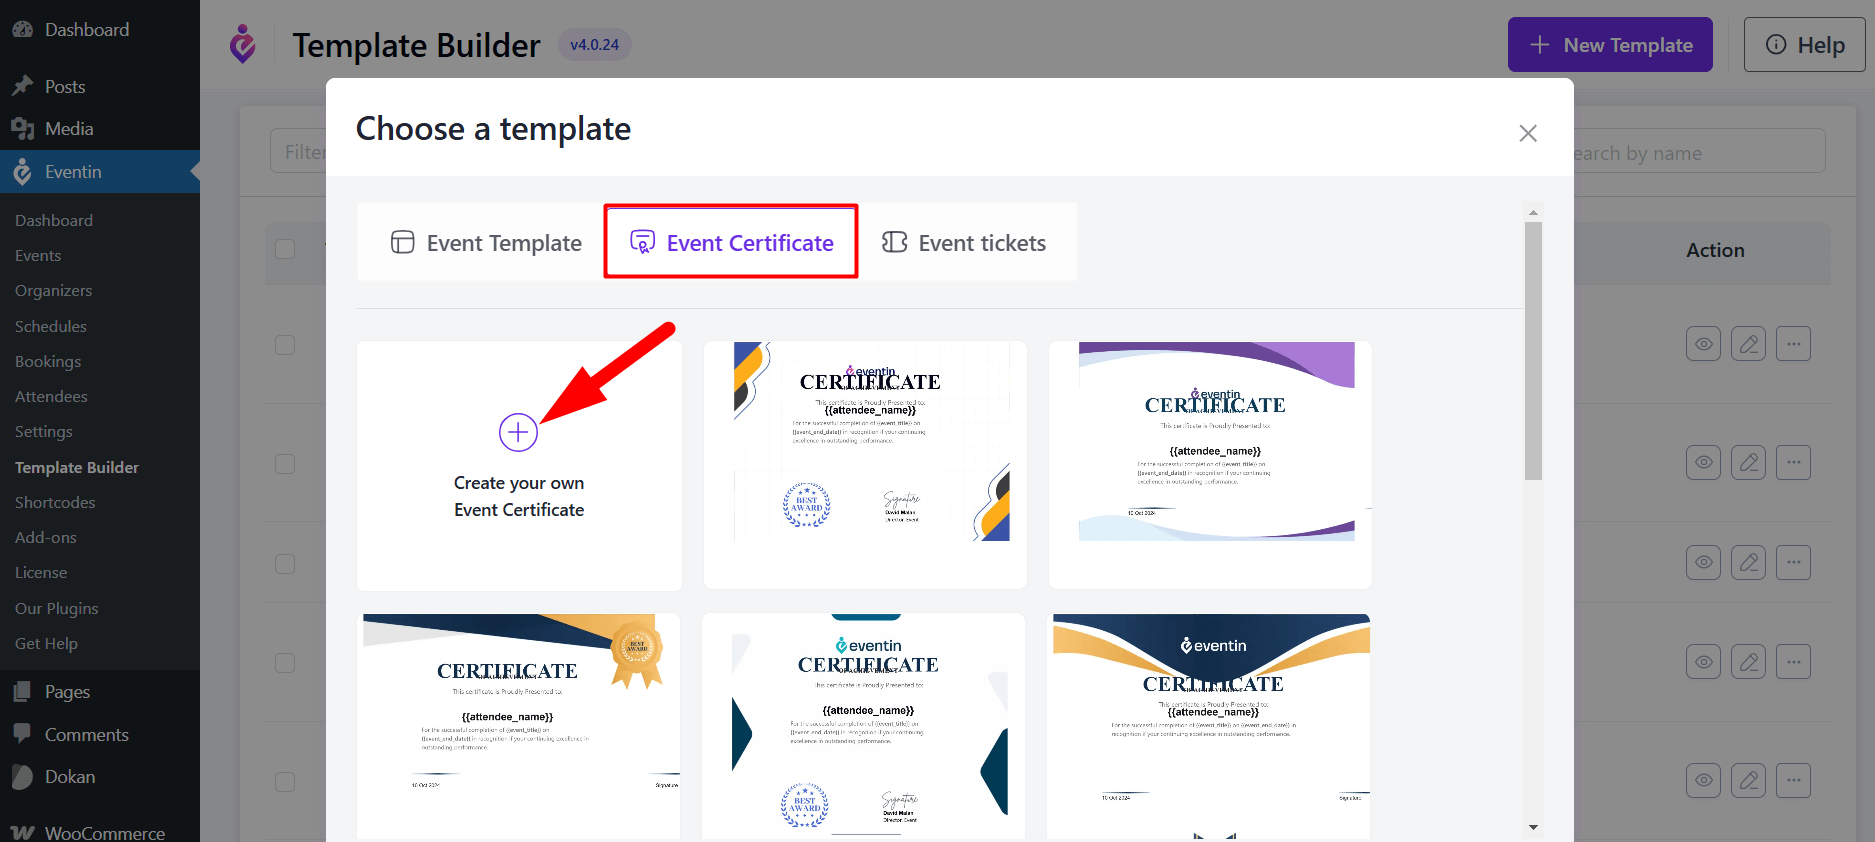
Now click on ‘+ New Template’, and a new page will pop up. To create a certificate template, click on the ‘Event Certificate’ button.
There are some pre-made templates available that you can use for your certificate
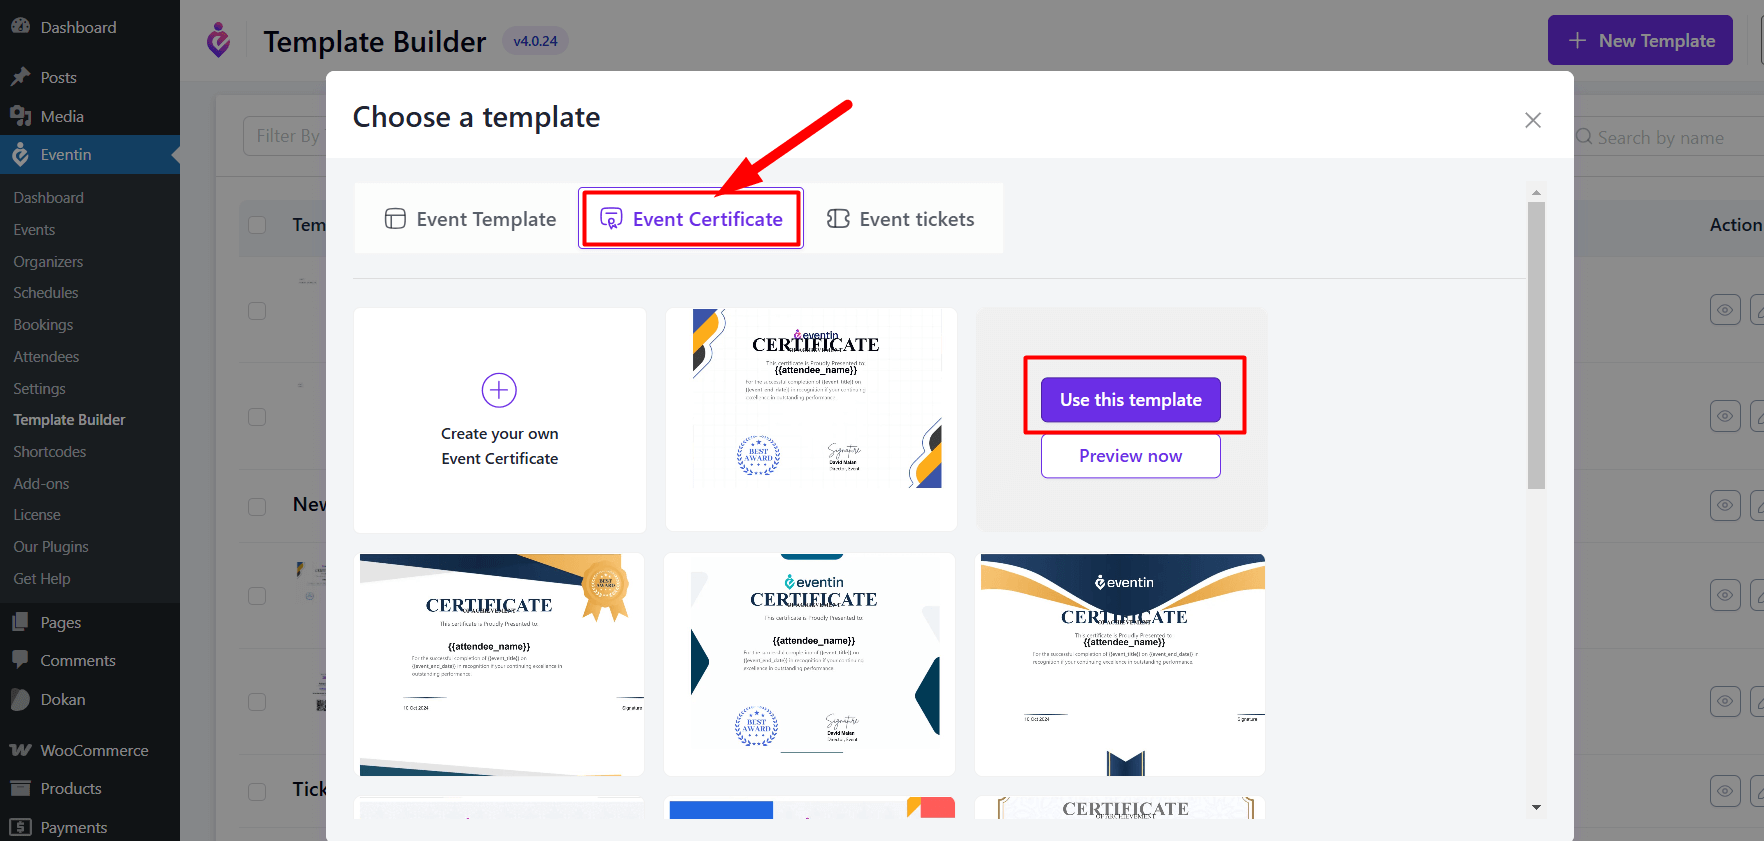
If you want to create your own certificate design, click on ‘+ Create your own’
If you start creating from scratch, a new page with the template builder will open. In the template builder, click the ‘+’ icon to add Gutenberg widgets. For Eventin events, you can search for and add the following widgets: Event Title, Event Info, Attendee Info, Ticket Info, and Ticket QR Code. You can rearrange these widgets as needed to customize the layout of your certificate.
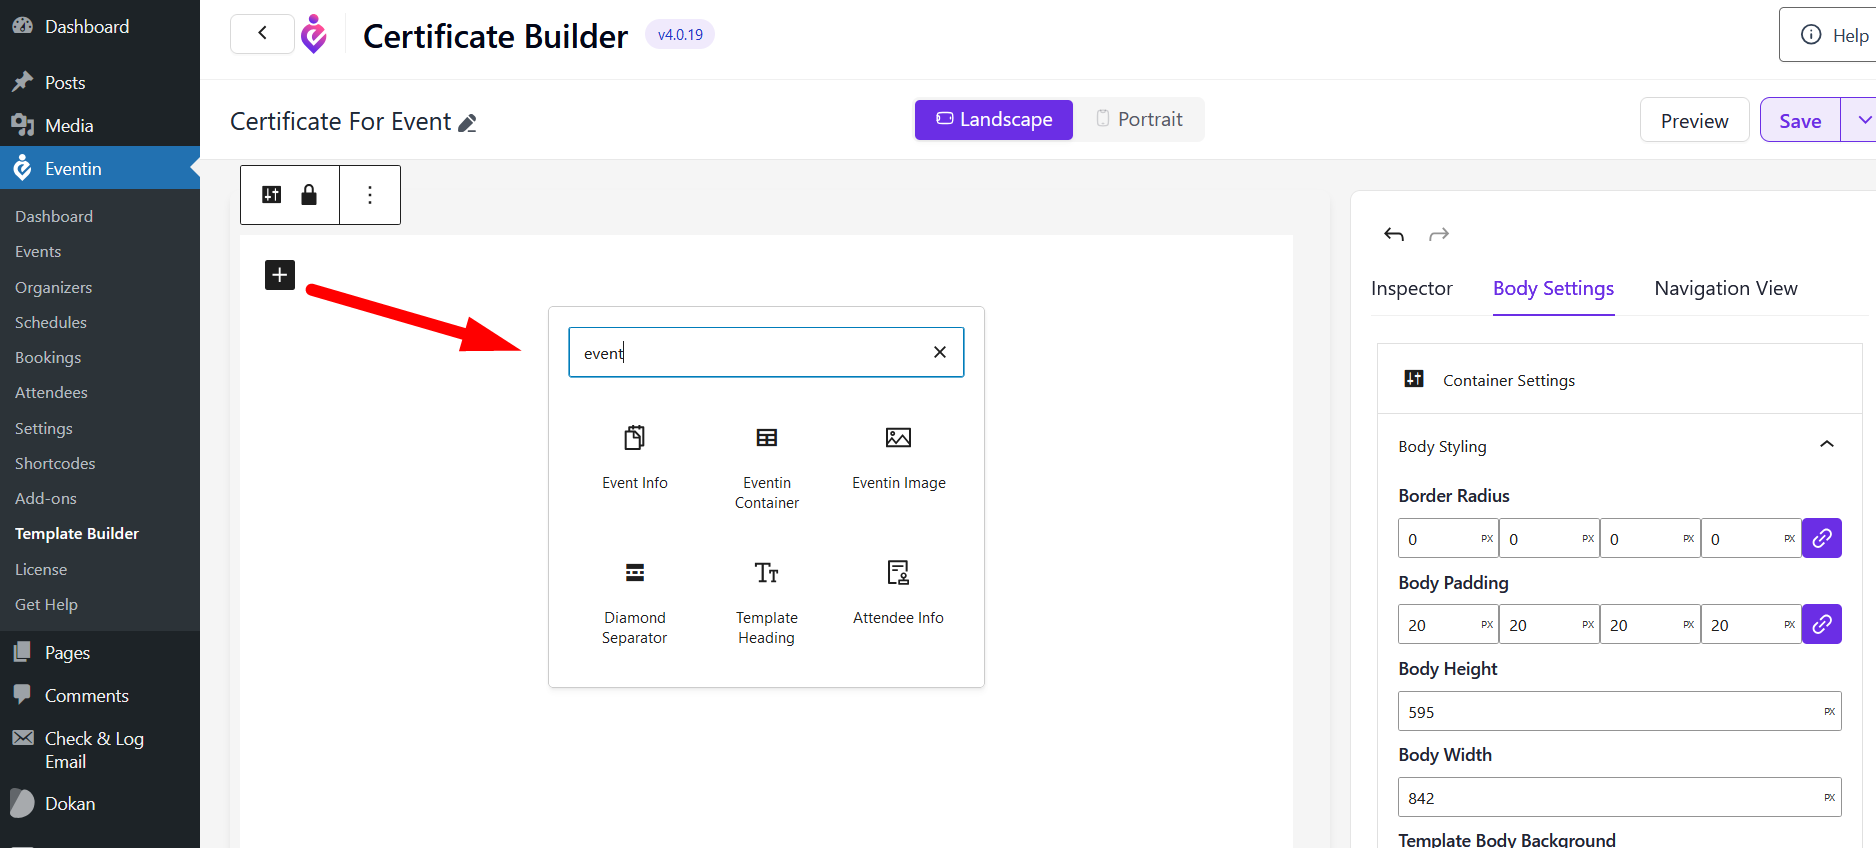
Select a color or image for your certificate background and styling according to your choice. Once done, click on ‘Save & Publish.
How to Assign a Certificate Template to Events #
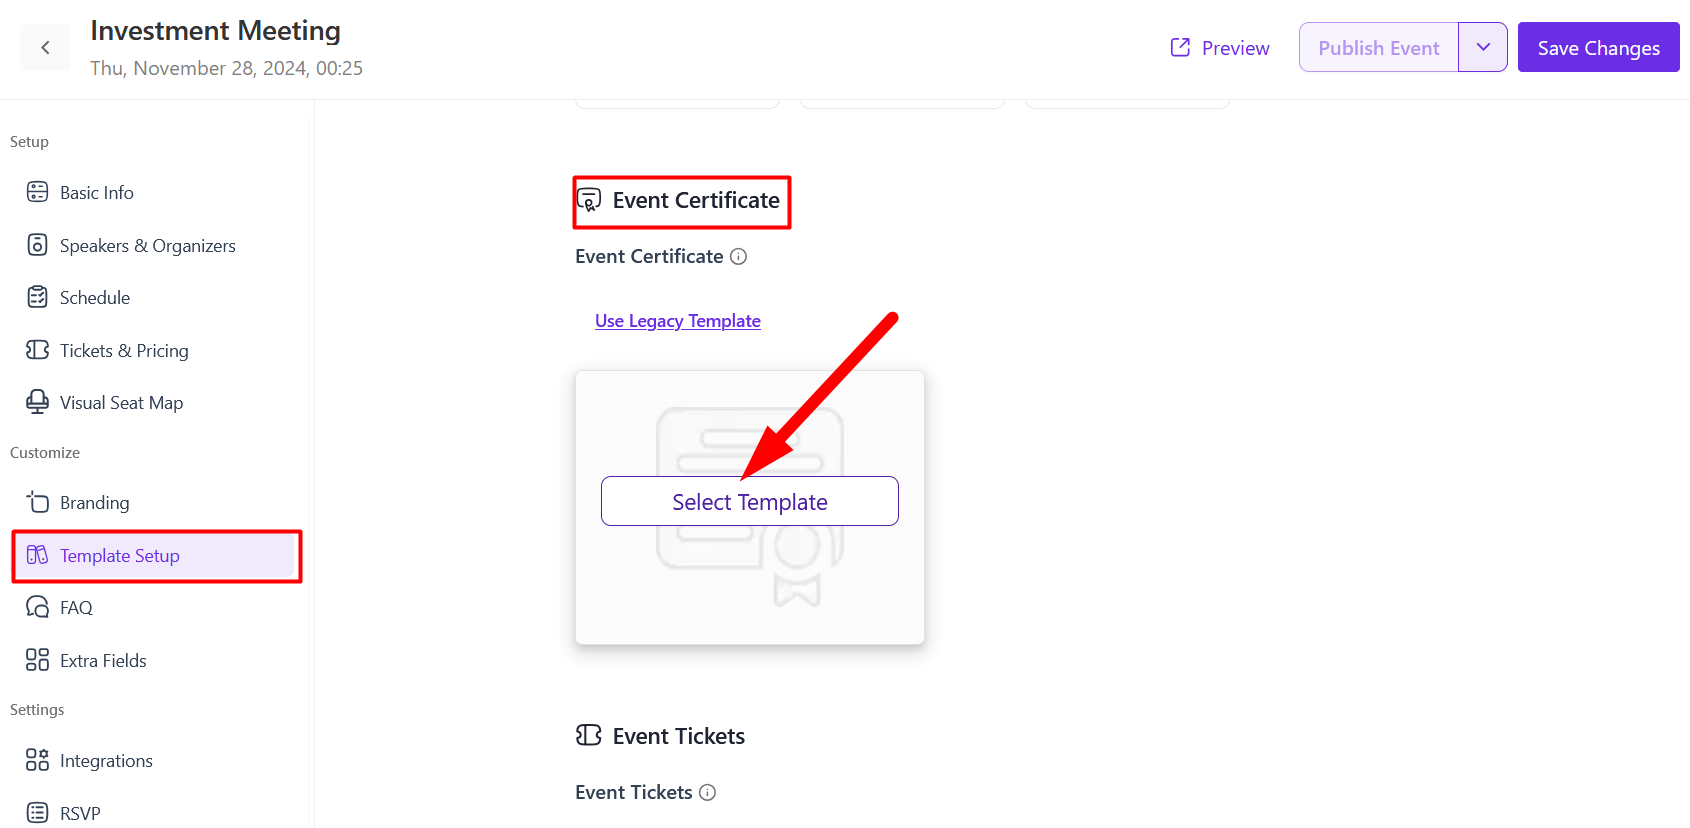
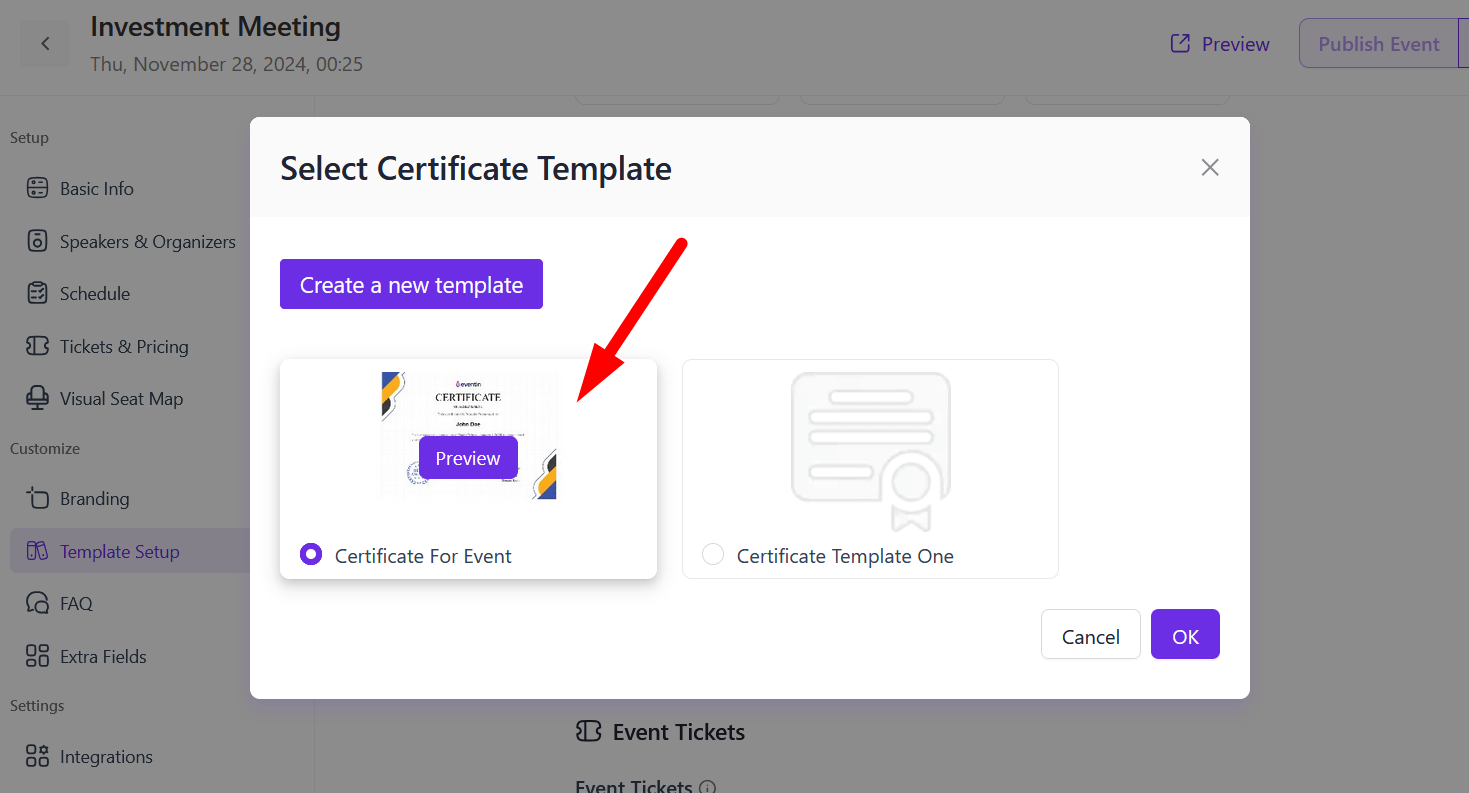
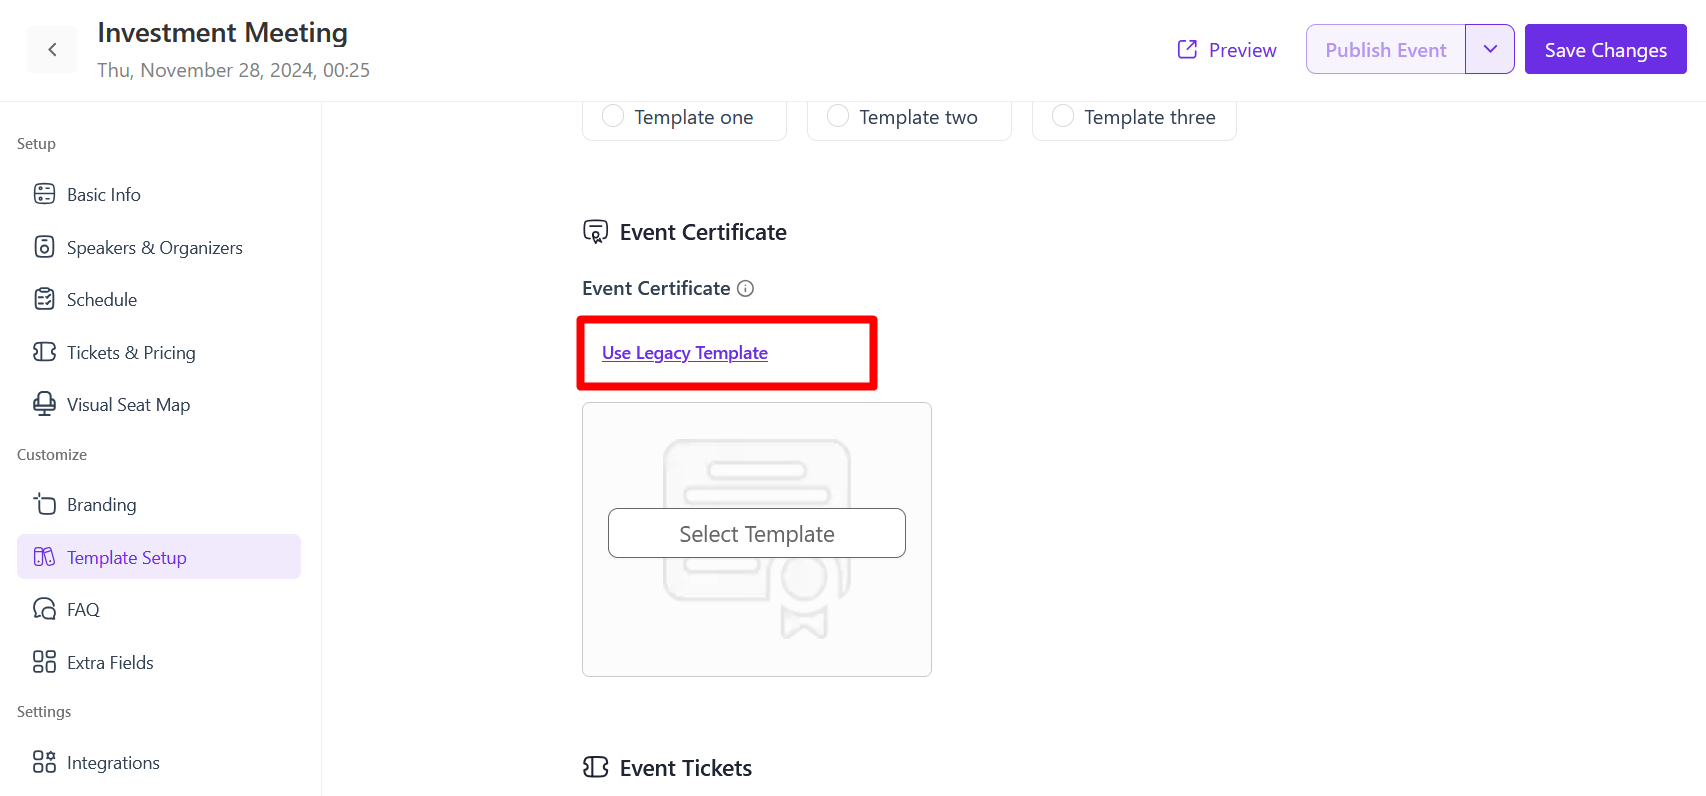
You can use either the Eventin certificate builder template or the Legacy template. Follow the steps to select the template for the certificate.
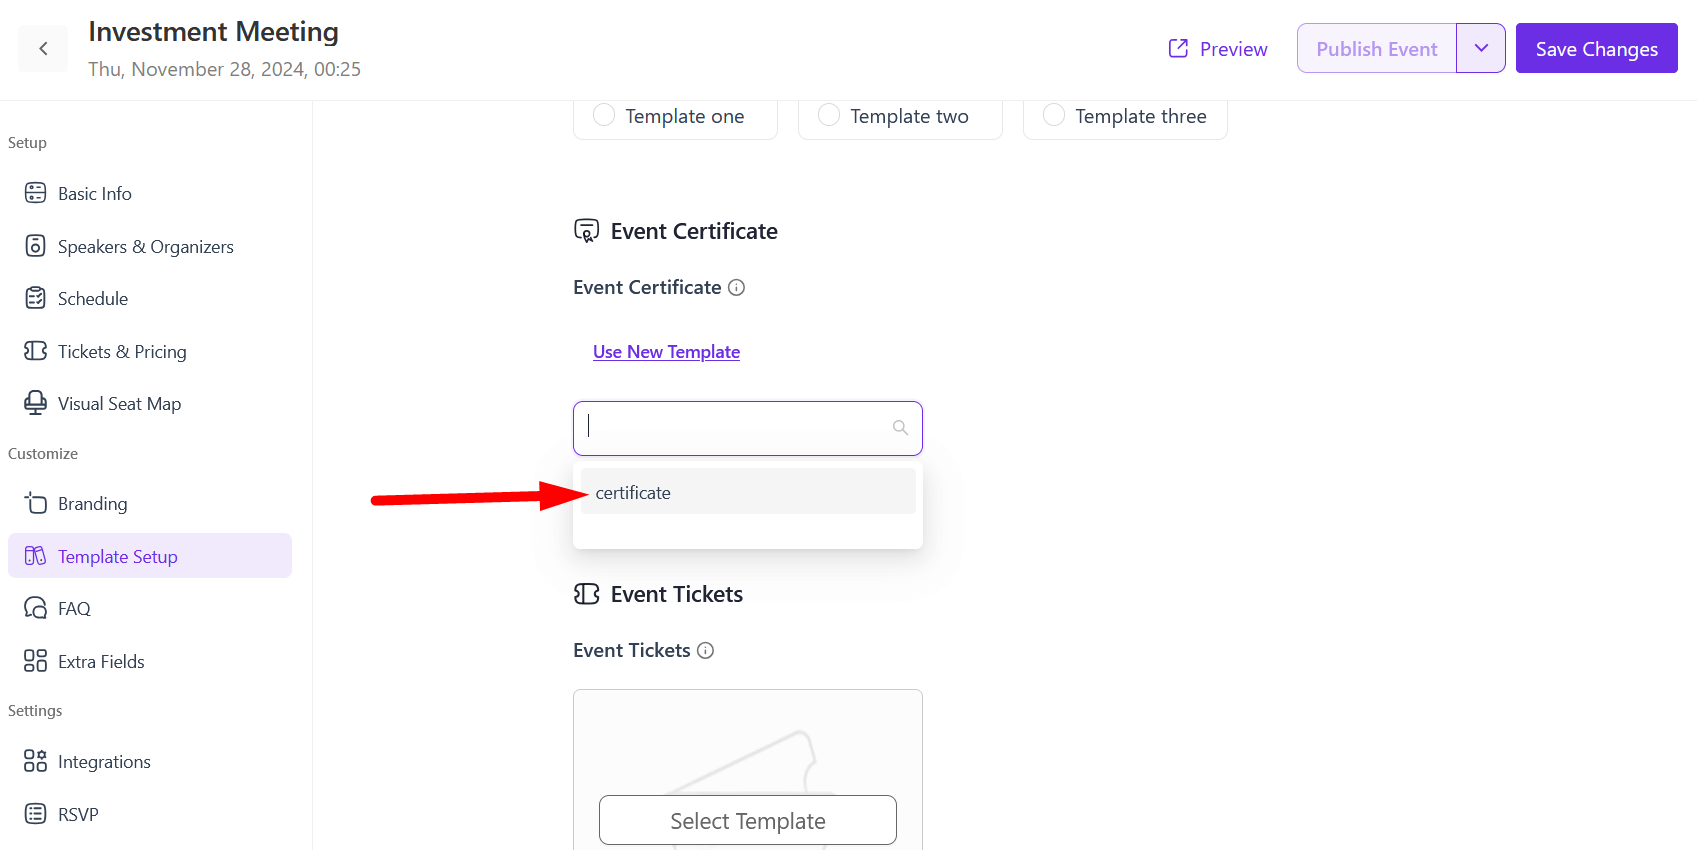
To select the Eventin certificate builder template, go to Events > select Edit > Template Setup > Event Certificate, and then choose the certificate template that you want to select.
For using Legacy Template, click on ‘Use Legacy Template’ to call a specific template for this particular event. The template will now automatically update it’s Event title and Event info based on which even it is assigned to.
Follow the documentation to create a legacy template using Gutenberg or Elementor.
How to Create a Legacy Template for a Certificate #
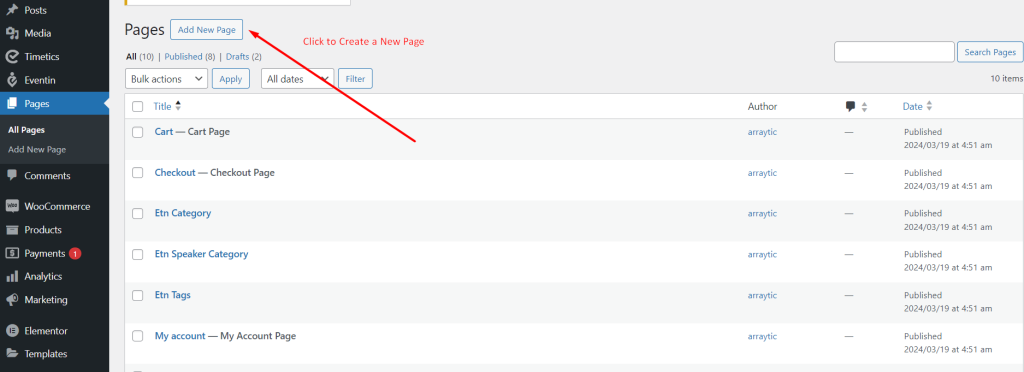
Create a Page for Certificate #
Now, you have to create a page in the WordPress dashboard.
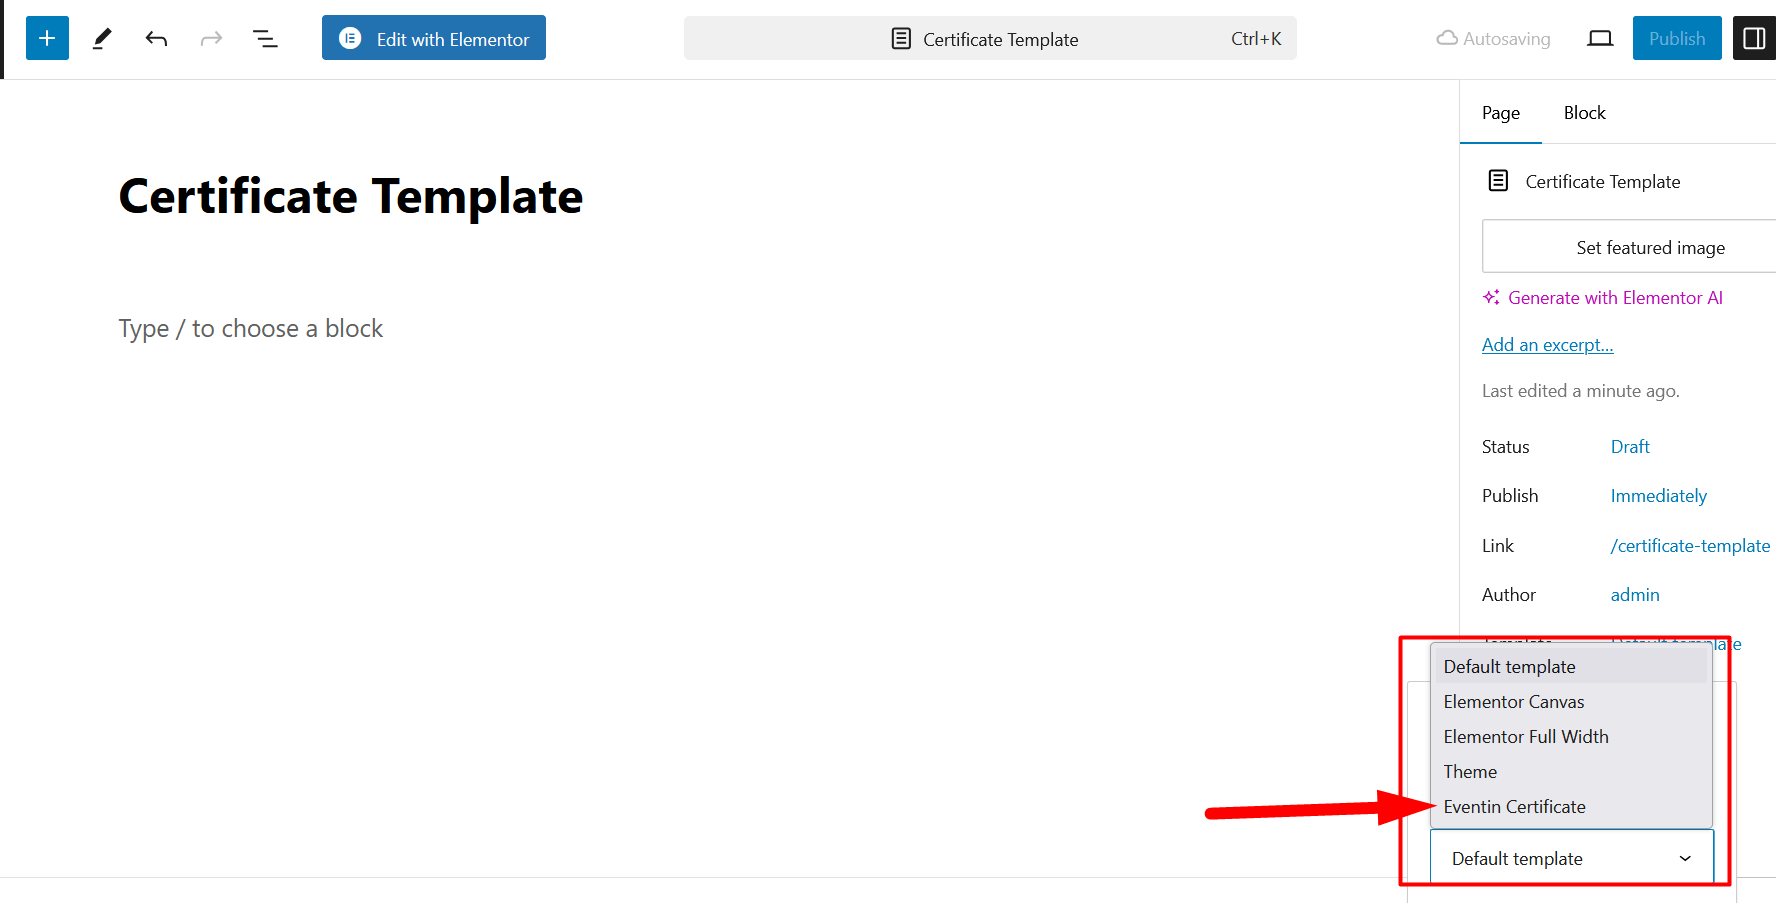
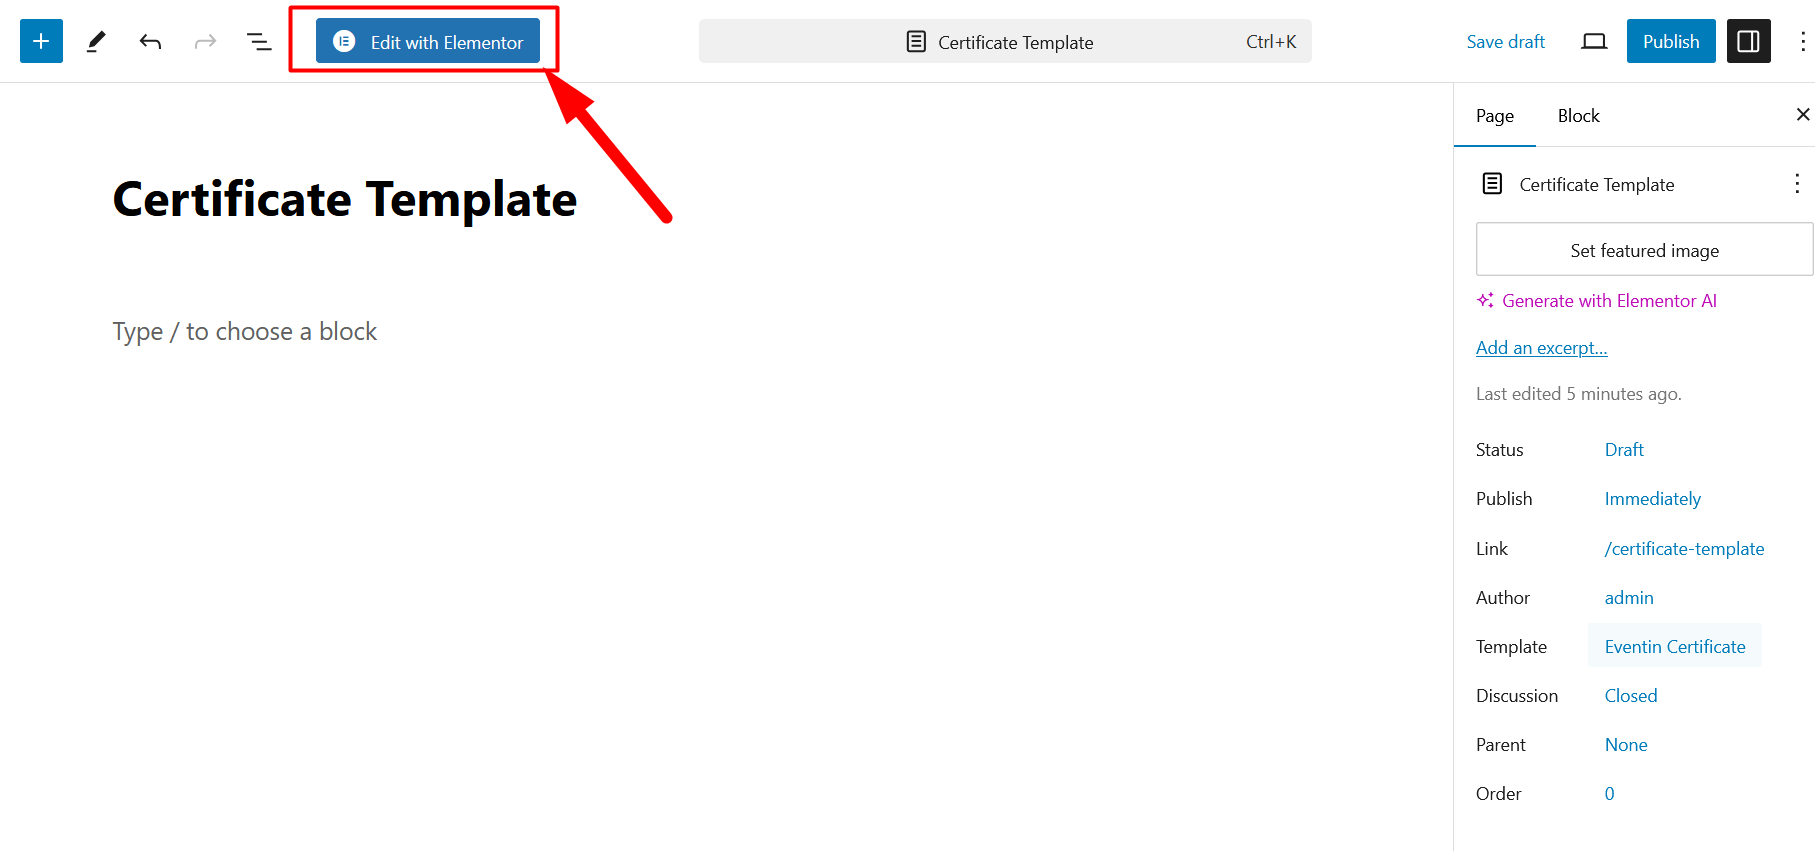
- Go to the WP Dashboard -> Pages -> Add New -> Create a page with a title.
- Select Eventin Certificate as the page template. 👇
Creating Certificate with Gutenberg Builder #
Adding Background #
You have to add the background image if you want to make your certificate template more attractive. Please click on the Gutenberg block and add a cover image for the certificate background.
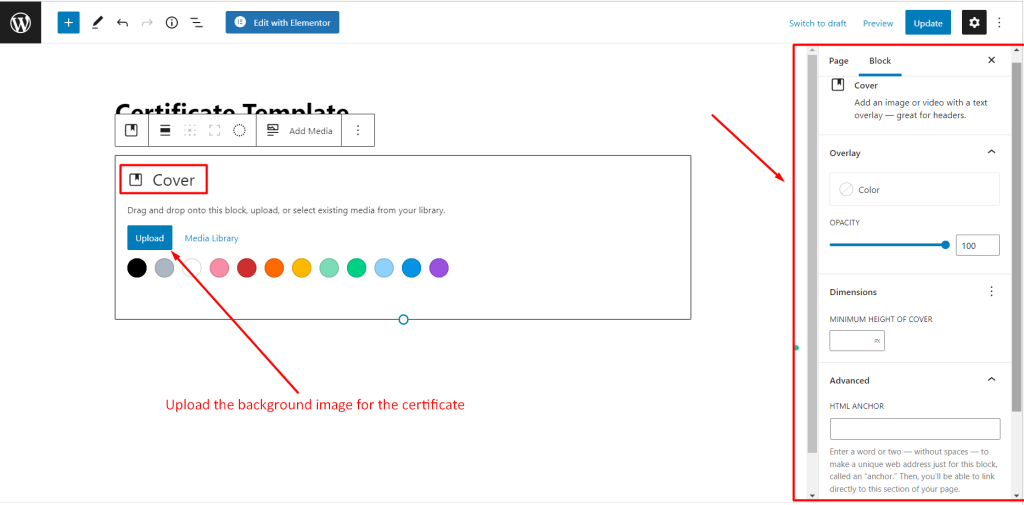
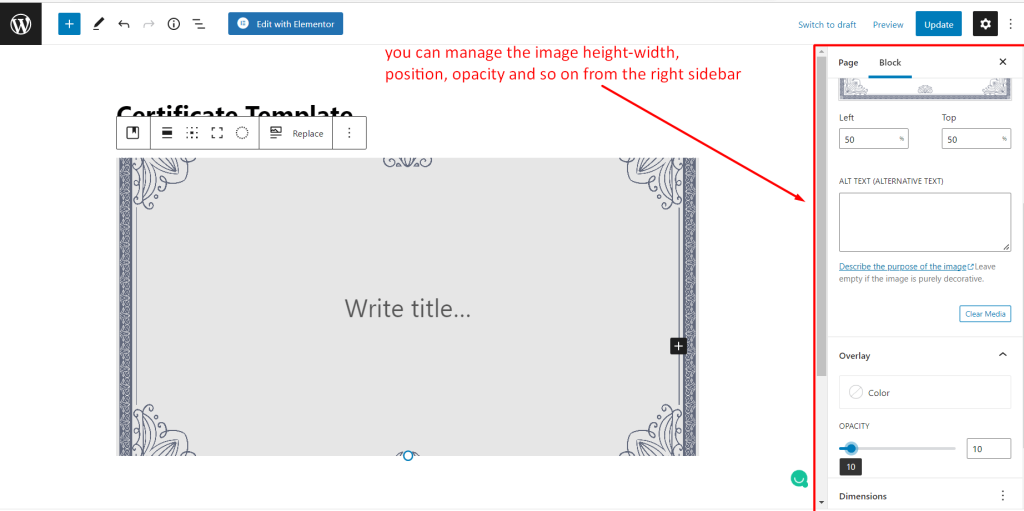
You can manage the background image position, color, opacity, focus point for the caption, dimension, and so on from the block tab on the right sidebar.
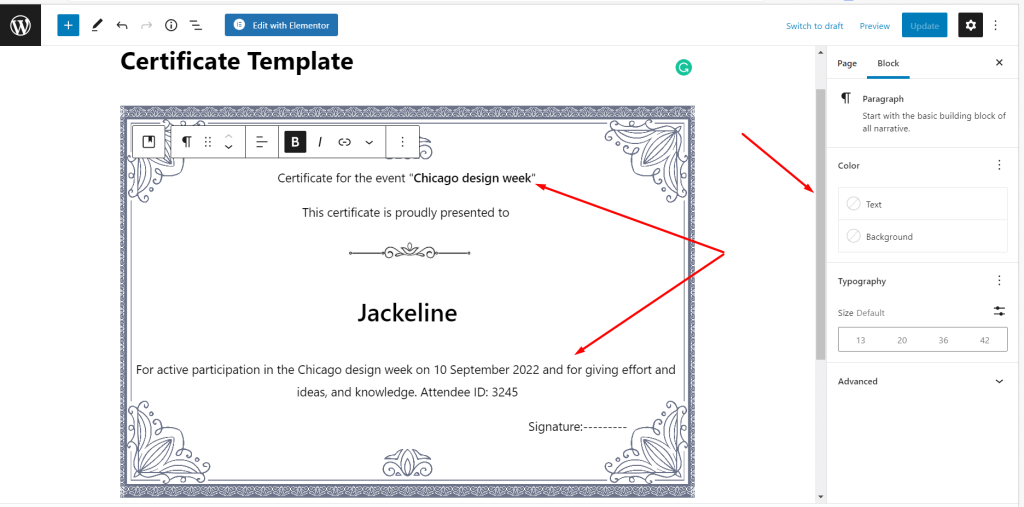
Adding Content #
You can use any Gutenberg blocks for adding the content on the certification like title, paragraph, image, and so on. You can also manage the typography, color settings, text settings, and other designs.
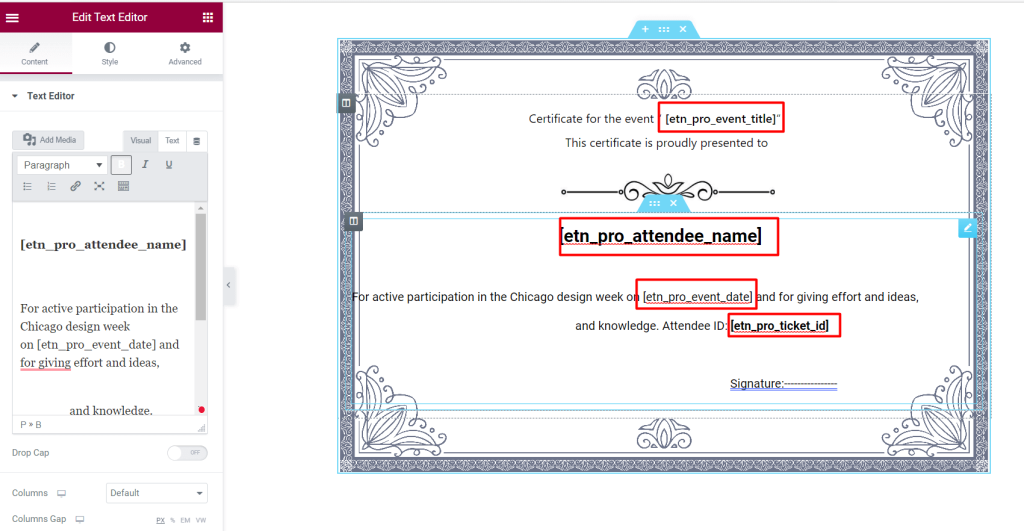
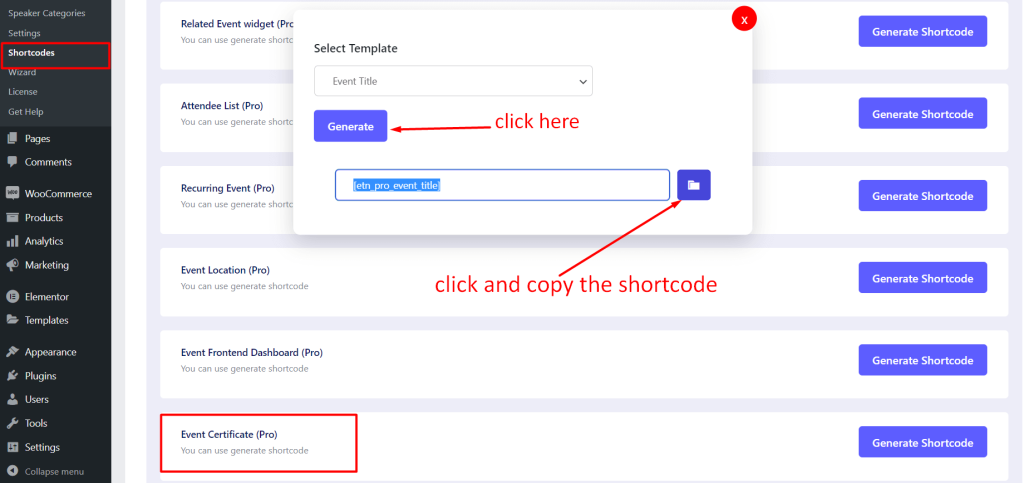
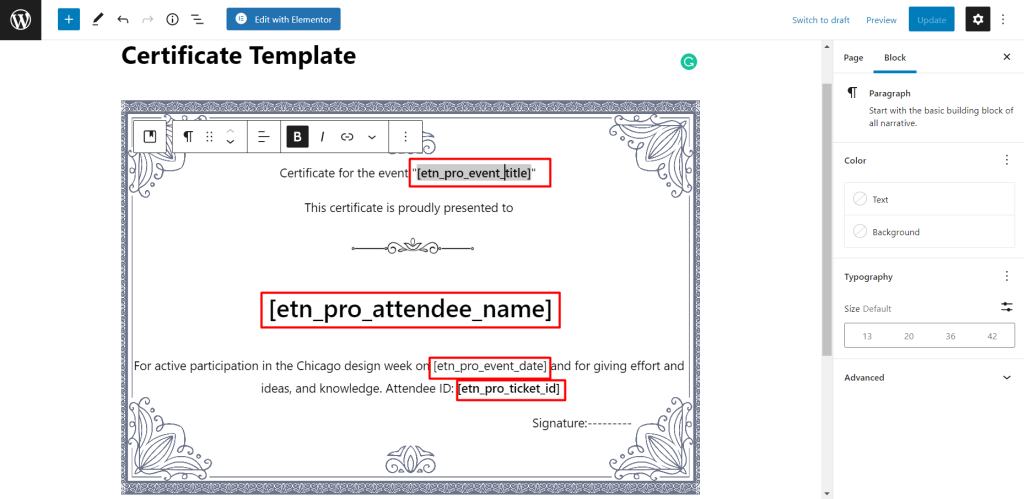
Adding Attendee Shortcode #
The attendee information comes dynamically in your certificate if you use the shortcode. Please go to the Eventin -> shortcode-> Event Certificate (Pro) -> Select the Event title, Event date, Attendee name, and Ticket ID of them.

You will see the shortcode generator option. Click on generate, copy the shortcode and add it to the certificate page.
Creating a Certificate with Elementor #
First of all, you have to create a page and select the Eventin Certificate template a page template. You can check HERE.
Then click on the “Edit with Elementor” and the Elementor editor will open.
Adding Background #
After opening the Elementor editor, add a section and section background image. You can customize the size, position, and so on from the left sidebar as you want.

Adding Content #
You can add any Elementor elements to add the content for the certification, like title, paragraph, image, and so on. You can also manage the typography, color settings, text settings, and other designs.
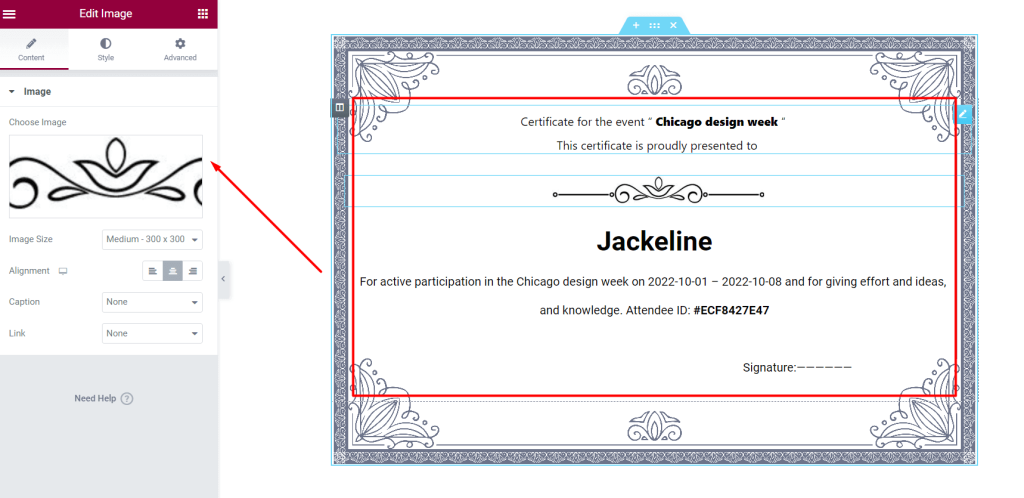
Adding Attendee Shortcode #
You can use the attendee shortcode for showing the attended information dynamically in the Elementor template also. You can generate the shortcode following this documentation HERE.
After generating the shortcode, add it to the template.