Translation with Loco translator #
For single-language translation, we prefer to use the Loco Translate plugin.
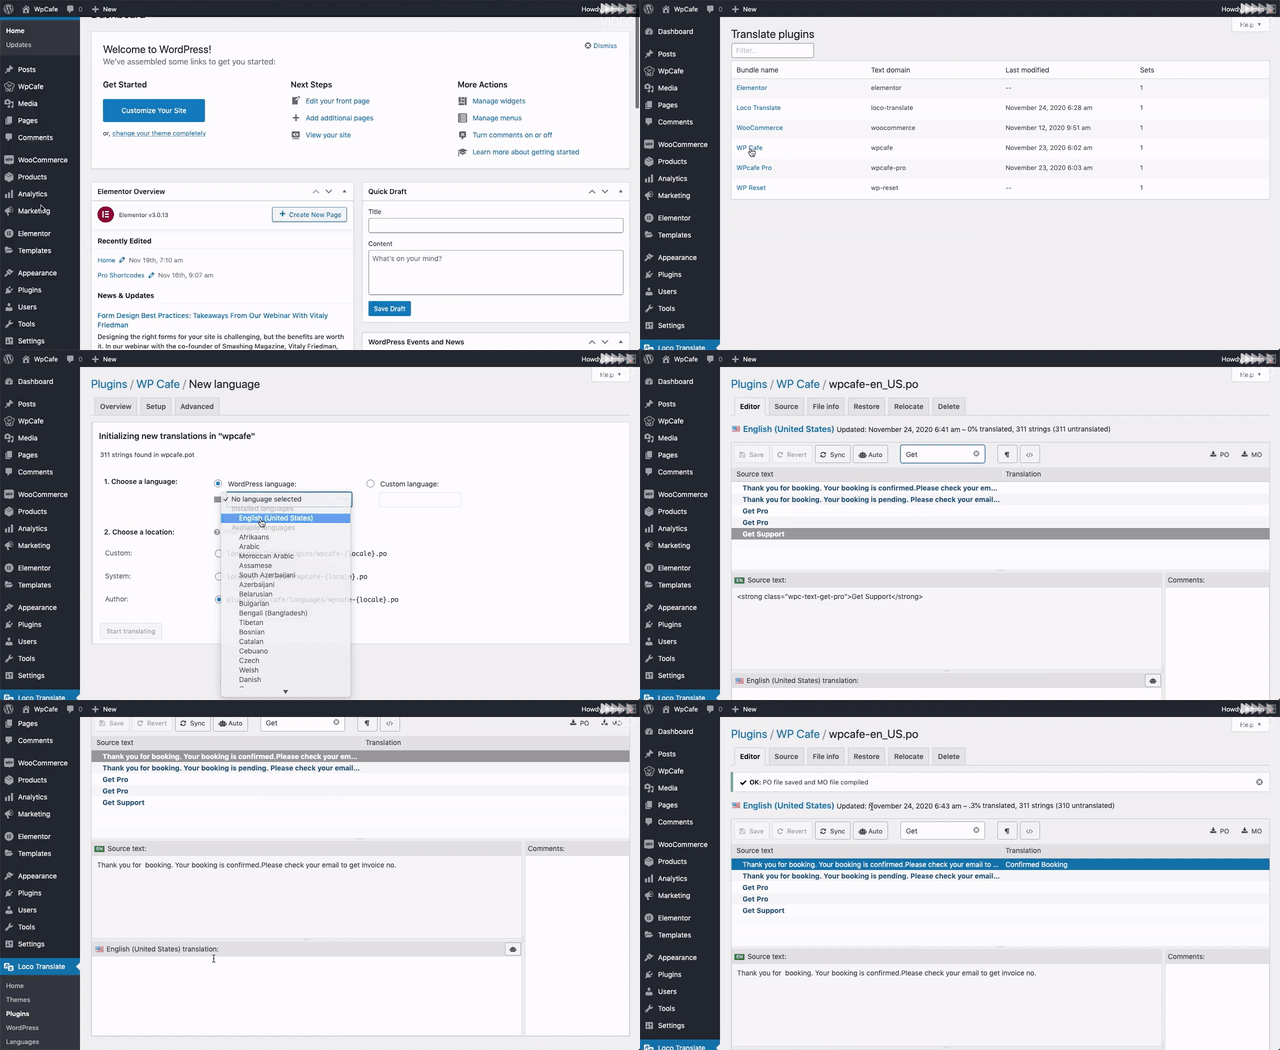
Step-1: First of all, install and activate the plugin.
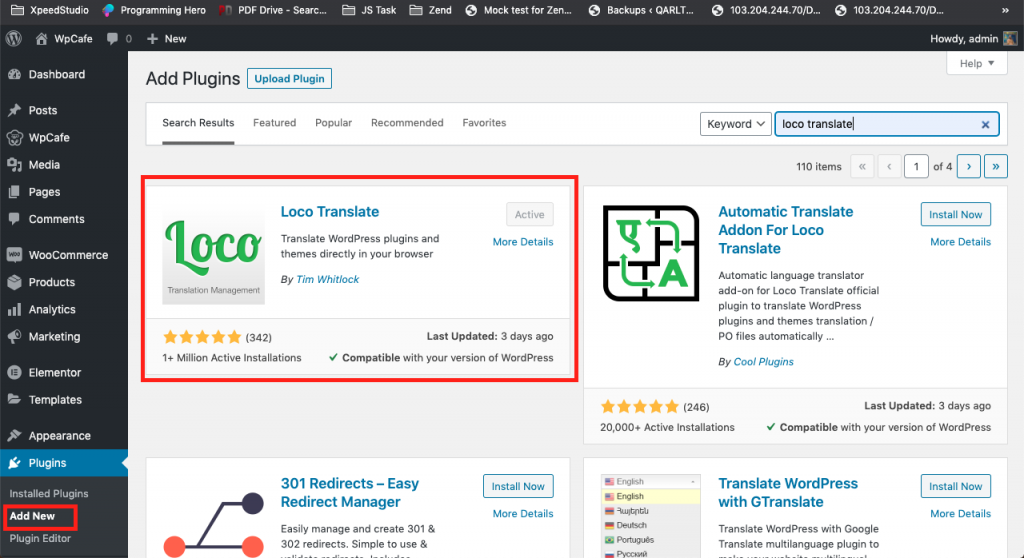
Step-2: Make sure you have changed the site language of your translated language.

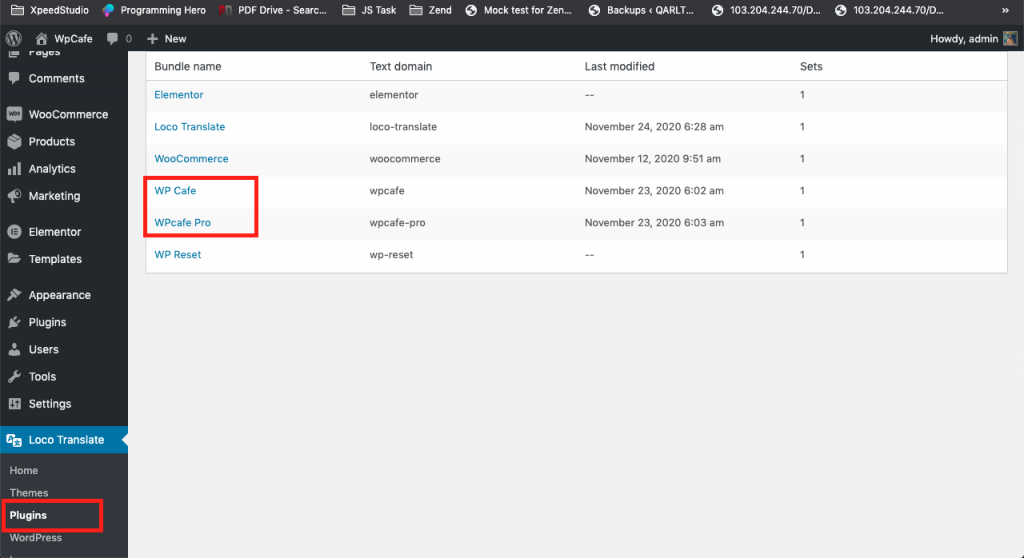
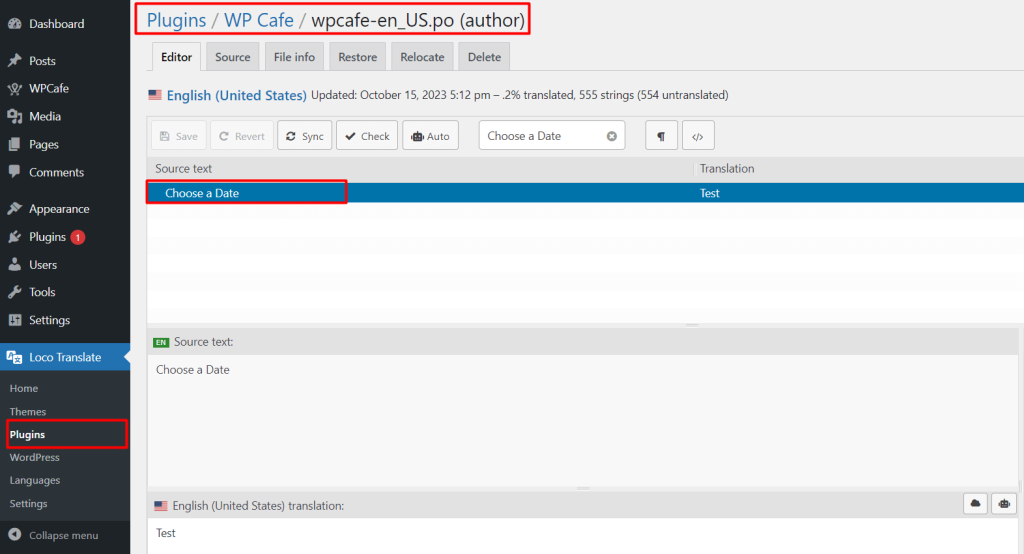
Step-3: From the Loco Translate > Plugins menu, click on the plugin name for setting up the translations.
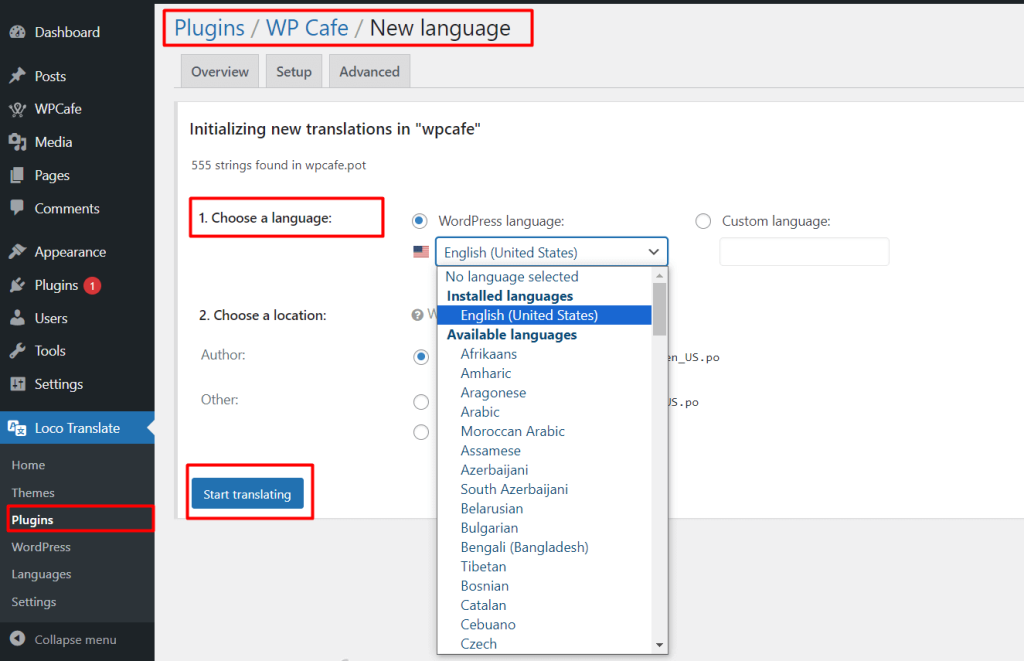
Step-4: Choose the language you want to translate.
Step-5: Then search for the text that needs to be translated and insert the translated text.
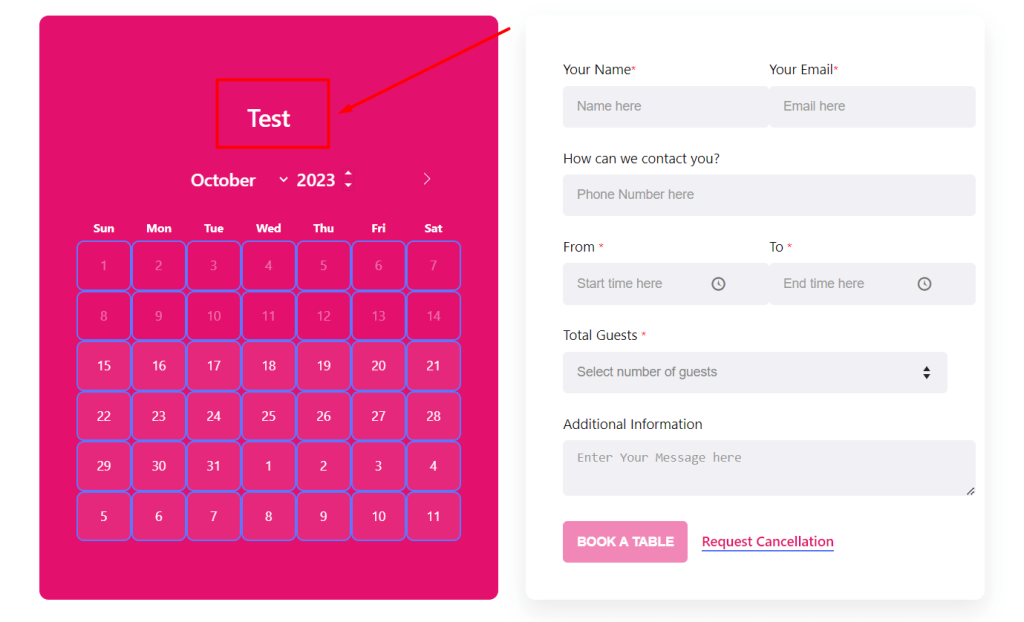
Translated test on the front view
Follow the VIDEO for more details.
Translation with WPML #
WPML is one of the most popular plugins for multiple-language translation. Using WPML, the plugin strings can be changed for different languages.
Reservation Calendar Translation #
Timepicker Translation # #
Translate both the Admin panel and user frontend view calendar’s time picker.
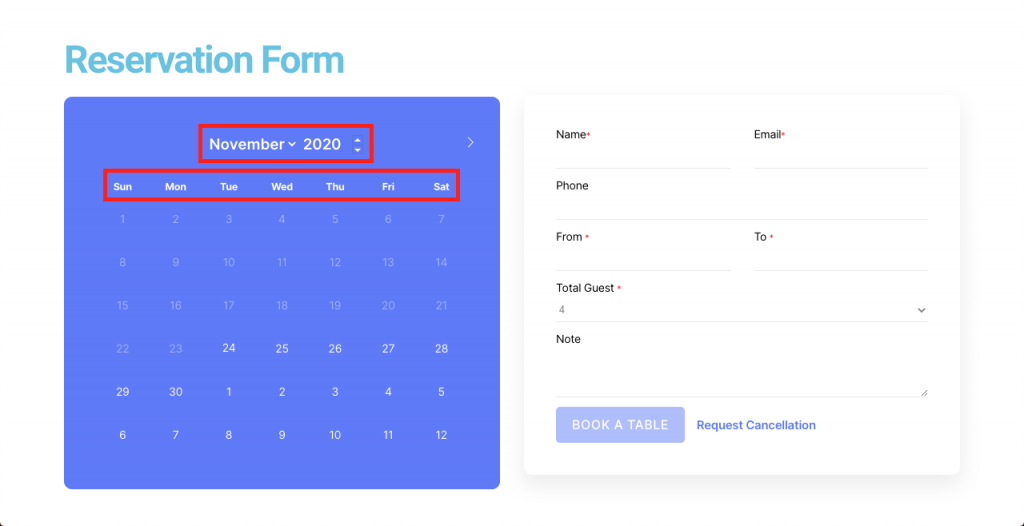
Get the available Language translation files list from Flatpicker’s official website or directly navigate to the language files list with the country code short form from here.
NOTE: Download the language file with the Javascript .js extension i.e. ar.js file for Arabic. Typescript files (.ts) will not work here.
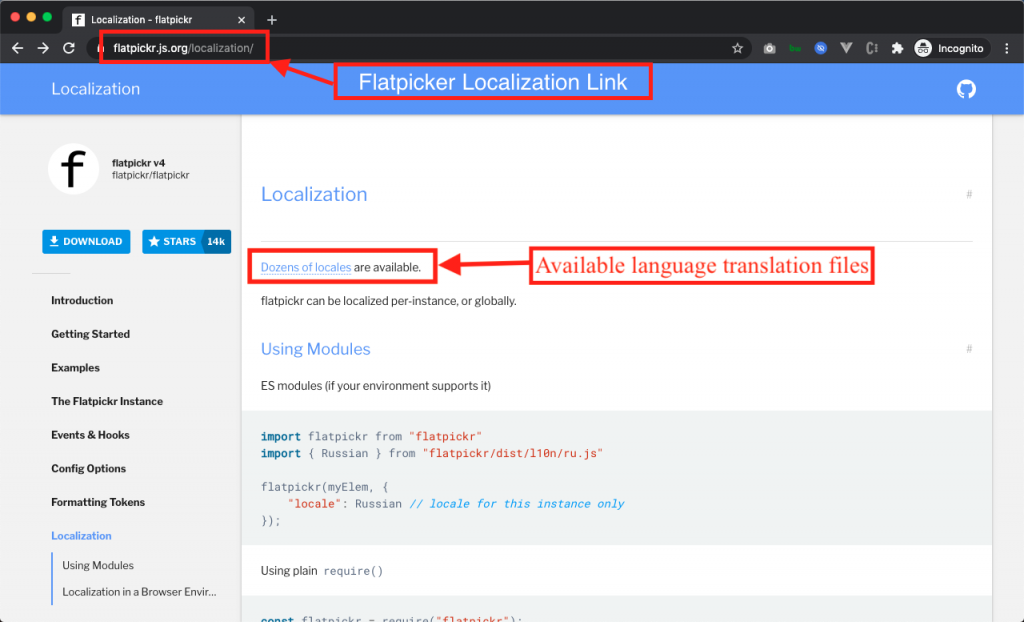
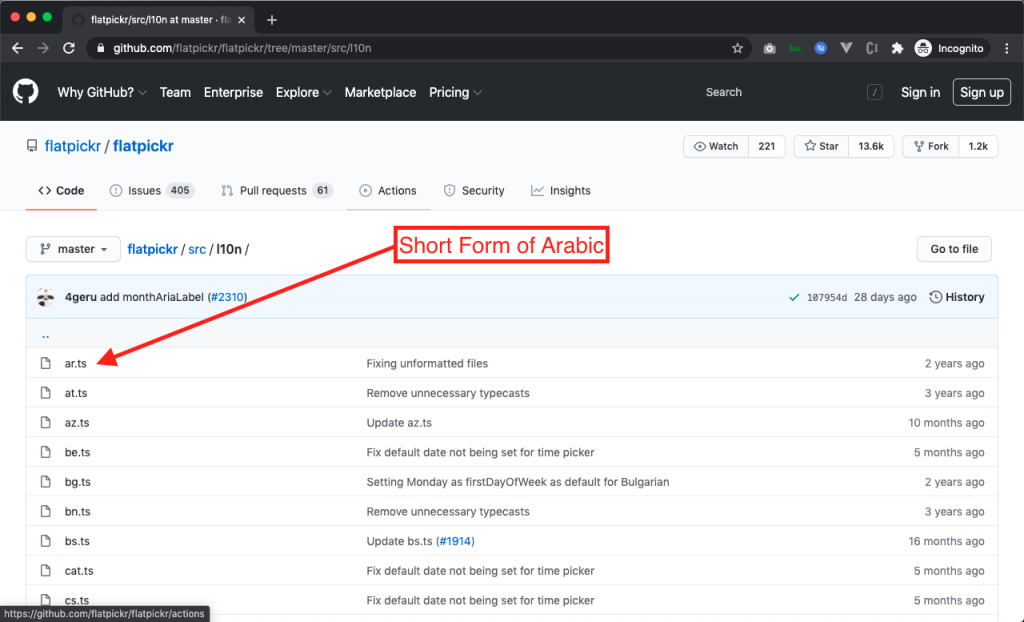
Pick the correct filename from the list.
For example, the Arabic language file is ar.ts, the Austria language file is at.ts, etc.
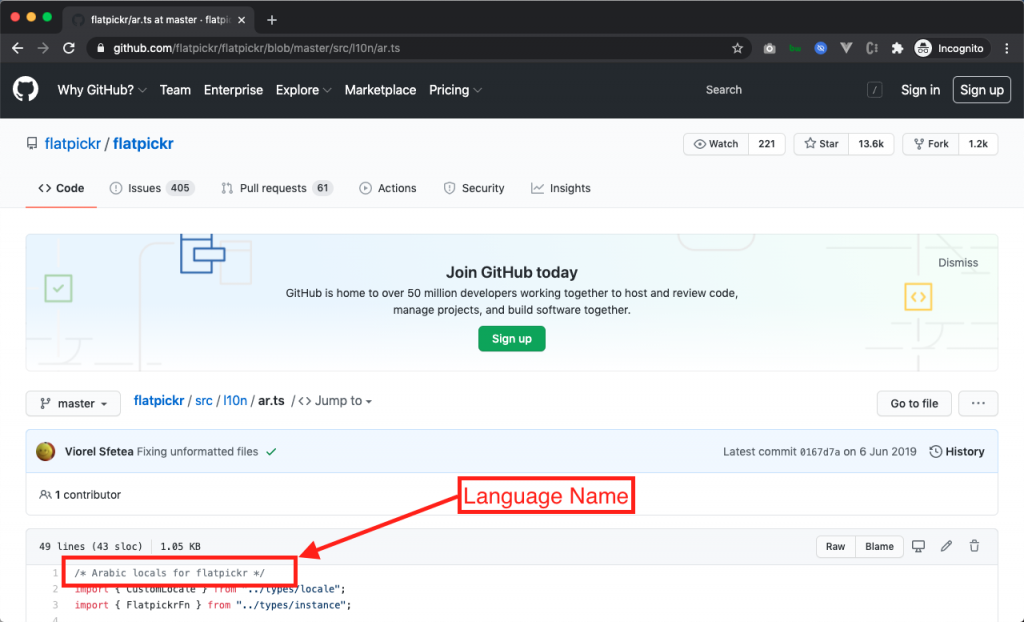
Make sure of the correct file by clicking on the file name i.e. ar.ts and at the start of the file, confirm the language.
Click on this link for the javascript file required for the time picker translation and replace the language short form from the end of the link.
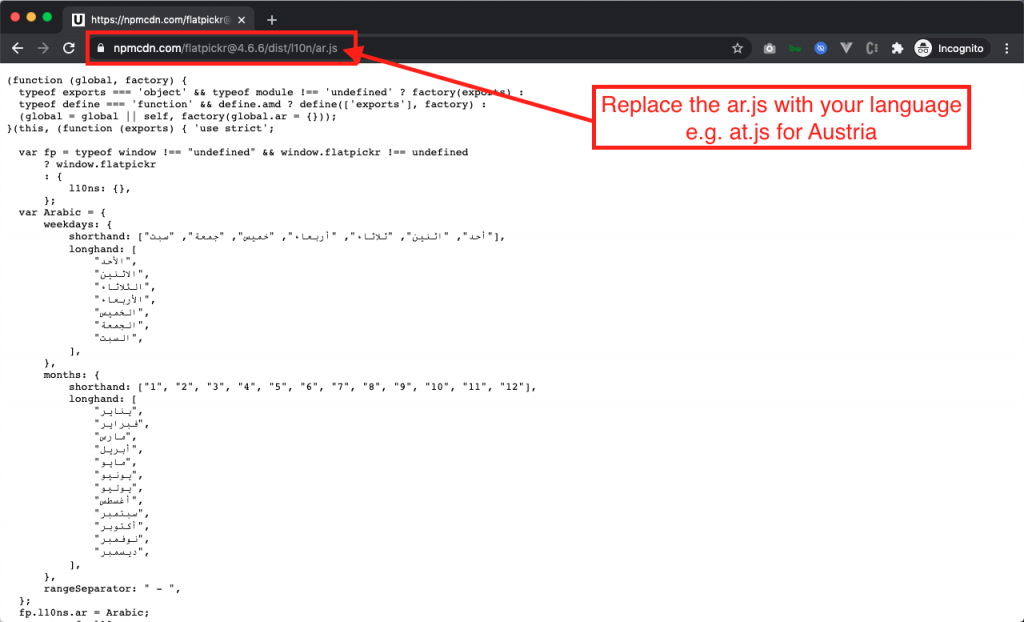
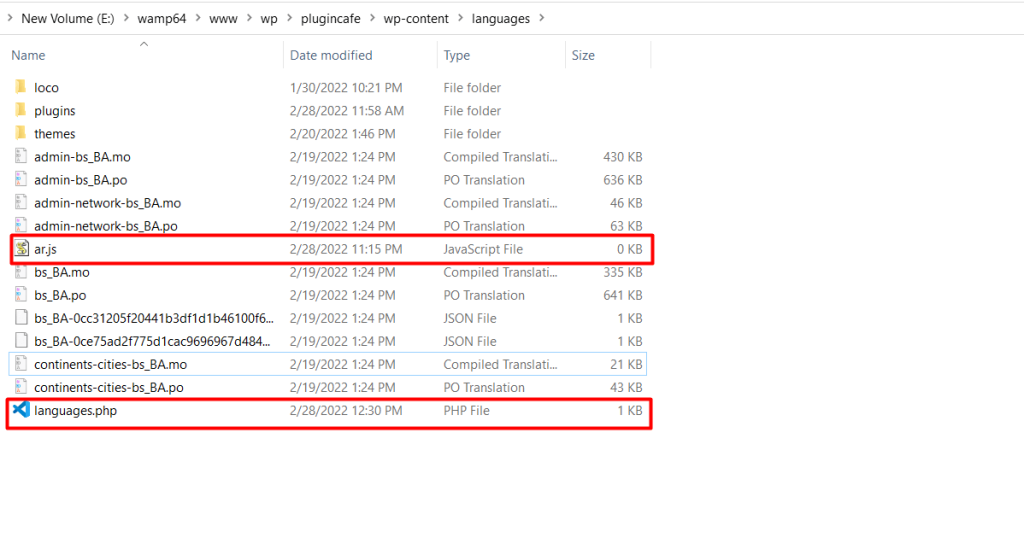
Copy the codes from the page and save them in a file with the same name i.e. ar.js for the Arabic language file. Then move the file inside the wp-content -> languages folder.
Then go to the Plugin folder -> Core -> Settings -> Part -> copy the languages.php file and paste the file into the wp-content -> languages folder.
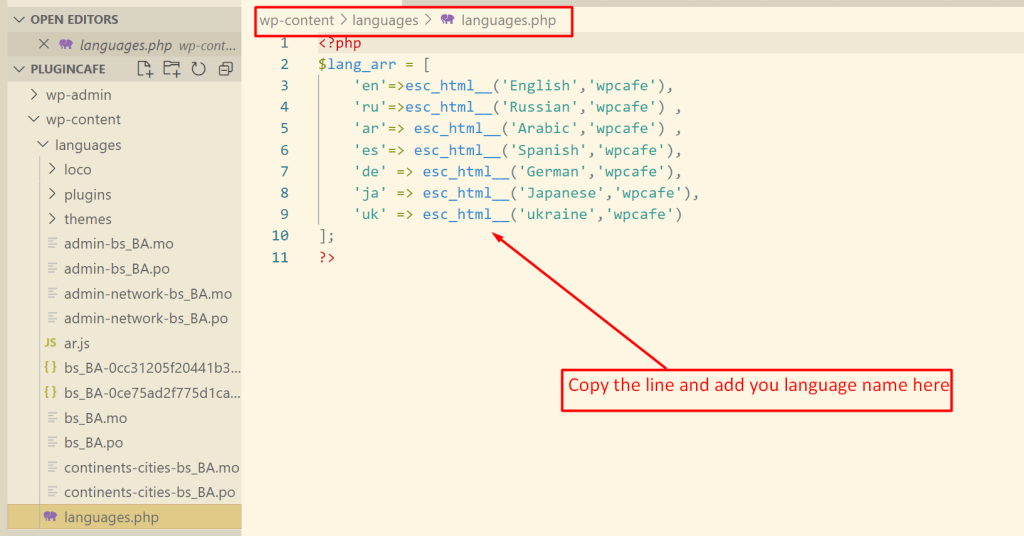
Then edit the languages.php file and add your language name here.
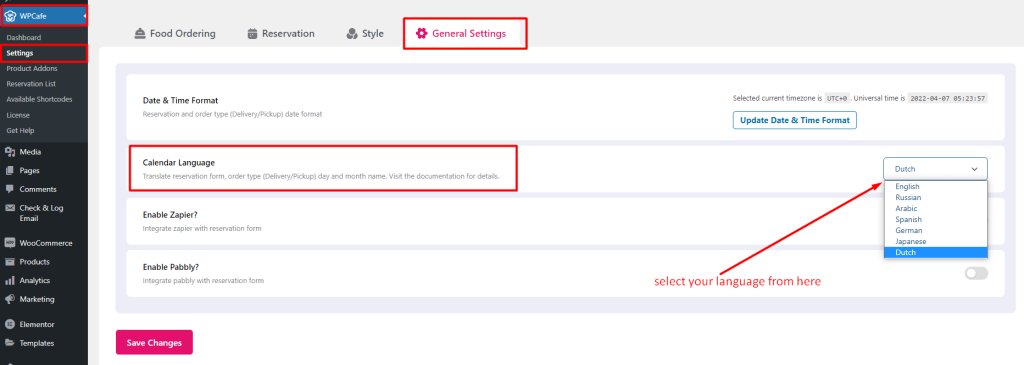
Finally, the language should appear in the WpCafe > General Settings menu.
