The Location feature in WPCafe allows you to manage multiple restaurant branches efficiently. You can assign unique opening hours, pickup or delivery schedules, and reservation settings for each branch. This helps customers select the right location during checkout or table booking.
How to Enable the Location Module #
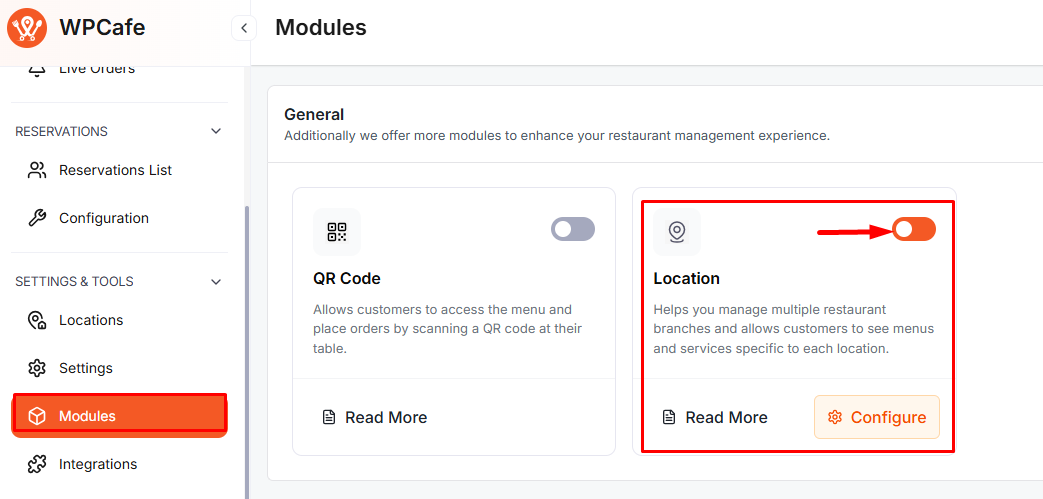
To access the Location option, you need to enable the module first. Go to WPCafe → Settings & Tools → Modules, then turn on the Location module.
How to Create a Restaurant Location #
To create a new restaurant location, go to WPCafe → Settings & Tools → Locations. Click Add Location and fill out the details as described below.

Basic Information for Location #
- Restaurant Name: Enter the name of your restaurant or branch.
- Location: Search or type your address manually. You can also select it from the map suggestions (if available).
Override Default Open Hours for Location #
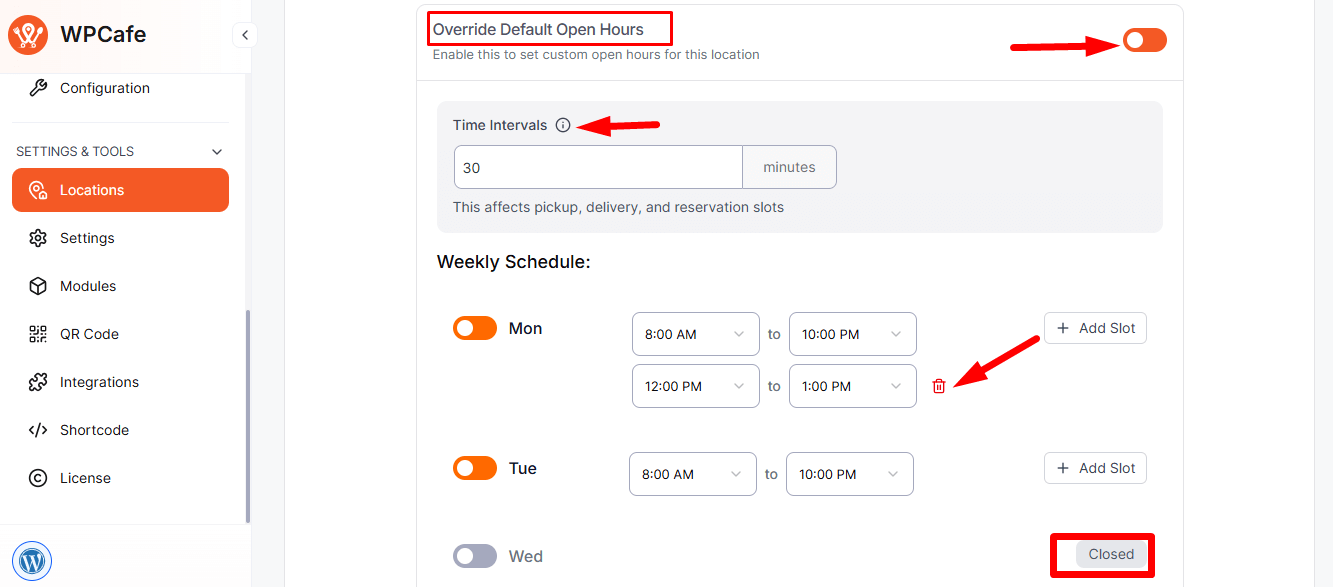
Use this option to customize the general opening hours for a specific branch.
Steps: Enable Override Default Open Hours, set your preferred weekly schedule, add multiple time slots if needed, and click Save to apply.
Override Default Pickup Schedule for Location #
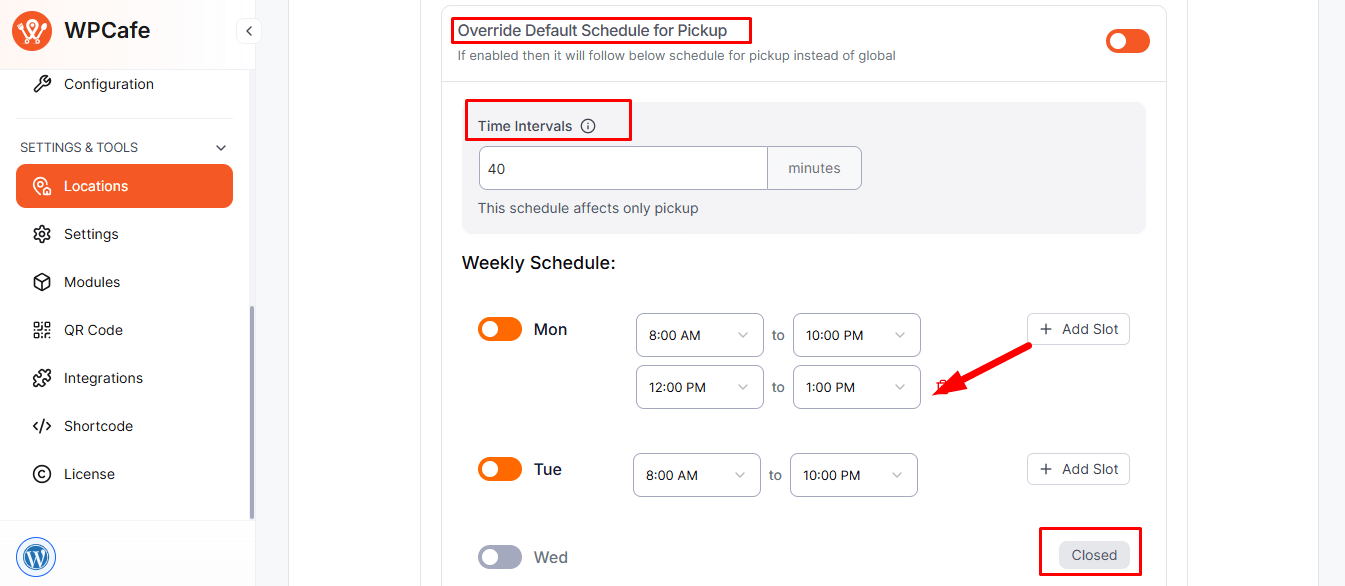
If your customers prefer takeaway orders, you can create a custom pickup schedule.
Steps: Enable Override Default Schedule for Pickup, set your preferred days and time slots, add more if needed, and click Save to confirm.
Override Default Delivery Schedule for Location #
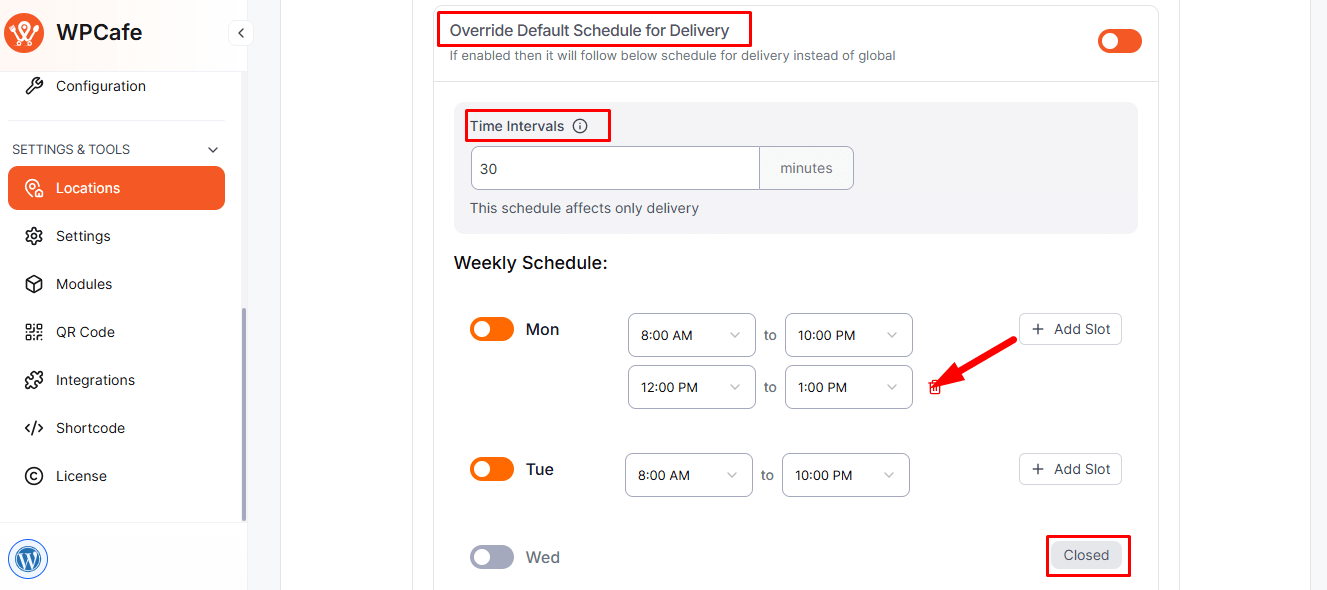
Set a unique delivery schedule for each restaurant location.
Steps: Enable Override Default Schedule for Delivery, set delivery hours with active days and time slots, add more if needed, and click Save to apply.
Override Default Reservation Schedule for Location #
This option allows you to create a custom schedule for table reservations.
- Enable this option to set custom reservation hours, define slot intervals, and click Save to apply.
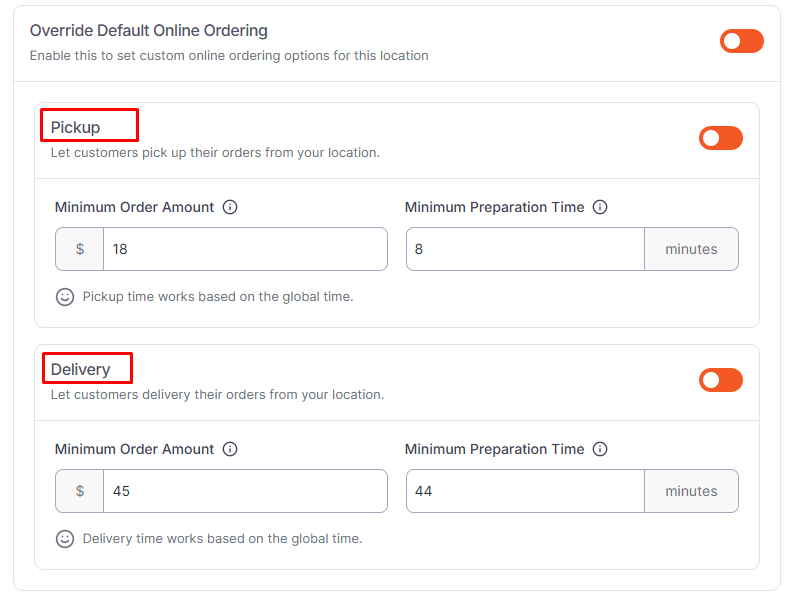
Override Default Online Ordering Settings for Location #
You can customize online ordering options (pickup and delivery) for each location.
Pickup Settings #
When enabled, customers can place pickup orders from this location.
- Minimum Order Amount: Set a required order minimum.
- Minimum Preparation Time: Define preparation time before pickup.
Note: Pickup times follow the global schedule unless overridden for this branch.
Delivery Settings #
Control delivery timing and order conditions per location.
- Minimum Order Amount: Define the minimum order value for delivery.
- Minimum Preparation Time: Set the average prep time before delivery begins.
Note: Delivery timing depends on the global or branch-specific delivery schedule.
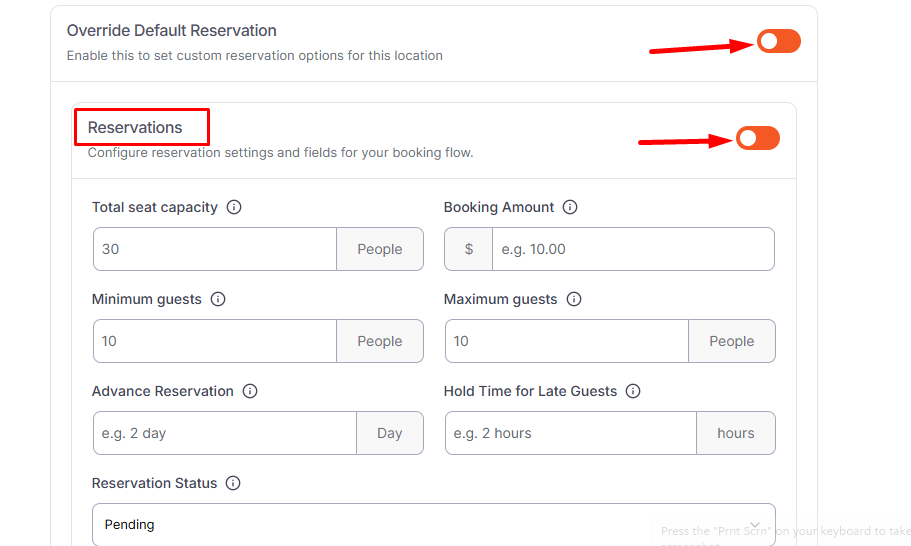
Override Default Reservation Schedule for Location #
Enable this option to set custom reservation rules for a specific branch. You can define how bookings work for each location, rather than relying on global settings.
Reservation Settings:
Set the maximum and minimum guest counts, deposit amount, and advance booking days. Define how long each reservation lasts, decide if bookings need approval, and choose whether the price multiplies by the number of guests.
Visual Table Layout (Optional):
Enable this feature (coming soon) to assign reservations to specific tables visually.
Note: Reservation times follow the global schedule unless overridden.
Save the Location #
Once all fields are filled, click Publish to save the branch.
Your new location will now appear under WPCafe → Locations, and its custom settings will automatically apply on the frontend.
Frequently Asked Questions (FAQ) #
Q1: Can I create multiple restaurant branches?
A1: Yes. You can create as many branches as needed under WPCafe → Locations.
Q2: Do I have to enable all override options?
A2: No. Enable only the ones you need. If disabled, the global settings will apply.
Q3: Will customers see these locations at checkout?
A3: Yes. Customers can choose their preferred location during order or reservation.
Conclusion #
The Location feature in WPCafe makes it easy to manage multiple restaurant branches with separate hours, reservation rules, and order schedules. By tailoring each branch’s settings, you provide customers with a smoother and more personalized ordering and booking experience.


