The Pickup feature lets customers place orders online and collect them from your restaurant. You can manage schedules globally or per branch, set time slots, preparation times, and instructions for smooth order management.
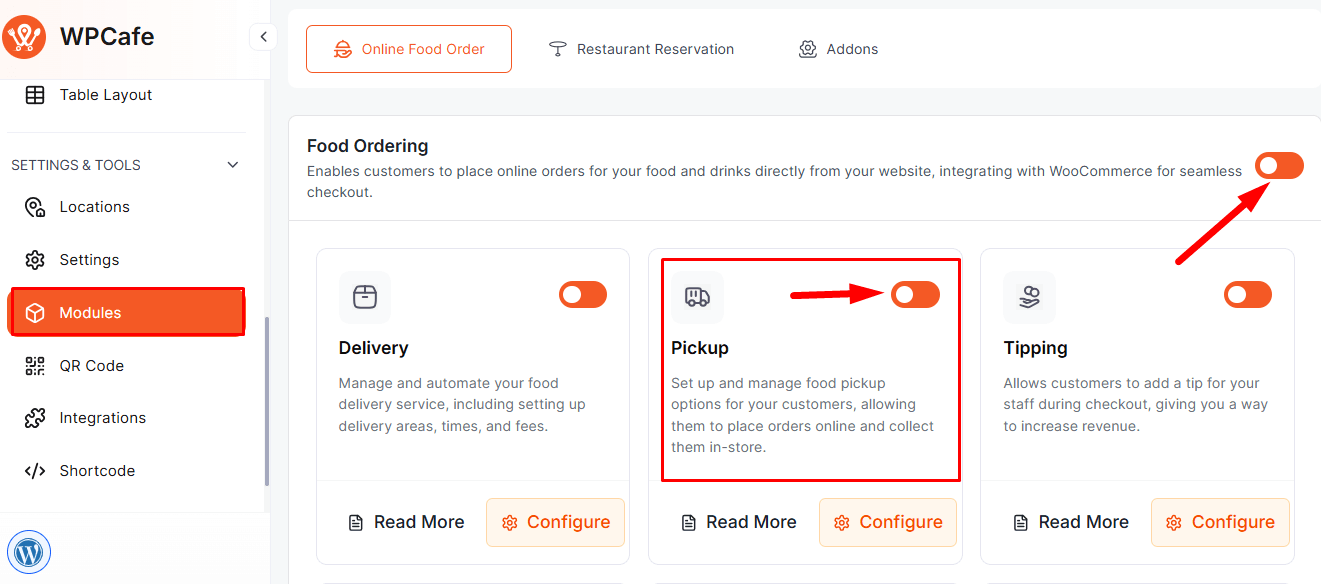
Step 1: Enable the Pickup Module #
Go to WPCafe → Settings & Tools → Modules, enable Pickup, click Save Changes.
After enabling, all pickup-related settings will appear under Settings → Pickup.
Step 2: Set Pickup Schedule #
- Go to WPCafe → Settings & Tools → Settings → Schedule. Set Time Intervals in minutes, which define the slot length shown to customers.
- Under Weekly Schedule:
- Switch a day On to make it available.
- Select Start and End Time from the dropdowns.
- Click Add Slot for multiple windows.
- Leave a day Off to mark it Closed.

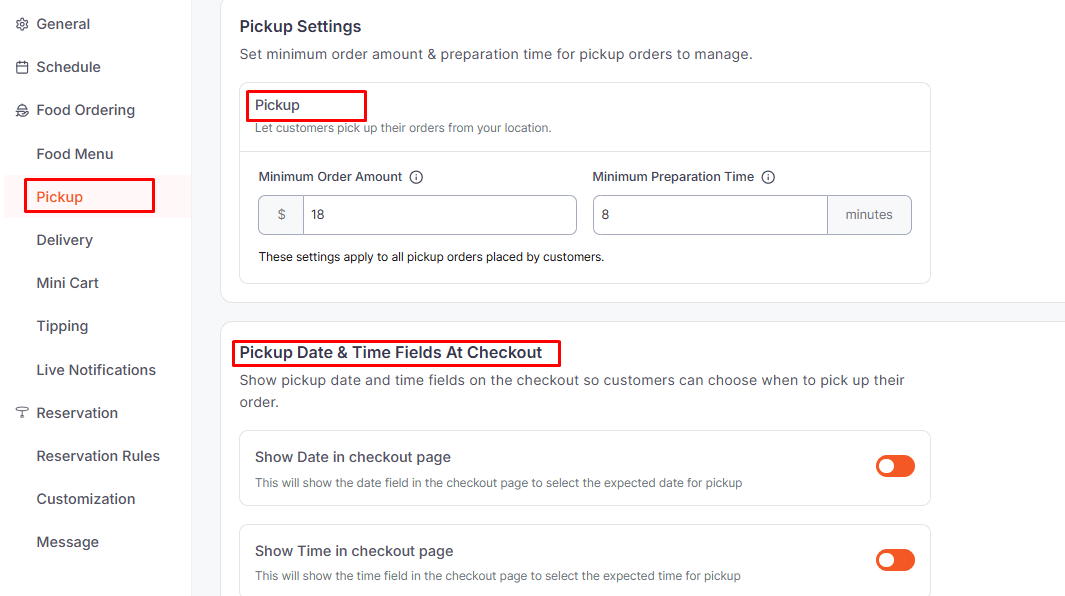
Step 3: Global Pickup Settings #
- Minimum Order & Preparation Time: Set minimum spend and prep time.
- Pickup Orders: Allow customers to pick up from your restaurant.
- Pickup Date & Time: Enable date and time selection at checkout.
- Pickup Message: Add instructions or messages for customers.
Step 4: Location-wise Pickup Schedule #
If your restaurant has multiple branches, you can set a custom pickup schedule for each location.
How to Set:
- Go to Settings → Locations → [Select Location].
- Enable Override Default Schedule.
- Set the weekly schedule like in Step 2.
- Click Save Changes
Follow the documentation for location-based pickup settings..
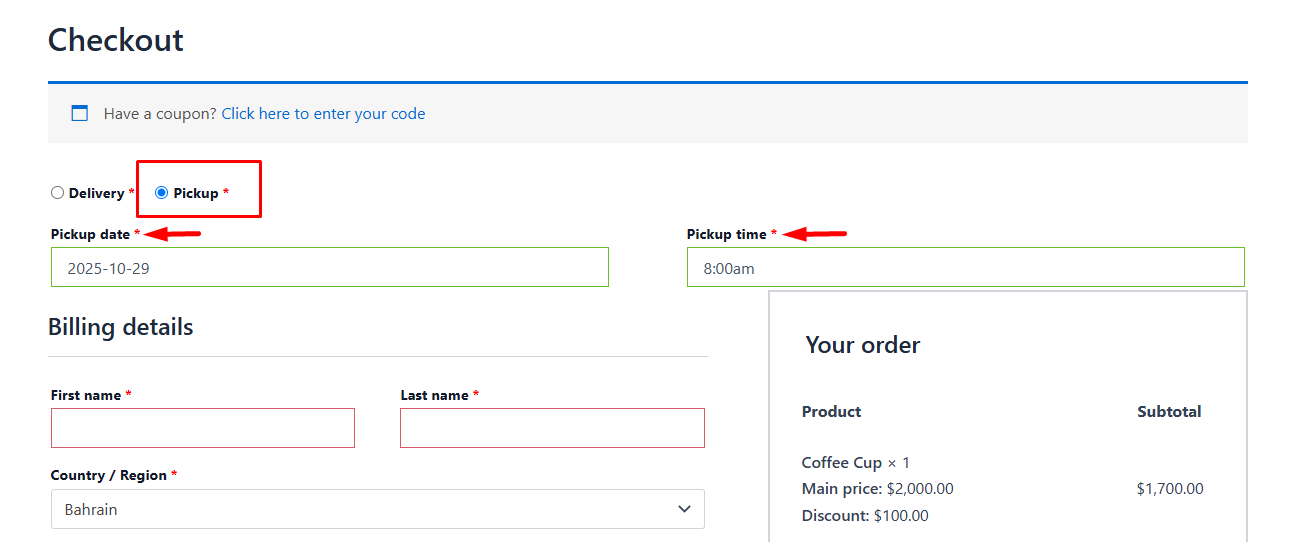
Frontend view: #
When completing checkout, the customer can select Pickup Date & Time for the order.
Frequently Asked Questions (FAQ) #
Q1: How early should I place a Pickup order?
A1: Pickup orders should be placed according to the Minimum Preparation Time set in Settings → Pickup.
Q2: What kind of time slots are available?
A2: Pickup slots are created based on Time Intervals (e.g., 30 minutes), and you can set multiple slots per day in the Weekly Schedule.
Q3: What messages or instructions can be shown to customers?
A3: In Pickup Message, you can provide instructions, location details, or any special notes for the customer.
Conclusion: #
The Pickup feature allows customers to collect their orders at a time that suits them, providing added convenience. It supports branch-wise scheduling and makes preparation and order management smooth.


