The Delivery feature in WPCafe allows customers to order online and receive deliveries at their convenience, with flexible global or branch-wise schedules for efficient order management.
Step 1: Enable the Delivery Module #
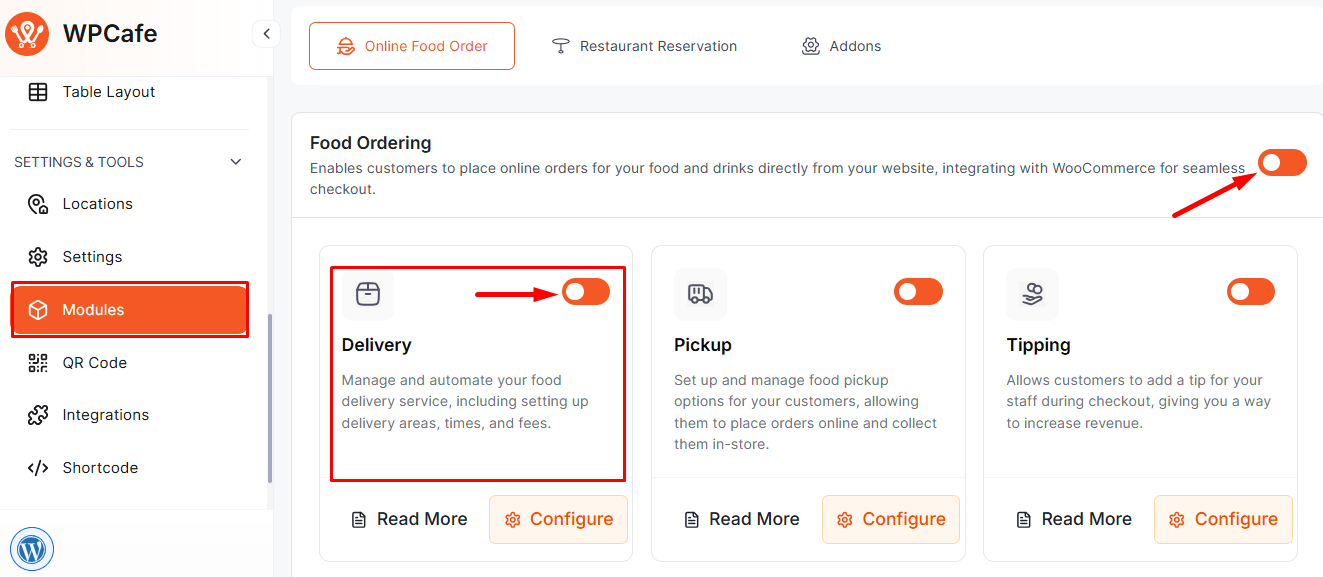
Go to WPCafe → Settings & Tools → Modules, enable Delivery, and click Save Changes. All delivery settings will now appear under Settings → Delivery.
Step 2: Set Delivery Schedule #
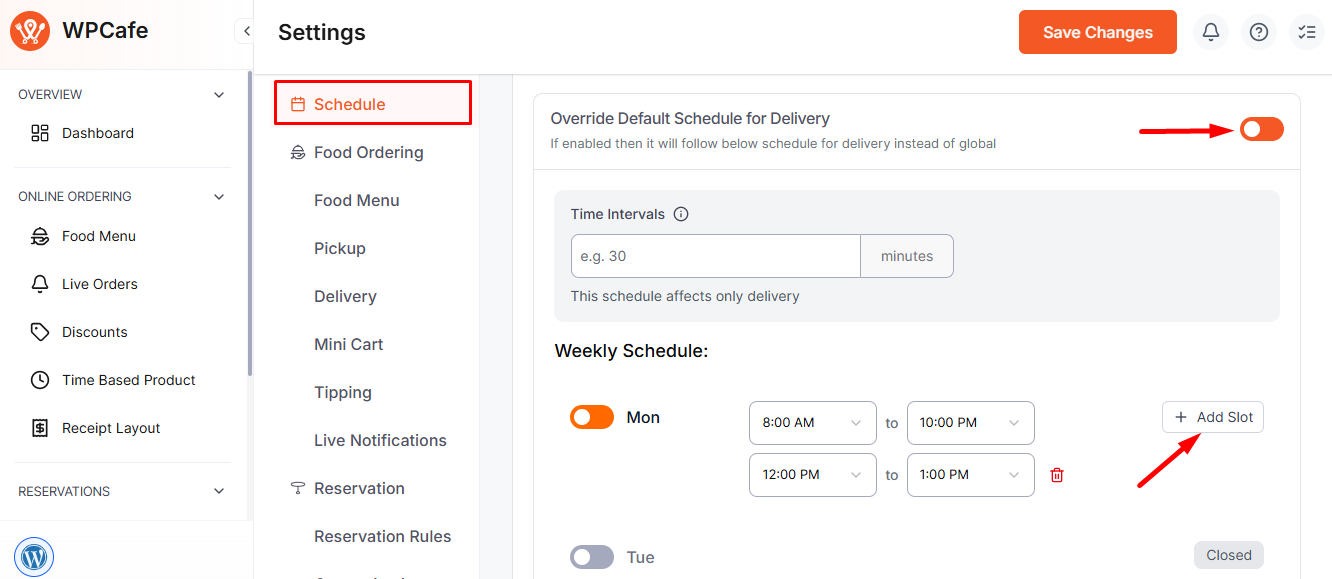
Go to Settings → Schedule, set Time Intervals, and configure the Weekly Schedule:
- Switch a day On to make it available.
- Select Start/End Time and click Add Slot for multiple windows.
- Leave a day Off to mark it Closed.
Step 3: Global Delivery Settings #
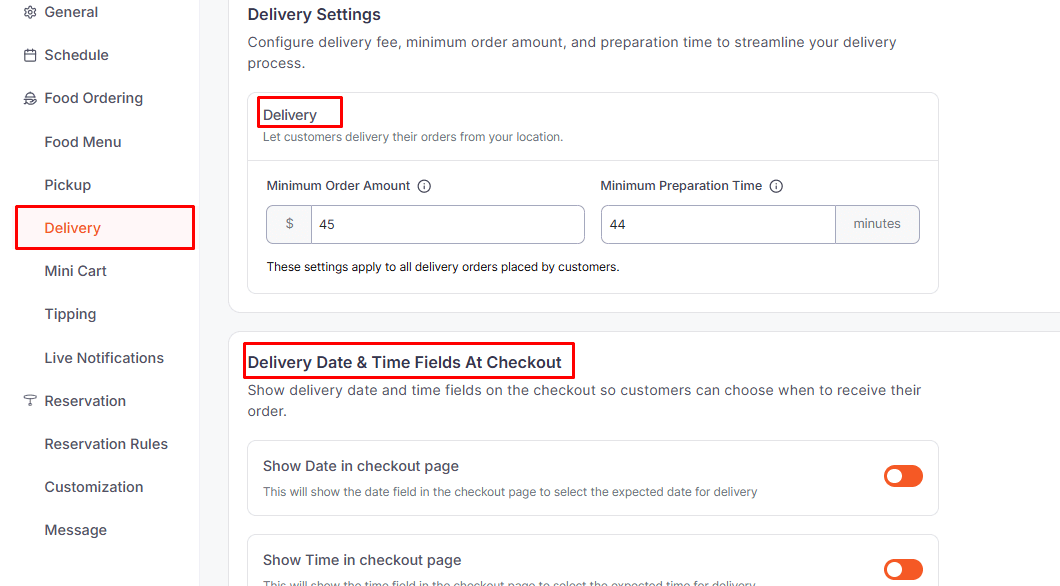
- Minimum Order & Prep Time: Set minimum spend and preparation time.
- Delivery Orders: Enable delivery to customer addresses.
- Delivery Date & Time: Allow date and time selection at checkout.
- Delivery Message: Add custom instructions or messages for customers.
Step 4: Location-Wise Delivery Schedule #
For multiple branches:
- Go to Settings → Locations → [Select Location]
- Enable Override Default Schedule
- Set weekly schedule like in Step 2 and Save Changes
Follow the documentation for location-based delivery settings..
Frontend View #
Customers can select the Delivery Date & Time during checkout.

Frequently Asked Questions (FAQ) #
Q1: How early should I place a Delivery order?
A1: Delivery orders should be placed according to the Minimum Preparation Time set in Settings → Delivery.
Q2: What kind of time slots are available?
A2: Delivery slots are created based on Time Intervals, and multiple delivery windows can be set for each day in the Weekly Schedule.
Q3: What messages or instructions can be shown to customers?
A3: In the Delivery Message, you can provide delivery address details, special notes, or any other instructions for the customer.
Conclusion: #
The Delivery feature allows customers to have their orders delivered directly to their addresses. It supports branch-wise scheduling and simplifies delivery timing and order management.


