The Reservation Settings in WPCafe let you control every part of the booking process, from seat capacity, guest limits, booking amounts, and hold times to button labels and reservation status. You can also manage business hour visibility and booking behaviour. With the Visual Table Layout, you can visually design your table setup and assign reservations more efficiently.
Reservation Configuration Options #
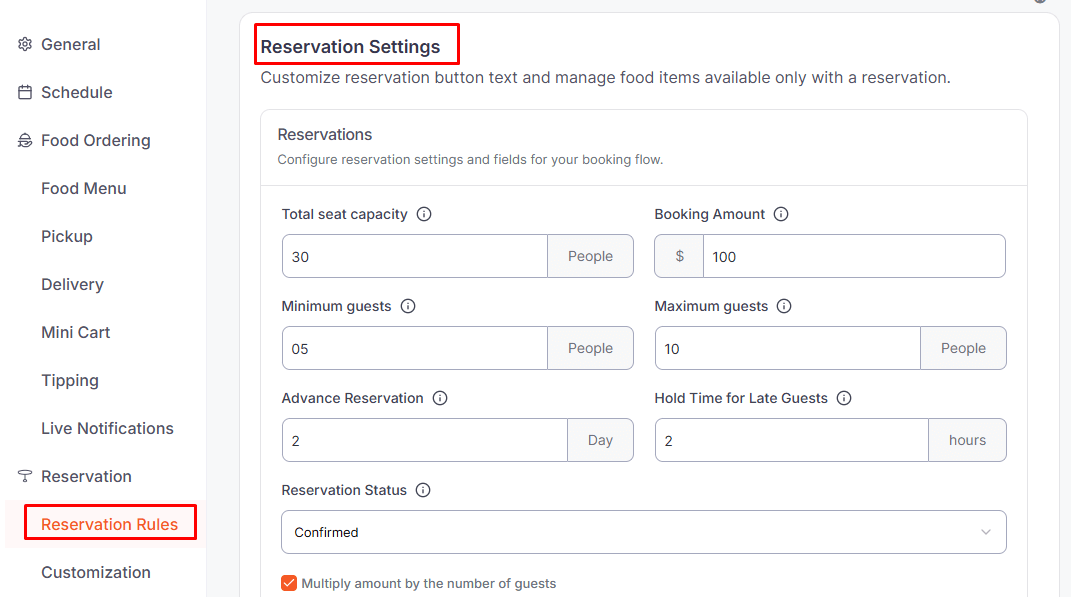
Go to WordPress Dashboard → WPCafe → Settings → Reservation → Reservation Rules and configure your restaurant’s seats, booking amount, and guest limits.
- Advance Reservation – Set how early (in minutes/hours) customers must book before their reservation time.
- Maximum Future Reservation – Control how far into the future customers are allowed to place a reservation.
- Reservation Status – Choose the default status for new bookings (e.g., Pending, Confirmed).
- Statuses That Block Time Slots – Select which reservation statuses will prevent a time slot from being booked again.
- Minimum Guests – Define the minimum number of people required per reservation.
- Maximum Guests – Set the maximum number of people allowed per reservation.
- Booking Amount – Enter the required booking charge or deposit amount (optional).
- Total Seat Capacity – Specify the total number of seats available in your restaurant.
- Multiply Booking Amount by Guests – Enable this if the booking amount should be multiplied by the total number of guests.
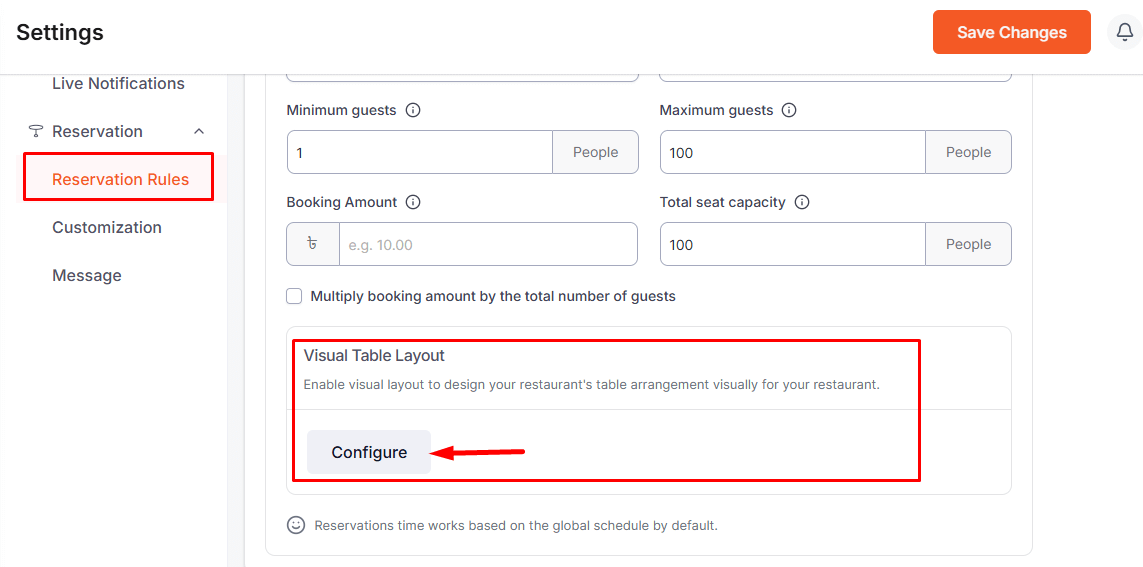
🔹Visual Table Layout #
The Visual Table Layout feature allows you to design your restaurant’s table arrangement in an intuitive and interactive way. Follow this documentation to set up your table layout in detail.
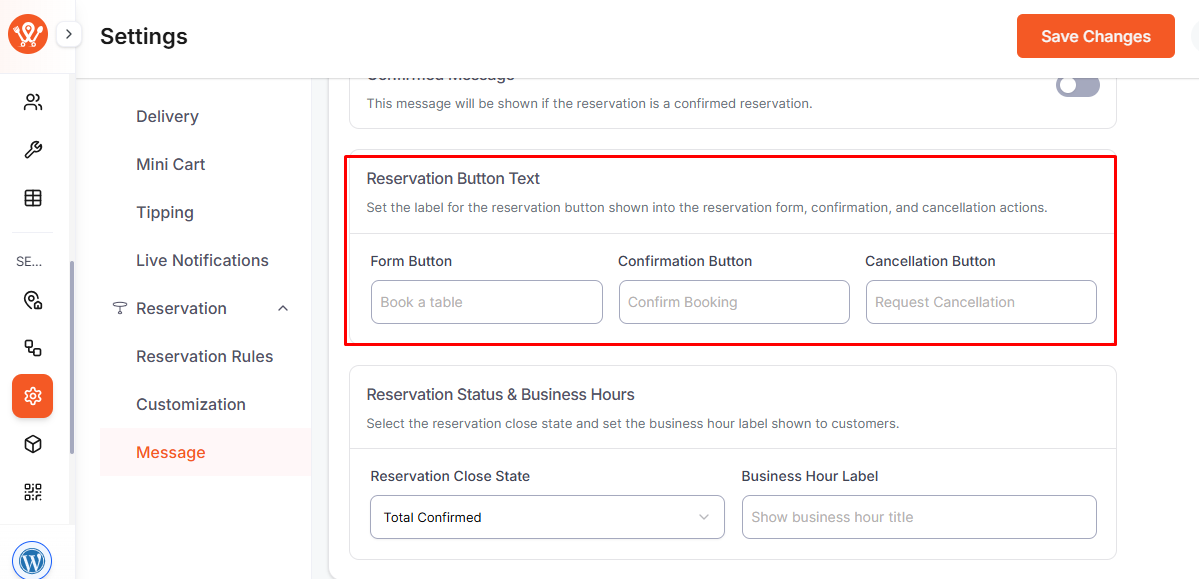
🔹Reservation Button Text #
Easily update the text for all buttons in your reservation form—Form Button, Confirmation Button, and Cancellation Button—from:
Dashboard → WPCafe → Settings → Reservation → Message. This way, you can make the buttons clearer and friendlier for your visitors
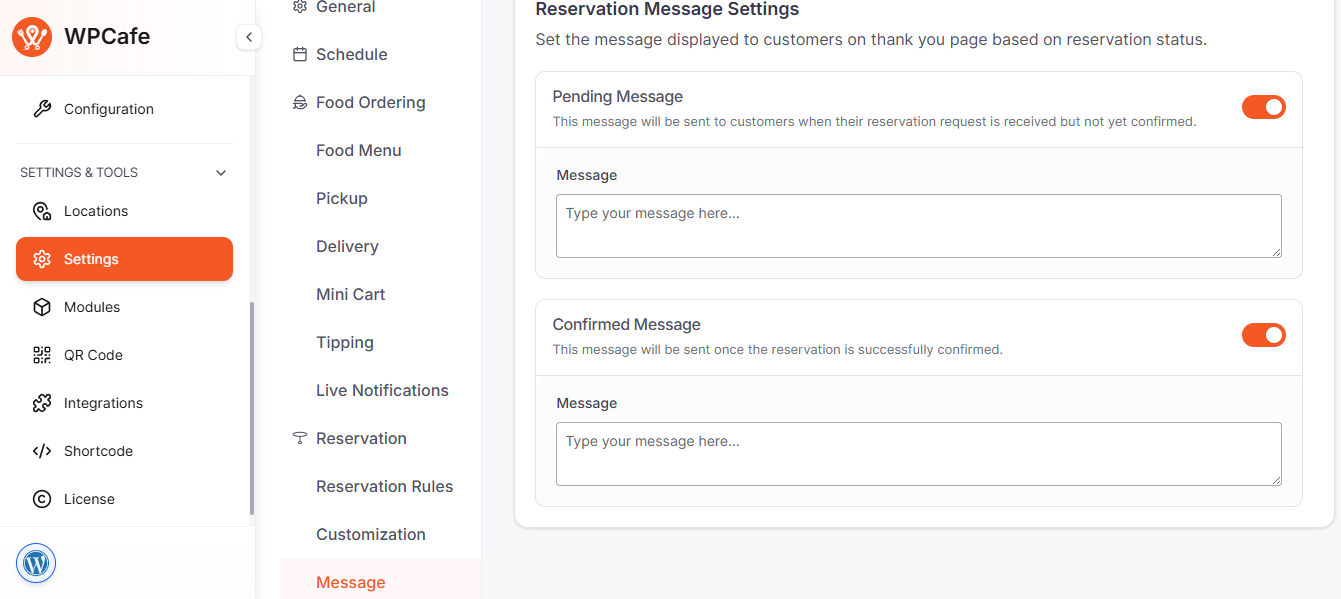
Customise Thank You Page Message #
You can show customers a clear message after they submit a reservation, letting them know whether it’s pending or confirmed.
Go to WPCafe → Settings → Reservation → Message to customise the Pending and Confirmed messages.
Just edit the text you want to show and use the toggle to enable or disable each message.
Finally, click Save Changes to apply the updates.
🔹Frequently Asked Questions #
Q1: Can I limit how far in advance customers can make a reservation?
A1: Yes. In the Advance Reservation field, you can define how many days before the booking date customers are allowed to make a reservation (e.g., 2 days in advance).
Q1: What happens if customers arrive late for their booking?
A1: You can use the Hold Time for Late Guests option to decide how long a reserved table will remain available. After that time passes, the table becomes free for new bookings.
Q1: Can I customize the button text on the reservation form?
A1: Absolutely. Under Reservation Button Text, you can change the text for the booking, confirmation, and cancellation buttons to match your restaurant’s branding and tone.
🔹Conclusion #
Configuring Reservation Settings in WPCafe ensures a smooth, customer-friendly booking experience. Clear limits, customized buttons, and hold times help manage tables efficiently. The upcoming Visual Table Layout will provide even greater control over seating and reservations.


