The onboarding process in WP Cafe helps you quickly set up your restaurant system right after activating the plugin. Instead of going through settings one by one, onboarding allows you to configure the most important details at a glance.
When you install and activate WP Cafe, you’ll see the onboarding screen. From here, you can either:
- Complete the setup by filling in your restaurant information, or
- Skip the process and configure later from the plugin settings.
Step-by-step guideline #
Getting started is simple! When you continue with onboarding, the first screen you’ll see is the Restaurant Setup Form. Here, you need to provide some basic details about your restaurant.
Step-1: Set Up Your Restaurant #
- Restaurant Type: There are 2 types of restaurants. Food Ordering, Reservation. You can select any one of them, or both.
- Restaurant Name: Enter the name of your restaurant.
- Restaurant Address: Provide your restaurant’s full address.
- Email Address: Add the email to receive order or reservation notifications.
- Phone Number: Enter your contact number for customer queries or confirmations.
- Newsletter Subscription (Optional): Tick the checkbox if you’d like to receive helpful updates.
After filling up the details, click on the continue button for the next.

Step-2: Set Your Weekly Schedule #
In this step, you can set your restaurant’s weekly schedule. You can set your restaurant’s open time, break time, and off days.
- Active Hours: Define the opening and closing times for each day.
- Break Time: Add break hours when your restaurant is unavailable.
- Off Days: Mark any day as closed if your restaurant does not operate.
You can skip this step if you don’t want to set the schedule now, or click Continue to proceed to the next step.

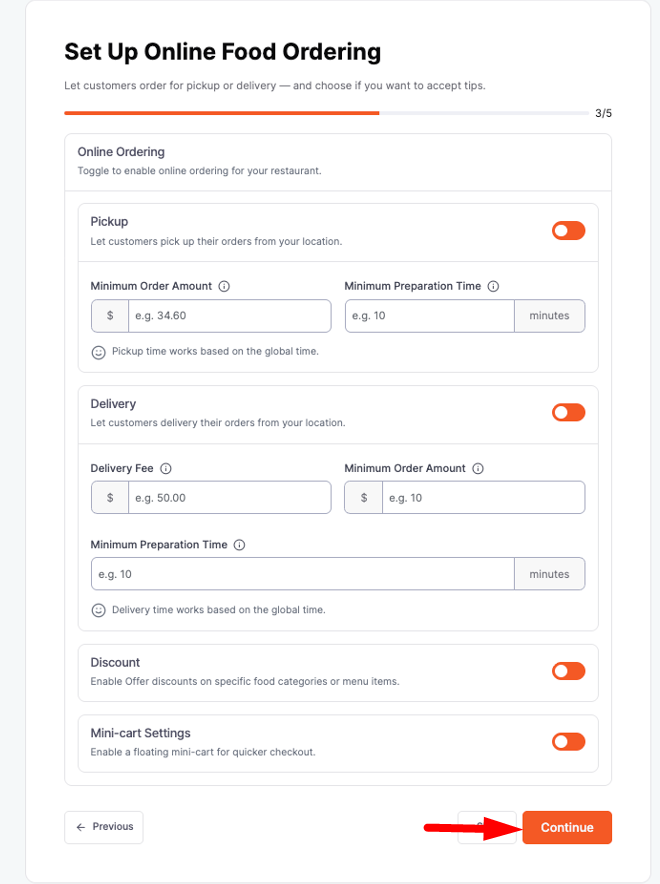
Step-3: Set Up Online Food Ordering #
Allow customers to place orders for pickup or delivery, and decide if you want to enable tips during checkout.
Pickup
Allow customers to pick up their orders from your location.
- Minimum Order Amount: Set the minimum amount a customer must spend for pickup.
- Minimum Preparation Time: Set the minimum time required to prepare the order (in minutes).
Delivery
Allow customers to have their orders delivered from your location.
- Delivery Fee: Specify the fee for delivery.
- Minimum Order Amount: Set the minimum amount required for delivery.
- Minimum Preparation Time: Set the minimum time required to prepare delivery orders (in minutes).
Discounts
Enable discounts on specific food categories or menu items.
Mini-Cart Settings
Enable a floating mini-cart for faster checkout.
After configuring these options, click the Continue button to proceed to the next step.
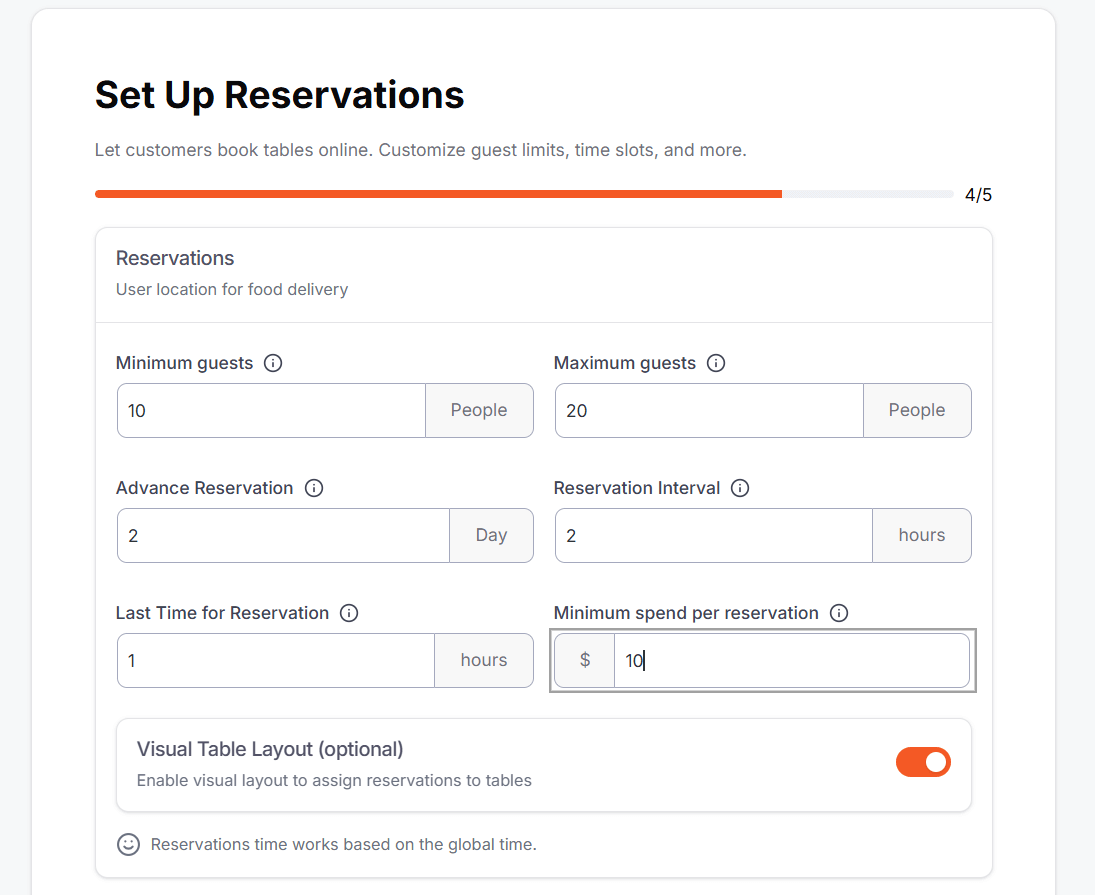
Step-4: Set Up Reservations #
Allow customers to book tables online and configure your reservation settings for a seamless booking experience.
- Minimum Guests: Set the minimum number of people per reservation.
- Maximum Guests: Set the maximum number of people per reservation.
- Advance Reservation: Define how many days in advance customers can book a table.
- Reservation Interval: Set the time interval between reservations.
- Last Time for Reservation: Specify the latest time before the booking day when customers can make a reservation.
- Minimum Spend per Reservation (Optional): Set a minimum spending amount per reservation.
- Visual Table Layout (Optional): Enable assigning reservations to specific tables visually.
Reservation times are based on the global time settings.
Step-5: Connect with WooCommerce #
Sync your food menu with WooCommerce to easily manage orders, payments, and categories.
- Install & Activate: Ensure WooCommerce is installed and activated on your website before proceeding. If WooCommerce is not installed, you will get the option to install it directly from the onboarding wizard.
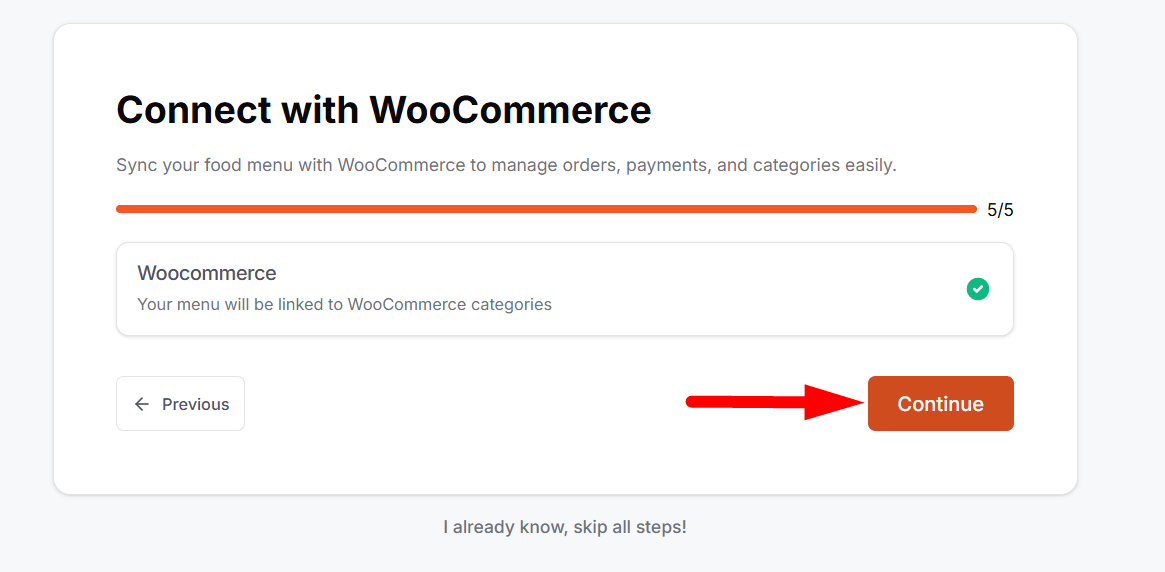
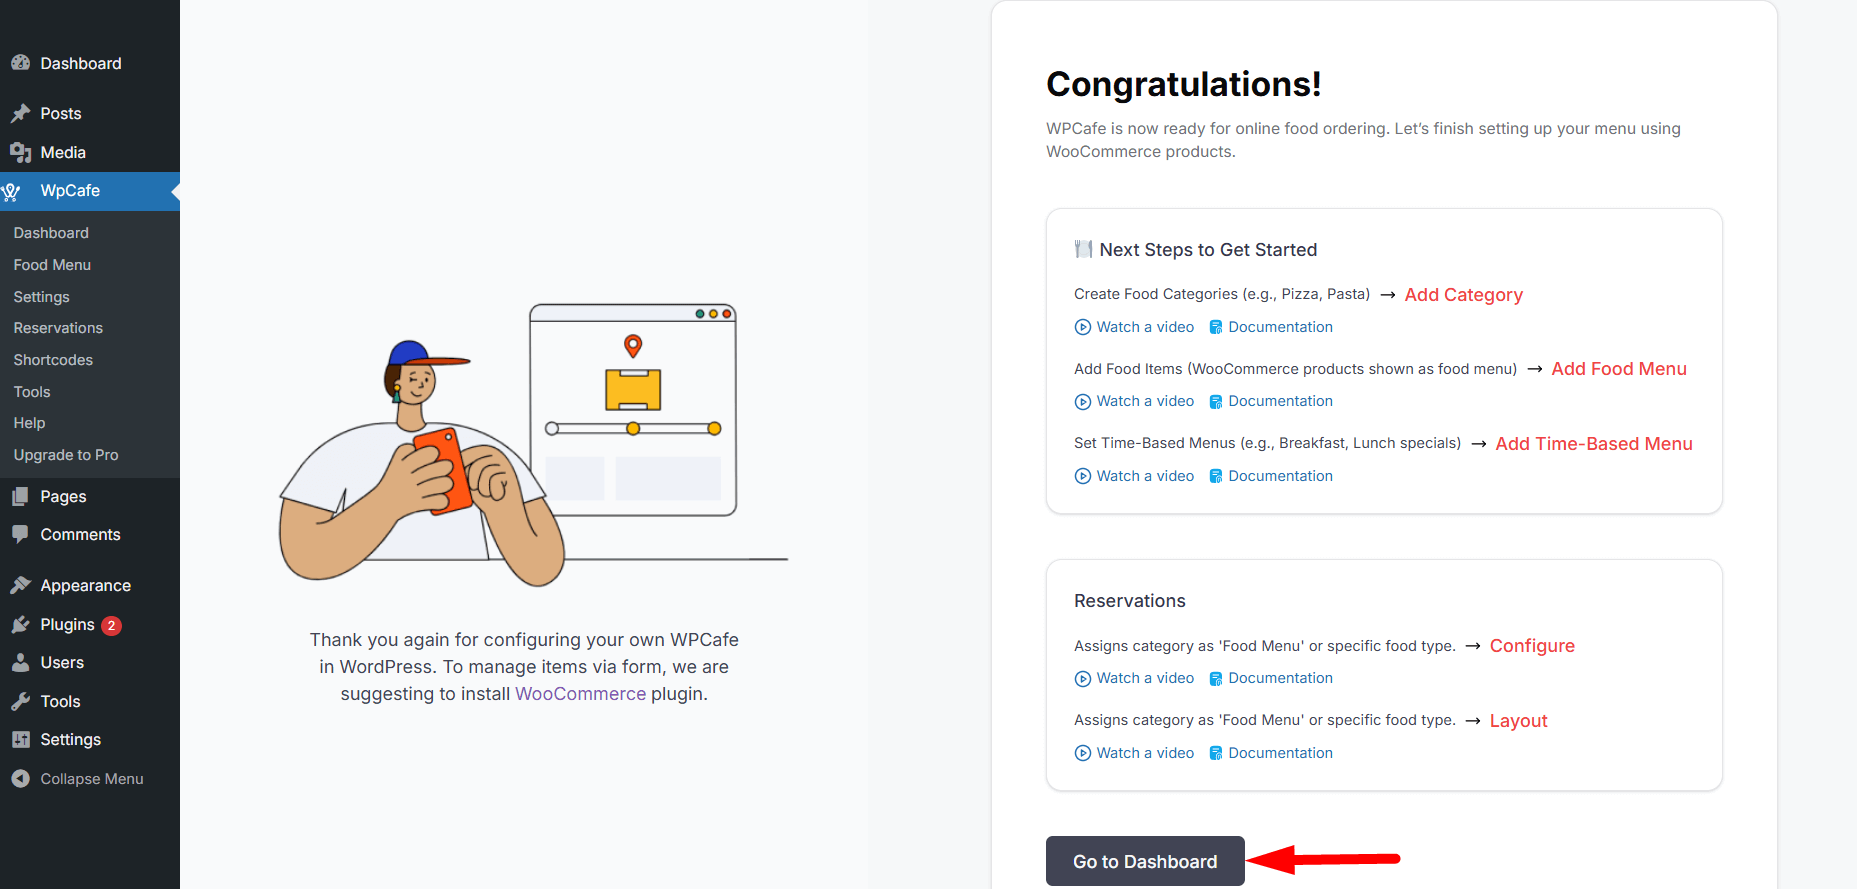
After WooCommerce activation, your onboarding will be successfully connected. “Congratulations”, you can quickly verify the connection from your WordPress dashboard at a glance.
FAQ #
Q1: Can I skip the onboarding process?
A1: Yes, you can skip onboarding and configure all settings later from the WP Cafe plugin settings.
Q2: Do I need WooCommerce installed before onboarding?
A2: No, if WooCommerce is not installed, the wizard will give you an option to install it during onboarding.
Q3: How can I verify if WooCommerce integration is successful?
A3: After activation, you can check the connection from your WordPress dashboard for a quick confirmation.
Conclusion #
Completing the WP Cafe onboarding process sets up your restaurant system efficiently, including reservations, online ordering, and WooCommerce integration. This ensures you can manage your restaurant, menu, and orders seamlessly from a single platform, saving time and simplifying operations.


