Eventin allows organizers to enable attendee registration, providing a seamless process for participants to secure their spot for an event. This feature helps manage attendee check-ins efficiently and ensures that all necessary information, such as contact details, is collected before the event.
Enable Attendee Registration #
From your dashboard, go to Eventin >Settings >Event Settings >Attendee >Enable Attendee Registration. Enable this option, and you will see a tab on your Eventin dashboard to manage attendees.
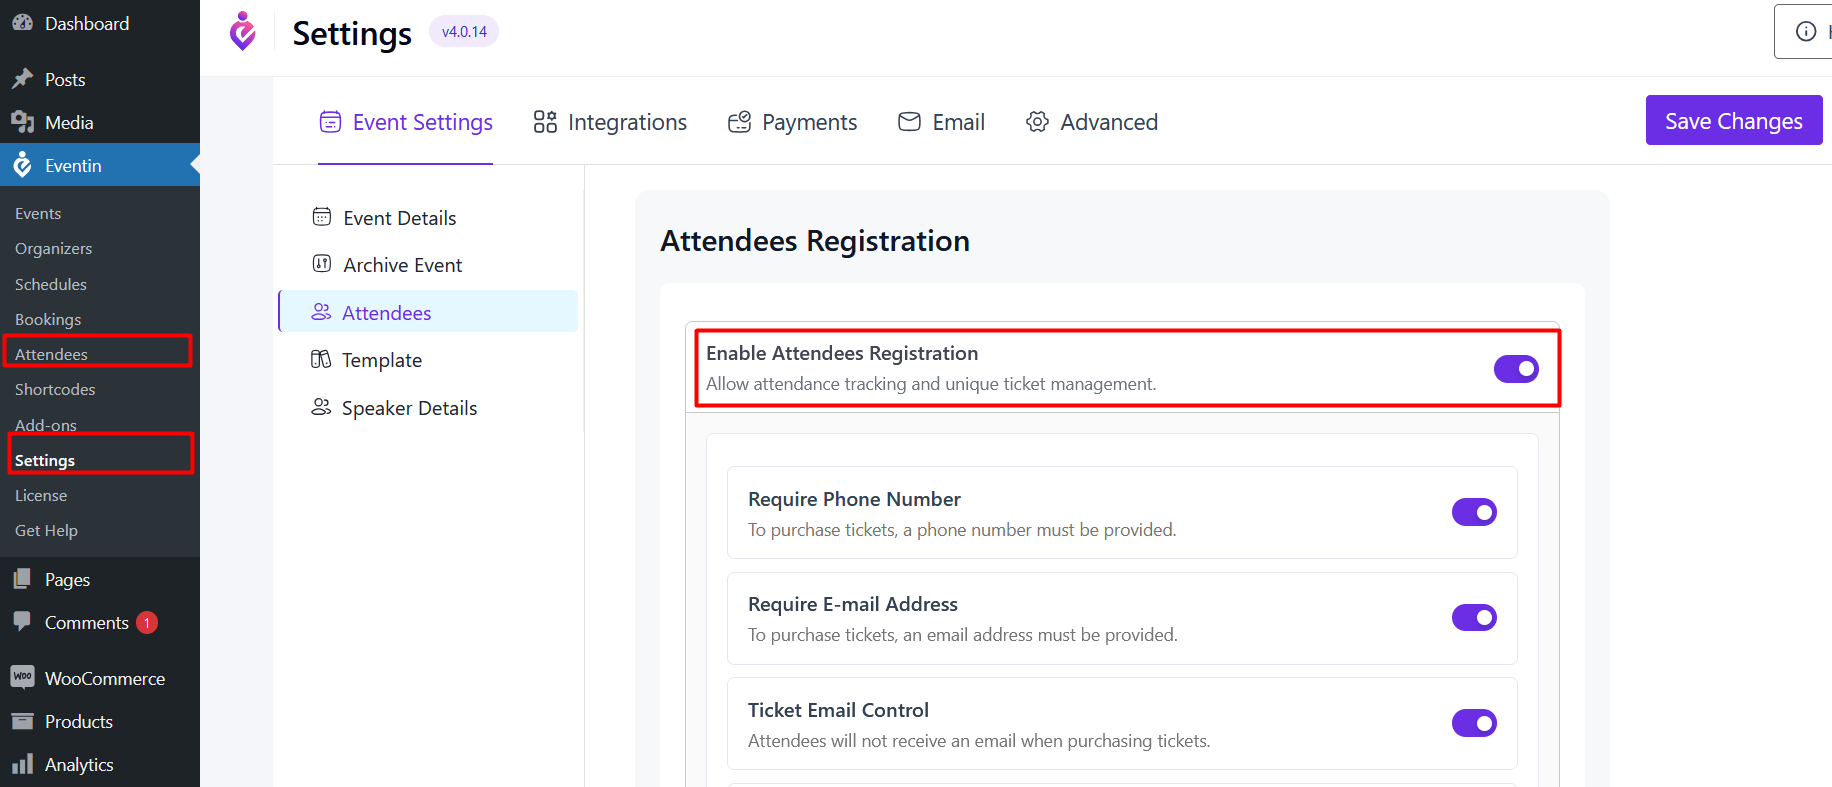
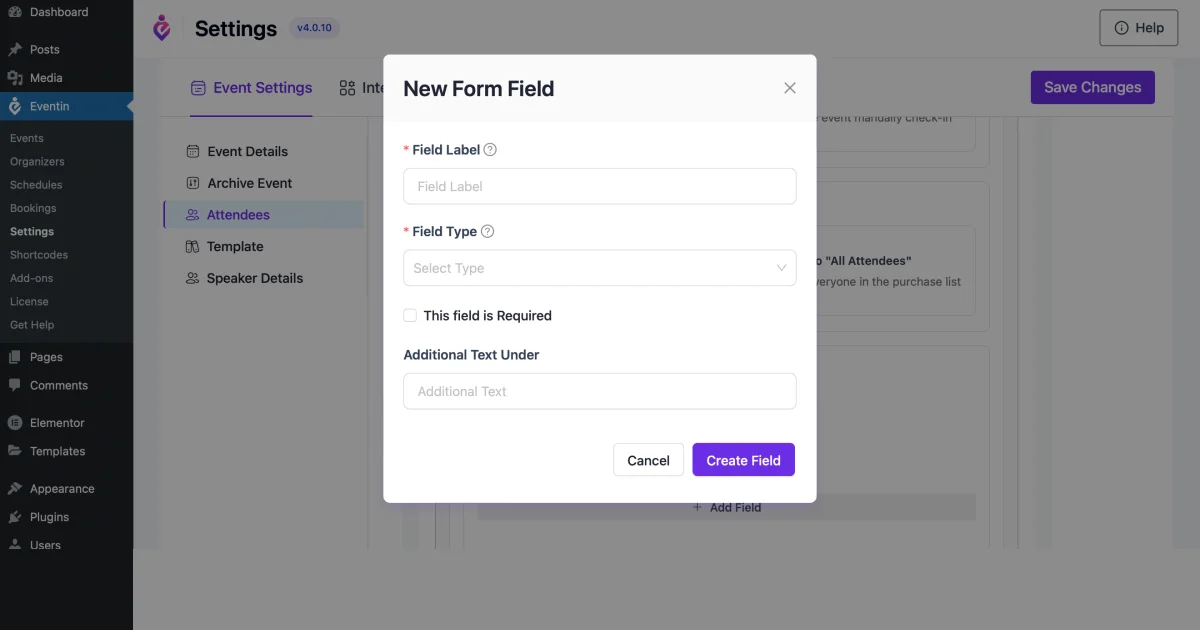
If you want to require the phone and email for registration, then enable the “Require Phone for Registration” and “Require E-mail for Registration” options. Click the ” Add button” and add extra fields for attendee registration. Give the input label name, then select your input type (Text & Number), then input your placeholder name.
🔹 NOTE: Eventin Pro is required only if you want to add extra registration fields beyond the default options.
🔹 NOTE: Enabling Attendee registration will make it mandatory for attendees to fill out the Attendee Details Form during ticket purchase.
🔹 NOTE: When you enable Require phone for registration and Require e-mail for registration, then the attendee has to give their phone number and email. Otherwise, the attendee can’t confirm the ticket.
Attendee Extra Fields(Pro) #
If you want, you can add extra fields to your Attendee Registration. Follow the Documentation on how to add extra fields globally and individually.
Front-end Attendee registration form with email and phone.

Frequently Asked Questions #
- Q: Are phone and email required for ticket confirmation?
A: Only if you have enabled Require Phone for Registration and Require Email for Registration. - Q: Can I add custom registration fields?
A: Yes, but this is available in Eventin Pro. You can add fields globally or individually per event. - Q: Can attendee registration be disabled after enabling it?
A: Yes, you can disable it anytime from Eventin → Settings → Event Settings → Attendee. - Q: Do I need Eventin PRO to enable Attendee Registration?
A: No. Attendee Registration is available in the free version of Eventin.
Conclusion #
Enabling attendee registration ensures a smooth event check-in process, accurate collection of participant information, and better management of your events. With optional custom fields and required contact information, you can tailor the registration process to your event’s needs.


