Introduction #
Eventin is a powerful WordPress plugin designed to help you create, manage, and publish events with ease. Whether you are hosting in-person, virtual, or hybrid events, Eventin provides a simple, step-by-step workflow to set up your event, manage tickets, schedule sessions, and customize the attendee experience. You can create events manually, use AI assistance, or follow the onboarding guide, making it flexible for any workflow.
Eventin gives you three simple ways to create a new event. You can choose the method that fits your workflow.
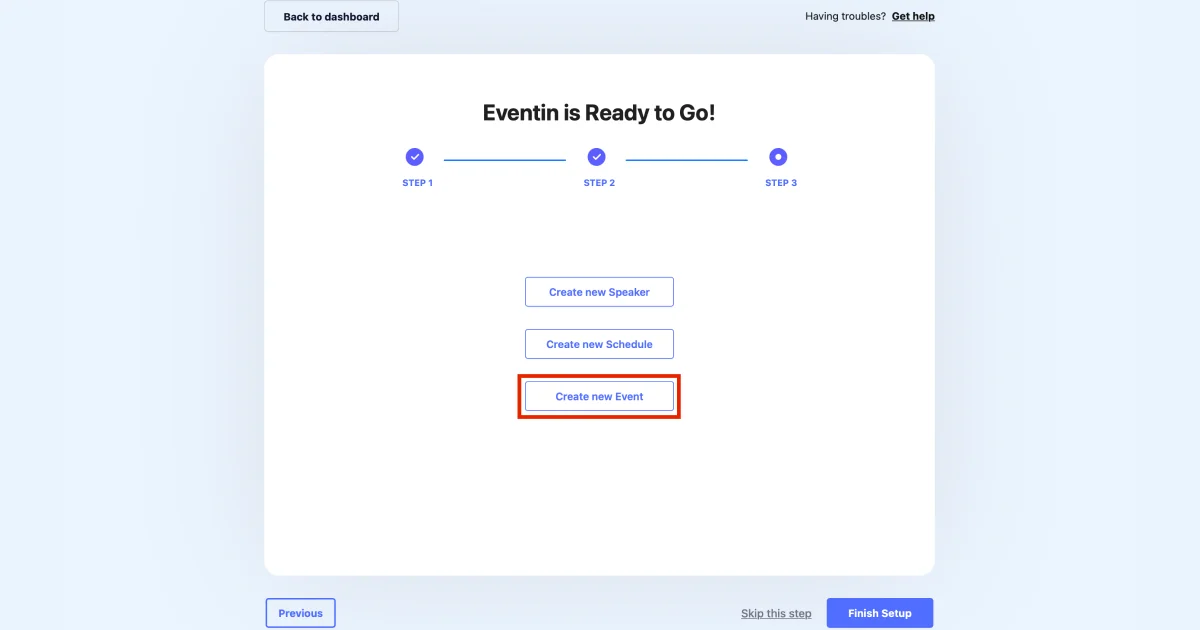
1. From the Onboarding Page # #
When you install and activate Eventin for the first time, you will see an onboarding flow.
From there, you can start creating your first event using the guided form. This is useful if you are new and want a quick setup.
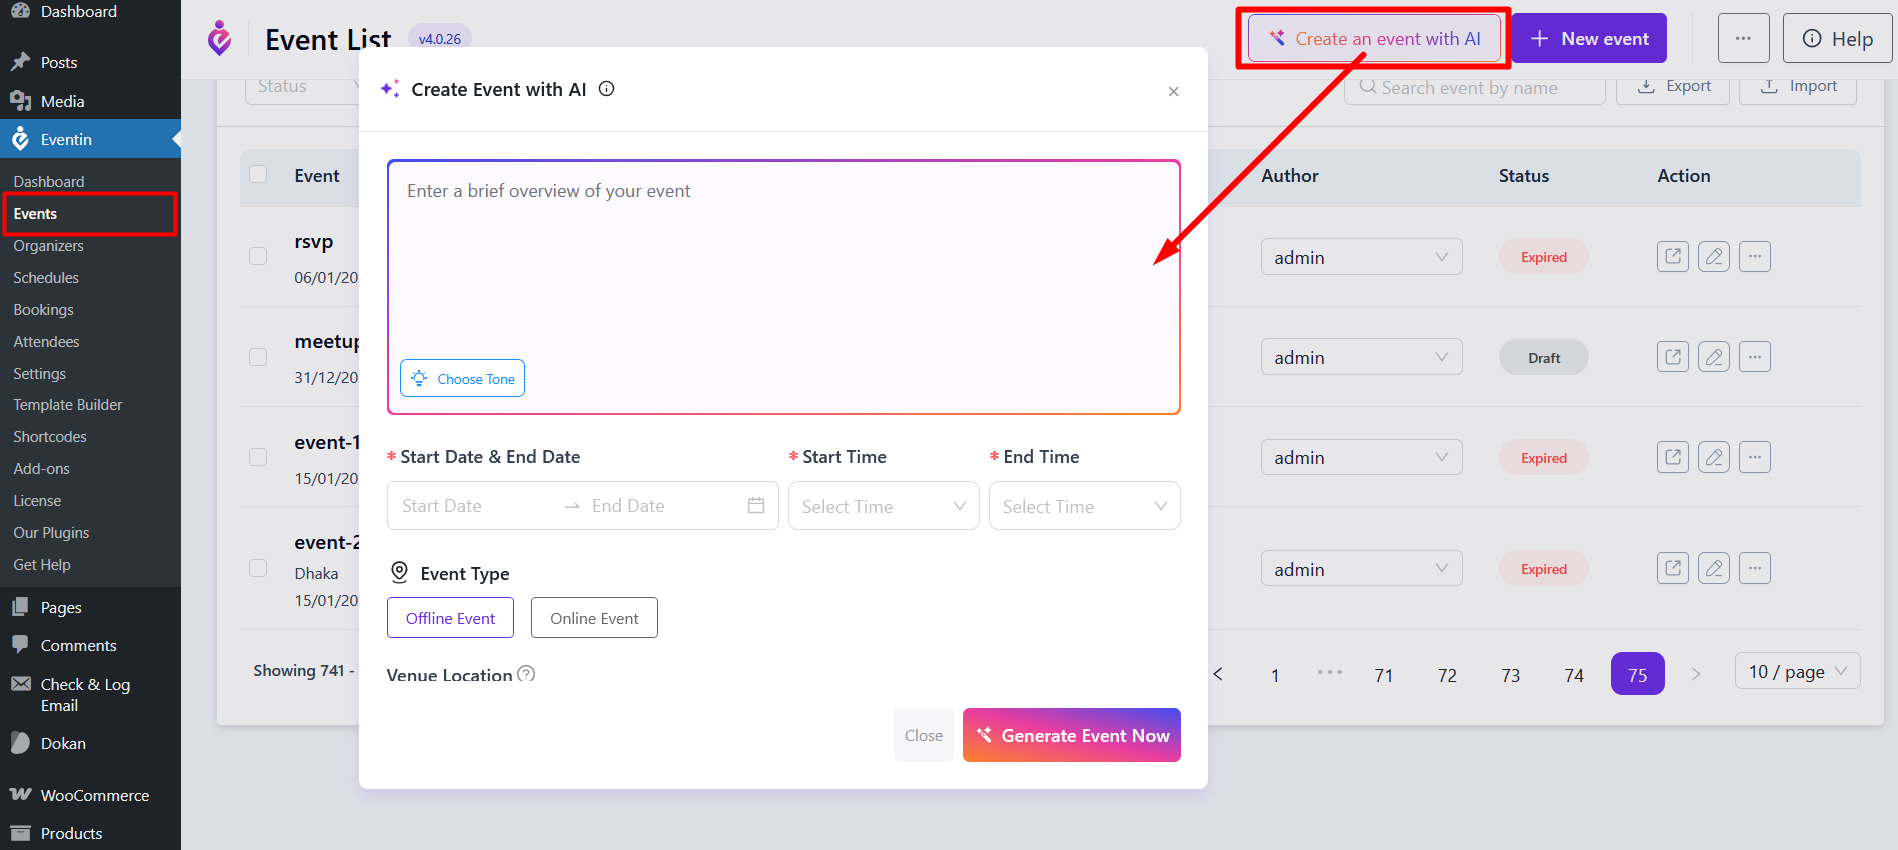
2. Create an Event Using AI #
You can also create an event using Artificial Intelligence. The AI tool will help generate your event title, description, and basic details automatically. You can review and edit everything before publishing.
For advanced AI configuration, check the AI documentation.
.
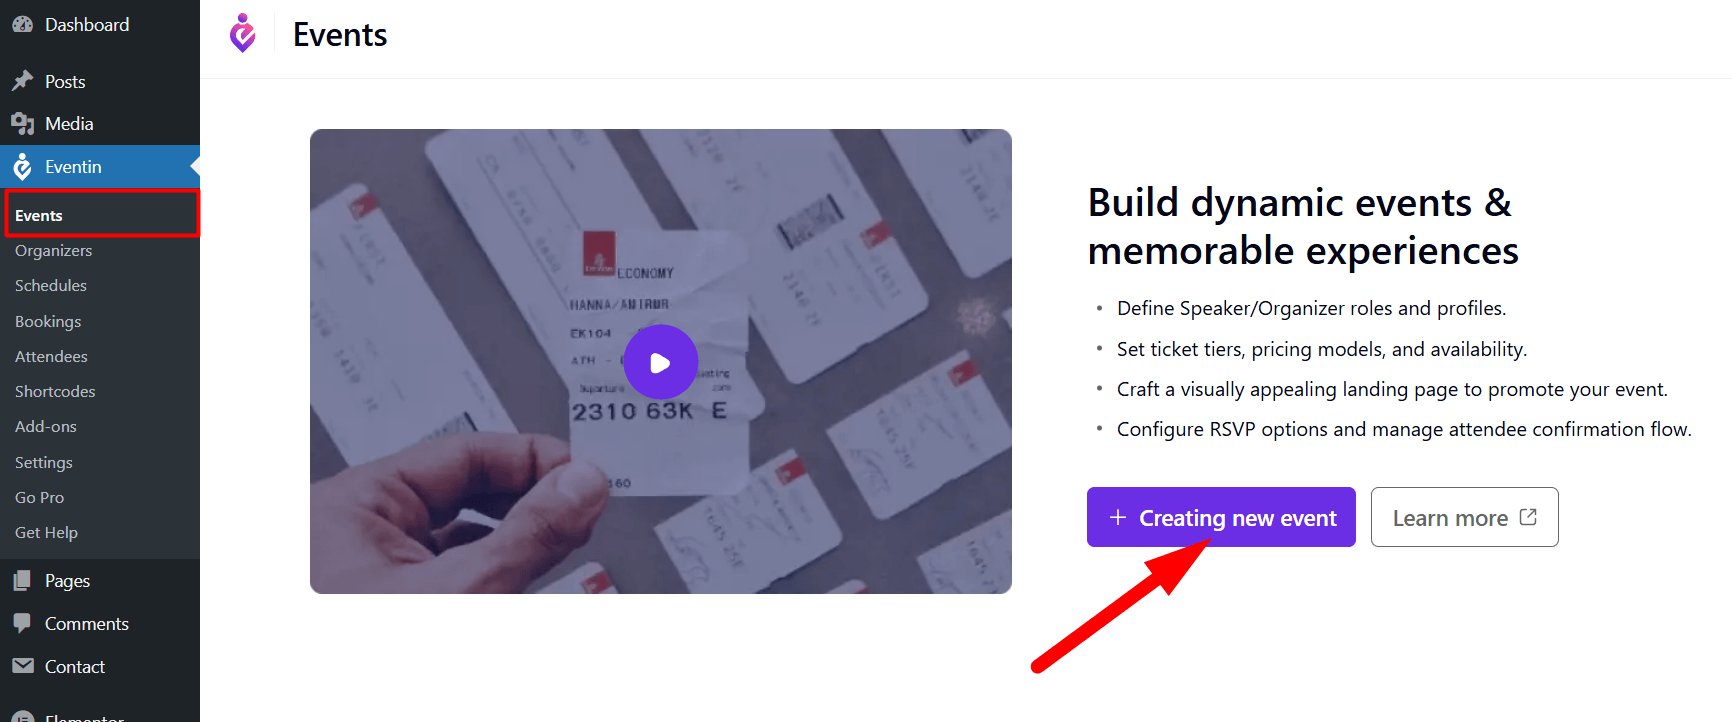
3. From the Events Page #
Standard Method to Create a Single Event. Go to Eventin → Events → Add New.
This will open the event creation page, where you can add all event details manually.
Create New Event #
After opening the event creation page, you will see a step-based layout at the top:
Eventin lets you create and manage events using a simple step-by-step flow.
You will complete the event setup in four steps:
- Basic Info
- Tickets
- Schedule
- Advanced
Follow the steps below in order.
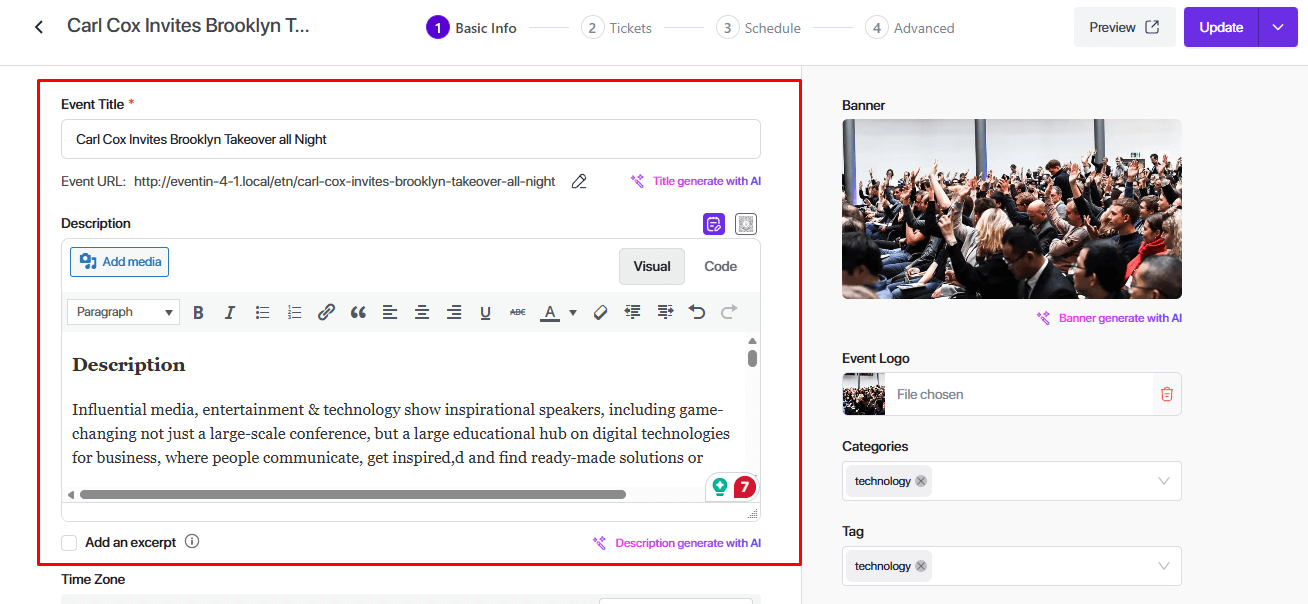
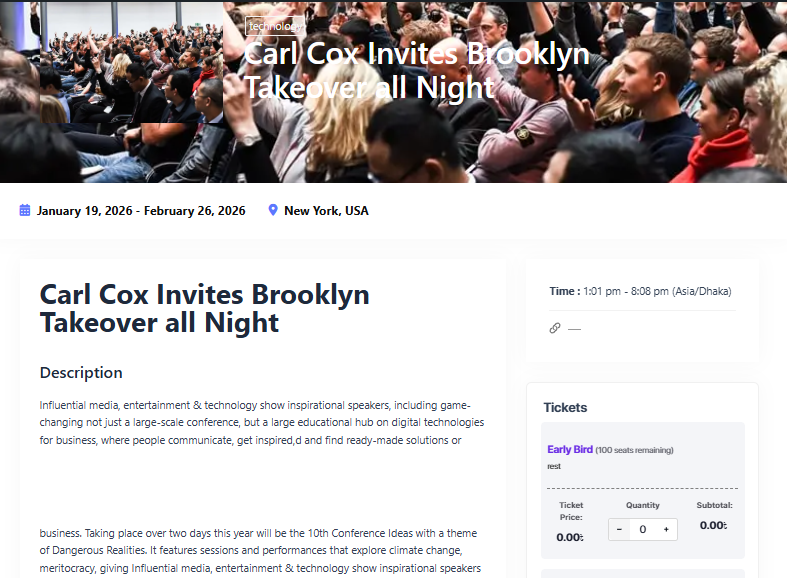
Step 1: Basic Info #
This is where you add the main details of your event.
Fill in event details
- Event Title: Enter the name of your event.
- Description: Add event details using the editor. You can include text, images, or links.
- Excerpt (optional): Add a short summary if needed.
Set time and date
- Time Zone: Select your event time zone.
- Start Date & Time: Choose when the event starts.
- End Date & Time: Choose when the event ends.
- Recurring Event (optional): Enable this if the event repeats.
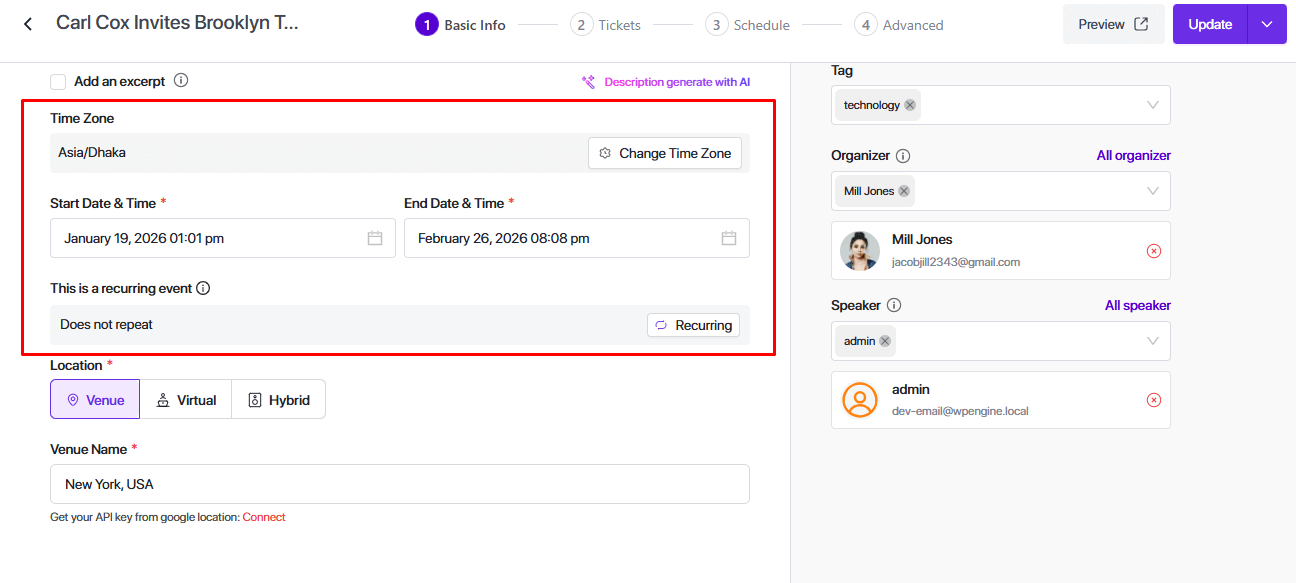
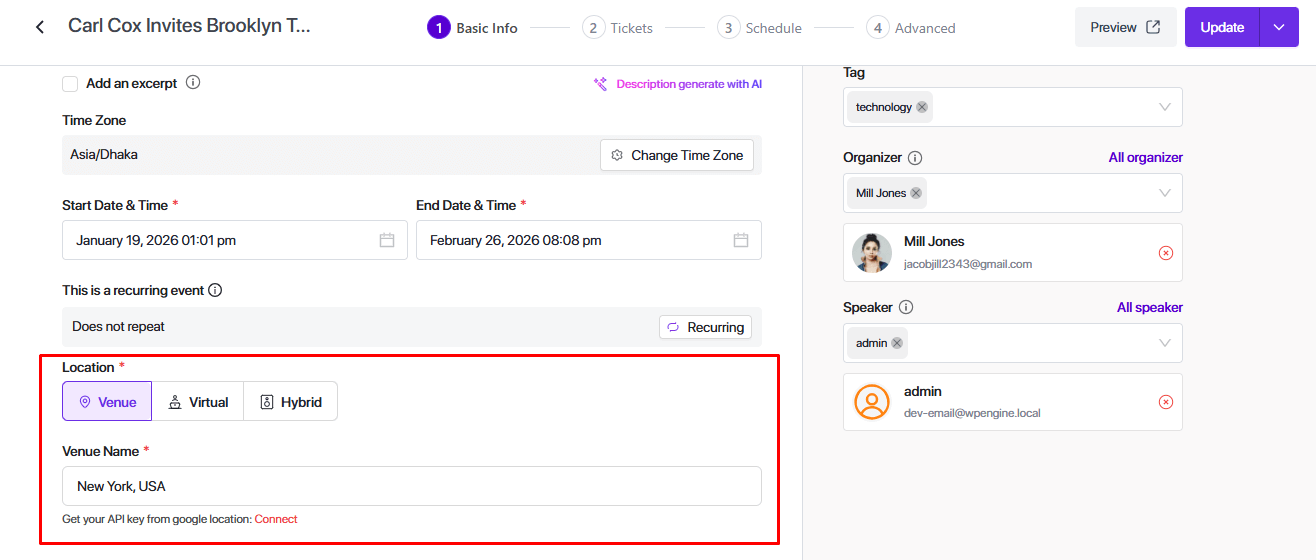
Choose event type
- Venue: For in-person events.
- Virtual: For online events.
- Hybrid: For both online and in-person events.
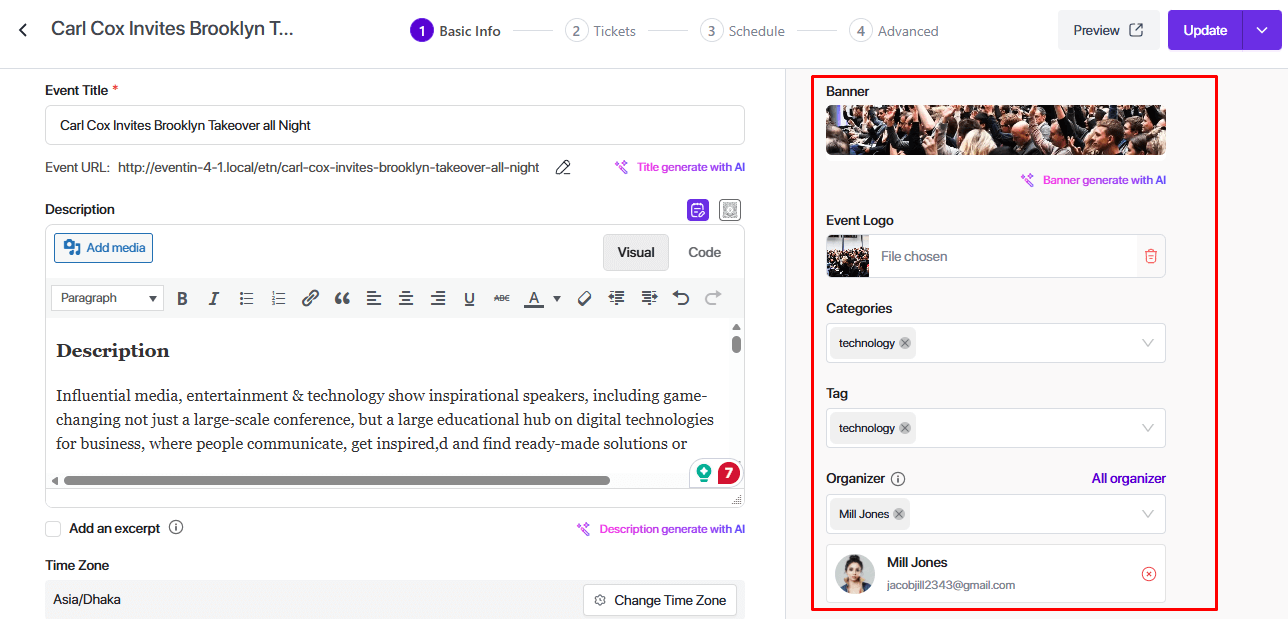
Add media and people #
- Banner: Upload or generate a banner image.
- Event Logo: Upload a logo if available.
- Category & Tag: Select relevant categories and tags.
- Organizer: Assign an organizer.
- Speaker: Add speakers if needed.
Once everything is set, move to the next step.
Step 2: Tickets #
This step is used to create tickets for your event.
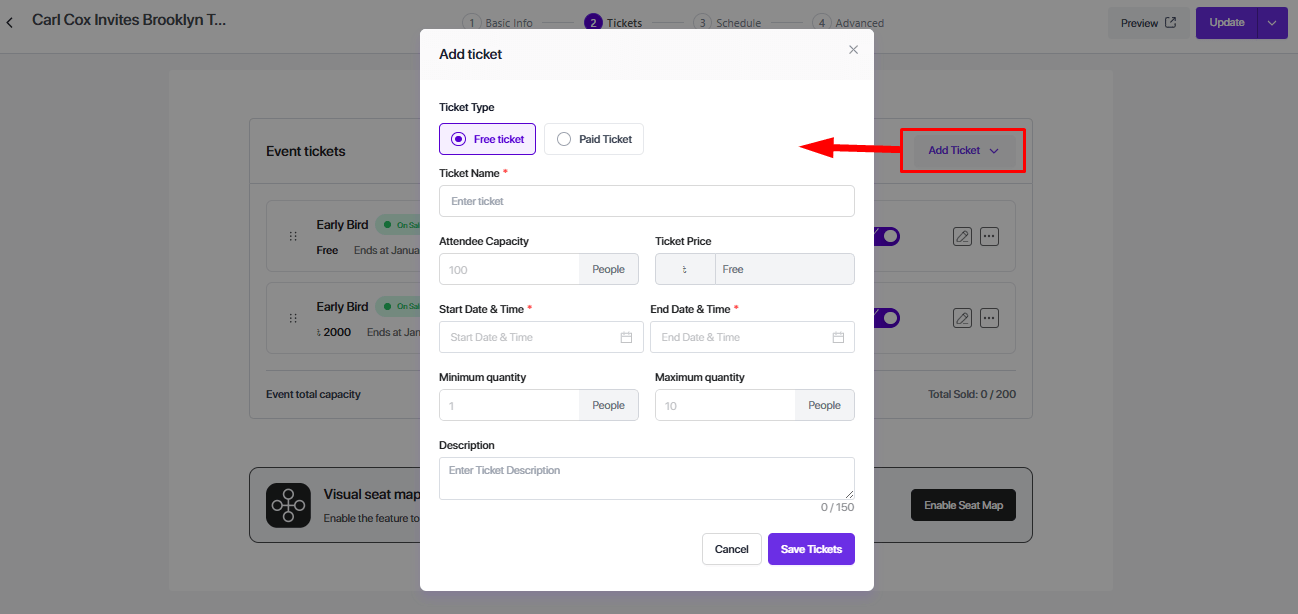
Add a ticket #
Click Add Ticket, then choose a ticket type:
- Free Ticket
- Paid Ticket
Configure ticket details #
- Ticket Name: Enter the ticket name.
- Attendee Capacity: Set how many people can buy this ticket.
- Ticket Price: Set the price (for paid tickets).
- Start Date & Time: Ticket sales start time.
- End Date & Time: Ticket sales end time.
- Minimum Quantity: Minimum tickets per order.
- Maximum Quantity: Maximum tickets per order.
- Description: Add short ticket details.
Click Save Tickets after finishing.
You can add multiple ticket types if needed.
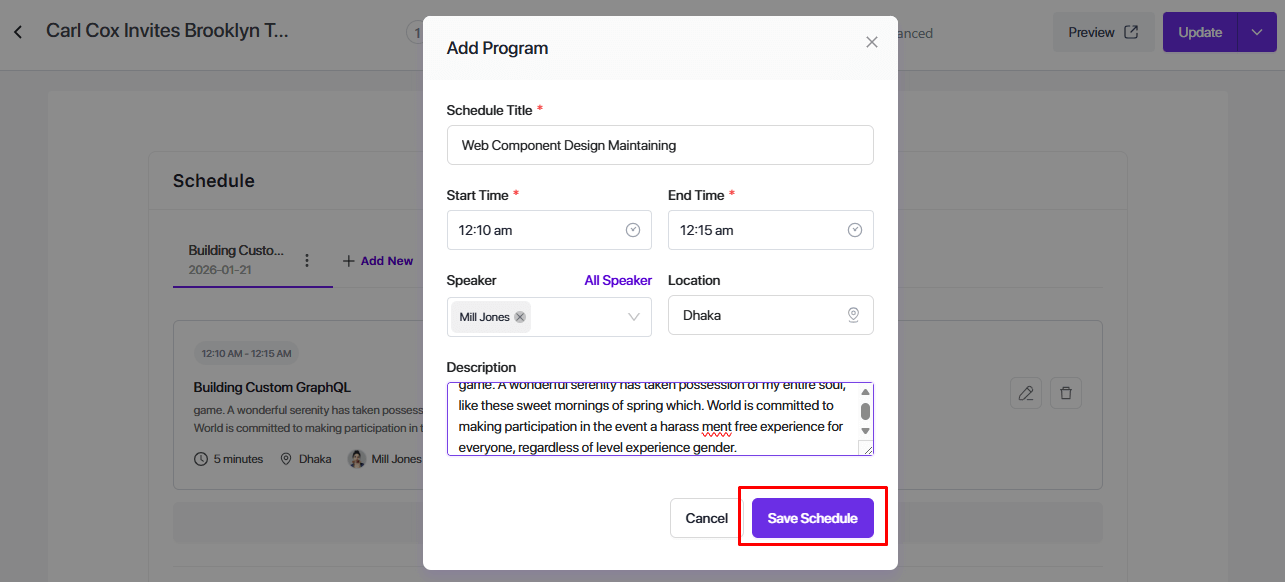
Step 3: Schedule #
This step is for creating the event agenda or program schedule.
Add schedule items
- Click Add New or Add Program.
- Add session details like:
- Program title
- Time
- Speaker
- Description
This helps attendees understand what will happen during the event.
When done, continue to the next step.

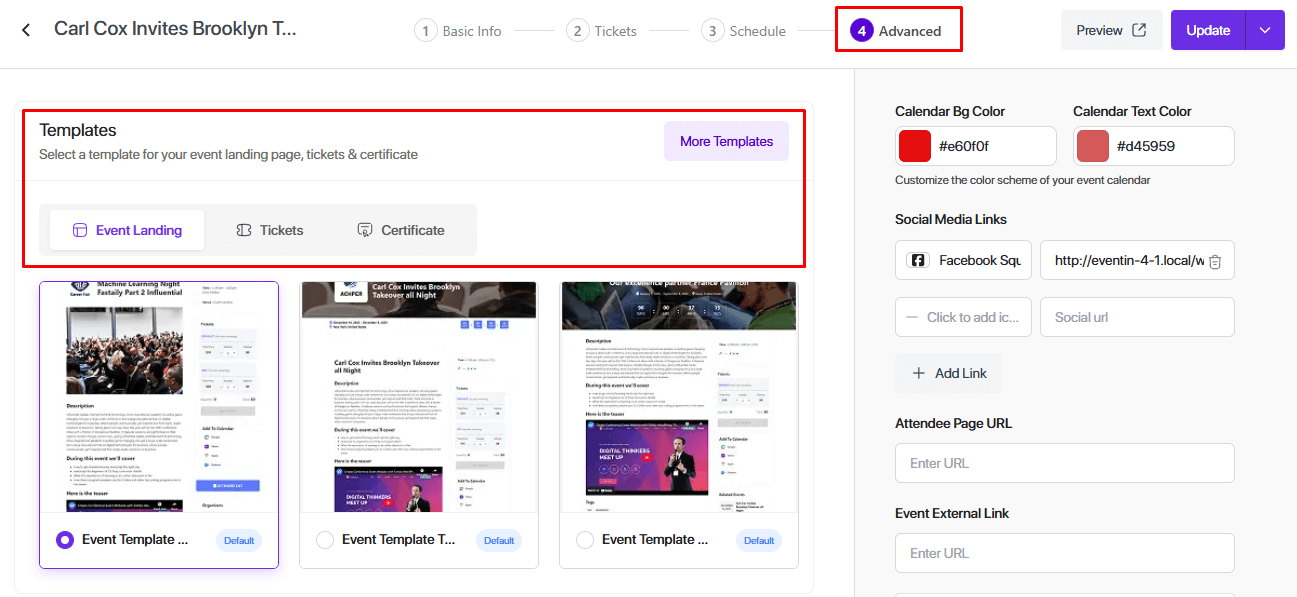
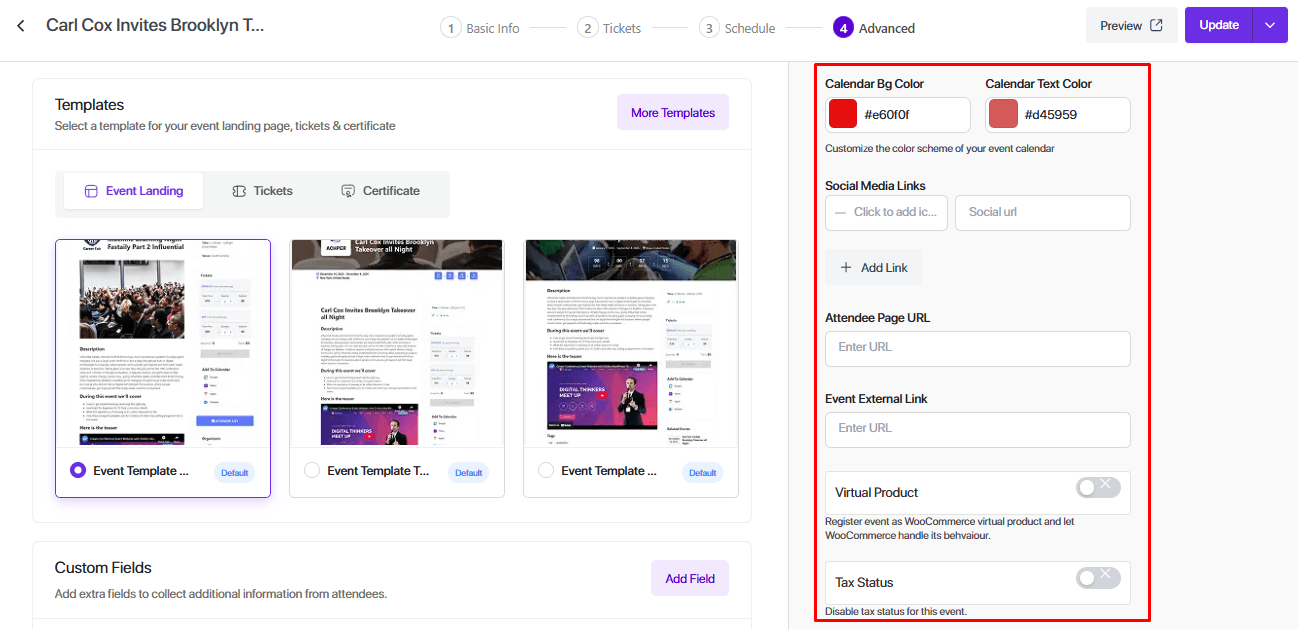
Step 4: Advanced #
This step includes design, settings, and extra options.
Templates
- Choose templates for:
- Event landing page
- Tickets
- Certificate
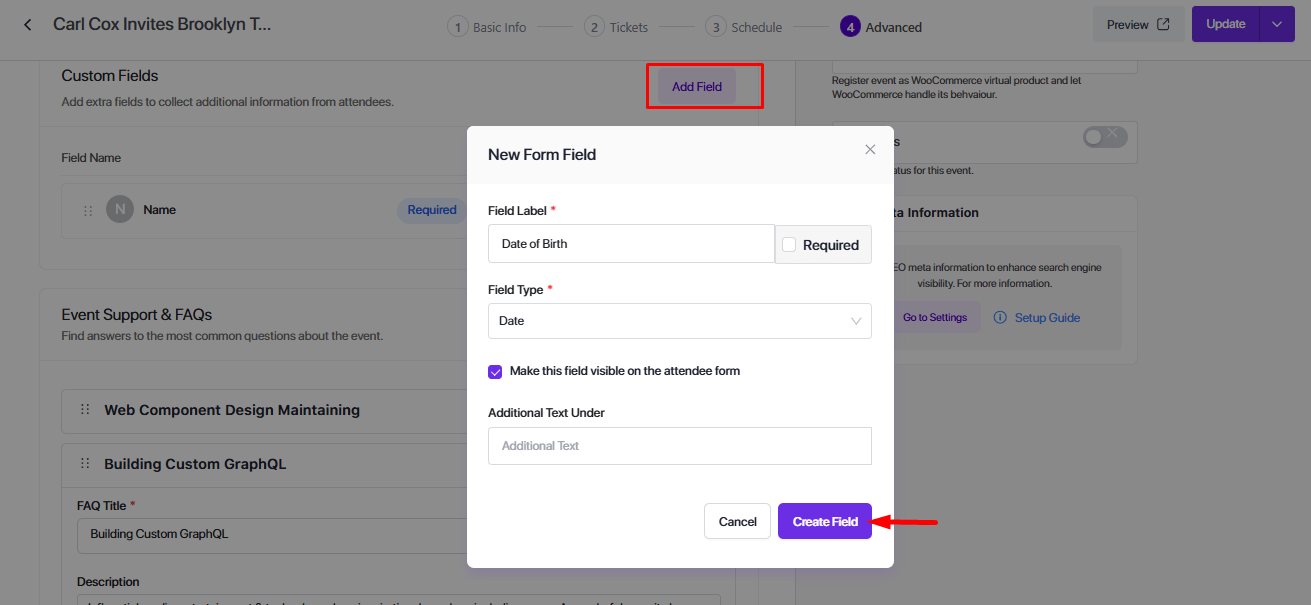
Custom fields
- Add extra fields to collect attendee information.
- Control which fields are visible or required.
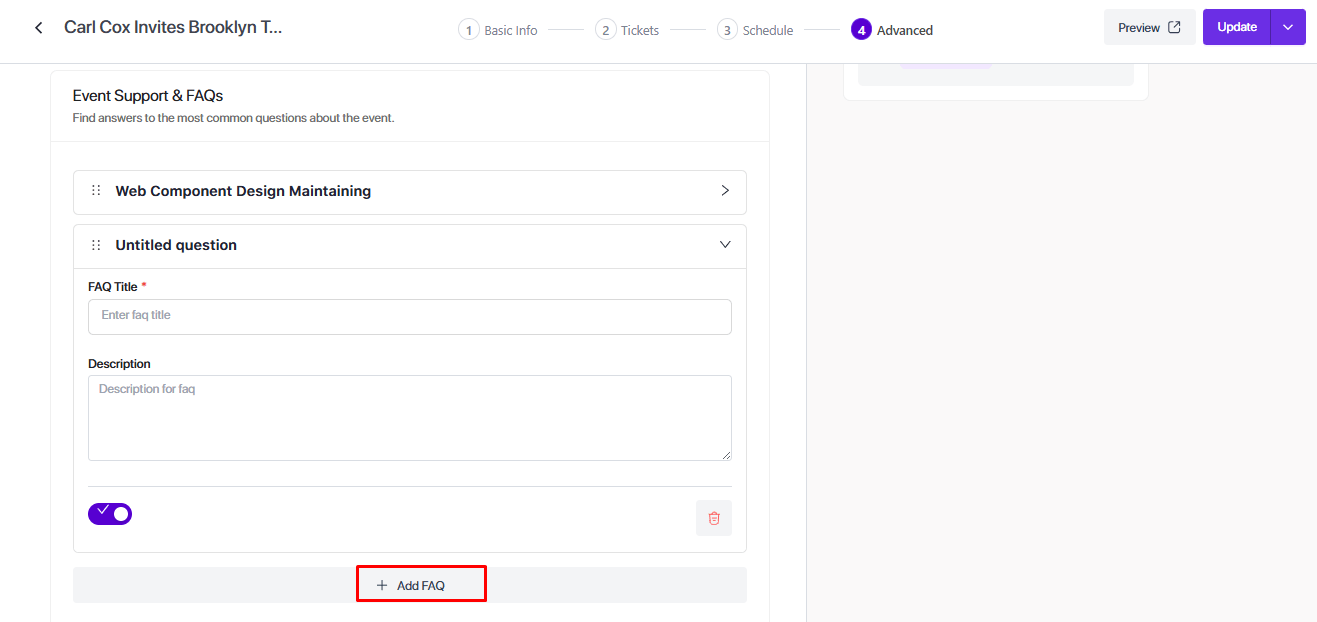
Event FAQs
- Add common questions and answers for attendees.
Design and links
- Calendar Color: Customize calendar colors.
- Social Media Links: Add social profile links.
- Attendee Page URL: Set a custom page link.
- External Event Link: Add an external URL if needed.
Other options
- Virtual Product: Enable for virtual events.
- Tax Status: Enable tax if applicable.
- SEO Meta Information: Set SEO details for search visibility.
- Third-Party Integrations: Connect supported tools.
Publish the Event #
After completing all steps:
- Click Save as Draft to save without publishing, or
- Click Publish to make the event live.
Your event is now ready and visible to attendees.
Frequently Asked Questions (FAQ) #
Q1: Can I edit an event after publishing?
Yes, you can edit all event details at any time. Changes will reflect immediately for attendees.
Q2: Can I set multiple ticket types?
Yes, you can add multiple ticket types with different prices, capacities, and availability periods.
Q3: Can AI-generated events be customized?
Absolutely. The AI generates basic content, but you can edit everything before publishing.
Q4: Are recurring events supported?
Yes, you can enable recurring events and set the frequency for each occurrence.
Conclusion #
Eventin provides a simple, flexible, and powerful way to create and manage events on your WordPress website. By following the step-by-step flow, you can quickly set up your event, manage tickets, schedule sessions, and offer a smooth experience for attendees. Whether using the guided onboarding, AI tools, or manual setup, Eventin is designed to make event management effortless and professional.


