
Overview #
The Eventbrite Import tool lets you bring your existing Eventbrite events into your WordPress site in a few clicks. You can import a single event using its Event ID, or import all events from a organizer using the Organizer ID.
1. Before you start #
You will need:
- An active Eventbrite account with at least one event.
- The Eventin plugin installed and activated on your WordPress site.
- Your Eventbrite Private API Key (we will get this in the next step).
2. Get your Eventbrite Private API key #
Step 1. Log in to your Eventbrite account.
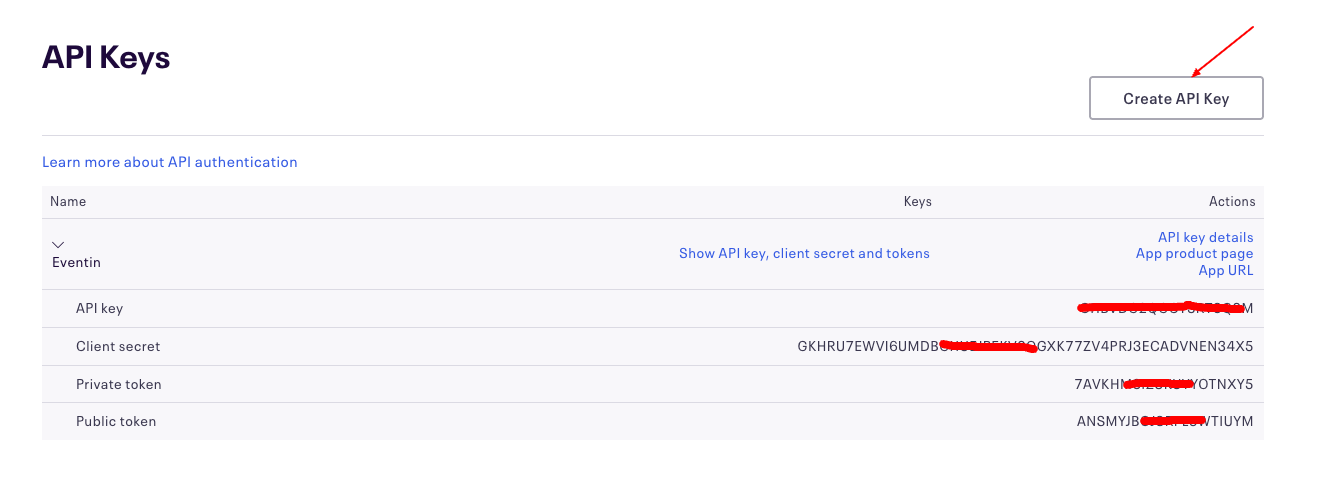
Step 2. Open this page in your browser: https://www.eventbrite.com/account-settings/apps
Step 3. Click “Create API Key” (or open an existing key).
Step 4. Copy the value shown under “Private Token”.
Step 5. Keep this token safe – do not share it publicly.
3. Connect Eventbrite to Eventin #
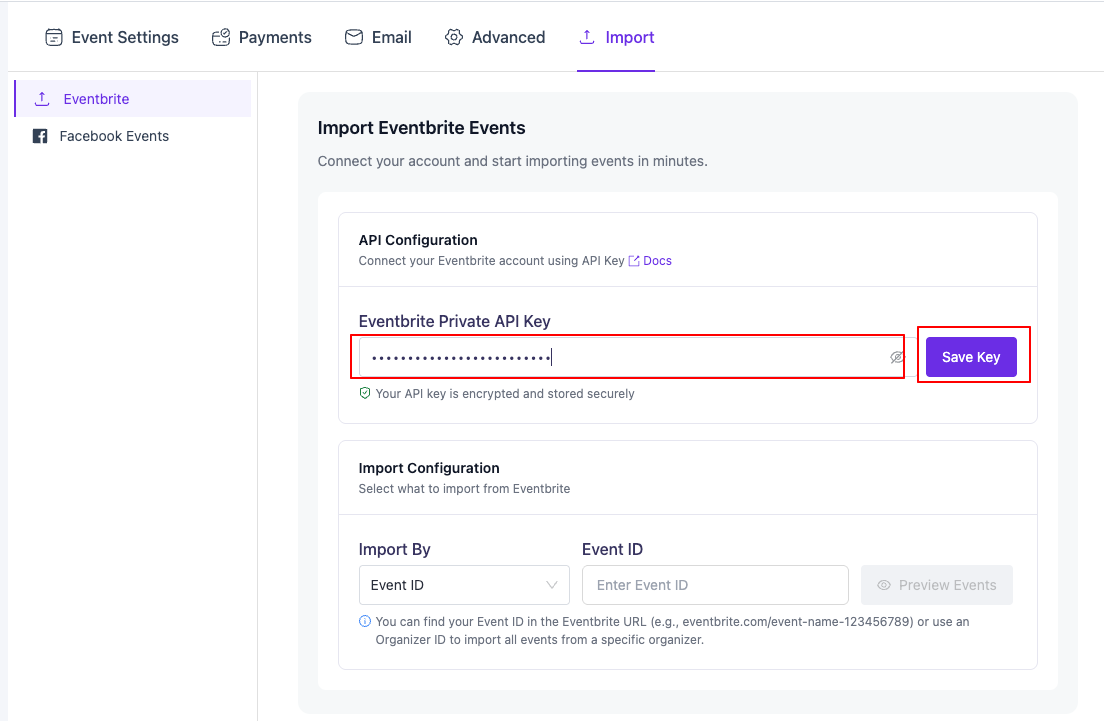
Step 1. In WordPress admin, go to: Eventin -> Settings -> Import -> Eventbrite
Step 2. Paste your Private API Key into the “Eventbrite Private API Key” field.
Step 3. Click the “Save Key” button.
Step 4. When the button label changes to “Connected”, your account is linked successfully.
4. Import your Event #
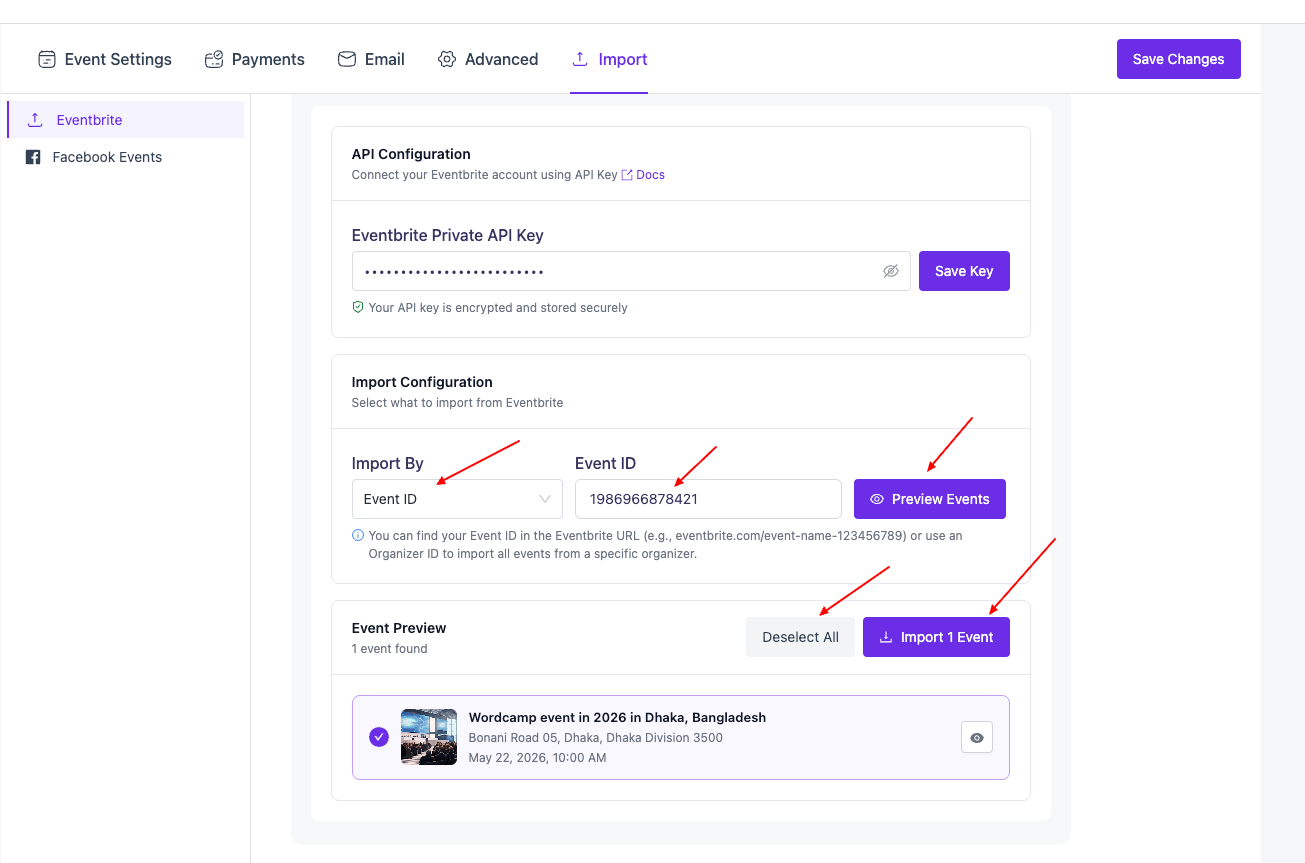
Step 1. In the “Import Configuration” section, choose how you want to import:
– Event ID -> imports one specific event.
– Organizer ID -> imports every event from that organizer.
Step 2. Enter the matching ID in the input field.
Tip: You can find the Event ID at the end of your Eventbrite event URL, for example: eventbrite.com/e/your-event-name-123456789 The number “123456789” is the Event ID.
Step 3. Click “Preview Events”.
Step 4. Wait a moment while Eventin fetches your events.
Step 5. The “Event Preview” section will show every event found. By default, all events are selected.
Step 6. Uncheck any events you do not want to import, or use “Select All” / “Deselect All”.
Step 7. Click the purple “Import X Events” button to start.
Thinks to know #
- Duplicates are detected automatically. Re-importing the same event will skip or update it, never create a copy
- The key is saved once. You do not need to paste it again the next time you visit this page
- If you change the “Import By” option, the preview list is cleared so you can start fresh.
- Imports run one event at a time, so a large organizer may take a short while to finish. Please keep the page open.
Need More help? #
If you are stuck, contact Eventin support with:
- A screenshot of the error message.
- The Event ID or Organizer ID you were importing.
- Your WordPress and Eventin version numbers.


