Aisentic is an intelligent AI-powered assistant designed specifically for WordPress event management. It helps you manage your events, answer customer queries, and streamline your workflow—all through a simple chat interface. Whether you’re a seasoned event organizer or just getting started, Aisentic makes WordPress event management effortless.
In this guide, you’ll learn how to install and set up Aisentic, complete the onboarding process to claim your free tokens, and configure the chatbot widget to appear on the right pages.
Prerequisite: This guide assumes you have a WordPress site with Aisentic plugin installed. If you haven’t installed the plugin yet, head to your WordPress dashboard → Plugins → Add New → Search “Aisentic” → Install and Activate.
Step 1: Complete the Onboarding Process #
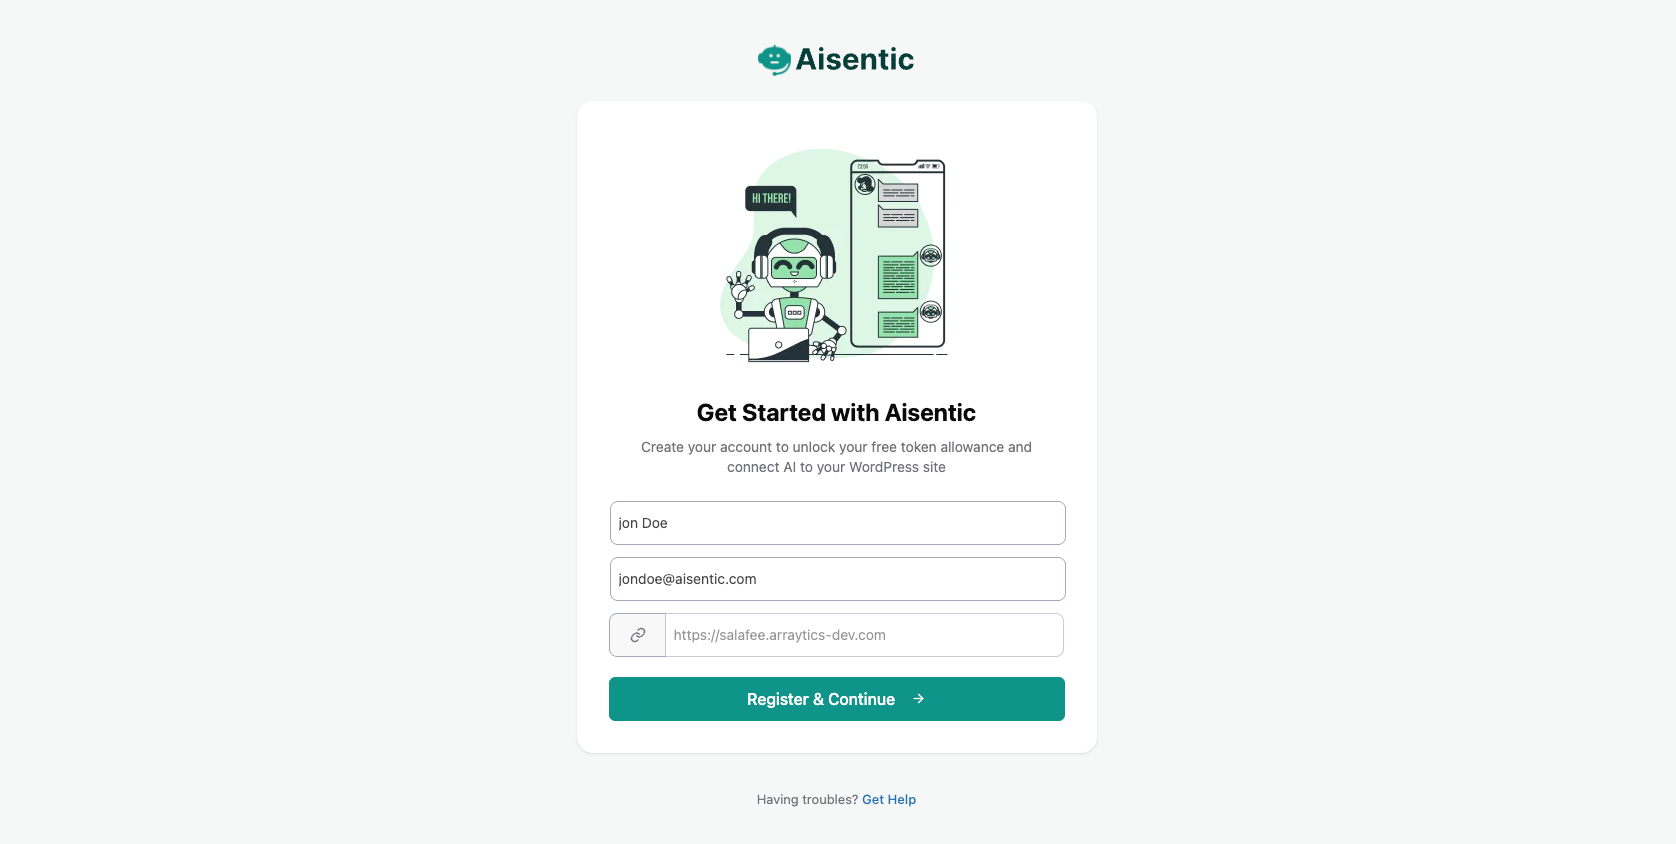
Once you install and activate the Aisentic plugin, you’ll be automatically redirected to the onboarding page. This is where you register your WordPress site to get started.
On the onboarding page, you’ll find a registration form. Fill in your details:
- Name: Enter your first name or full name
- Email: Provide a valid email address
After filling in the form, click the Register button to proceed.
Step 2: Explore the AI Configuration Page #
After successful registration, you’ll be redirected to the Aisentic plugin’s settings page, specifically the AI Configuration tab.
Here you’ll find:
- Current Plan: Displays your active subscription plan
- Available Tokens: Shows how many tokens you have left to use
- Tokens Used: Tracks how many tokens you’ve consumed
On the right side of this page, you’ll also see the Aisentic chatbot widget bubble—your gateway to AI-powered assistance.
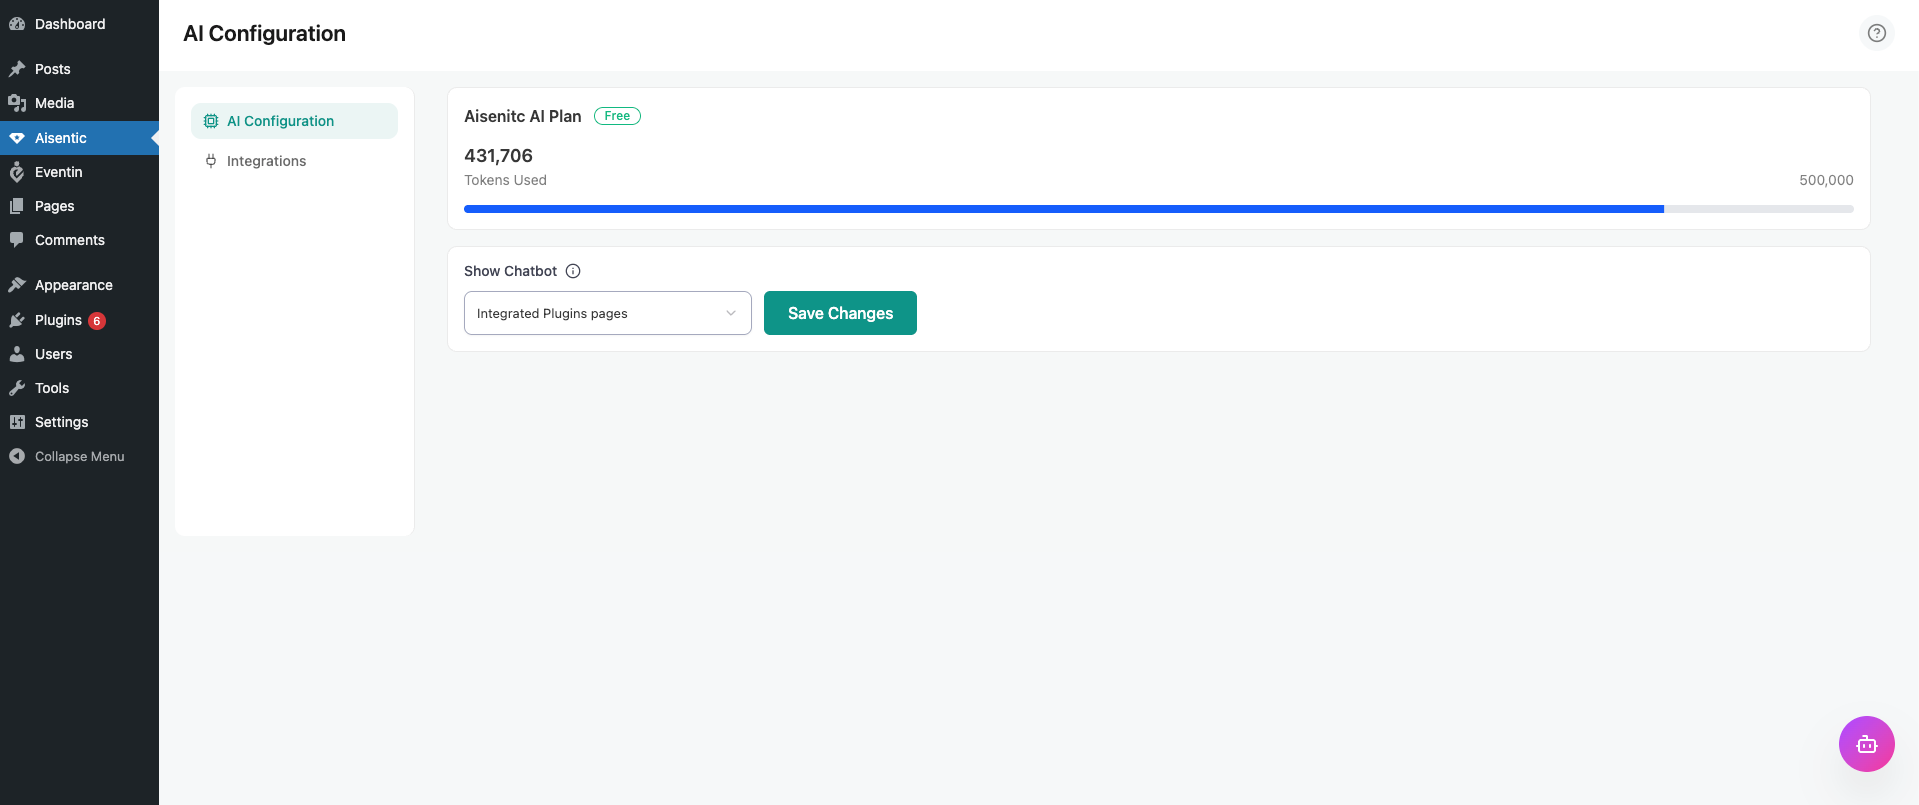
Step 3: Control Chatbot Visibility #
One of the key features is controlling where the chatbot widget appears on your WordPress admin panel. You can manage this directly from the AI Configuration page. Now it offers two visibility options:
Option 1: All Pages
The chatbot will appear on every page within your WordPress admin panel—including the dashboard, settings pages, and third-party plugin pages like Eventin, WP Cafe, and others.
Option 2: Integrated Plugins Pages:
The chatbot will only appear on pages related to plugins that are integrated with Aisentic, such as Eventin event management pages.
Tip: If you’re using Aisentic primarily for event management, choose “Integrated Plugins Pages” to keep your admin panel clean and focused.
Now, you’re now ready to start using AI to manage your WordPress events. Try asking the chatbot something like “Show me upcoming events” or “Create a new event” to see it in action!
Frequently Asked Questions #
Q1: Do I need to pay to use Aisentic?
A: No! Aisentic provides a free token allowance when you complete the onboarding process. You can use these tokens to explore all AI features at no cost. Once your tokens are used up, you can upgrade to a paid plan.
Q2: What happens if I skip the onboarding?
A: The onboarding process is essential to activate your free tokens and register your site. Without completing it, you won’t have access to the AI features. You can revisit the onboarding anytime from the Aisentic settings.
Q3: Is Aisentic only for Eventin users?
A: Not at all. While Aisentic integrates seamlessly with Eventin, it works with other WordPress plugins and general WordPress management tasks as well.
Conclusion
Getting started with Aisentic takes just a few minutes. By completing the simple onboarding process, you unlock powerful AI capabilities that make managing your WordPress events faster and easier. Configure the chatbot visibility to match your workflow, and you’re all set!
Ready to take your event management to the next level? Explore our guide on [“How to Manage Eventin Events with Natural Language”](#) to see Aisentic in action.


