Overview #
Add detailed per-product nutrition facts (calories, macros, vitamins) and allergen warnings to any WooCommerce product. WP Cafe ships a dedicated Nutrition & Allergens tab inside the product data panel — values render automatically on every WP Cafe product card and details popup so customers can make informed decisions.
Requirements #
| Prerequisite: Make sure WP Cafe and WooCommerce are installed and active. |
Step 1: Open the Nutrition & Allergens Tab #
- From the WordPress dashboard, go to Products → All Products and open any product.
- Scroll to the Product Data box.
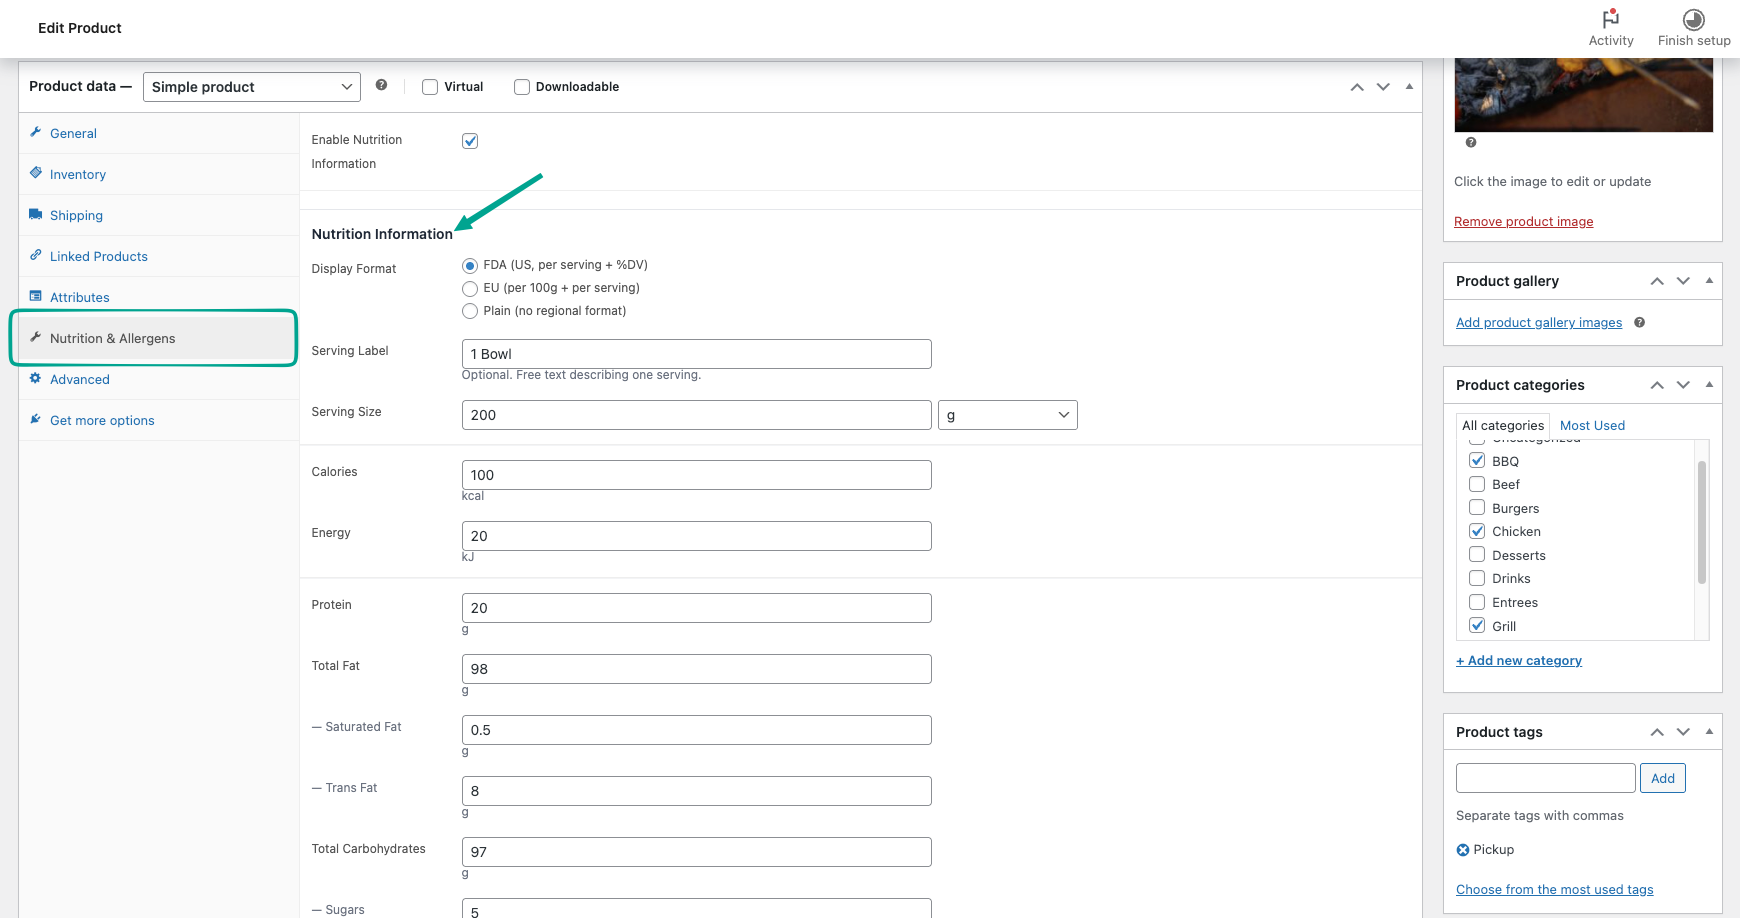
- Click the Nutrition & Allergens tab in the left rail (between Inventory and Linked Products).

Step 2: Enable Nutrition Information #
- Tick Enable Nutrition Information at the top of the panel.
- Pick a Display Format: FDA (US) — per serving + %DV, EU — per 100g + per serving, or Plain — no regional formatting.
- Set Serving Label (e.g.
1 bowl,2 pieces) and Serving Size + Unit (g, ml, oz, fl oz, pieces).
Step 3: Fill in the Nutrition Values #
Enter what you have — leave the rest blank. Empty fields are skipped on the frontend.
- Calories (kcal) and Energy (kJ)
- Protein (g)
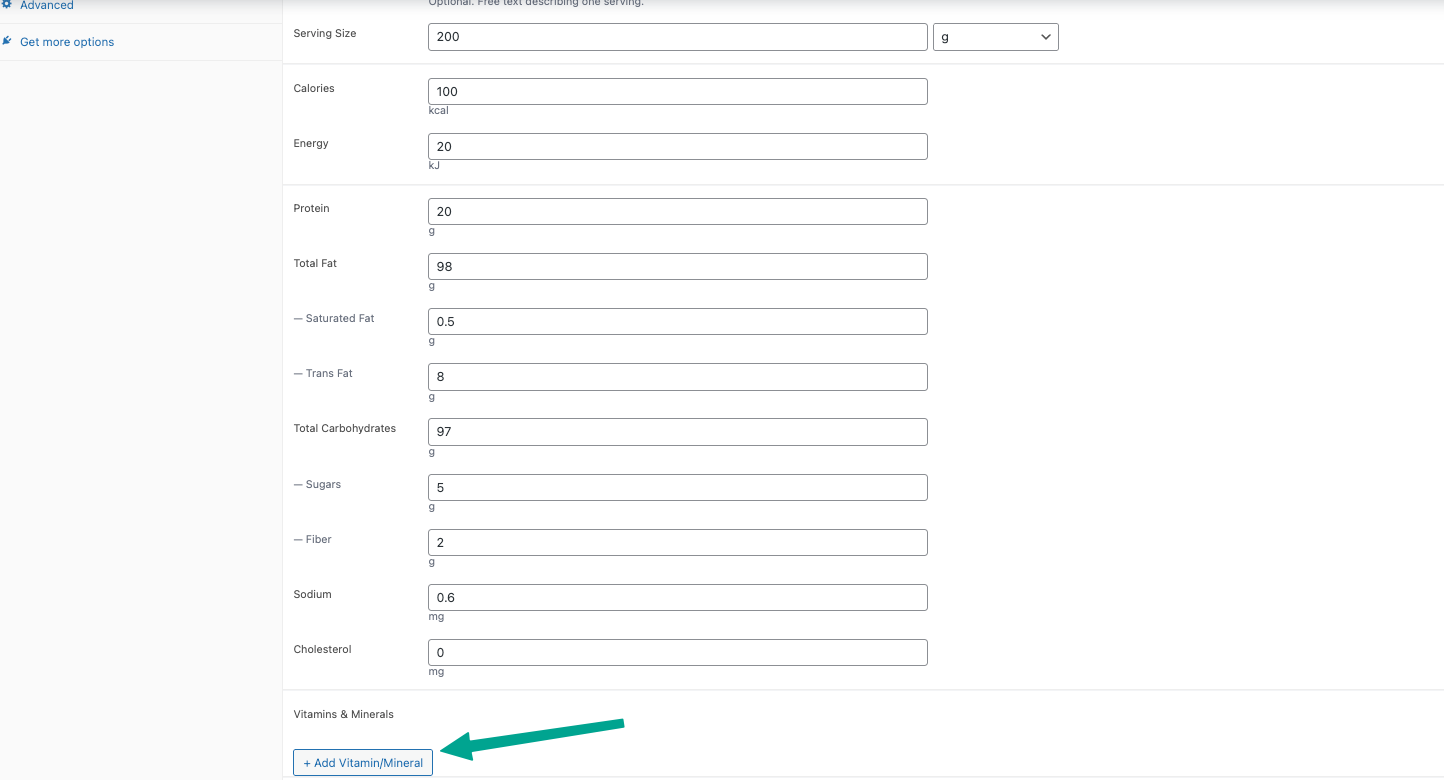
- Total Fat (g) → Saturated Fat, Trans Fat
- Total Carbohydrates (g) → Sugars, Fiber
- Sodium (mg)
- Cholesterol (mg)
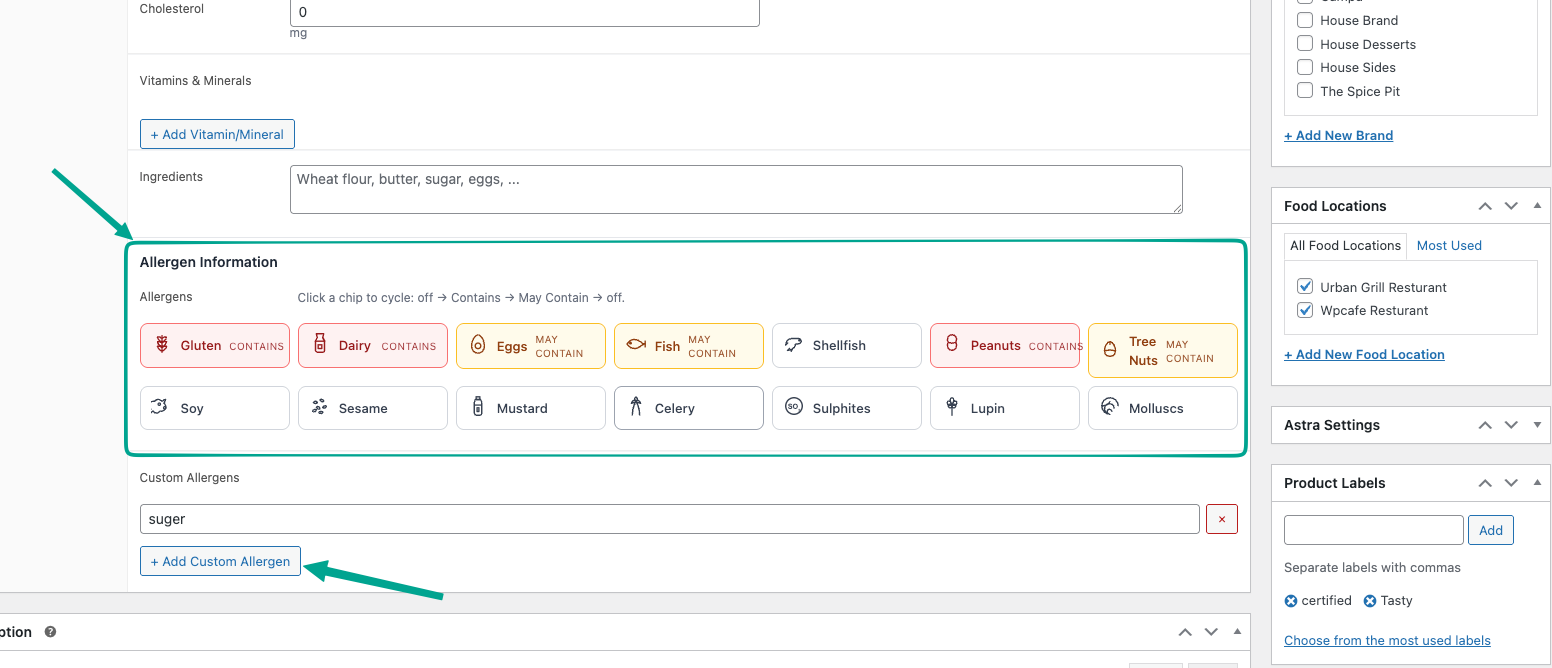
Step 4: Add Vitamins, Minerals, and Ingredients #
- Under Vitamins & Minerals, click + Add Vitamin/Mineral.
- Enter a name (e.g.
Vitamin D), a value, and pick a unit (% DV,mg,µg,IU). - Repeat for as many entries as needed; click
×to remove a row. - In the Ingredients textarea, list ingredients in plain text (e.g.
Wheat flour, butter, sugar, eggs, ...).
Step 5: Mark Allergens #
In the Allergen Information section, you’ll see a grid of preset allergen chips (gluten, dairy, eggs, nuts, etc.).
- Click any chip to cycle its state: off → Contains → May Contain → off.
- The chip color and badge update to reflect the current state.
- To add a non-preset allergen, scroll to Custom Allergens, click + Add Custom Allergen, and type the name.
Step 6: Save and Preview #
- Click Update at the top right of the product edit screen.
- Visit any page that uses a WP Cafe shortcode (e.g.
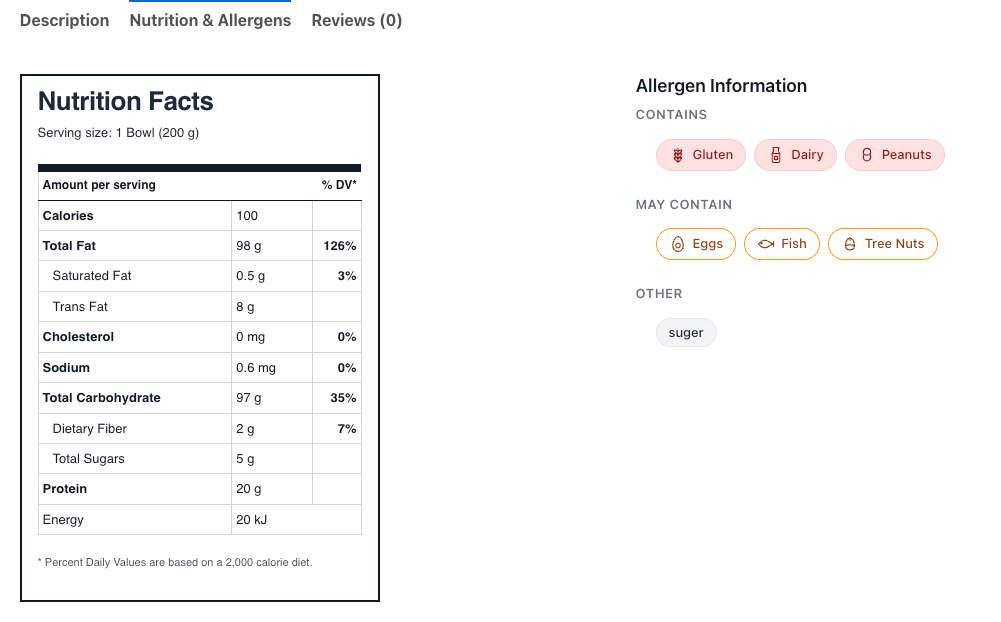
[wpc_food_menu_list]). - Open the product details popup — nutrition facts and allergen chips render below the description, formatted per your chosen Display Format.

Frequently Asked Questions (FAQ) #
| Q1: I filled the fields but nothing shows on the frontend. What’s wrong? The Enable Nutrition Information toggle at the top of the panel must be checked. If it’s off, all values stay hidden on the frontend even though they’re saved. Toggle it on and click Update. |
| Q2: What’s the difference between Contains and May Contain on allergen chips? Contains means the ingredient is intentionally in the product. May Contain means the kitchen handles that allergen and cross-contamination is possible (shared equipment, shared fryer, etc.). Both render with distinct colors so customers can tell at a glance. |
| Q3: Can I leave most fields blank if I only know calories and a couple of macros? Yes. Empty fields are skipped on the frontend only the values you fill render. Start with calories + serving size and add the rest over time. |
Conclusion #
Open any product, switch to Nutrition & Allergens, fill what you know, and your menu instantly carries clear, scannable nutrition + allergen info for every customer.


