If you want to show events on any external/third-party website without installing the Eventin there, then Script is the option you need. There are multiple advantages of the script.
- Send real-time data to other websites without any hassle
- It’s efficient to communicate with third-party websites
- It doesn’t involve communication when no relevant affairs have occurred
To get the script, you will need the following plugin.
For the script, you will need to follow three simple steps. Connect to the domain, generate scripts, and use the scripts.
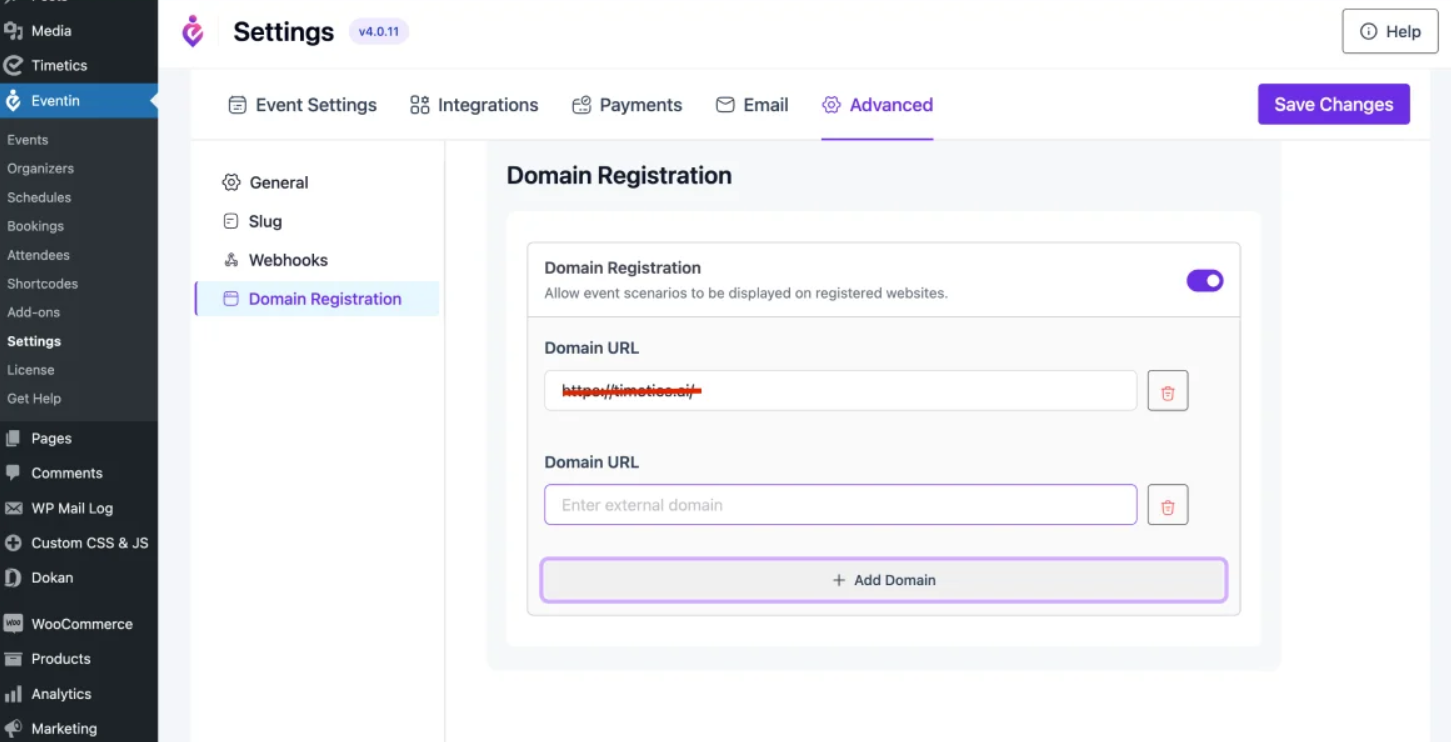
Connect the Domain #
Once you have installed the plugins, you are ready to get started. First of all, you will need to connect the domain at the eventin. The domain name is the domain where you want to send the date of your event with a script.
Go to Eventin from your WordPress dashboard and click on “Settings“, then click on the “Advanced” tab. There you can see a toggle button. Enable this section to access Domain Registration. An input box will be open there.

Add the domain name and click on the “save changes” button. Your domain will be connected to Eventin. You can add multiple domains and remove them, too.
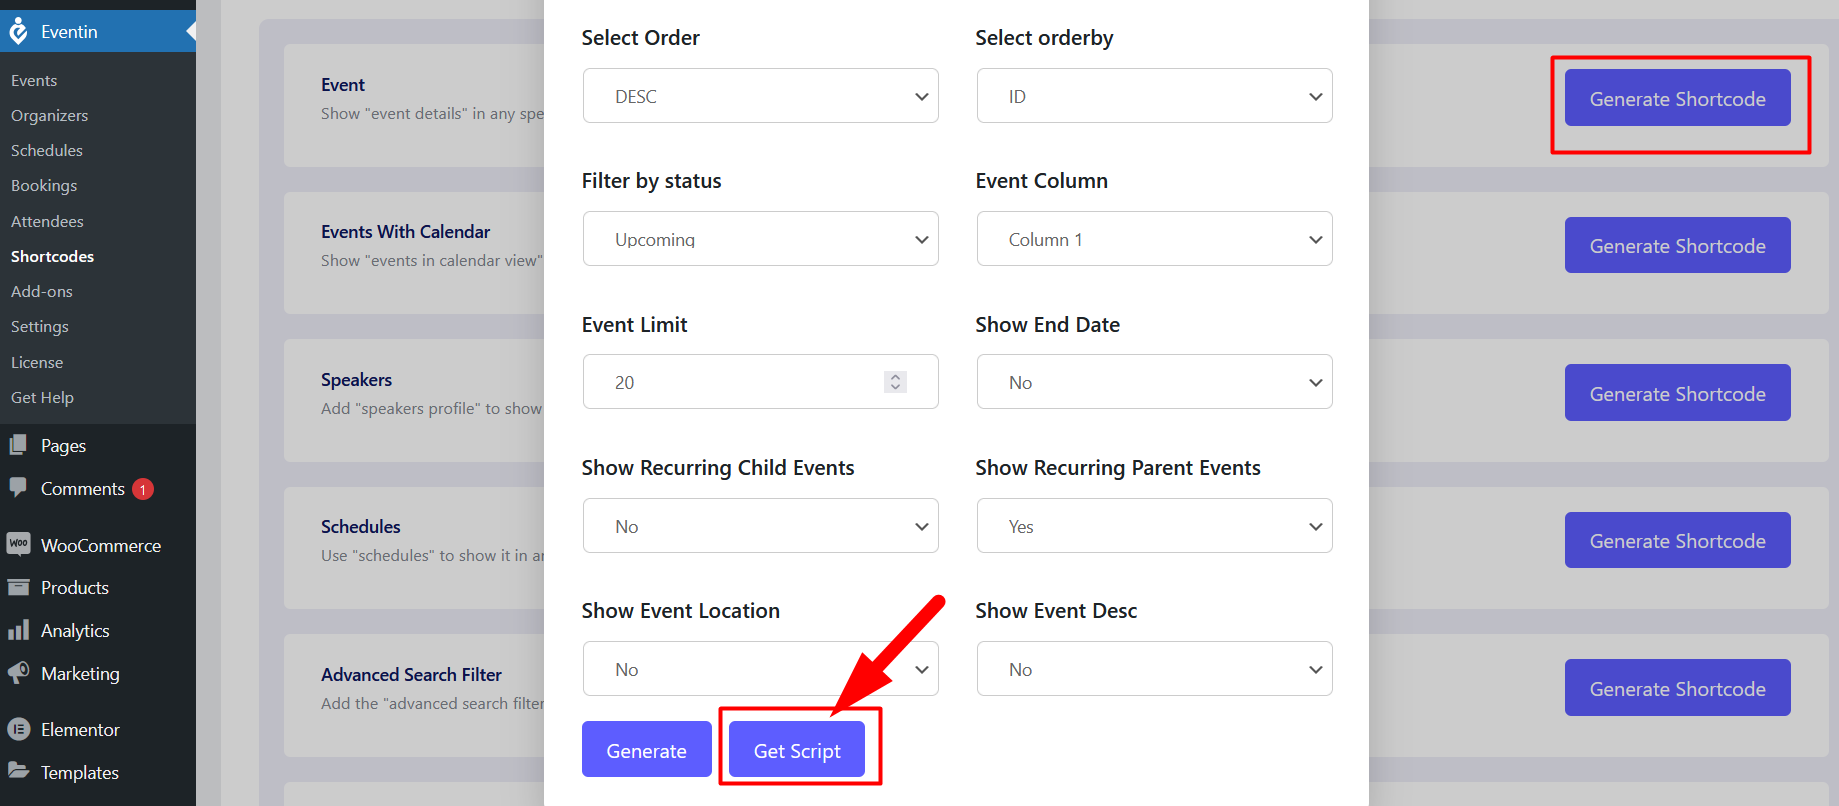
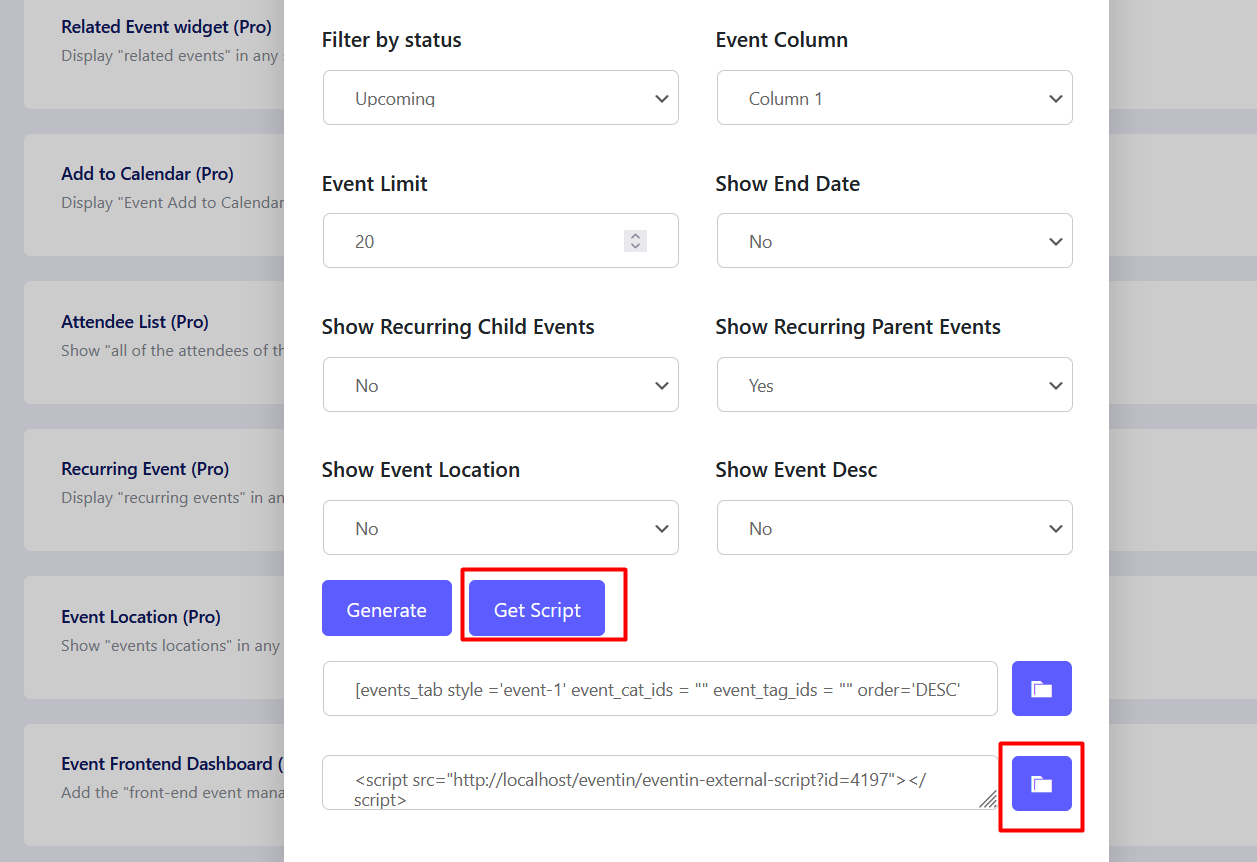
Generate Script #
Now you need to generate the script. You can generate a script from the events list page or the shortcode generation page. First, let’s see the shortcode options. Go to the shortcode option from the eventin’s menu. Click on “Shortcode“. It will pop up new options. You can see two options, “Generate ” and “Get Script“. Generate the shortcode and then click on “Get script“. Now copy the script for future use.
To generate a script from the event page, go to events and click on the events. For each event, you can see the “Get Script” options. It’s beside the edit options. Click here and copy the script.
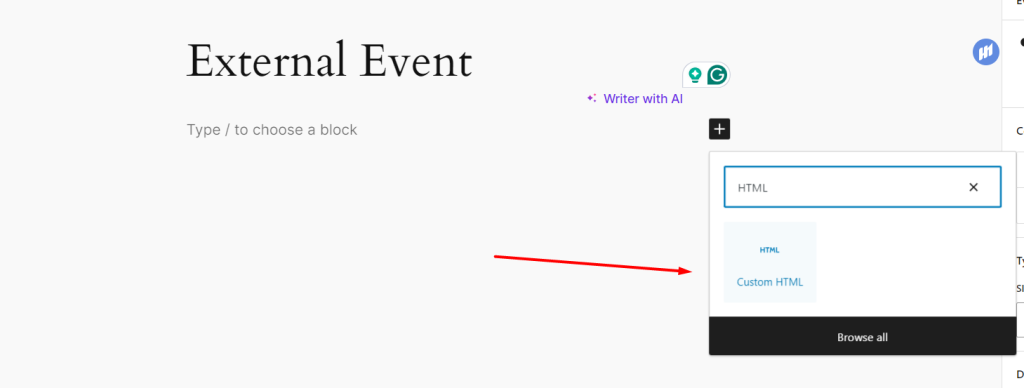
Use the Script #
Go to the third-party website and paste the script under the HTML block. You have done it. Just publish the page and it will work fine.
The front-end view of the Eventin script on the third-party website.


