Important- If you want to get attendee registration for your event, then WooCommerce plugin installation will be a must. Without installing WooCommerce, you will not be able to sell tickets and get attendee registration details from your event. Also, you can use the Stripe Payment method if you don’t want to use WooCommerce.
Enable Attendee Registration #
Get attendee details with Attendee registration. From your dashboard, go to Eventin->Settings->Event Settings->Attendee->Enable attendee registration. Enable this option and you will see a tab on your Eventin dashboard to manage attendees.
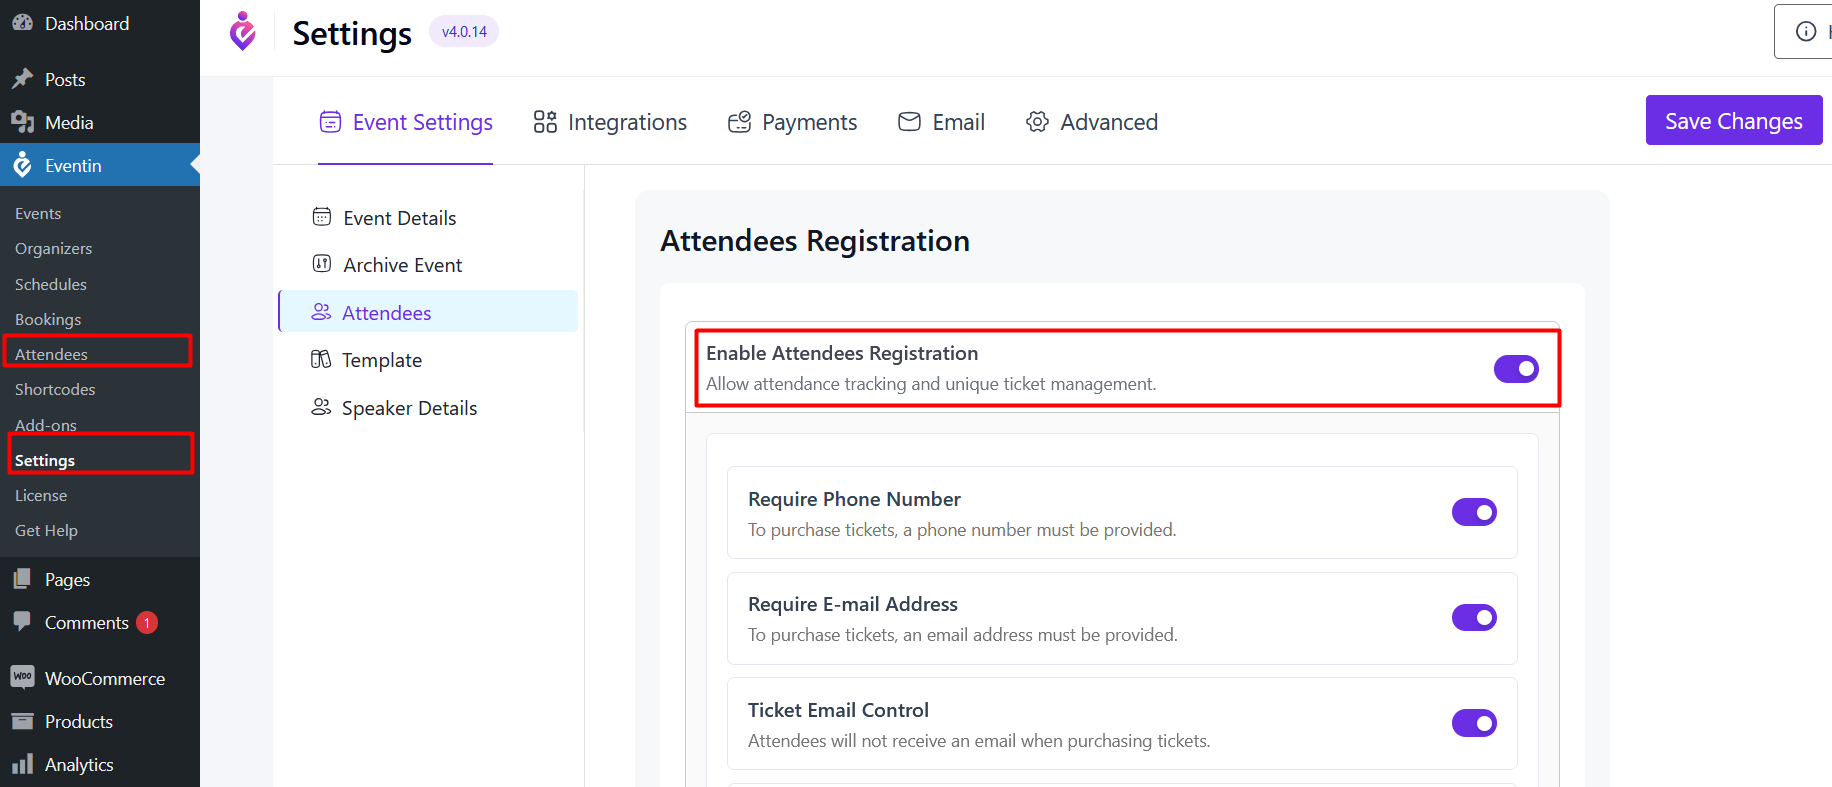
If you want to require the phone and email for registration then enable “Require Phone for Registration” and “Require E-mail for Registration” options. Click Add button and add extra fields for attendee registration. Give input label name, then select your input type (Text & Number) then input your placeholder name.

🔹 NOTE: Enabling Attendee registration will make it mandatory for attendees to fill up the Attendee Details Form during ticket purchase.
🔹 NOTE: When you enable Require phone for registration and Require e-mail for registration, then the attendee has to give the attendee phone number and email. Otherwise, the attendee can’t confirm the ticket.
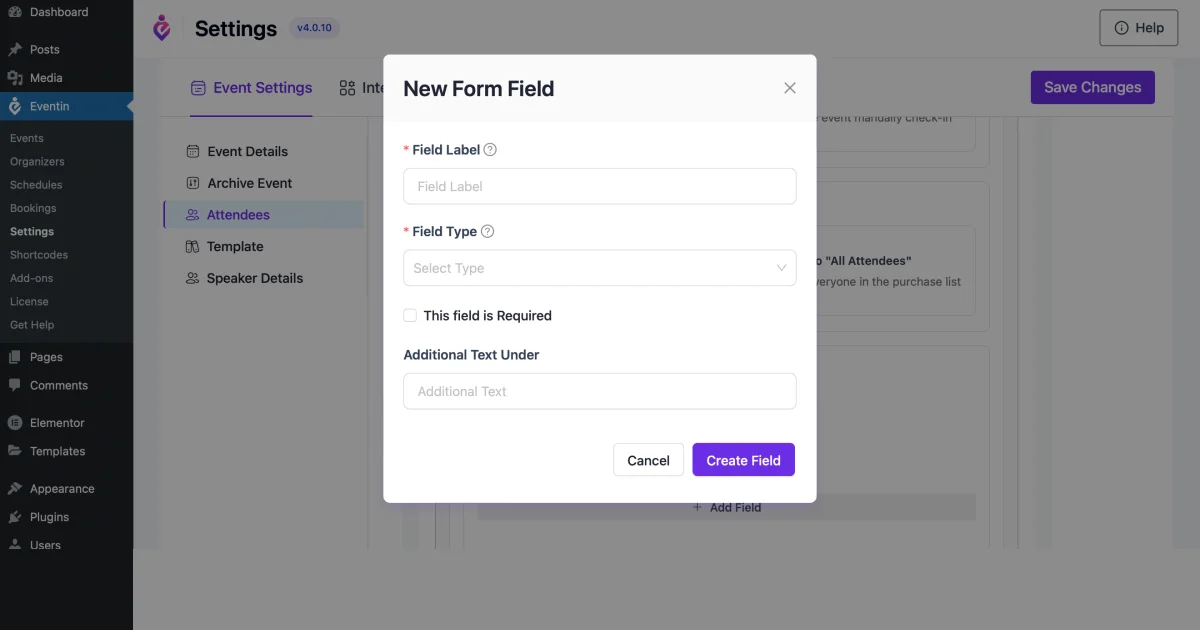
Attendee Extra Fields(Pro) #
If you want to add the extra fields on your registration form, you can add them from the settings.

Front-end Attendee registration form with email and phone.

Purchaser email on the checkout page. The purchaser will get a mail with the ticket details at this email address.

Ticket Download from Admin #
You can download the attendee Ticket from the attendee list as a PDF file. The Unique Ticket ID will be written on the ticket.
🔹 View Attendee Ticket Details

Setup Admin Email #
From your dashboard, select Eventin->Event Settings->Email Settings->Admin email address. Set the admin email you want to use for sending attendees’ emails.
🔹 NOTE: The email address Purchaser provides during checkout will be the email where the admin’s emails will be sent. See Checkout Page Purchaser Email

Ticket email to the purchaser #
Ticket Purchaser will receive an email with attendee ticket information and a link to update attendee details. The Purchaser can edit and update information from their mail. The purchaser can also download tickets from the mail.

The purchaser can download the attendee ticket form here and also can update attendee information if needed.


The purchaser will also get an email from WooCommerce that the order has been received.

Unique Ticket ID of Attendees #
Ticket purchasers will get an email with their ticket details once they register. A Unique Ticket ID will be emailed with the attendee details to the email the purchaser registers with during checkout.
🔹 NOTE: You can read our documentation on Selling Tickets to learn more about these features related to Ticket management.

Export Attendee Report(Pro) #
You can export all selected attendees as CSV files. You can select Attendees as date, event, payment status, and ticket status. To Export Attendee Report, select your attendee and export the CSV file.

Failed Payment Attendee #
Set a duration for attendees to pay for their tickets. You can set the number of days for attendees to pay. After that time, the ticket will be canceled and it will automatically be updated on your event page. Goto Eventin-> Settings-> Event Settings->Attendee->Remove Attendees After Failed Payment

