Eventin makes it easy to transform your WordPress website into a full-featured multivendor event marketplace. With its seamless integration with Dokan Multivendor and WooCommerce, Eventin allows multiple event organizers or vendors to register, create, and sell their events directly on your platform. Each vendor receives a dedicated dashboard to manage their events, track ticket sales, and monitor revenues, giving them full control over their offerings while you maintain oversight as the platform owner.
Key Features of Eventin Multivendor Marketplace:
- Vendors can create, edit, and manage their own events.
- Support for single-tier and multi-tier ticketing for each event.
- Dedicated event store for each vendor to manage offerings efficiently.
- Flexible commission and profit-sharing system between marketplace owners and vendors.
- Seamless integration with Dokan Multivendor and WooCommerce for payments, memberships, and vendor management.
With Eventin, building a professional, monetized, and scalable event marketplace has never been easier. Vendors focus on delivering great events, while you manage the platform and revenue streams.
Follow along with this video guide for a complete walkthrough:
Installing and Activating Required Plugins #
You need to install 4 plugins to get the complete set of functionality for this addon. From your dashboard, install and activate the following plugins:
- Eventin(Free)
- Eventin(Pro)
- WooCommerce
- Dokan(Lite)
Note: Without Eventin Pro, the “Event” menu will not appear in the vendor dashboard. After installing and activating the plugins, go to Settings → Permalinks → Post Name → Save Changes.
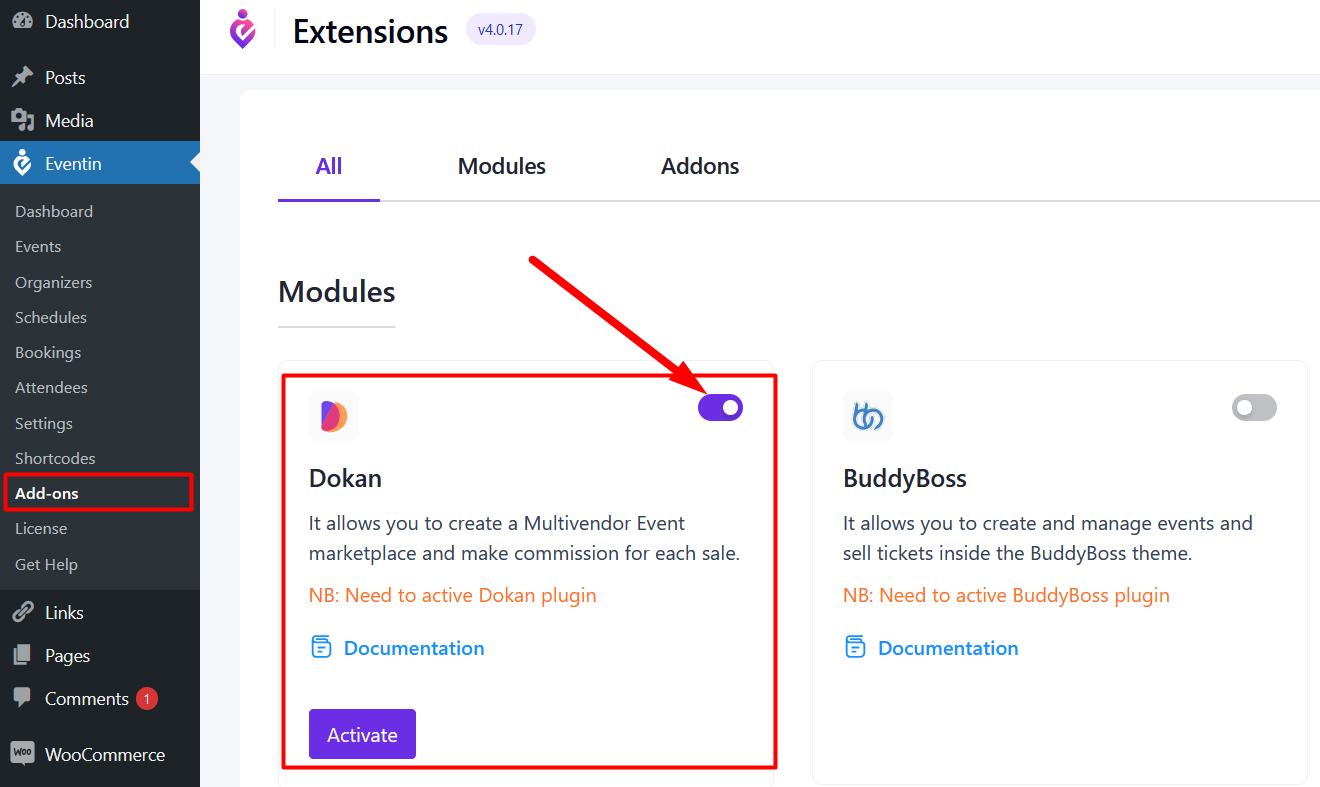
Dokan Addon Enable #
To get the “Event” menu from the Vendor dashboard, go to the Eventin -> Add-ons and enable the “Dokan” module.
WooCommerce Settings #
Get WooCommerce payment gateways for your site. Go to WooCommerce -> Settings -> Payment and enable your preferred payment method. Check out the WooCommerce Documentation to learn more about its features.
Add Vendors in Dokan #
With Dokan, you can add multiple vendors to your page. Later, vendors can submit the events as products on your website. From the Dokan dashboard, you can create vendors. Go to Dokan -> Vendors -> Add the necessary information, then click Create Vendor.

Check out the Dokan Documentation to learn more about its features.
Vendor Dashboard #
Vendors can access the dashboard by logging in with their vendor account. The Eventin setting option is available there.
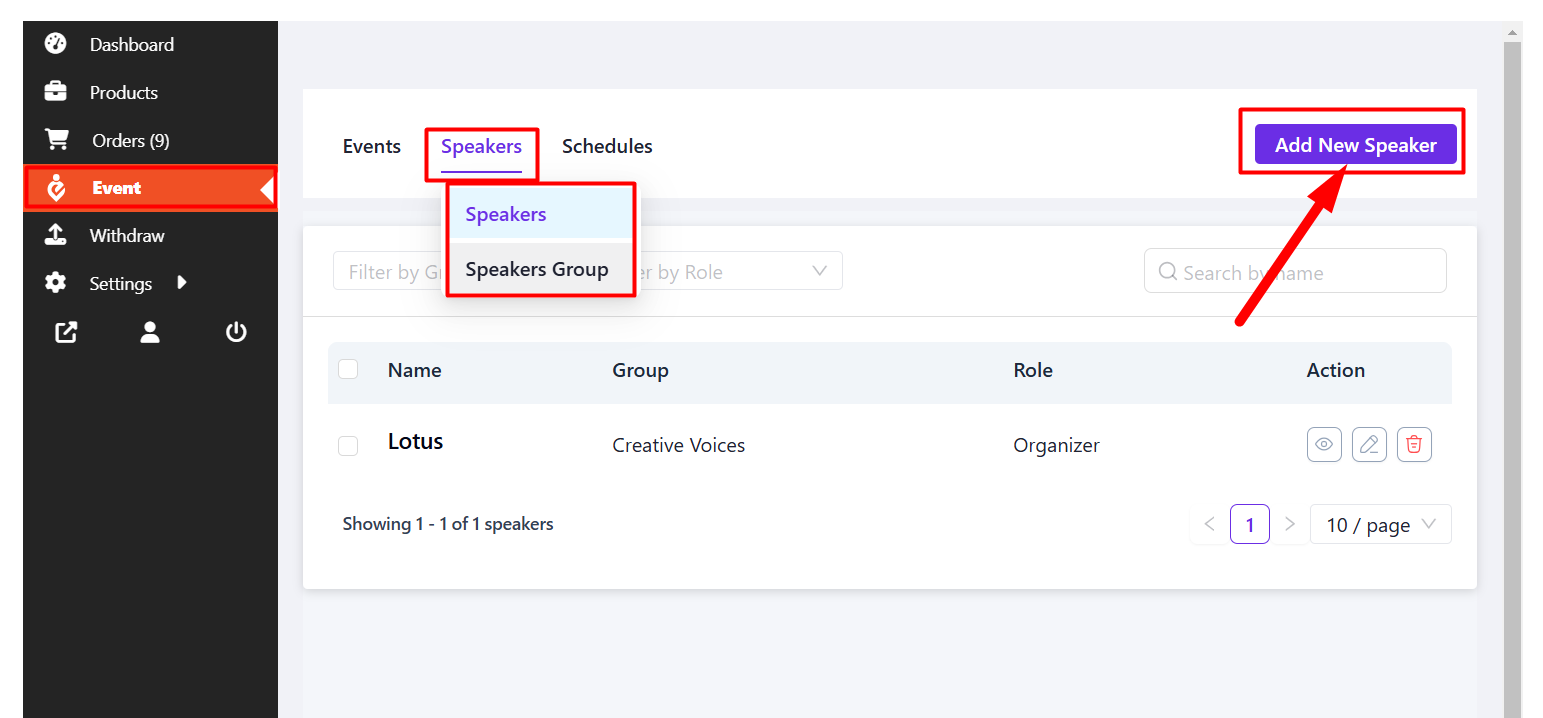
Add Speakers #
To add a speaker from the front end, go to the Speakers tab. Now, you will see the speaker and speaker group menu. From here, you can add the speaker group first.
Then add the speaker and assign the speaker group to the speaker you have created.
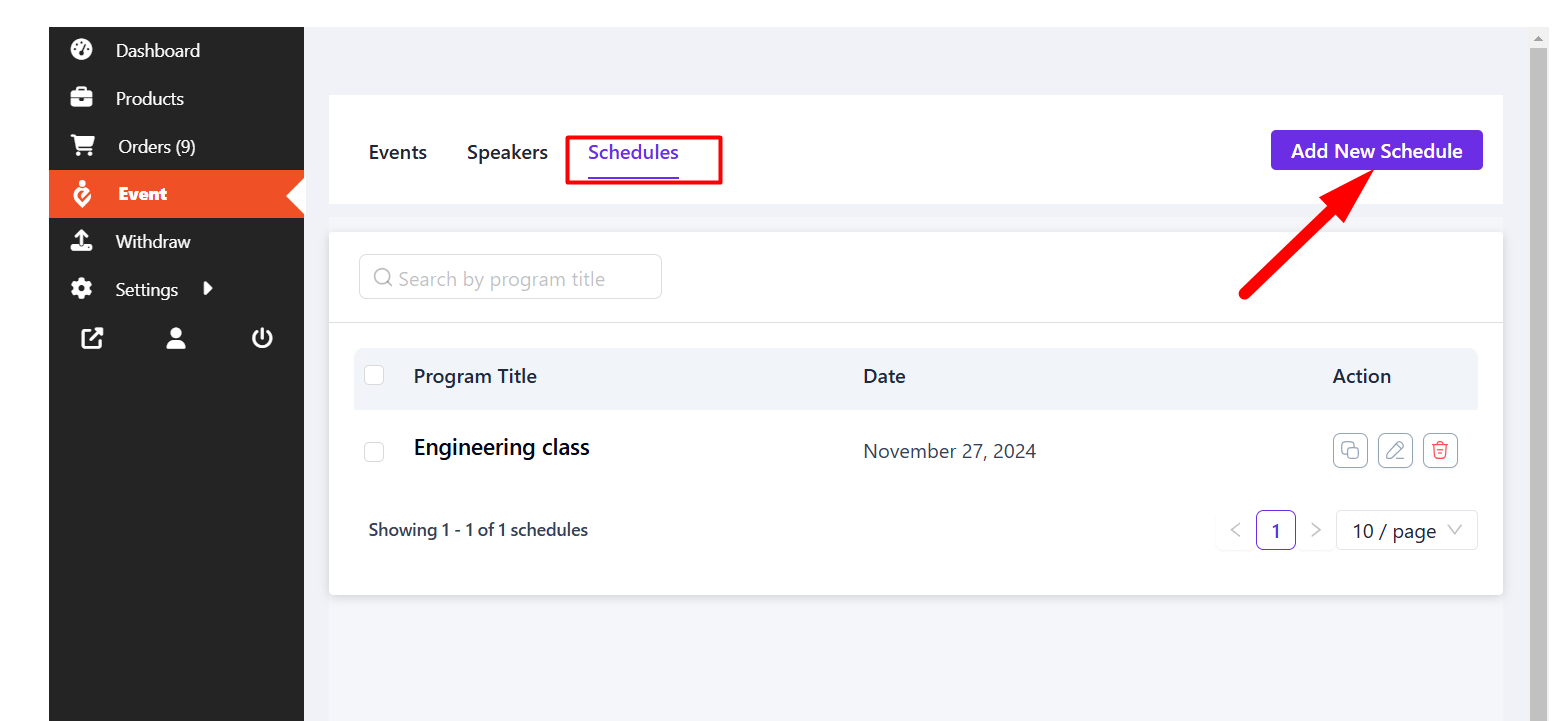
Add Schedules #
To add the event Schedule from the front end, you have to go to the Schedule tab. Now, click on the “Add New Schedule” button in order to get started and submit the schedule after inserting the information.
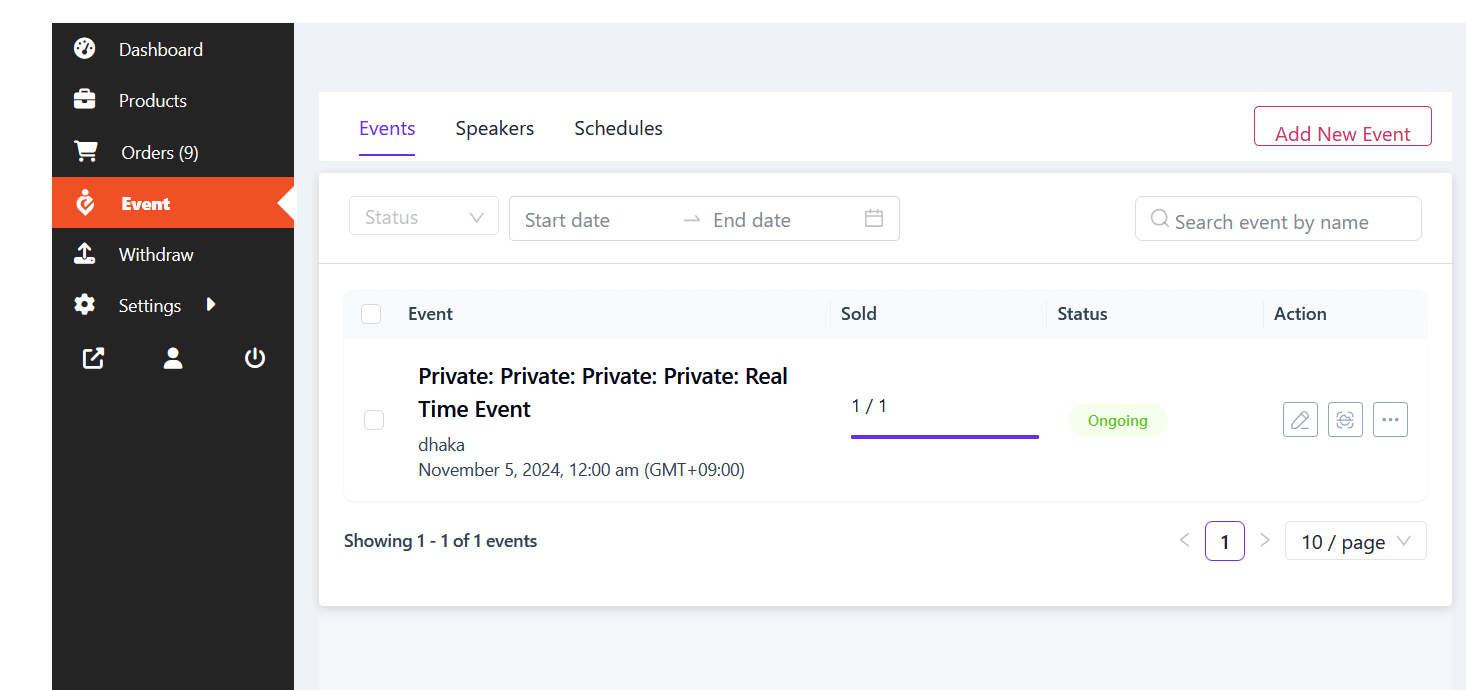
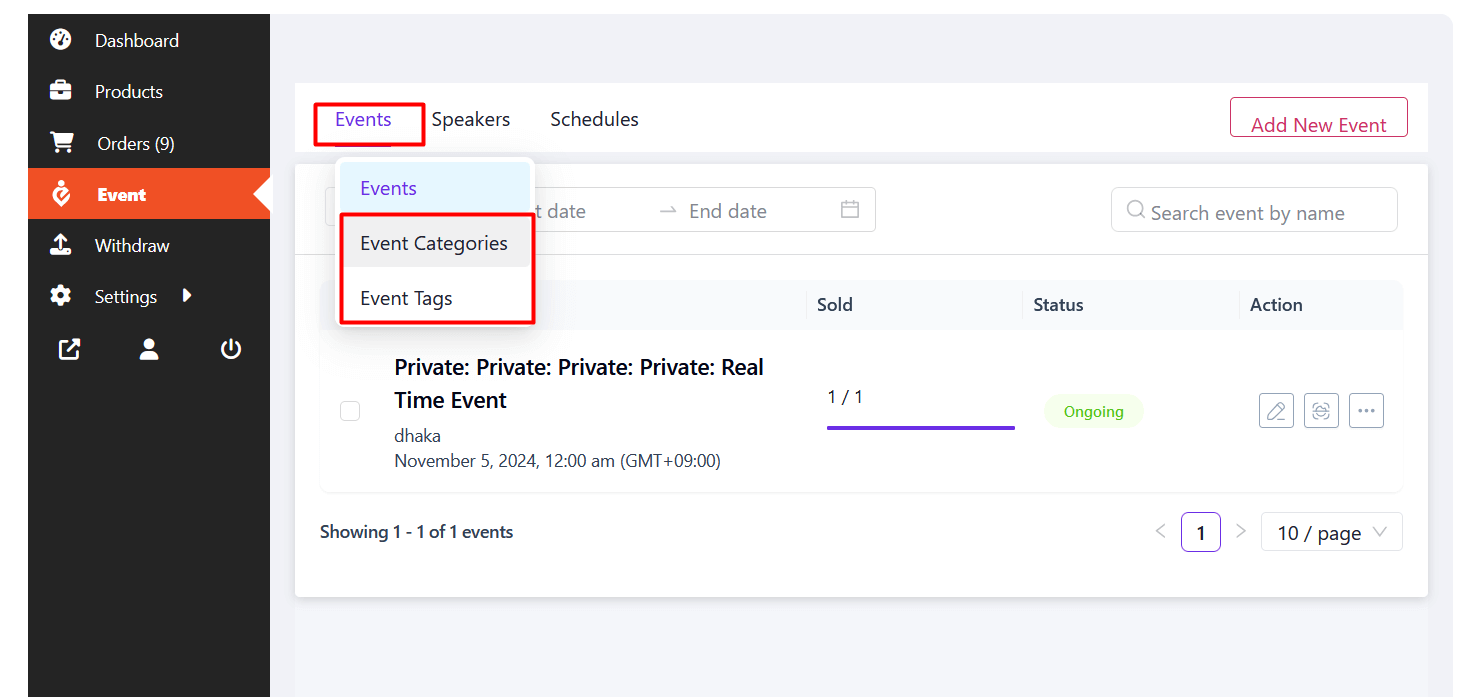
Add Events #
Before adding an event, you can add the event tags and categories from the event menu.
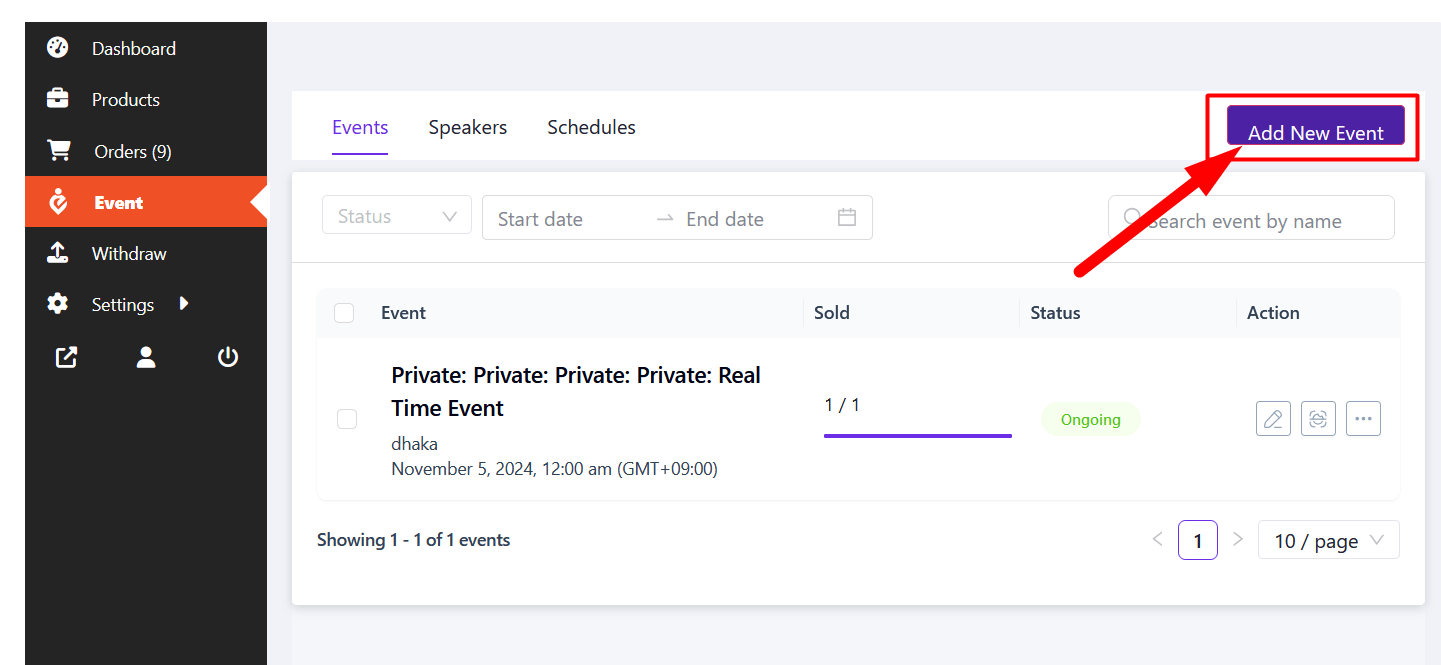
Vendors can add new events, which will work as Event submissions for the marketplace owner. To add an event, click on the “Add New Event” button.
These events will show up for individual vendors’ stores. Once you click the button, you will need to add event-related Basic inofrmation. After adding, click on Create button. information.
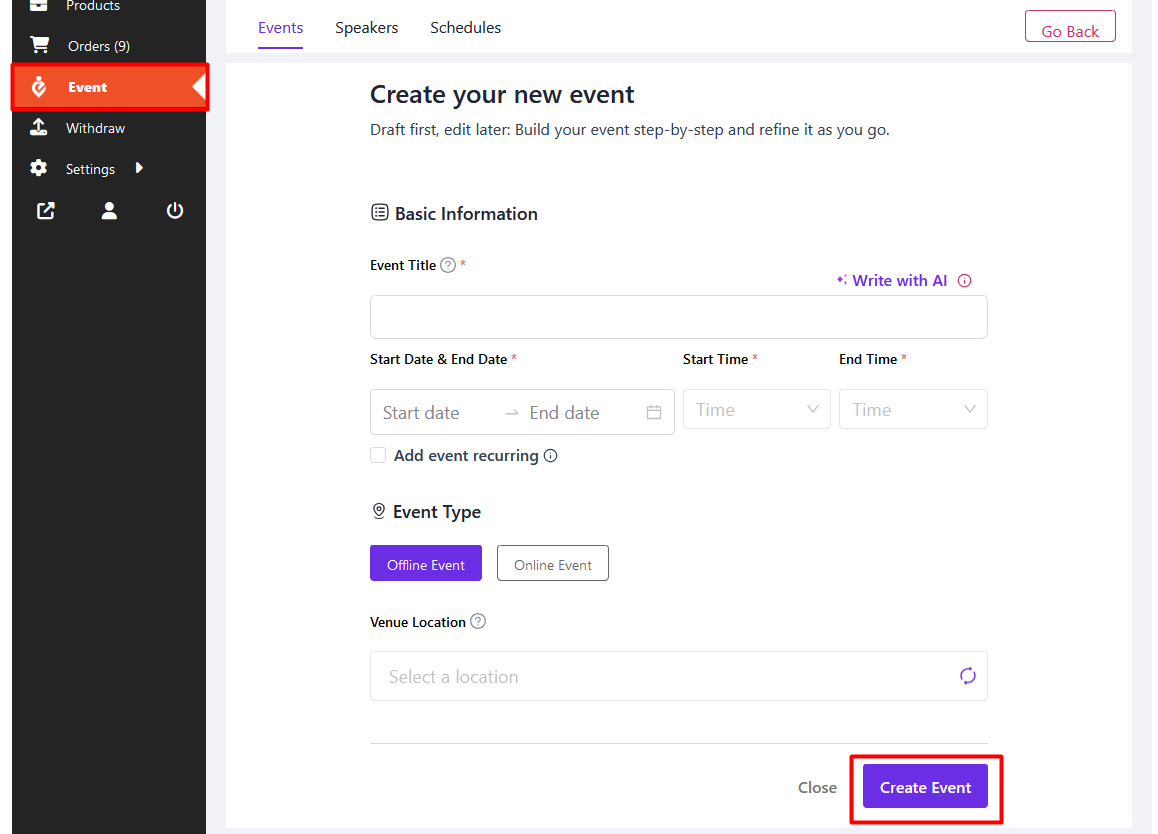
Follow the Documentation to add all the event information for your event.
After adding all information, click on the Save and Publish button to publish your event. You can also preview the event using the Preview button.
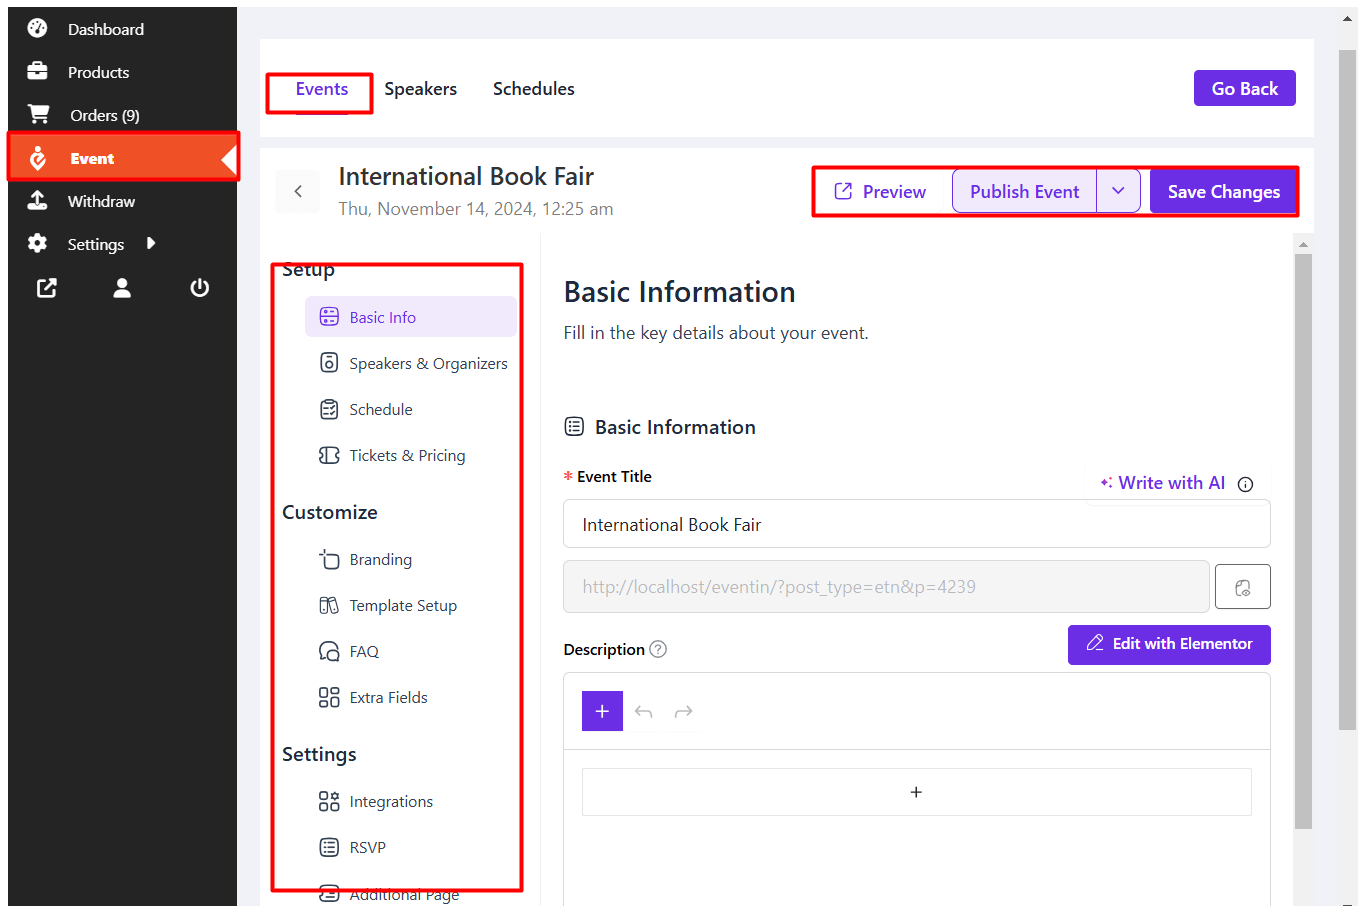
After submitting the form, you can see an event created in the event menu.
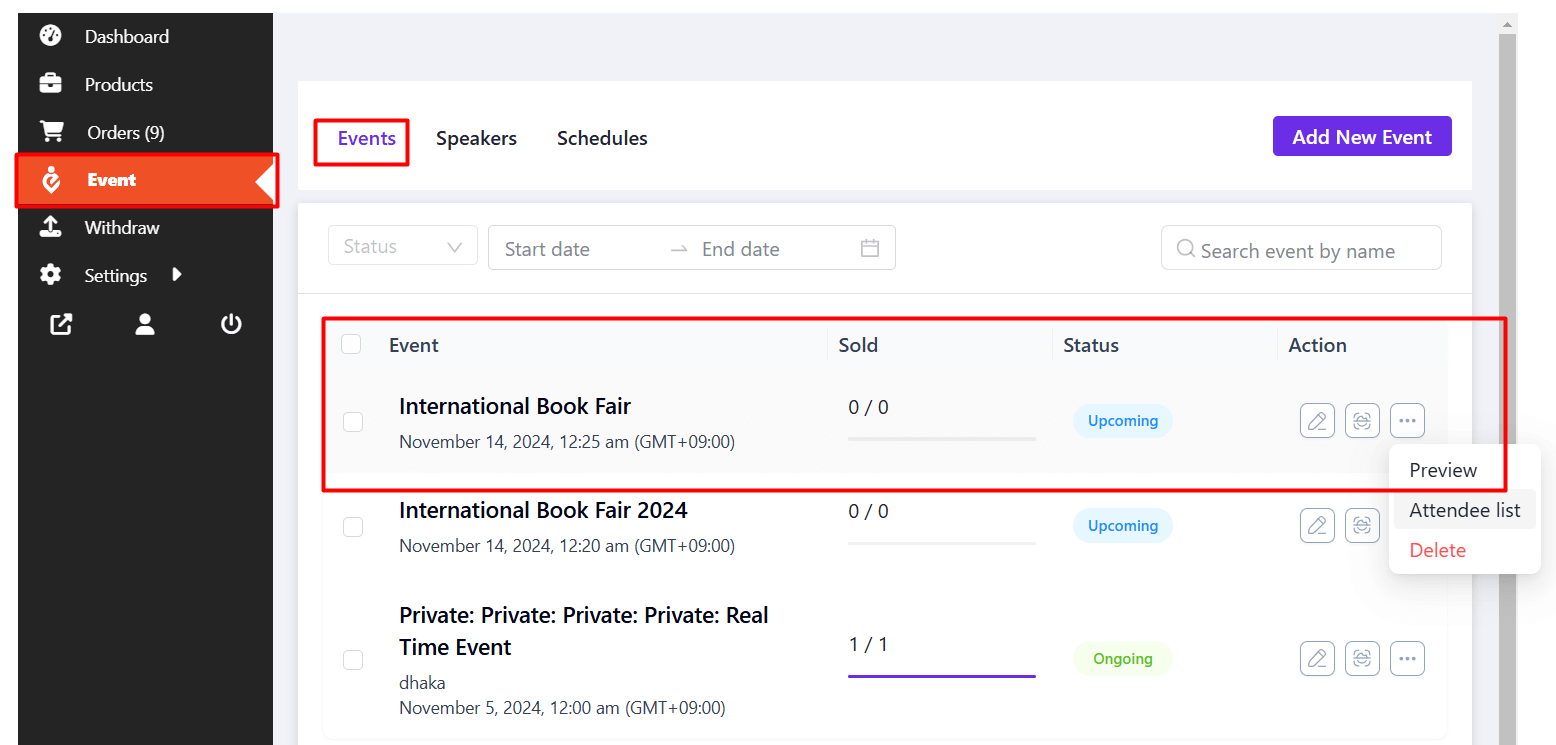
Now you can visit the event, and all the customers or visitors can see the single event. As a vendor, you can also edit, update, or delete existing events. Your event will also show up on the main event showcasing page.
Submitted events by individuals will be added to the main event list. Admins/marketplace owners can access it from their Eventin dashboard.
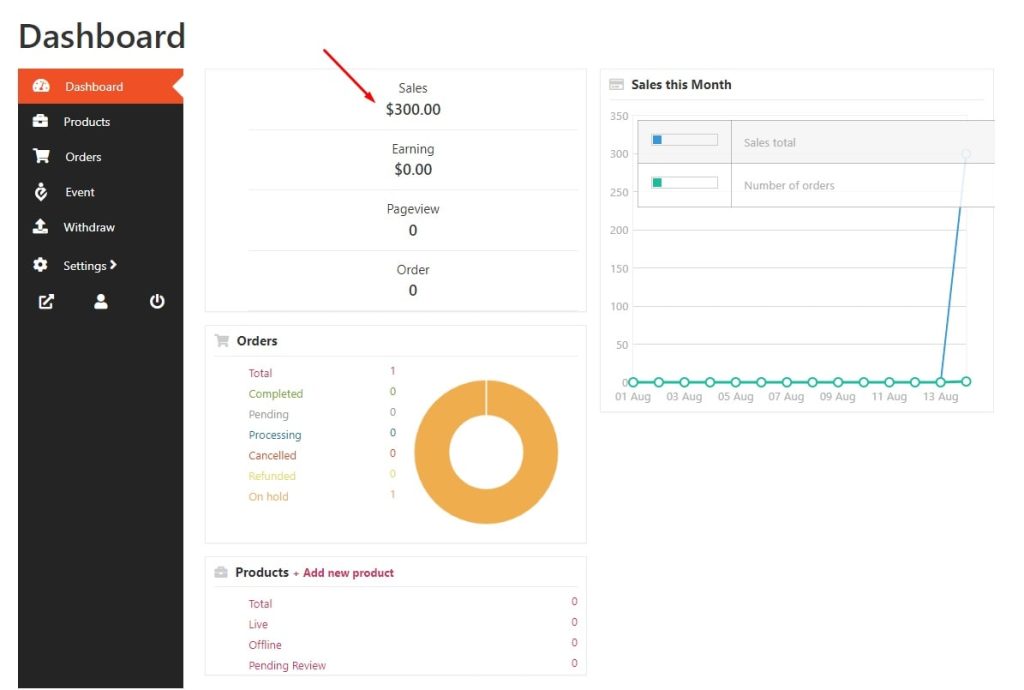
Vendor Dashboard Sales Chart: #
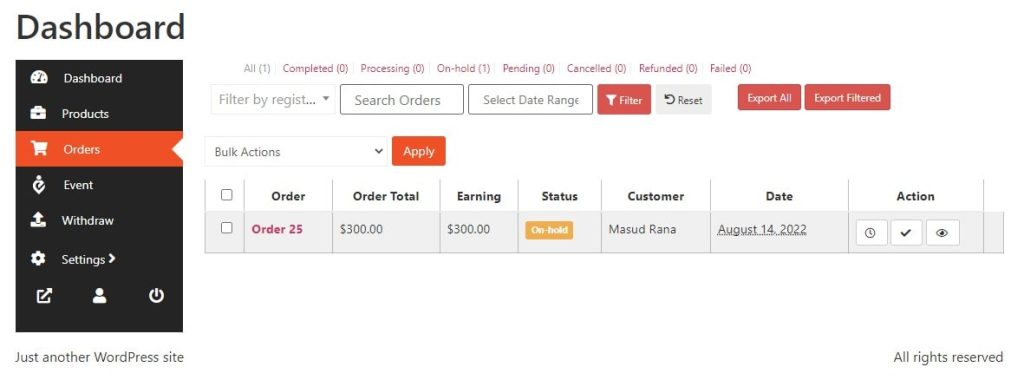
From here, the vendor will be able to check all of their financial and order history.
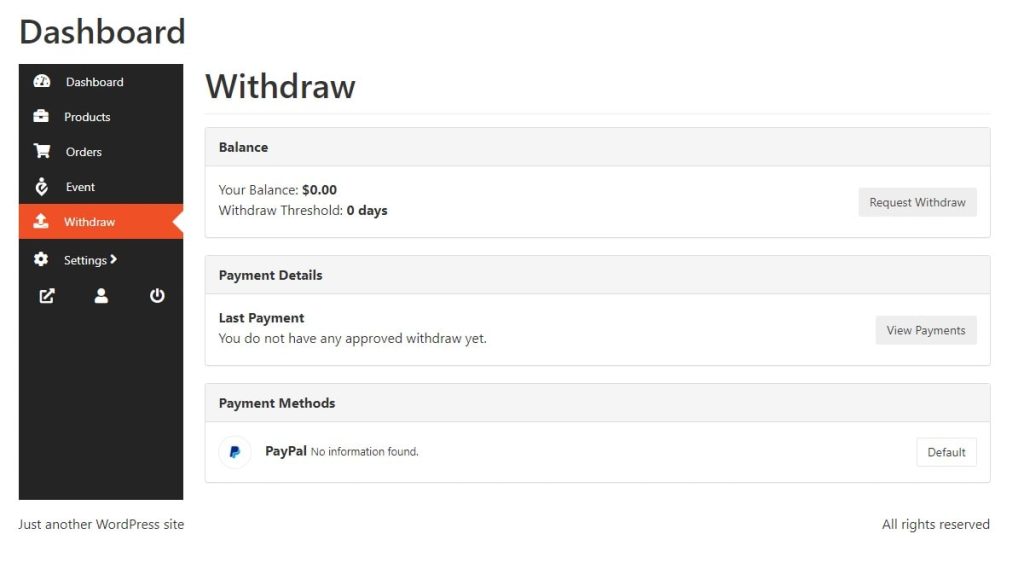
Vendor Withdrawal Information. #
From here, vendors will be able to check their withdrawal information.
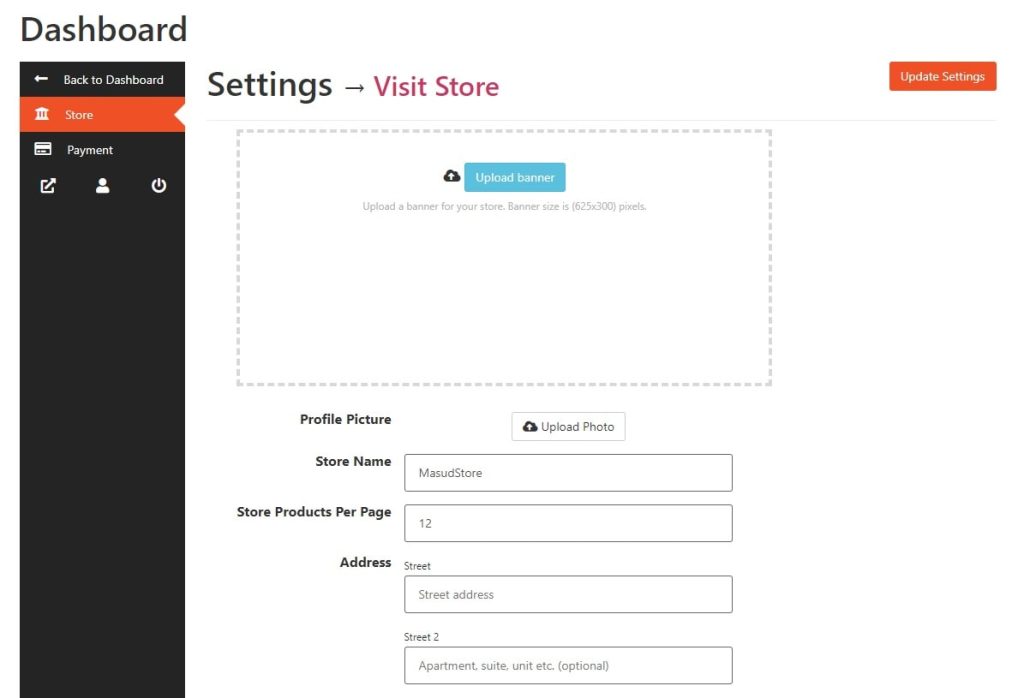
Edit Vendor Profile Settings #
Click on Settings > to access the vendor settings page.
From here vendors will be able to upload Profile pictures, Banner images, Store Names, addresses, etc.
Frequently Asked Questions (FAQ) #
Q1: Can vendors create and manage their own events?
Yes, once you connect Eventin with Dokan, vendors can create and manage events from their Dokan dashboard.
Q2: Is WooCommerce required for selling tickets?
Yes, WooCommerce is used as the e-commerce engine for processing ticket purchases.
Q3: Can I charge commission on ticket sales?
Absolutely. Dokan allows you to set commission rates for each vendor.
Q4: Can vendors see their event bookings?
Yes, vendors have full access to their event details and booking history from their frontend dashboard.
Conclusion #
By integrating Eventin with Dokan and WooCommerce, you can create a scalable and user-friendly multi-vendor event booking platform. Whether you’re building an event hub for conferences, workshops, or local classes, Eventin gives you all the tools to empower vendors and grow your business.


