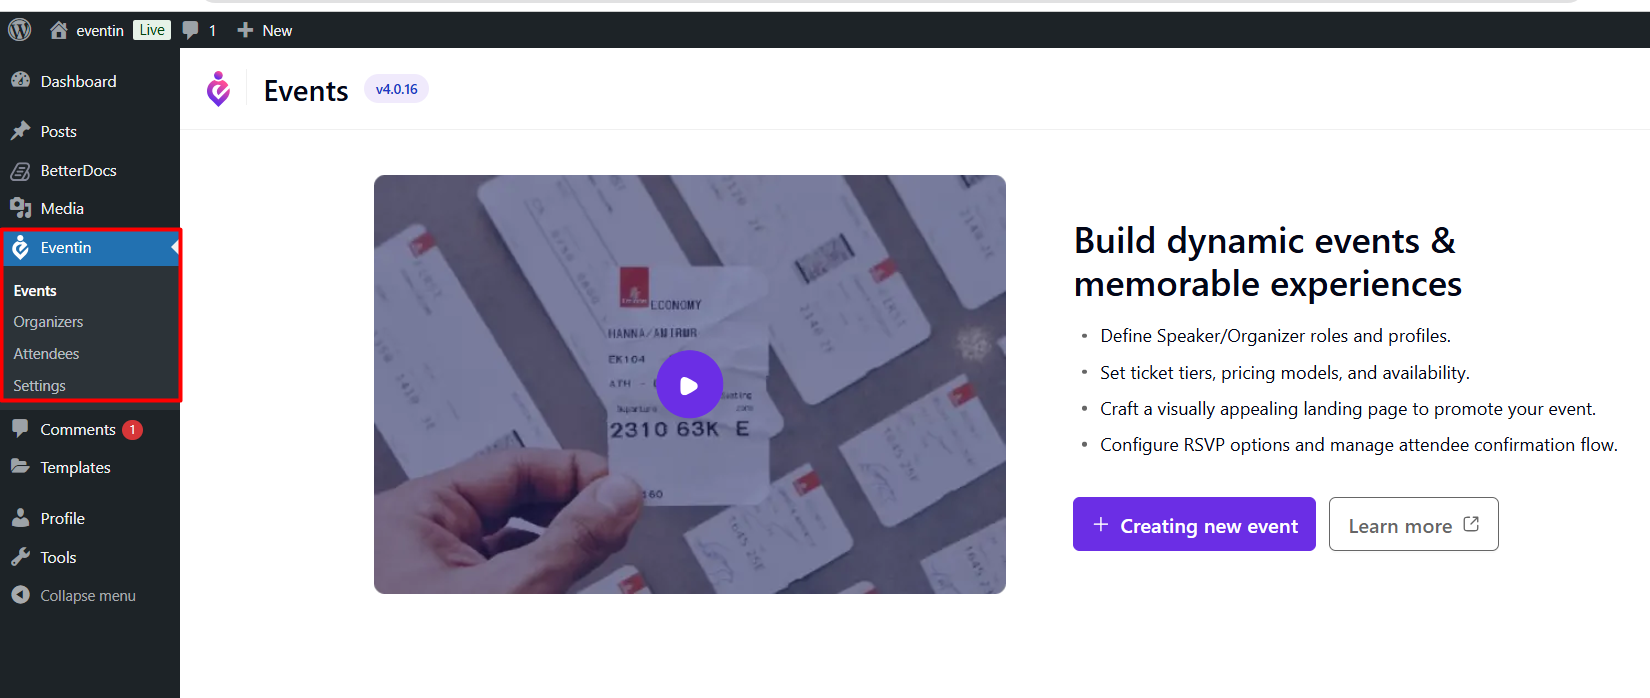
Eventin Menu Access Permissions #
The Eventin Plugin allows administrators to control which menu items and features users can access based on their assigned roles. This ensures that users can only interact with the sections of the plugin that are relevant to their responsibilities. By managing these permissions, administrators can protect sensitive settings while giving users the tools they need to perform their tasks efficiently.
To configure menu permissions, follow this path:
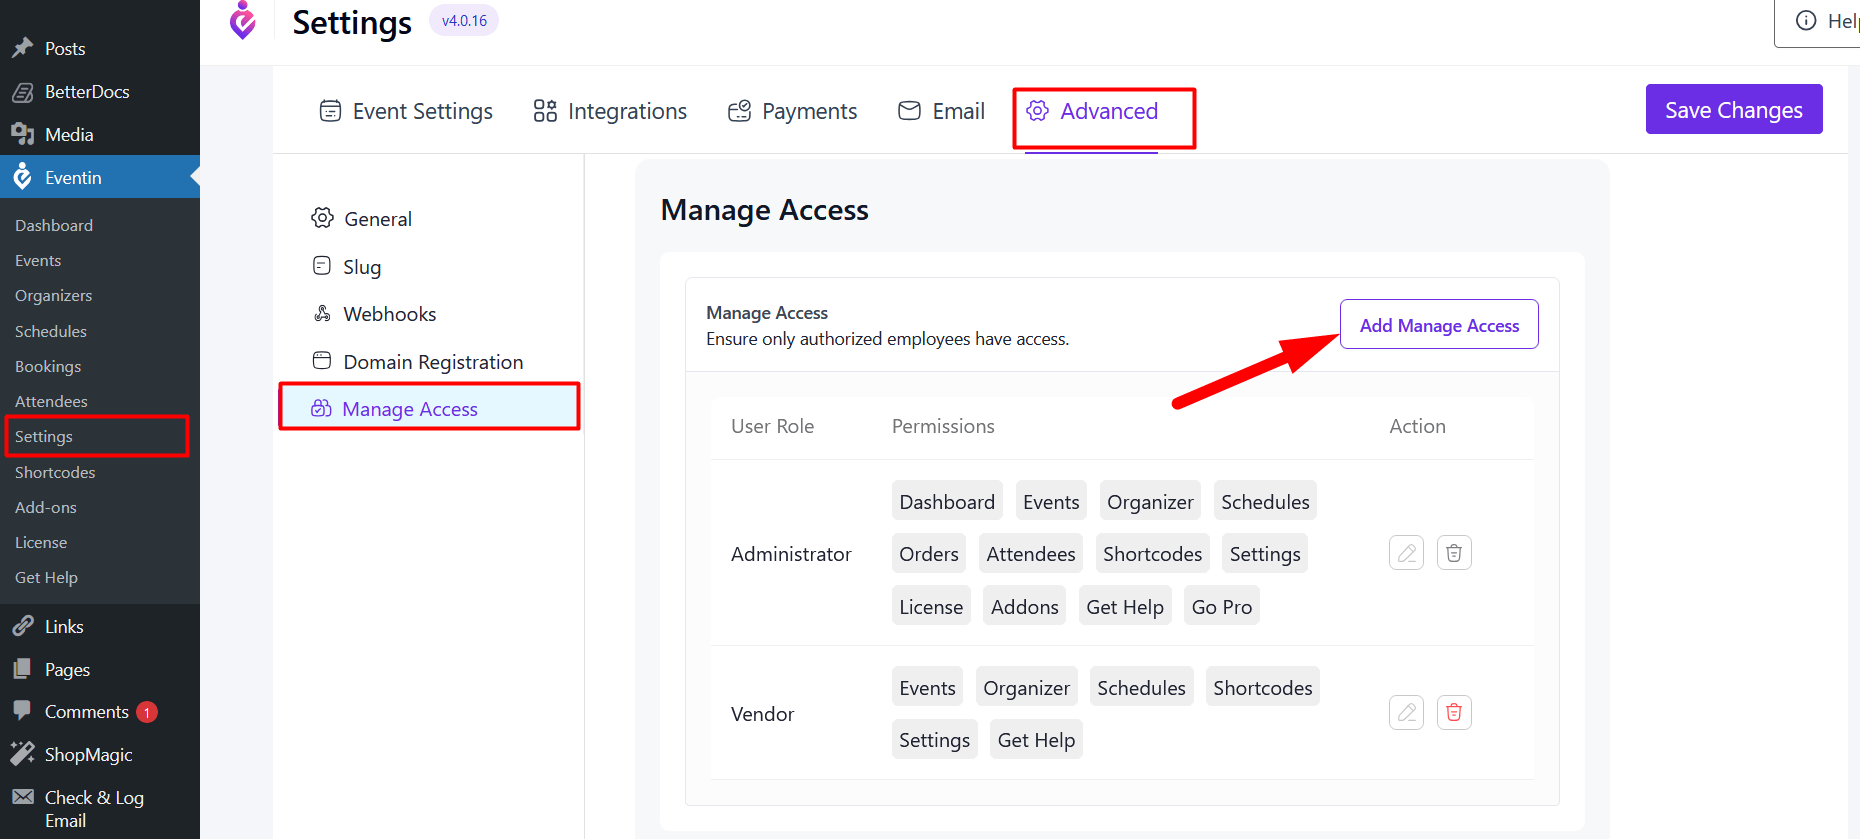
- Navigate to Eventin -> Settings -> Advanced.
- Click on Manage Access.
- Click on the Add Manage Access button to begin setting up permissions for a user role.
Configuring Menu Permissions: #
Once you click on Add Manage Access, you will be prompted to select a user role from the dropdown menu. After selecting the user role, you can grant or restrict access to the following menu items within the Eventin plugin:
- Dashboard
- Events
- Organizer
- Schedules
- Orders
- Attendees
- Shortcodes
- Settings
- License
- Addons
- Get Help
- Go Pro
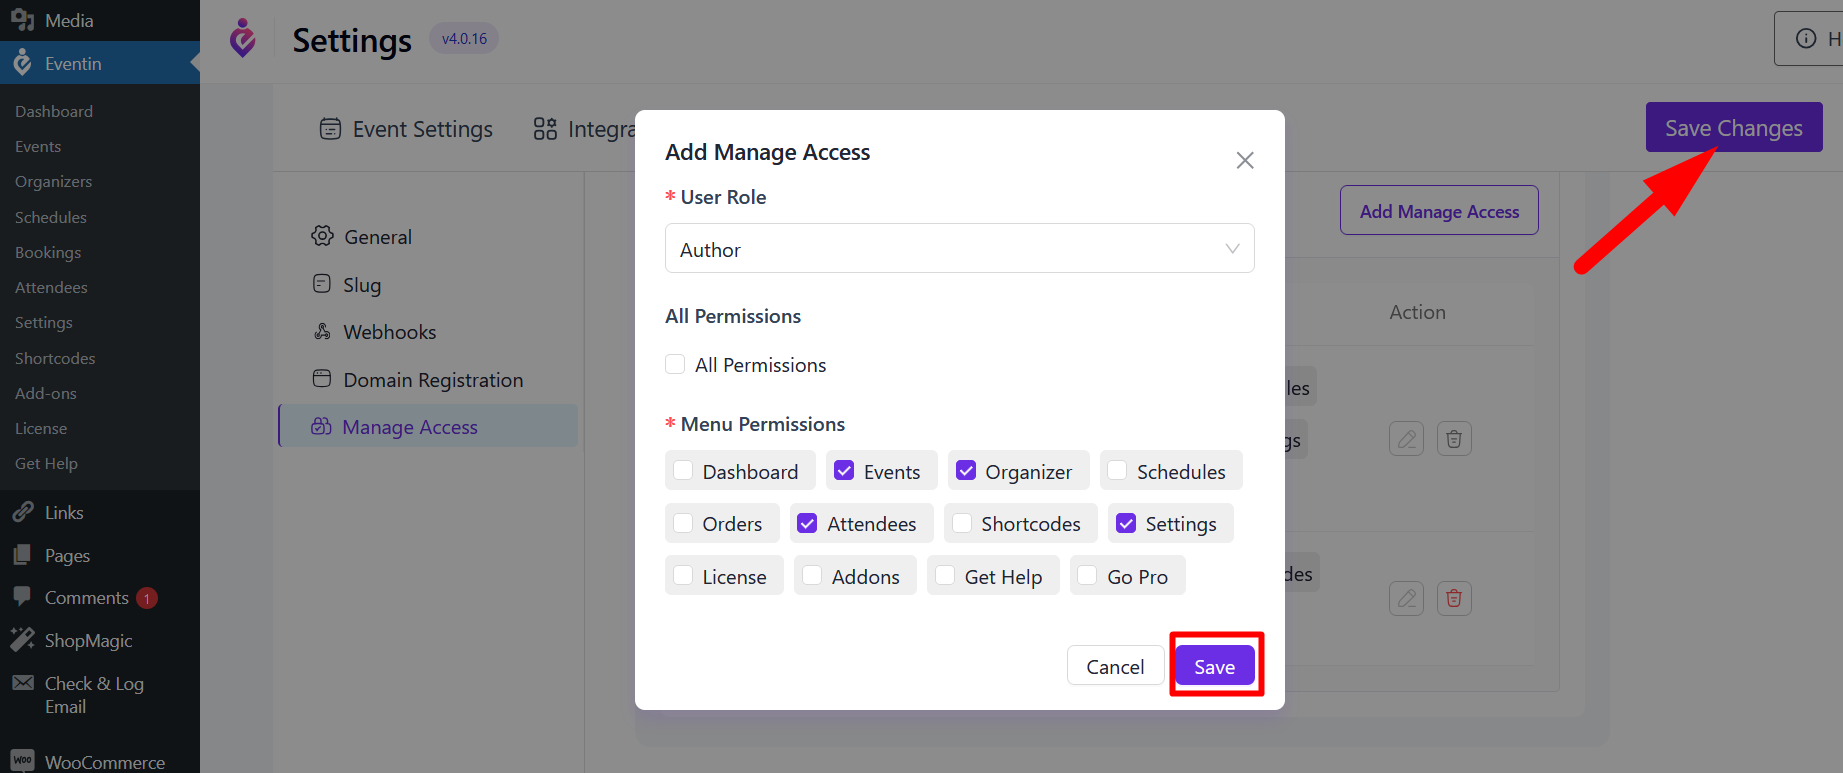
After selecting the desired menu permissions for the role, click Save Changes to apply the new access settings.
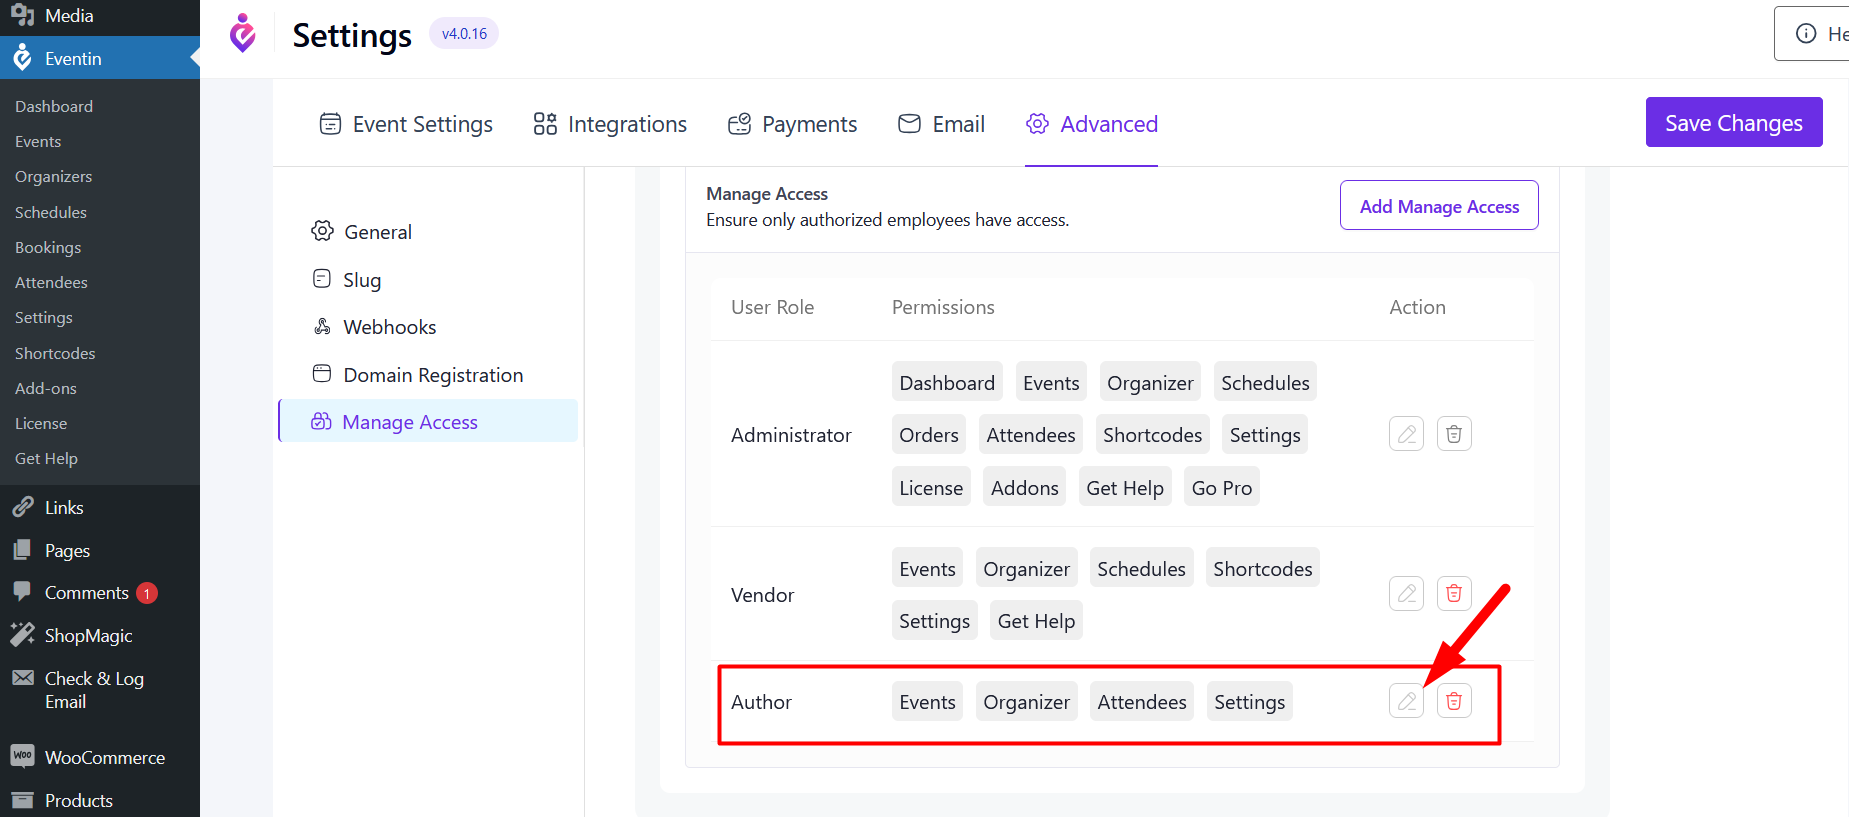
See from the Author dashboard: