Zoom Module with WP Eventin Event Plugin for WordPress #
With Zoom integration, the Eventin event management plugin allows you to easily host all your online Zoom events. By connecting Zoom, you can easily host Zoom meetings, webinars, and conferences for your organization.
Step-by-Step Process: #
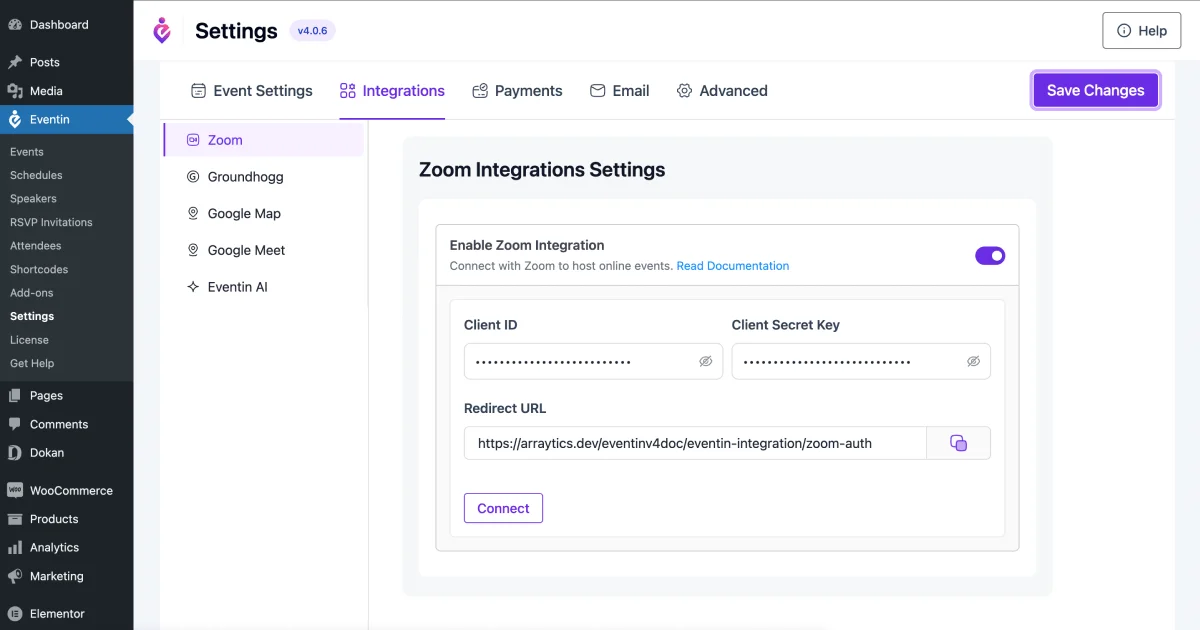
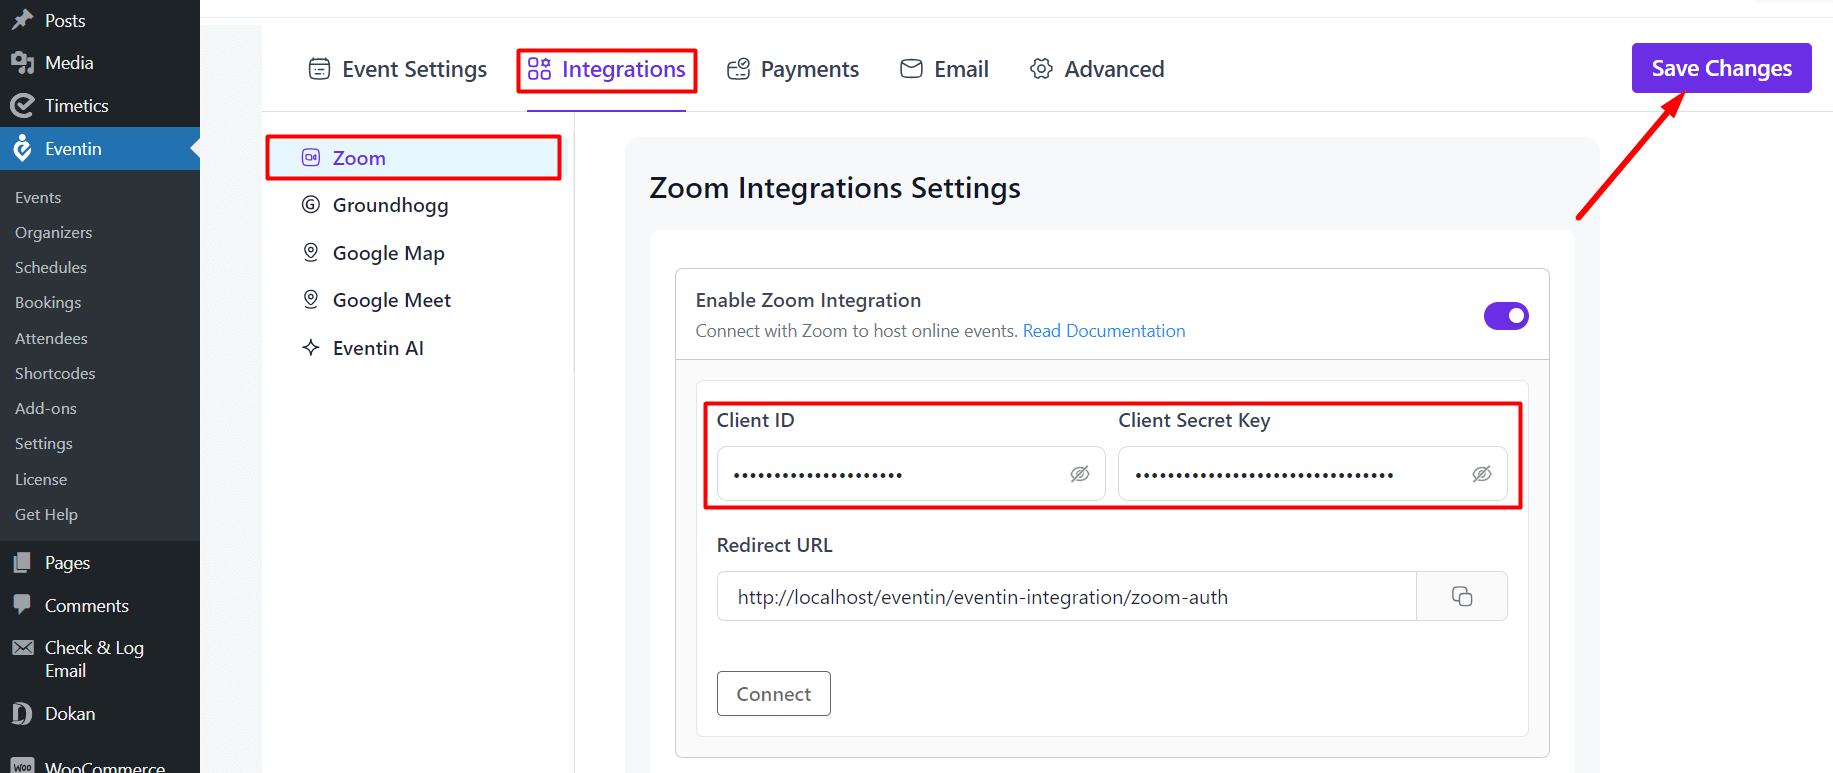
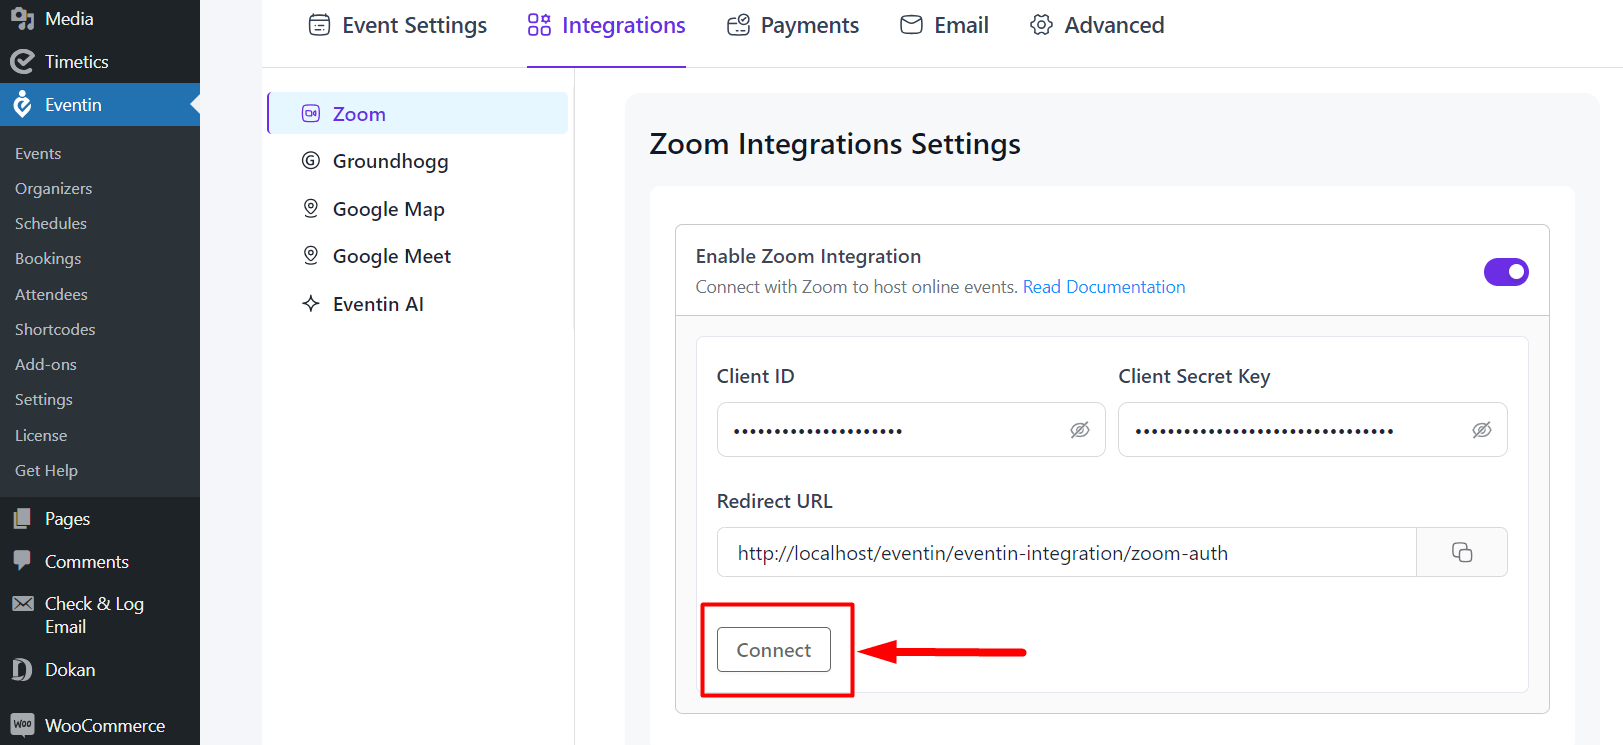
From your dashboard, go to Eventin > Settings > Integrations > Zoom. Enable Zoom integration and save changes.
🔹 NOTE: For creating a Webinar, you will need to use Zoom Webinar Subscription as the Zoom platform’s requirement.
Generating API Key and Secret Key #
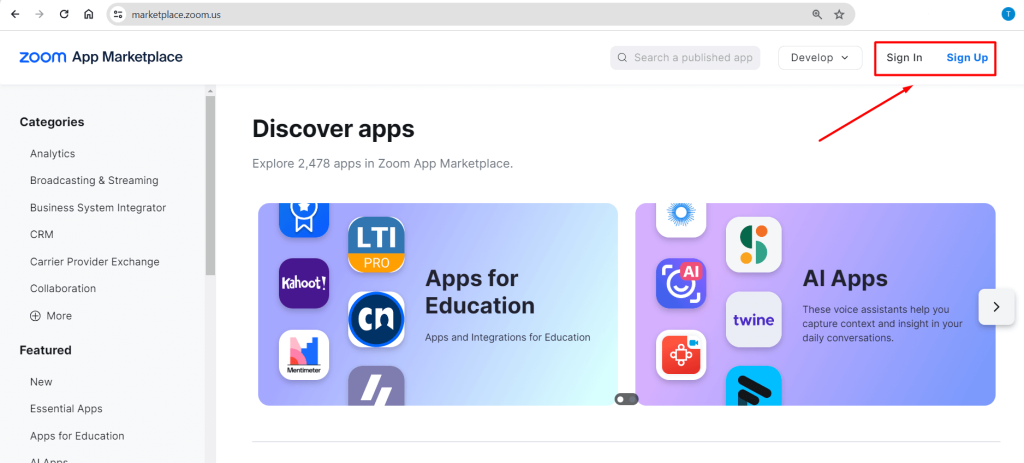
1) First of all, visit this link: https://marketplace.zoom.us/. You have to “Sign Up” first. If you have already an account then “Sign In” here.
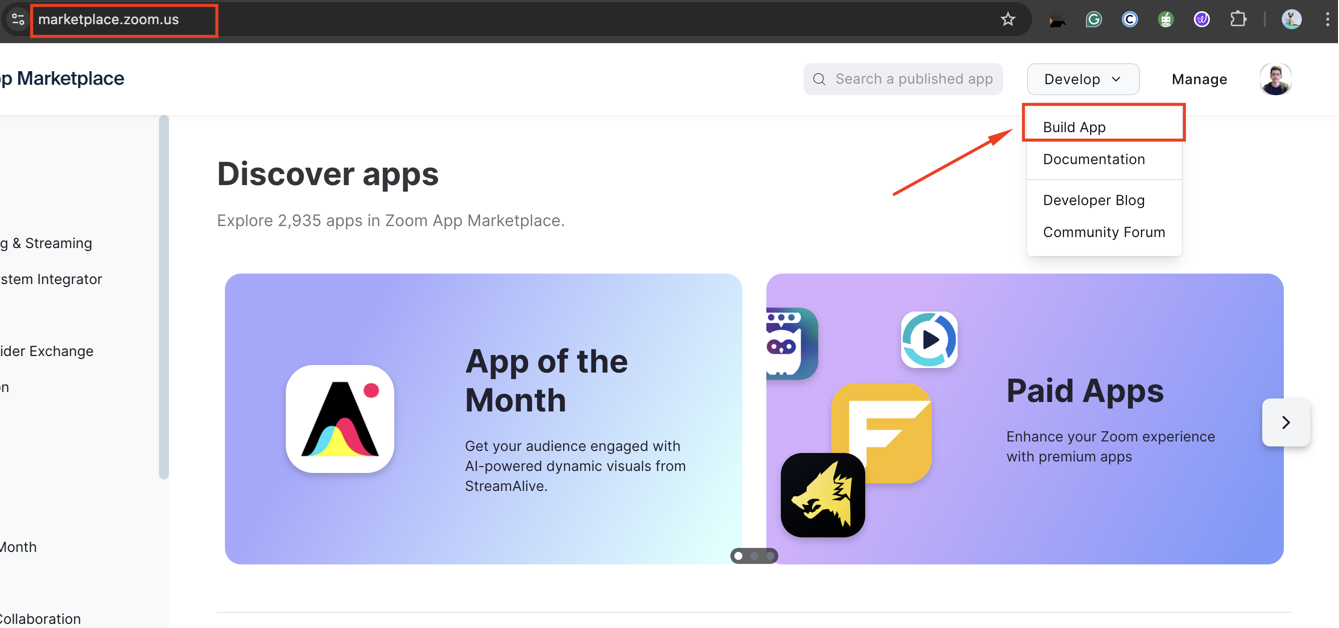
2) Now, click on Develop -> Build App at the top of the page.
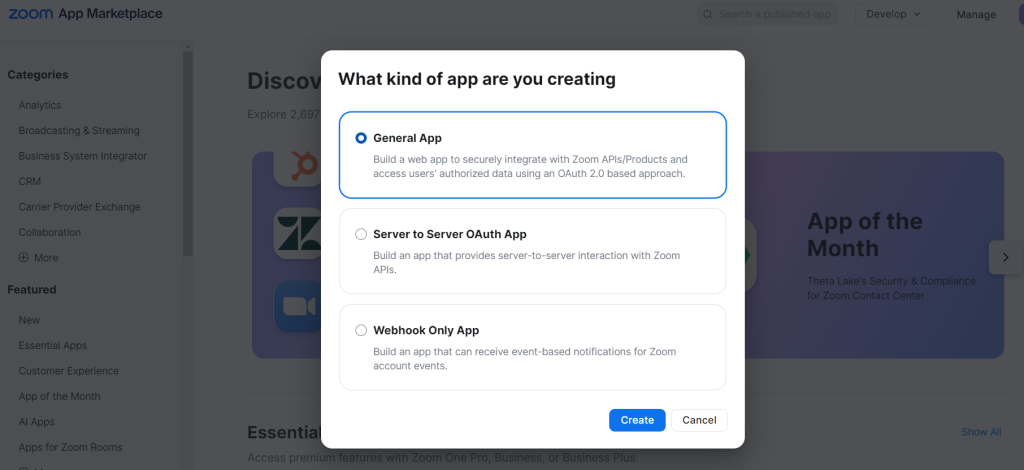
3) A page will popup and select “General App” and click on the “Create” button.
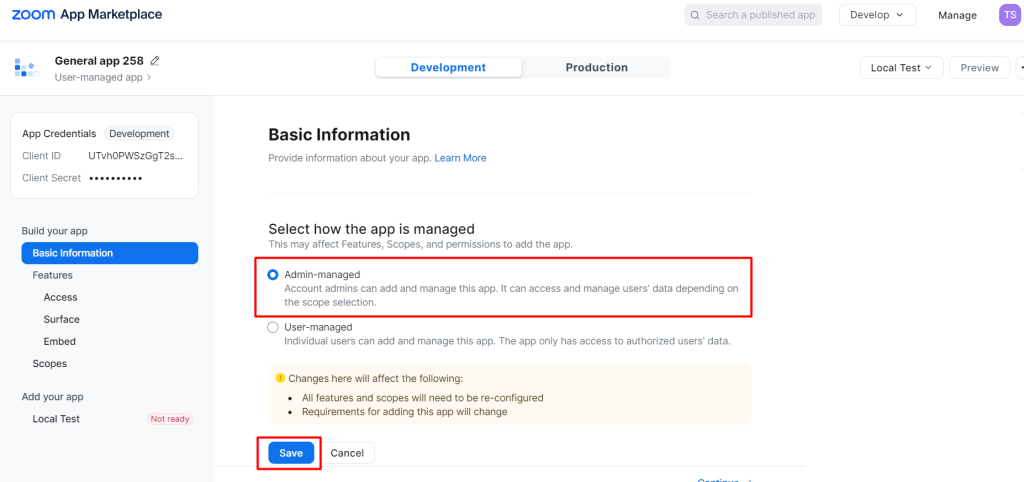
4) You will go to the Basic Information screen. Here select “Admin Managed” and click on the “Save” button.
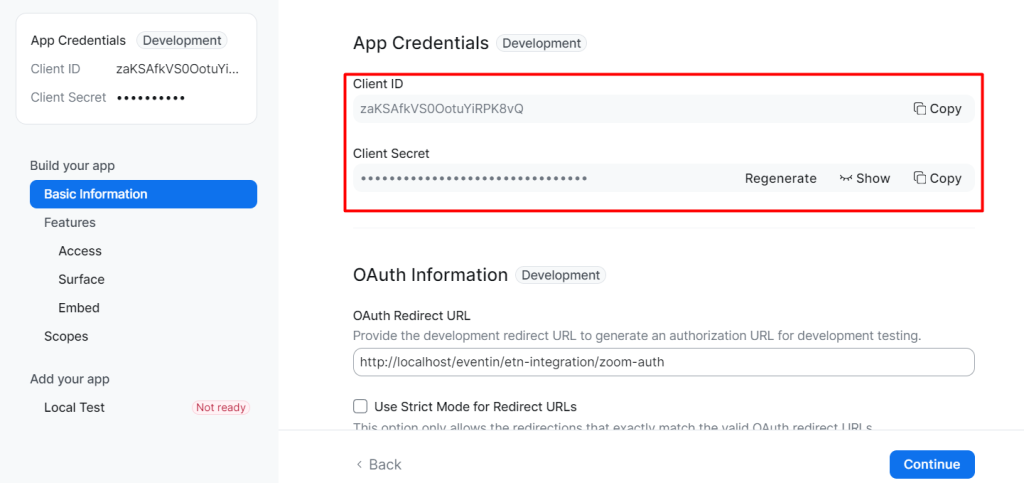
5) Now, copy the “Client ID” and “Secret Key” and insert them on the Eventin -> Settings -> Integrations -> Zoom -> Client ID and Secret Key and save changes.
🔹 NOTE: After inserting the API key, you must save changes first for connection. If your API key is wrong, you won’t get the Host ID to create a meeting.
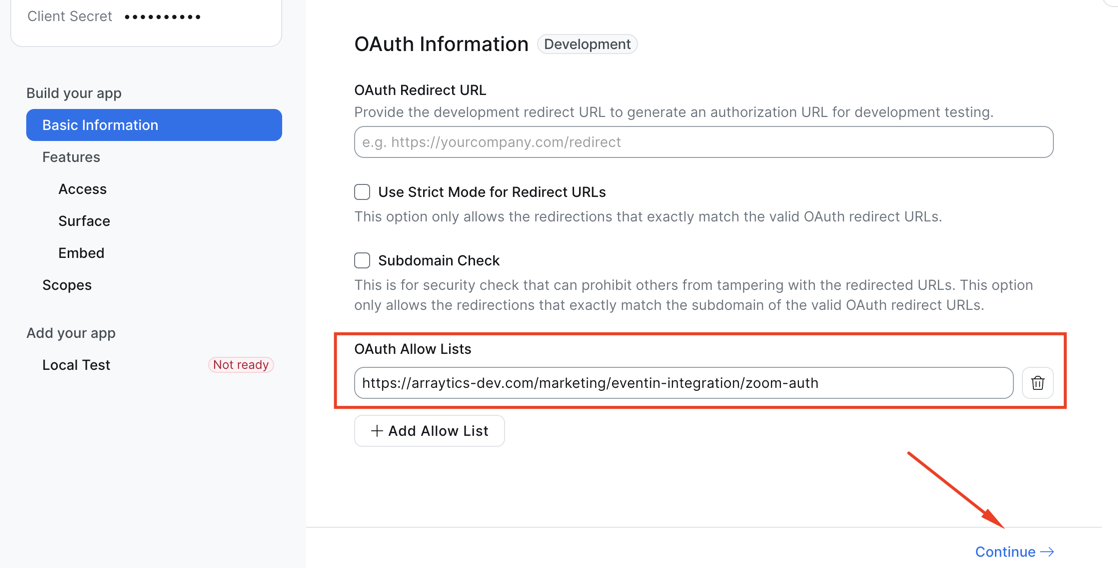
6) From Settings -> Integrations -> Zoom and copy the Redirect URL.
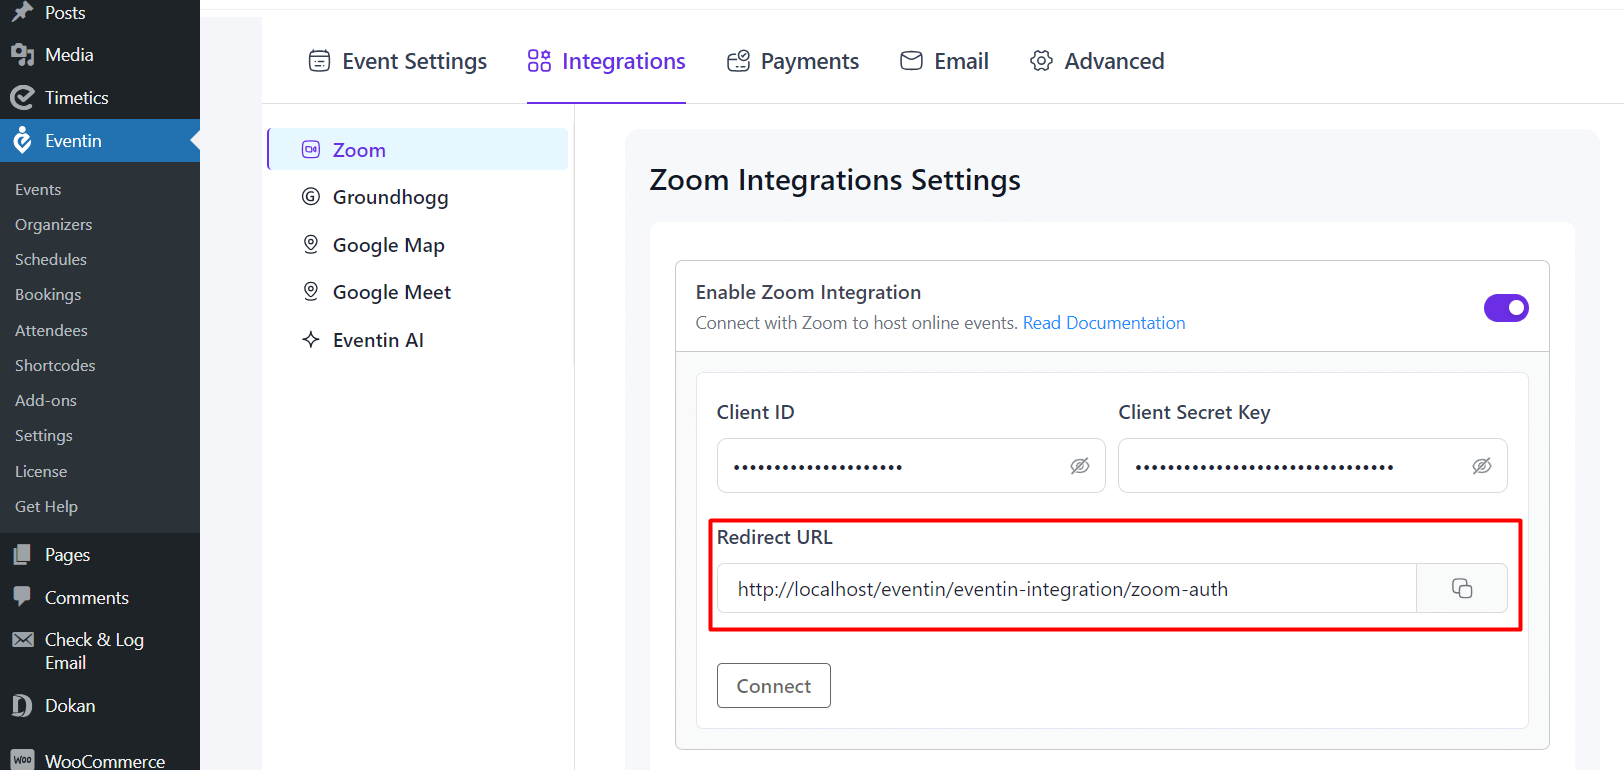
Now go to the Zoom tab and scroll down from the basic information page and enter the “OAuth Redirect URL” to “OAuth Allow Lists” and Continue.
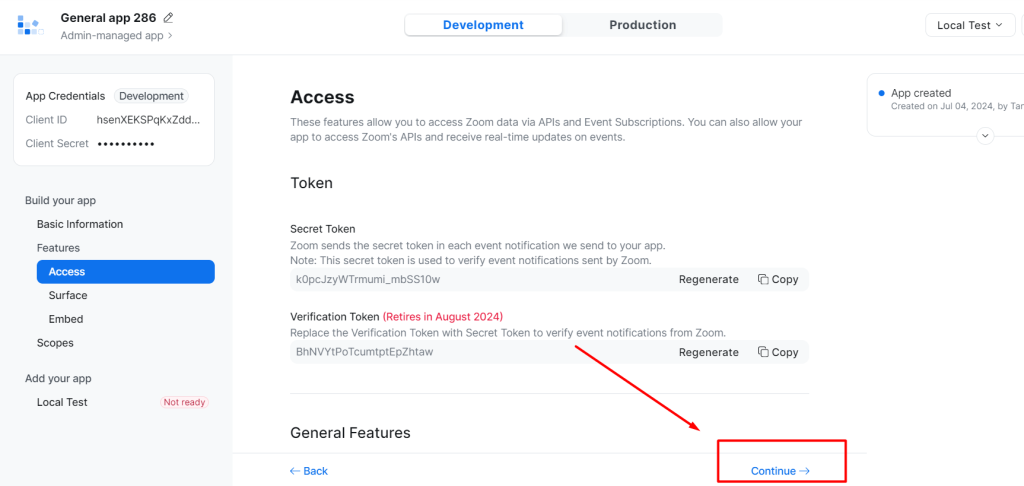
7) You will get the “Access” menu. Just “Continue” it.
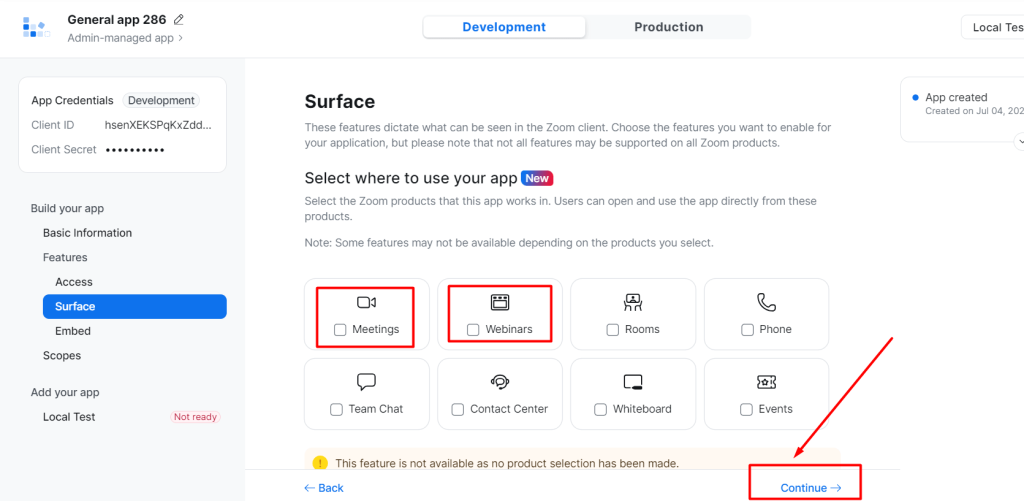
8) On the “Surface” menu page, select where you want to use your app and click on “Continue“.
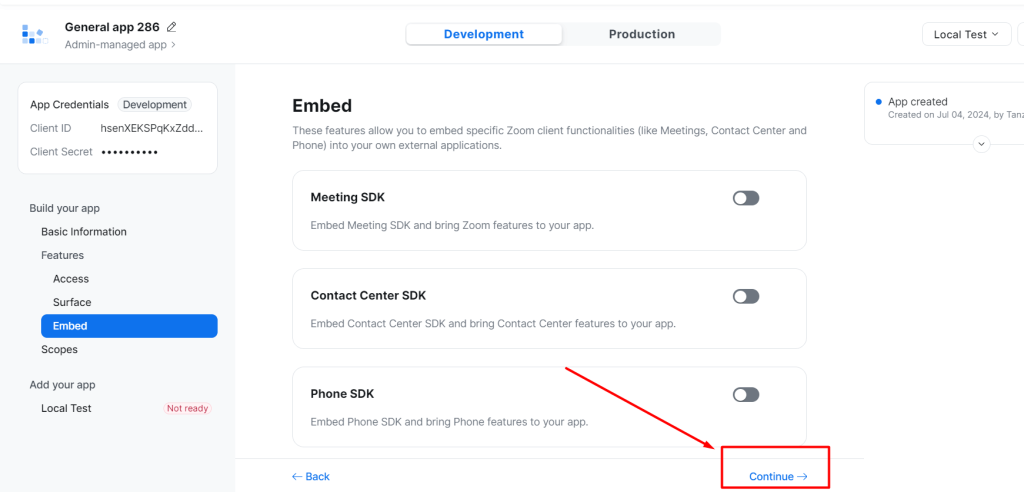
9) Also, skip the “Embaded” menu page and click on “Continue“.
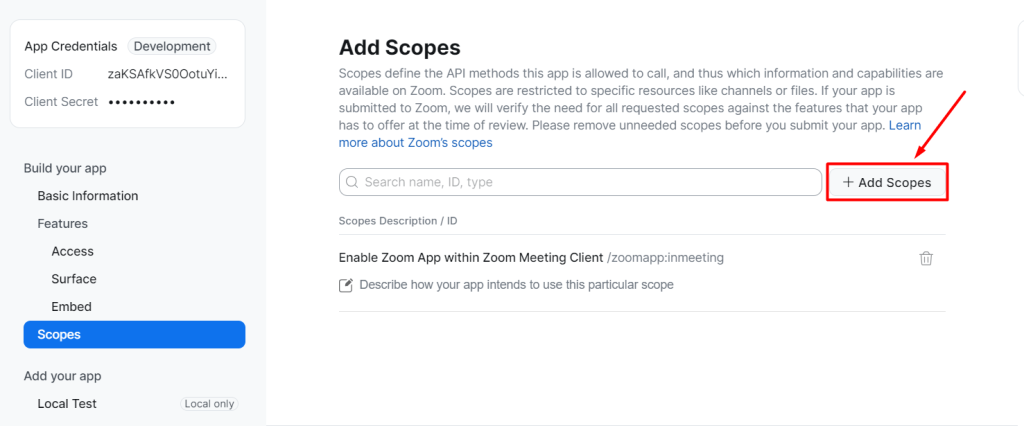
10) Now, you will go to the add scope page. To add scope, click on the “Add Scope” button.
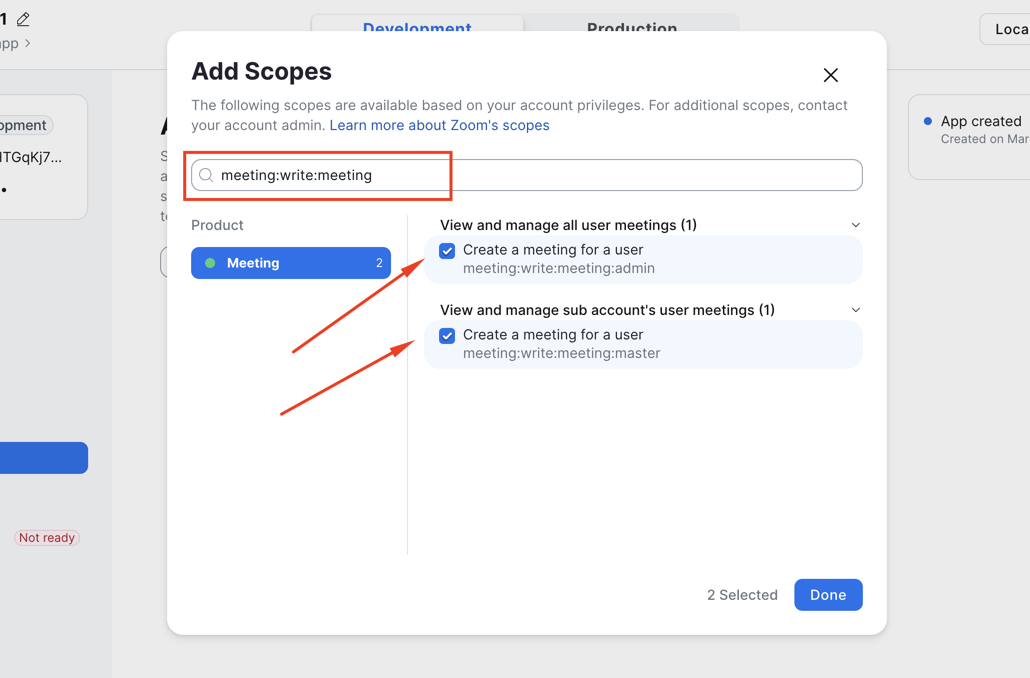
11) To add scopes for a meeting (type meeting:write:meeting), enable these two “Create a Meeting for User” options. Finally, click the “Done” button.
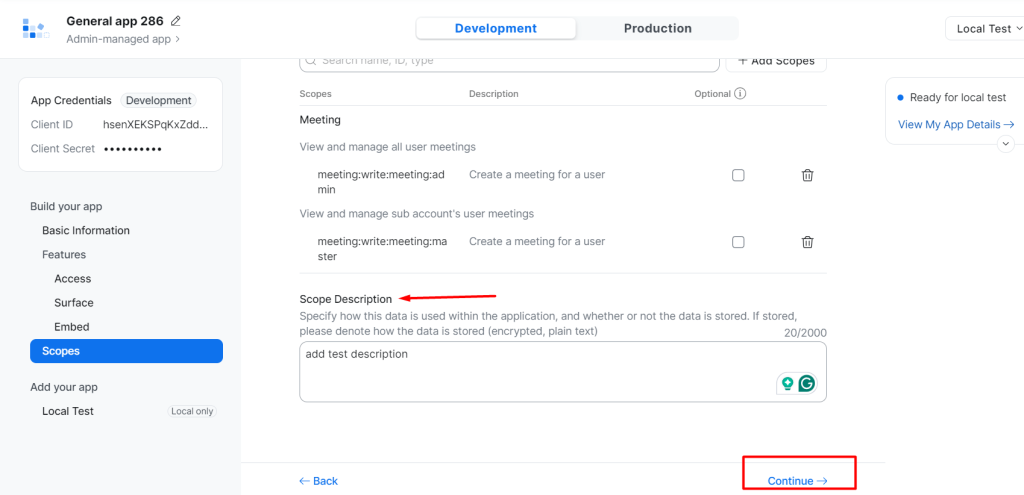
12) Now add a description for all the scopes that you already enabled and click on continue.
13) Now go to Eventin > Settings > Integrations > Zoom and click on the “Connect” button.
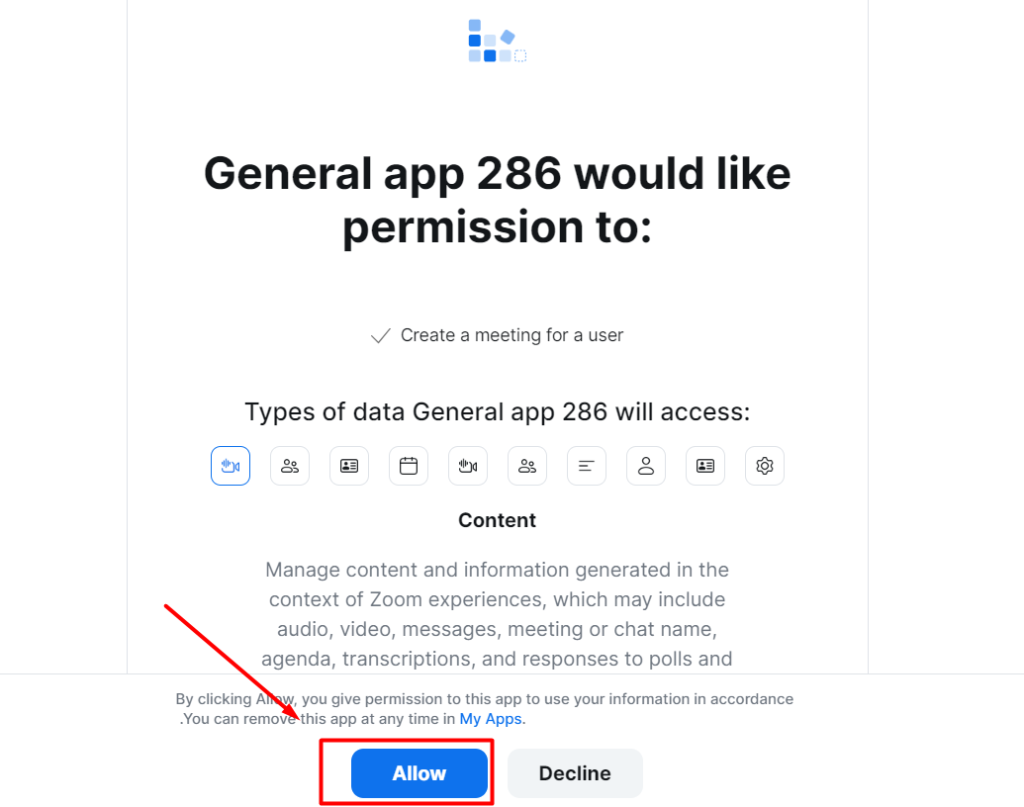
15) A new tab opens. Just agree on the condition and click on the “Allow” button. Finally, your Zoom is connected successfully.
Create Zoom Mettings #
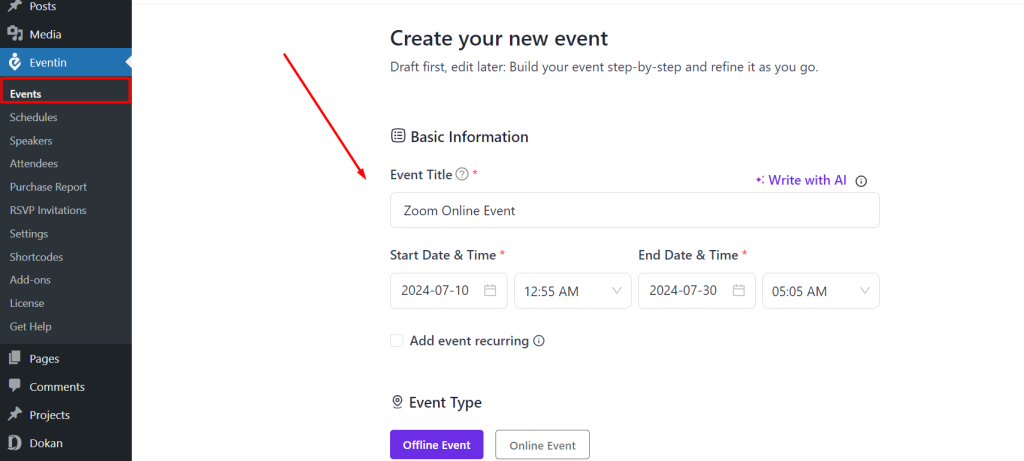
For creating the Zoom link, go to Eventin -> Event -> New Event -> Add necessary information for Event.
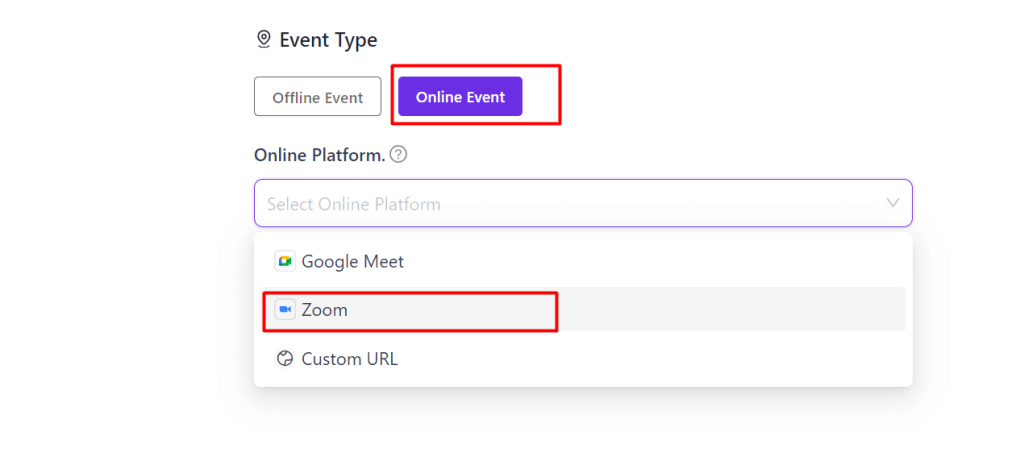
Now, click on “Online Event” as a event type and select Zoom. Now click on Create Event.
You can see the Zoom link create on your event.
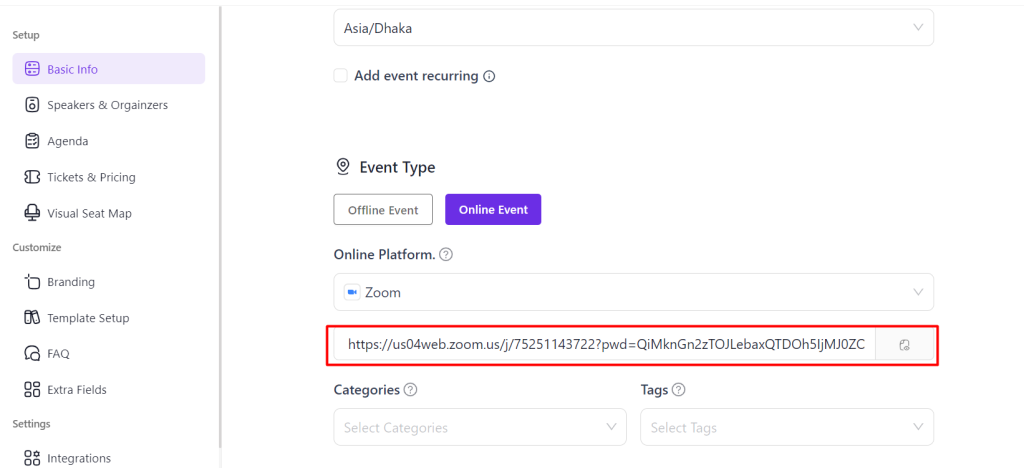
Finally, you can send this link of your clients or when the client purchases the Event, will get the Zoom link with an event ticket.


