Allow Location #
You can set your Food location and let users choose their location. Based on the user’s location, only food available in their location will be displayed. Create food location from your dashboard by going to Product -> Food Location then add Name, Description and upload an image.
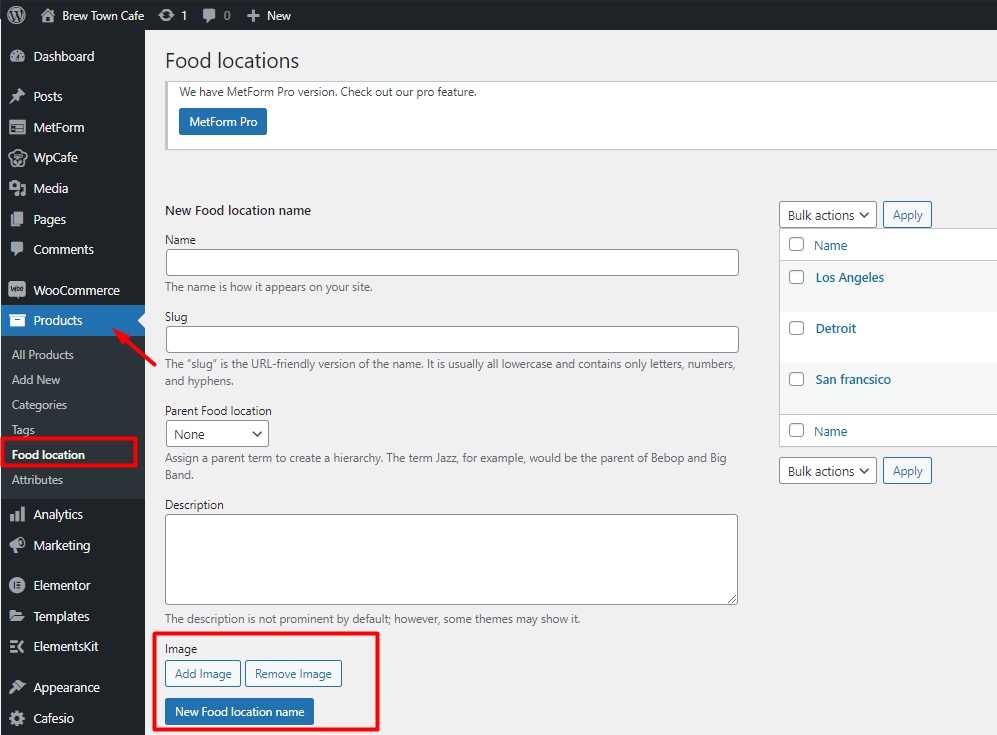
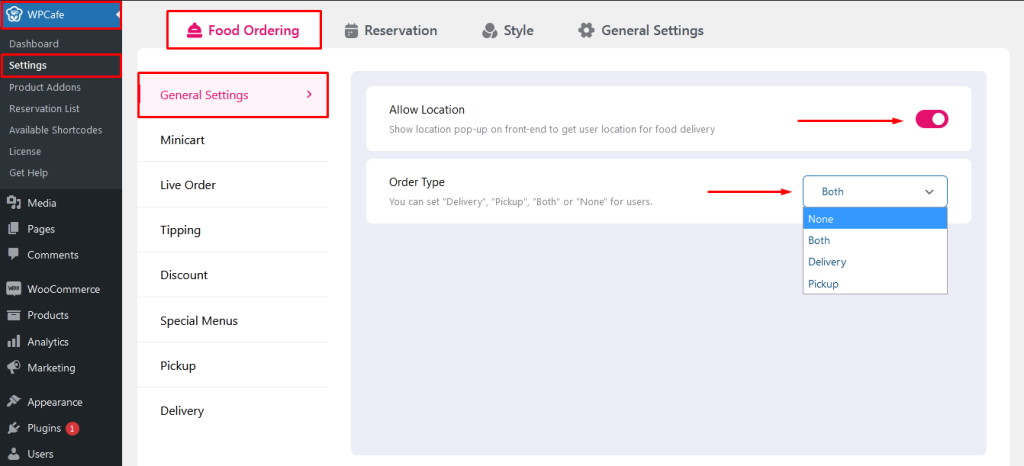
To display location, you need to enable location from the WPCafe -> Settings -> Food Ordering -> General Settings tab.

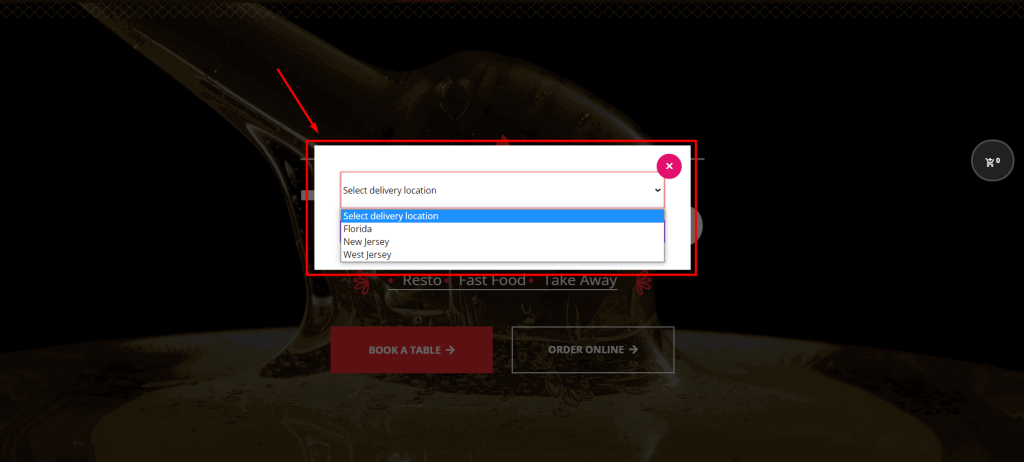
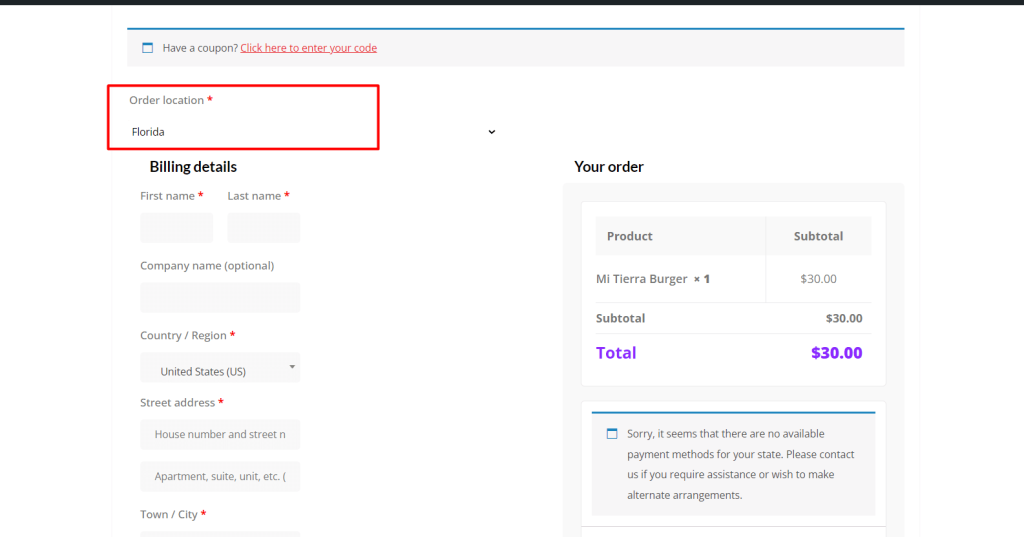
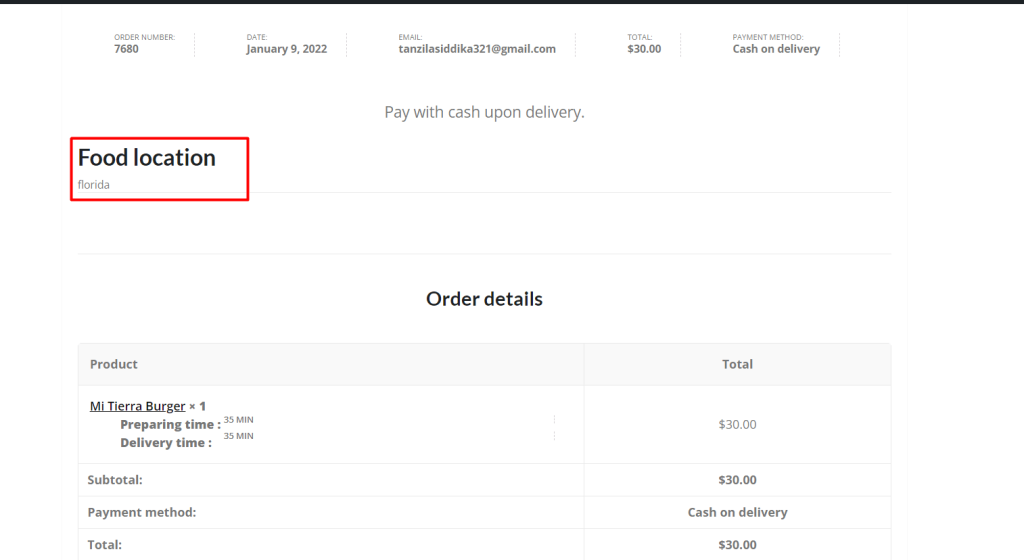
This will turn on a pop-up that will request users to choose their location before placing their order. This location will appear in the Checkout Page, Thank You Page and Email.
Allow Customer to Order Comfortably(Pro) #
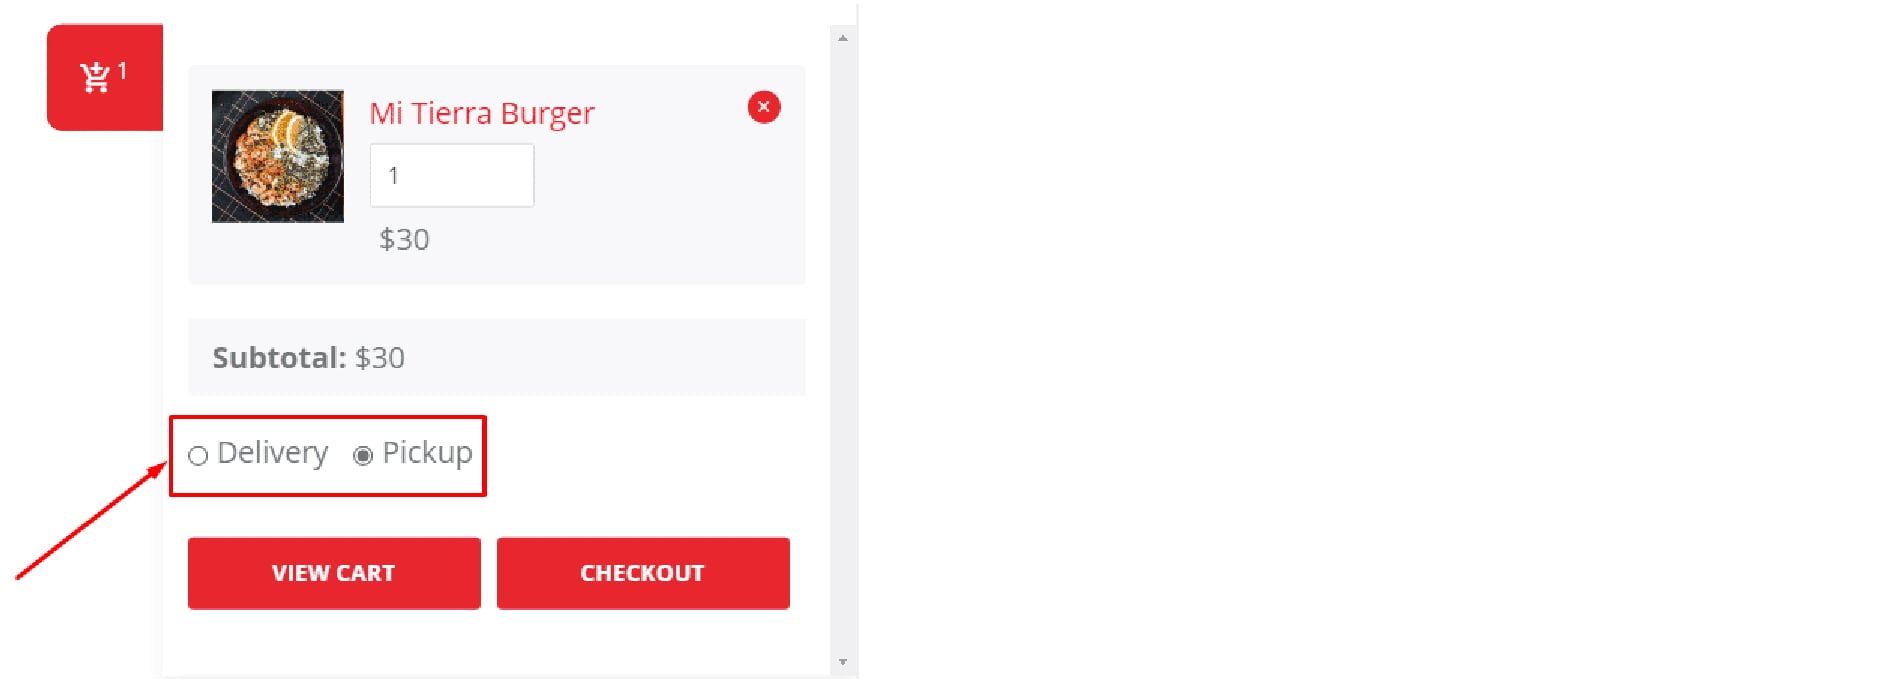
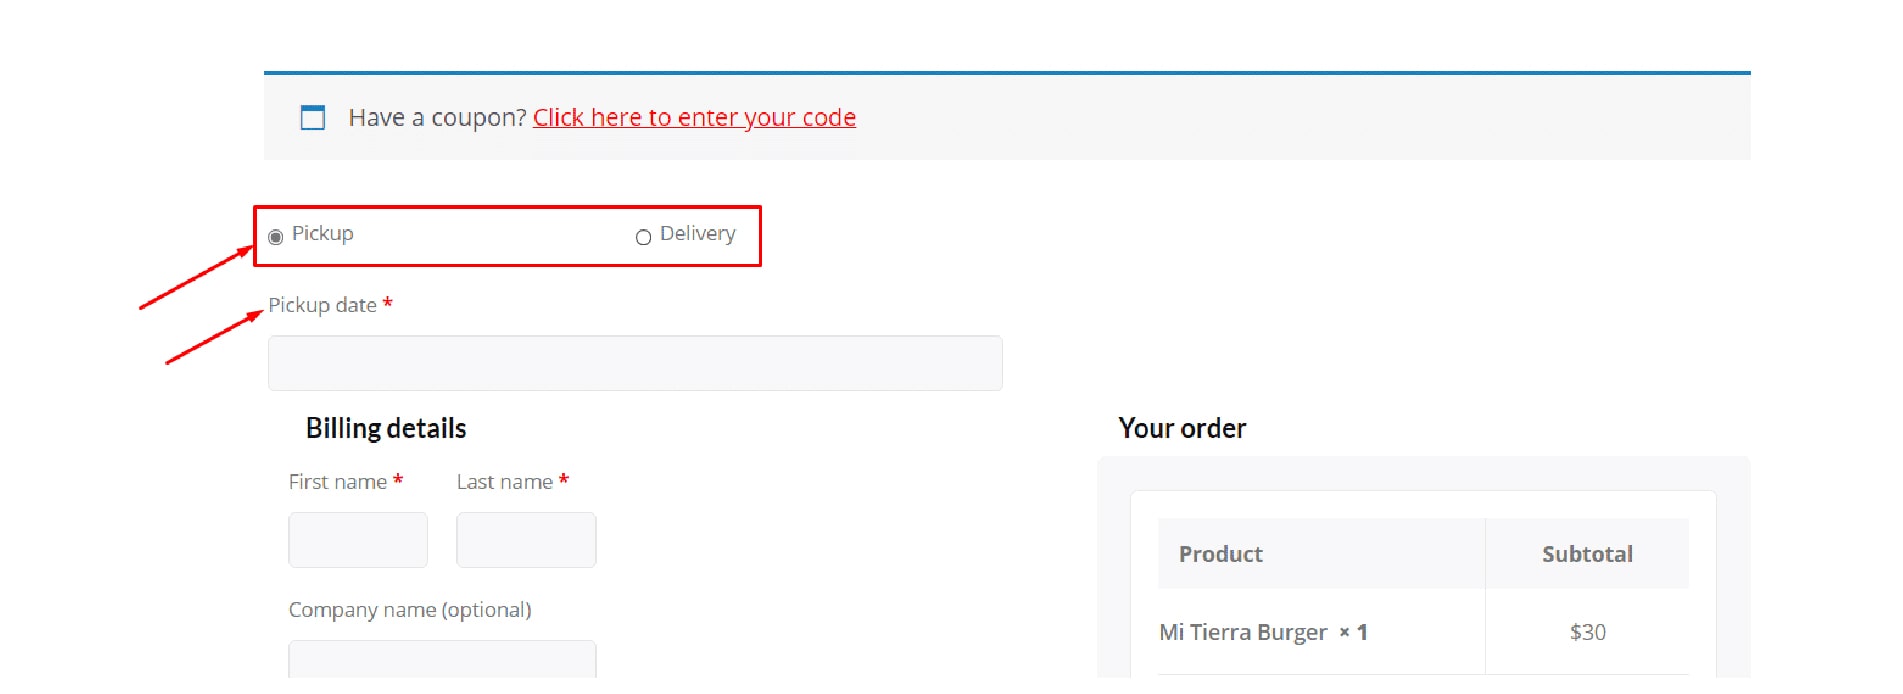
WPCafe will help you create a seamless ordering system that will lower the number of canceled orders. Depending on customer demand, you can allow only pickup, only delivery, allow both or you can keep it none. If you allow only pickup then customer can select only pickup options during order. If you allow delivery option then customers can select delivery option during their order. If you set both options then customer can select only one from pickup and delivery.
In order to set ‘Allow order for’, Go to WpCafe -> Settings -> Food Ordering -> General Settings -> Order Type (select from dropdown menu) -> Save Changes.
Once you save the changes then your customer will get options on cart page and checkout page. The screenshot is given below.
Order preparation days (Pro) #
Few food items are special and take extra time to prepare. Few items are delivered on a special request basis. So, it’s not possible to deliver all the food items in every day. You can set order preparation days duration from WPCafe. For example, if you set 5 days delivery time for the food, the customer will not be able to select the initial 5 days while selecting the pickup/delivery day date. [Here 5 days is for example only. You can set any number instead of 5]
Key- WpCafe -> Settings -> General Settings -> Order preparation days -> (add custom preparation time) -> save changes.


