With Eventin’s ticket variations, you can create multiple ticket types for the same event, each with its own unique pricing, quantity, and sales rules. For example, you can offer VIP, General Admission, or Early Bird tickets at different price points, and control the quantity available for each variation, such as limiting VIP tickets to 100 while offering 500 general tickets.
You can also set minimum and maximum purchase limits per customer, ensuring fairness and preventing bulk buying, such as allowing a maximum of 5 tickets per person for general admission.
Additionally, you can manage sale dates and times for each ticket type, enabling you to open and close sales for specific variations, like offering Early Bird tickets only between specific dates. This flexibility helps you optimize sales, manage inventory, and cater to different customer needs effectively.
Create Variations Tickets for Events #
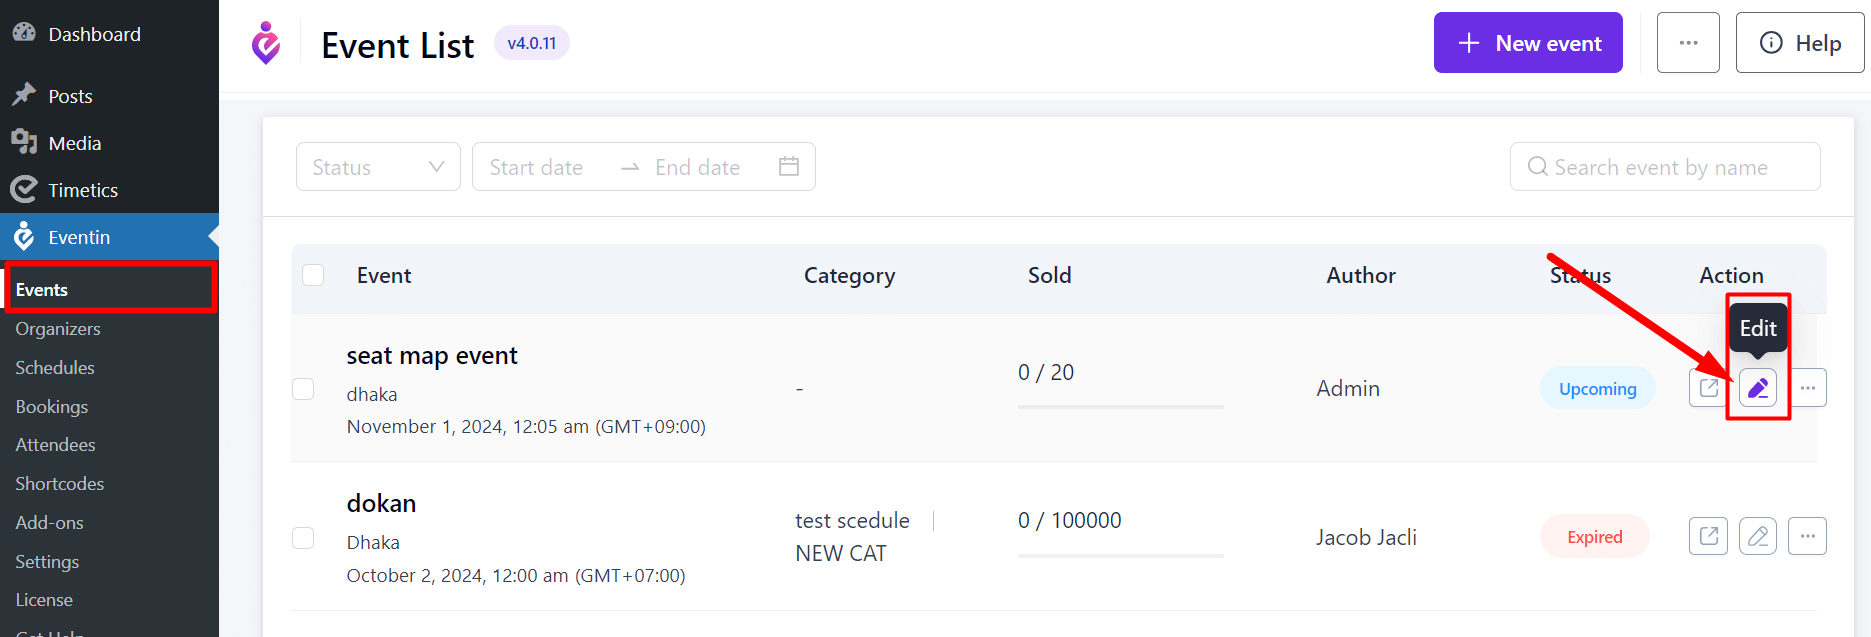
From your dashboard, go to Eventin -> Events then edit one of your events.
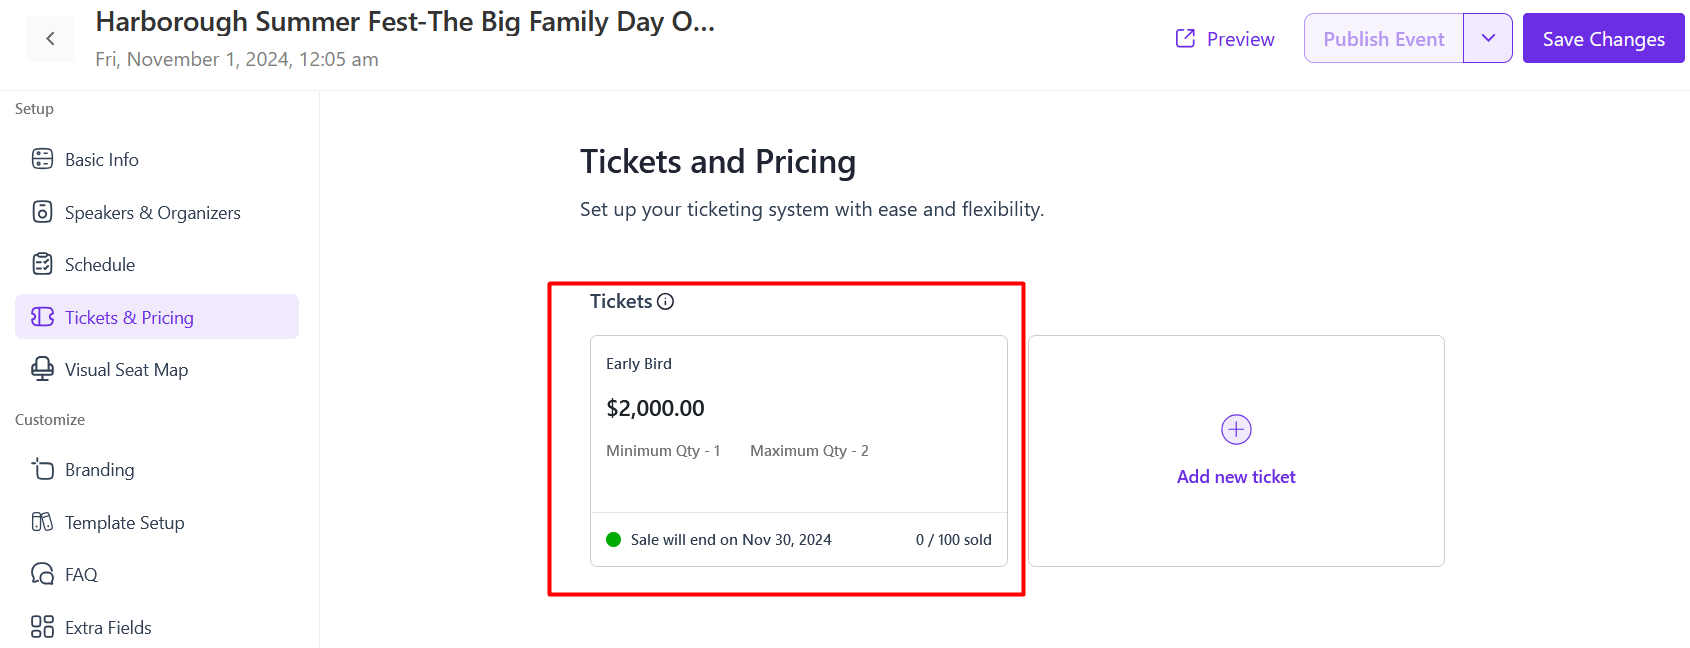
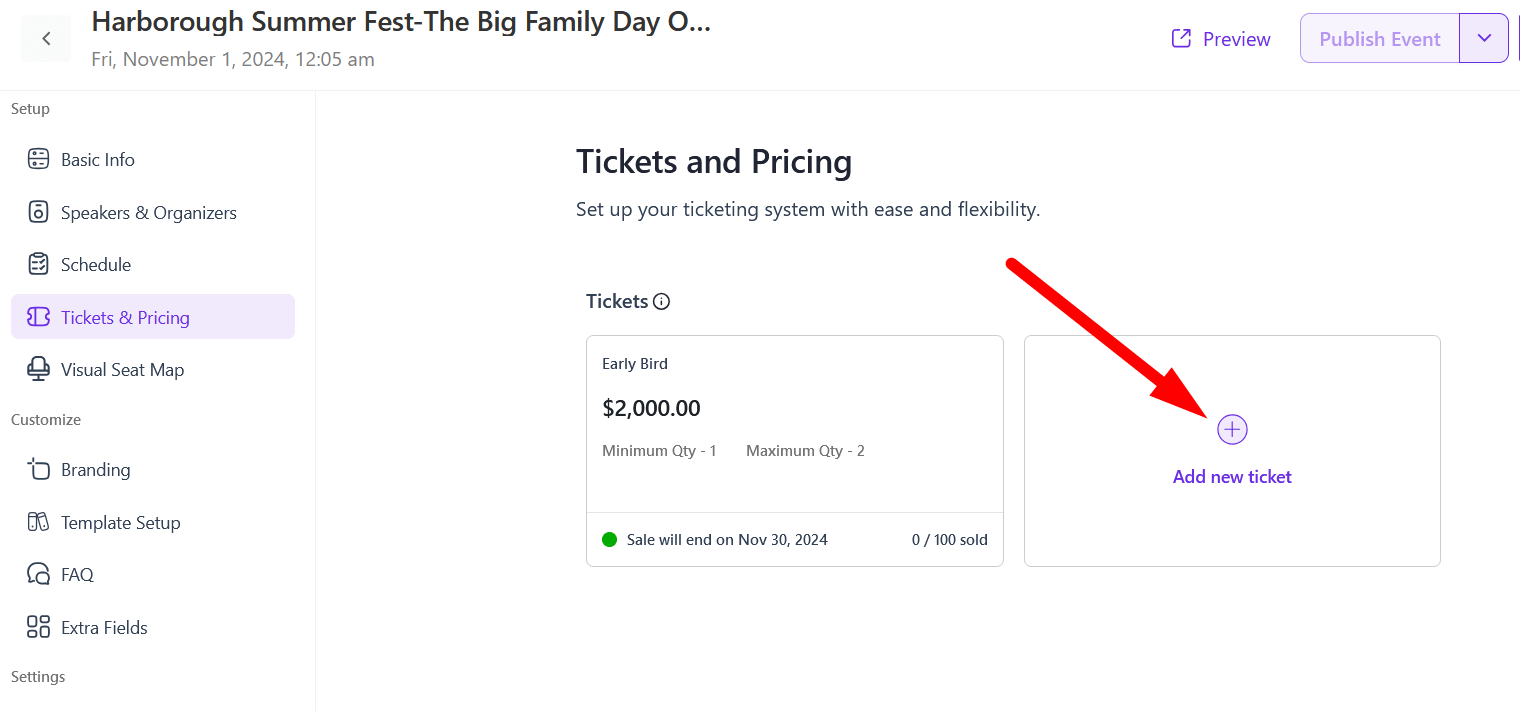
Once you go to the editor, scroll down and you will see the Ticket & Pricing menu. Click on that option and you can see the “Add New Ticket” form.
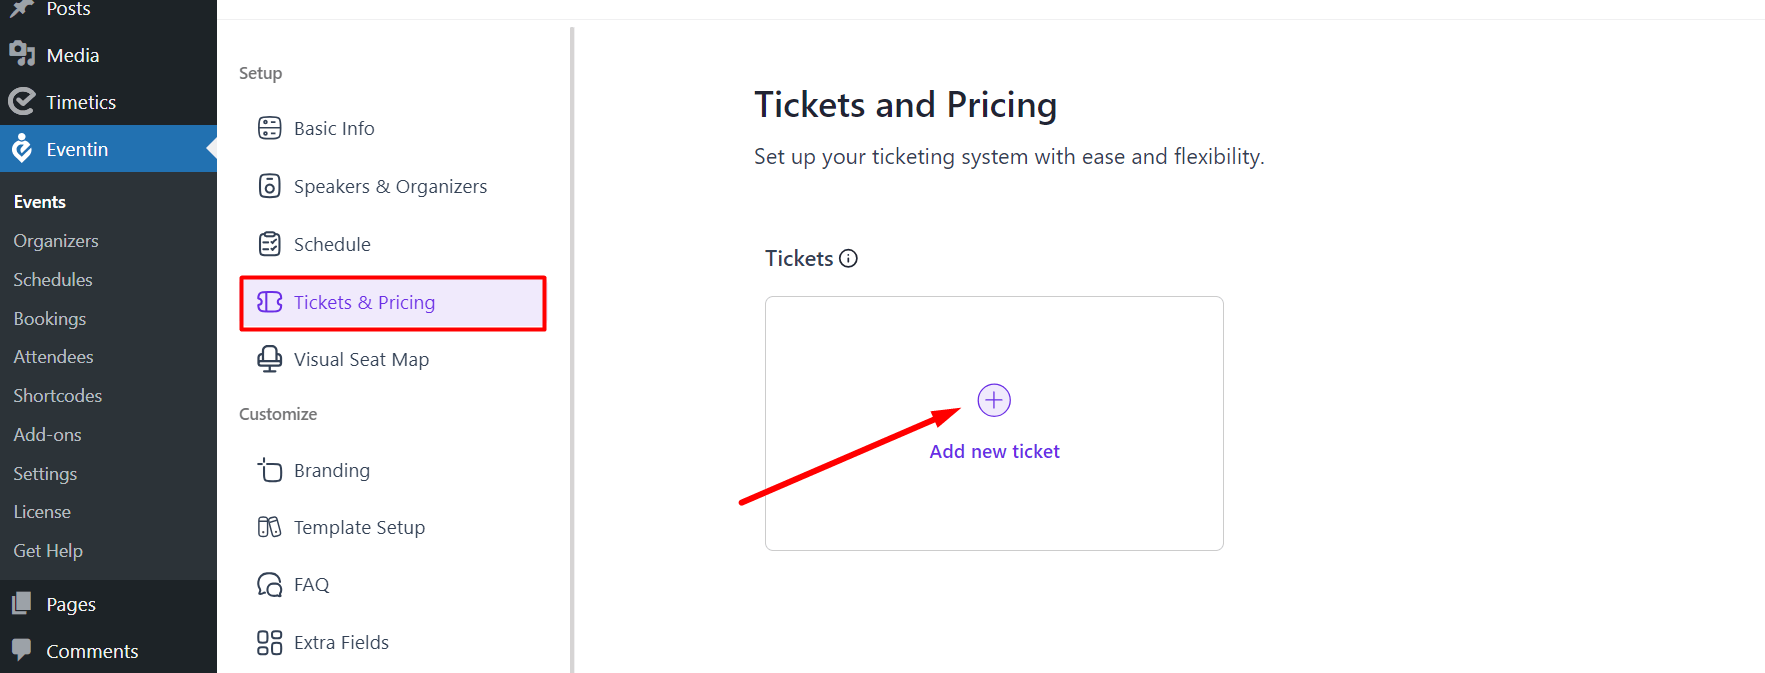
After clicking the “Add New Ticket” button, the following details need to be filled up.
- Ticket Name – Set a name for the ticket i.e ‘Early Bird’, ‘Regular’, ”VIP’
- No. of Tickets – Total number of tickets available for this ticket type/variation.
- Ticket Price – Set a price for the ticket
- Start and End date for Sale: Insert the start and end date for the sale of this ticket variation
- Start and End Time for Sale: Insert the start and end time for the sale of this ticket variation
- Minimum Purchase Qty – Set the minimum ticket purchase per order (PRO Feature)
- Maximum Purchase Qty – Set the maximum ticket purchase per order (PRO Feature)
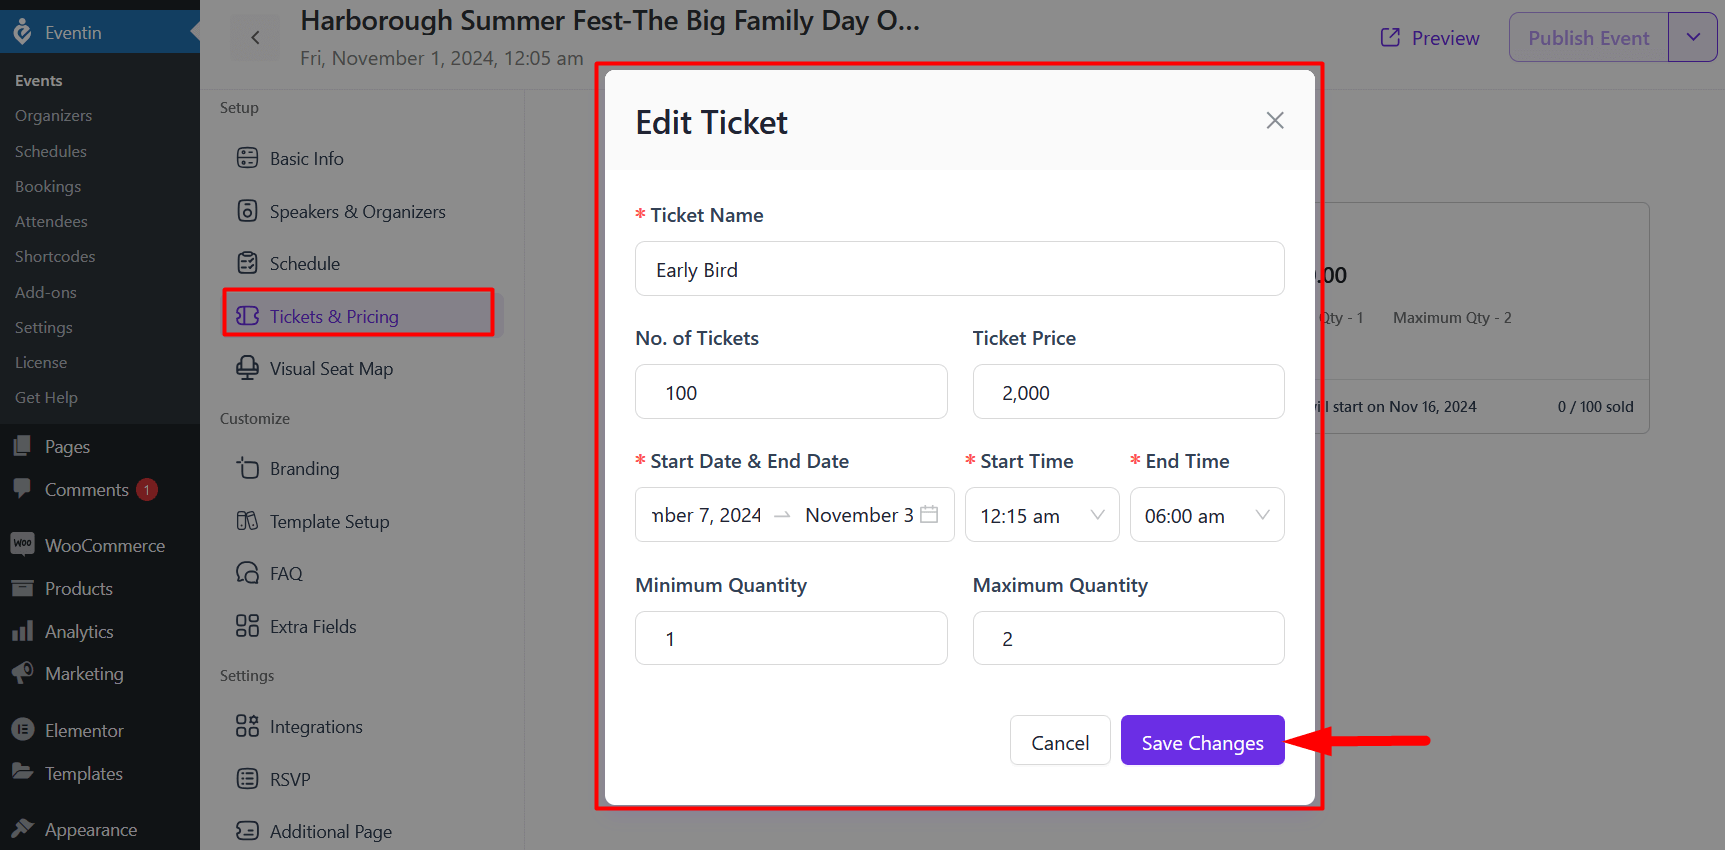
Finally, click on the “Add Ticket” button and your event ticket will be created successfully.
Multiple Ticket Variations #
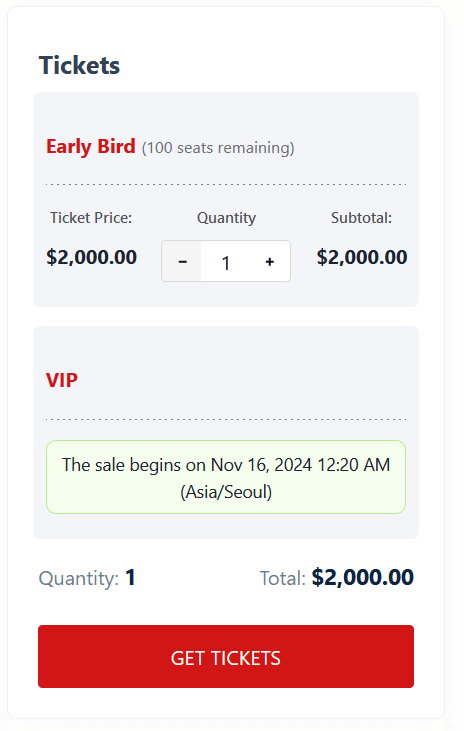
Create multiple types of ticket variations for events such as ‘Early Bird’, ‘Regular’, ‘VIP’ and set different prices for different tickets. With Eventin PRO, you can also set maximum and minimum ticket purchase quantity for every transaction. Maximum and Minimum ticket purchase quantity is a premium feature only.
Front end view of variation Tickets.