Hosting online events has never been easier! With Eventin’s Zoom integration, you can seamlessly connect your Zoom account to WordPress and manage all your virtual events, whether it’s a meeting or a large conference, right from your Eventin dashboard.
By enabling Zoom inside Eventin, you’ll be able to:
- Instantly create Zoom meetings while setting up events.
- Automatically share Zoom links with attendees through event tickets.
- Manage both in-person and online events from a single, unified platform.
Whether you’re running a small workshop or a large-scale conference, Eventin + Zoom ensures smooth scheduling, secure access, and a hassle-free experience for both organizers and participants.
Step-by-Step Process: #
Enable Module #
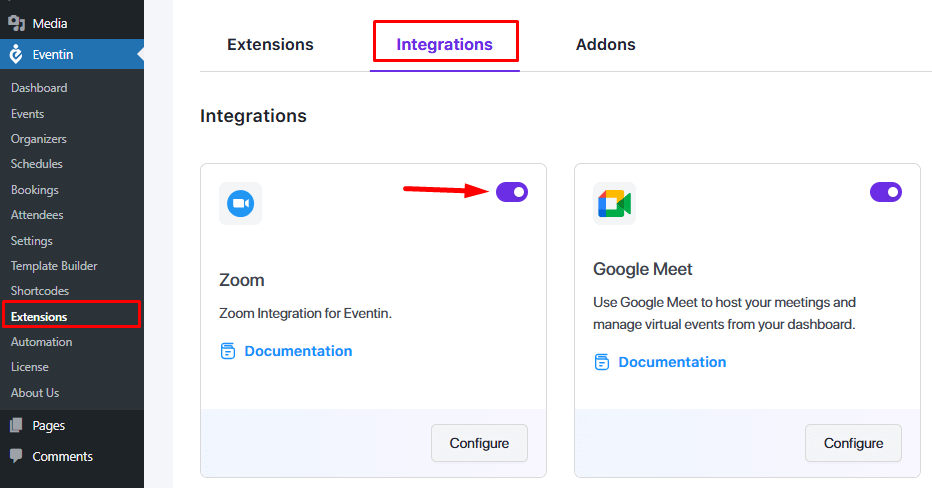
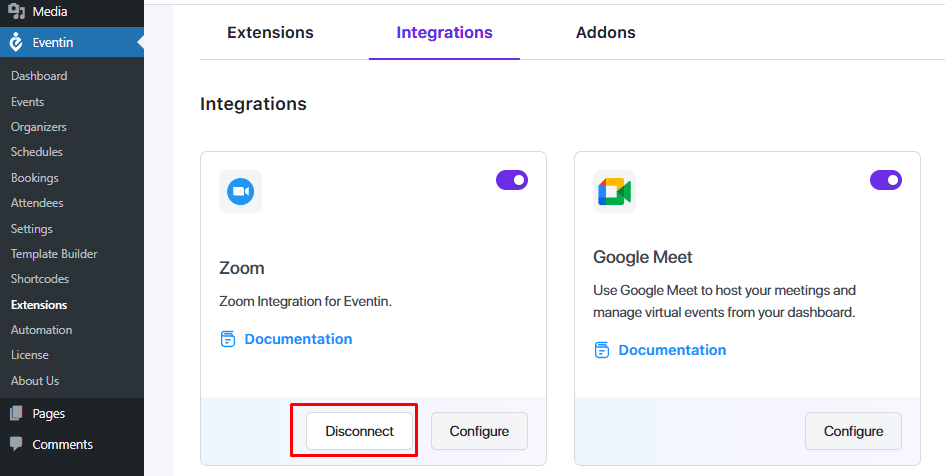
From your dashboard, go to Eventin > Extensions > Integrations tab and enable the Zoom module
🔹NOTE: For creating a Webinar, you will need to use Zoom Webinar Subscription as the Zoom platform’s requirement.
Generating API Key and Secret Key #
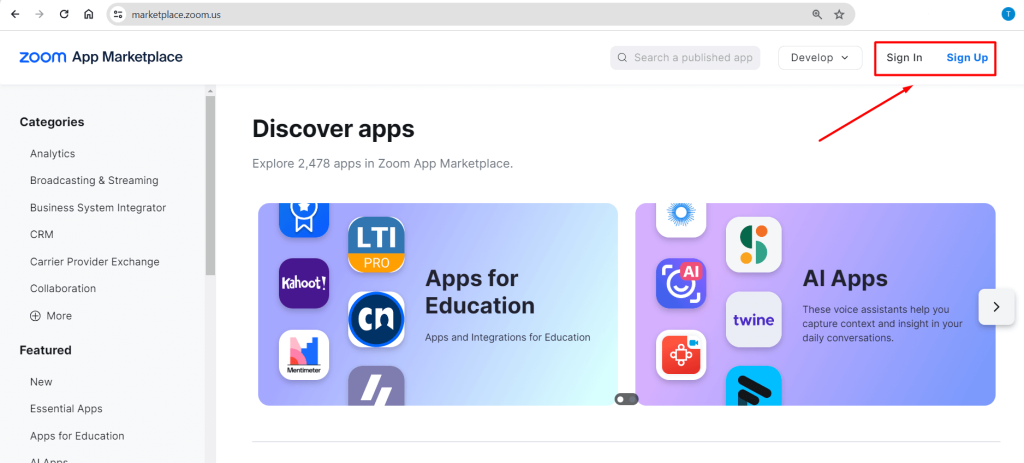
1) First of all, visit this link: https://marketplace.zoom.us/. You have to “Sign Up” first. If you already have an account, then “Sign In” here.
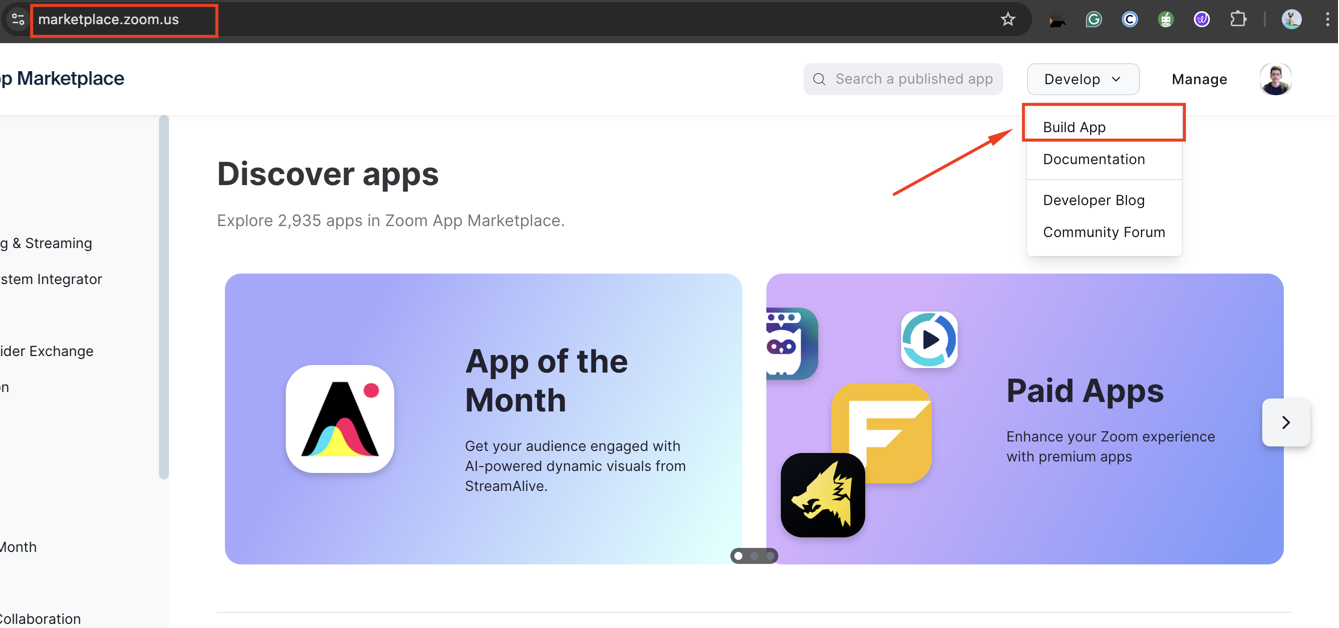
2) Now, click on Develop -> Build App at the top of the page.
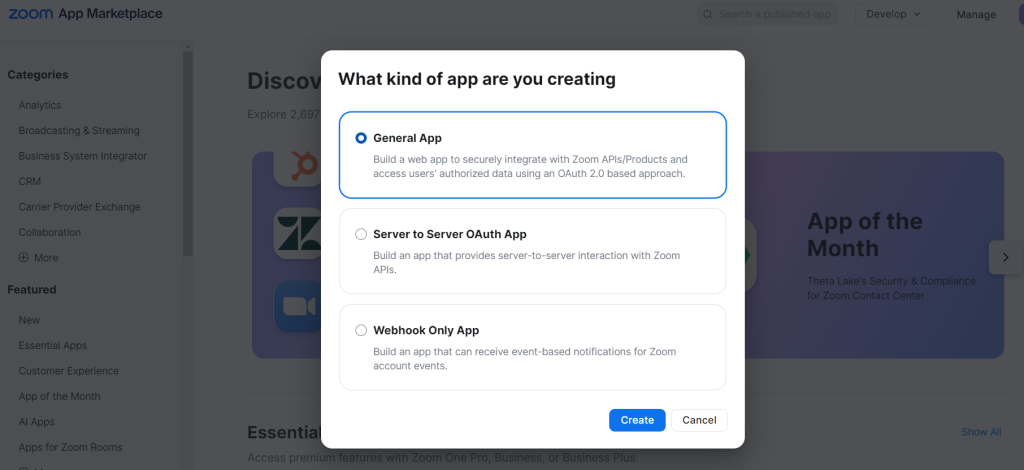
3) A page will pop up and select “General App” and click on the “Create” button.
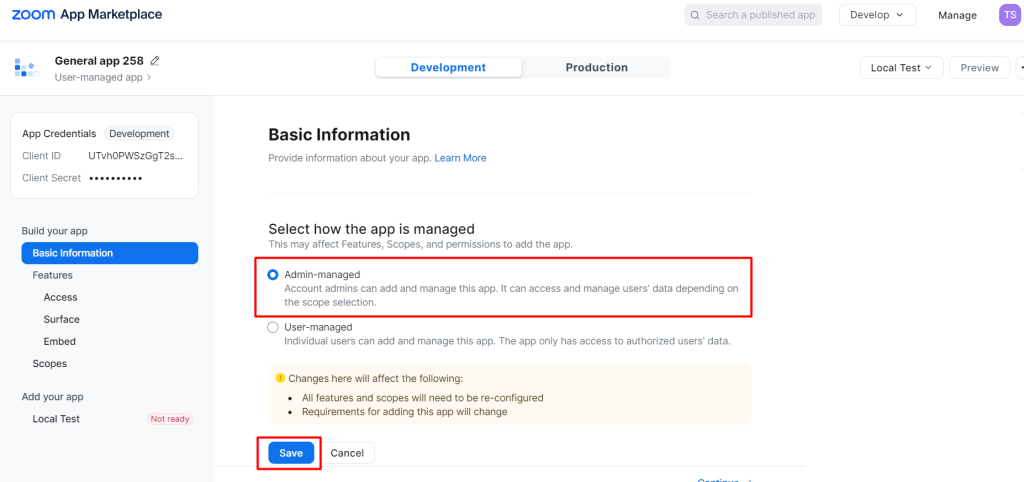
4) You will go to the Basic Information screen. Here, select “Admin Managed” and click on the “Save” button.
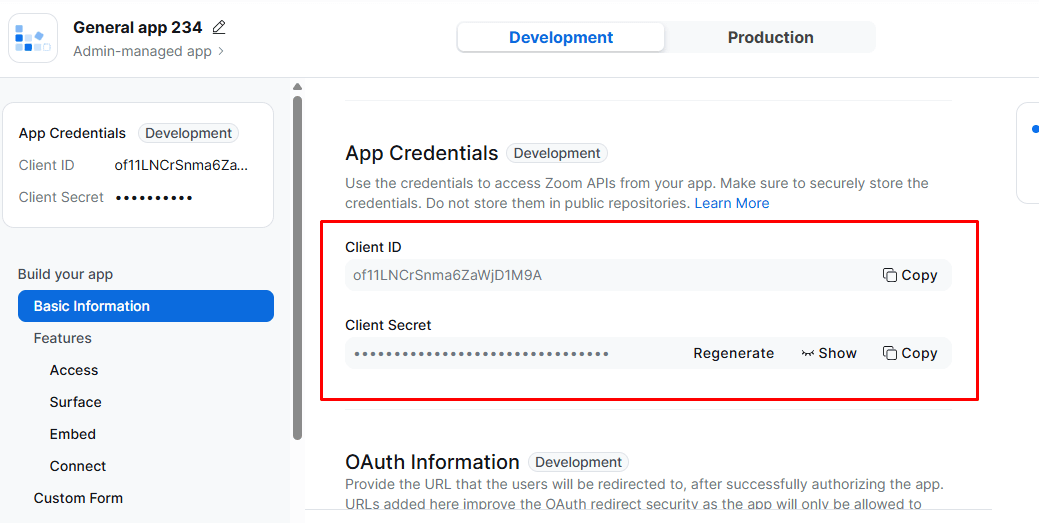
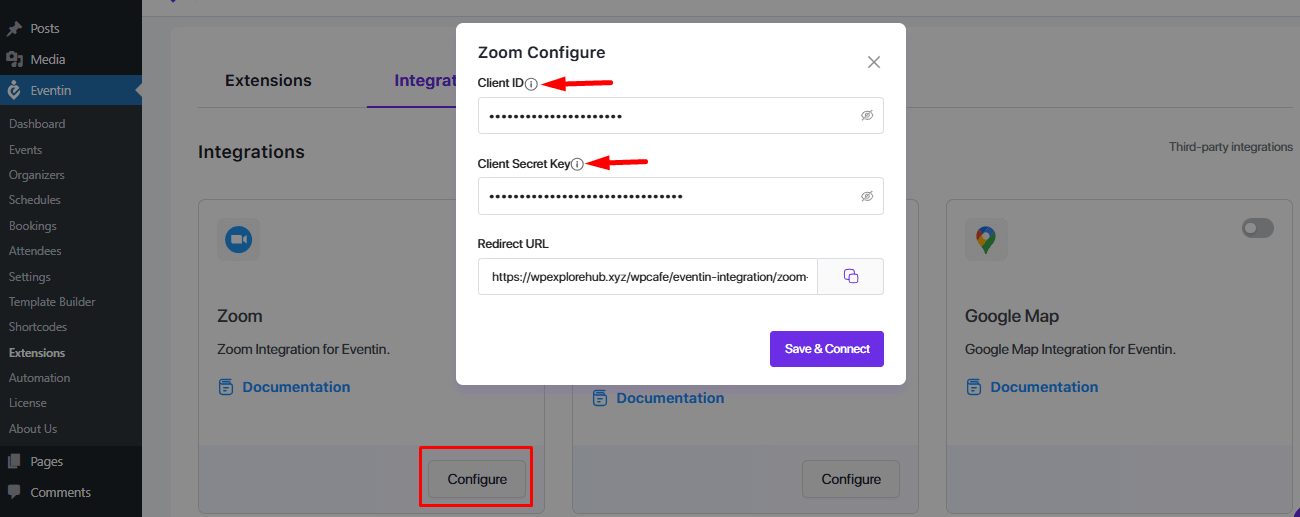
5) Now, copy the “Client ID” and “Secret Key” and insert them in the Zoom settings on the configure button.
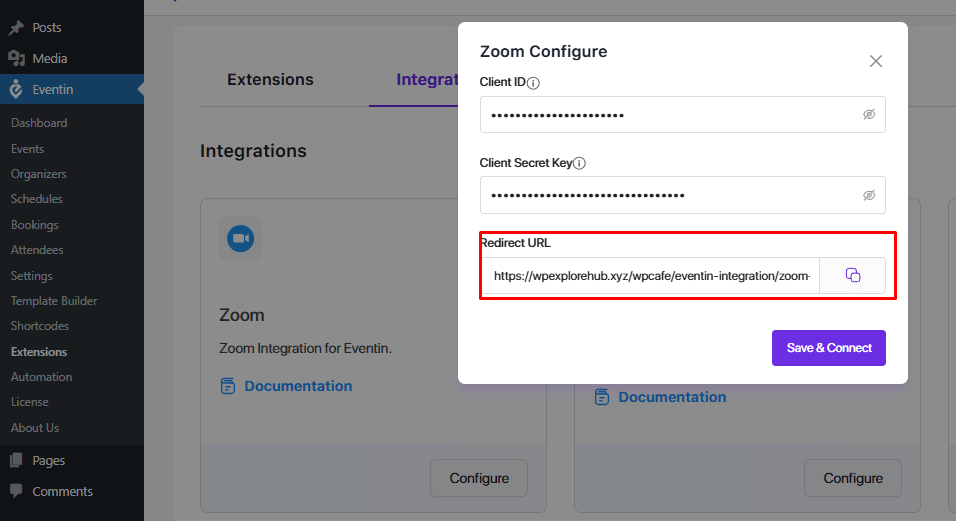
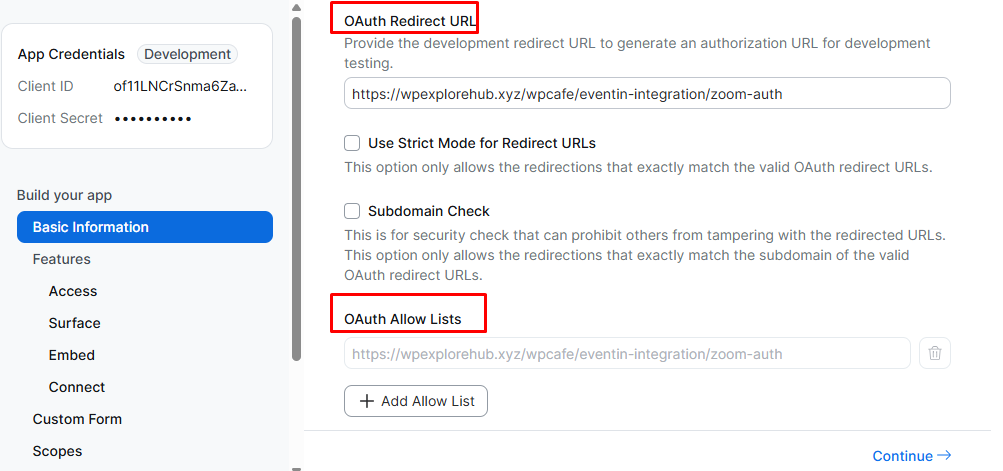
6) From Zoom settings, copy the Redirect URL.
Now go to the Zoom tab and scroll down from the basic information page, and enter the “OAuth Redirect URL” to the “OAuth Allow Lists” and continue.
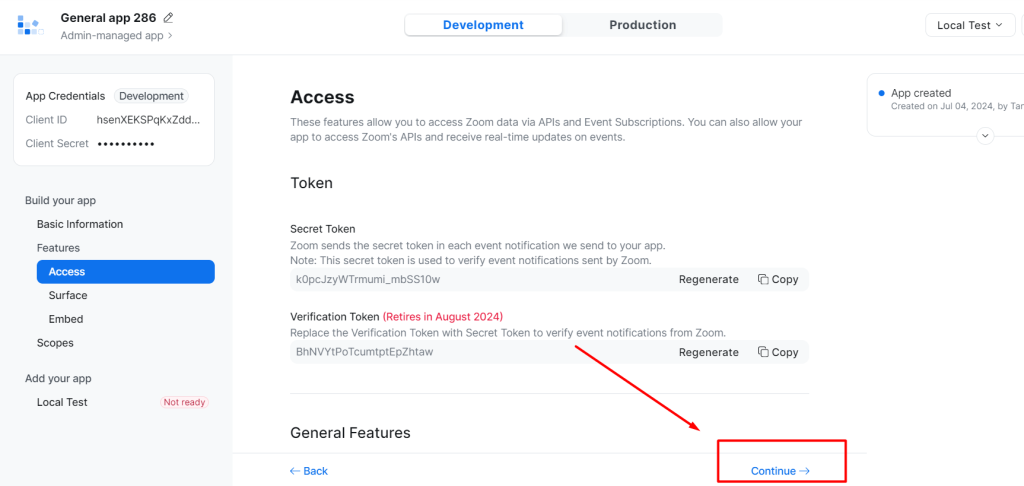
7) You will get the “Access” menu. Just “Continue” it.
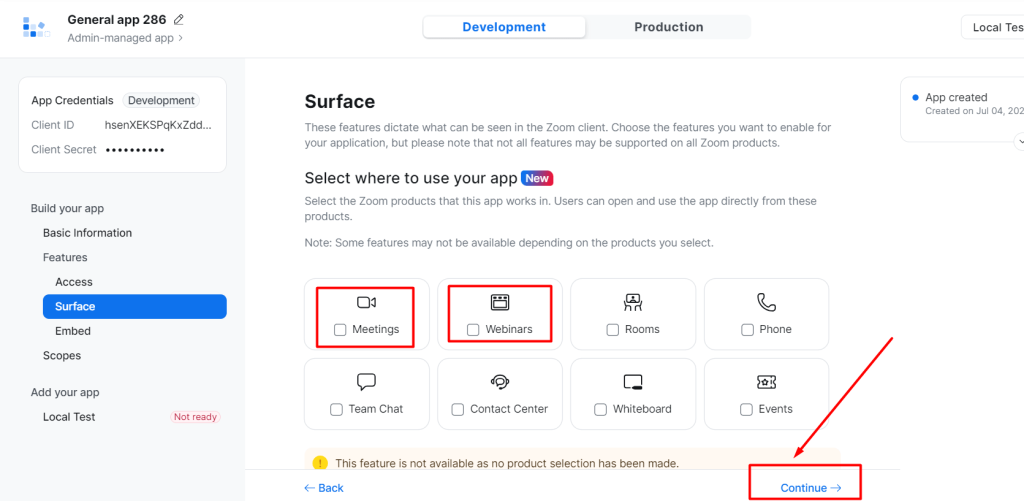
8) On the “Surface” menu page, select where you want to use your app and click on “Continue“.
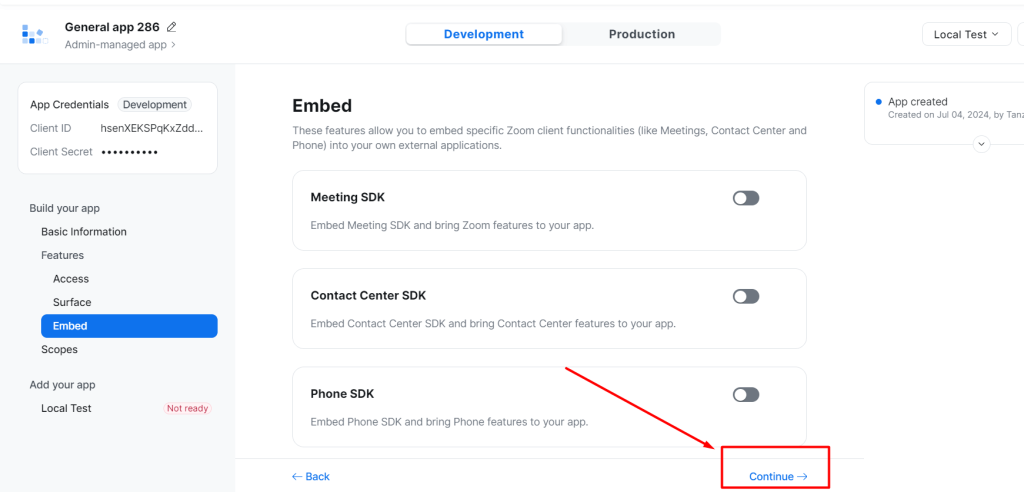
9) Also, skip the “Embaded” menu page and click on “Continue“.
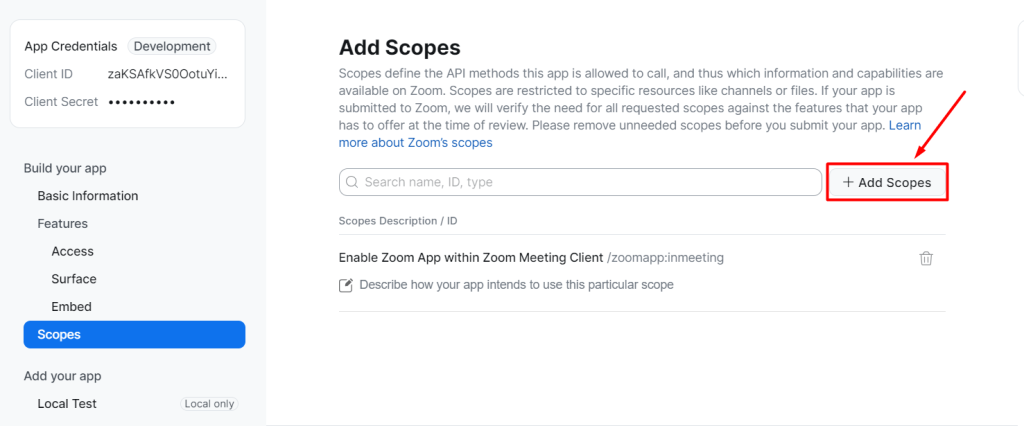
10) Now, you will go to the add scope page. To add scope, click on the “Add Scope” button.
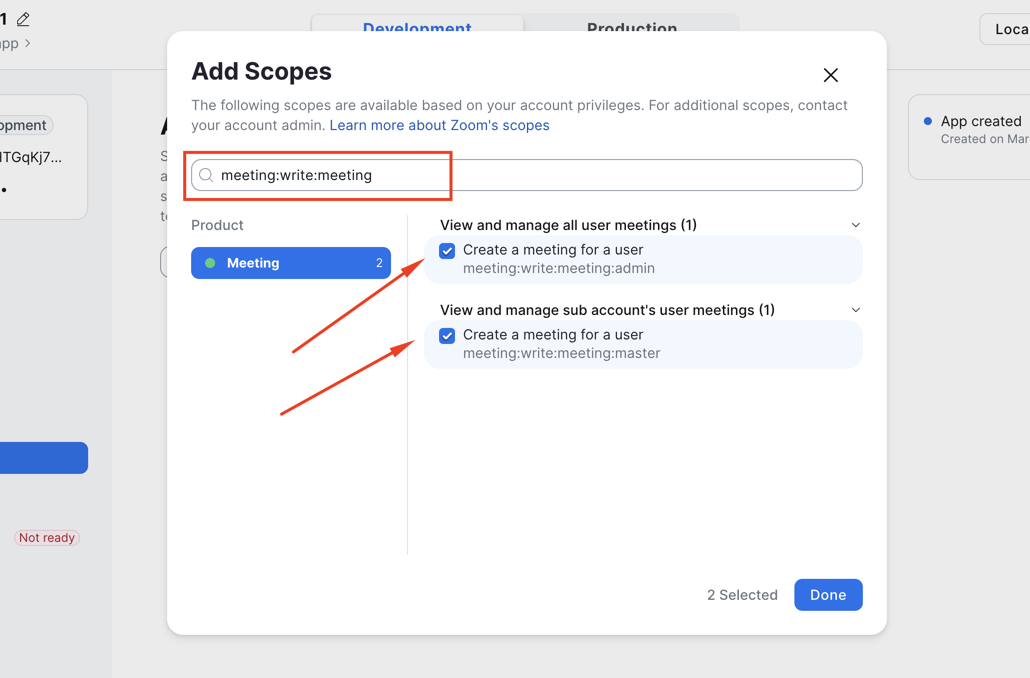
11) To add scopes for a meeting (type meeting:write: meeting), enable these two “Create a Meeting for User” options. Finally, click the “Done” button.
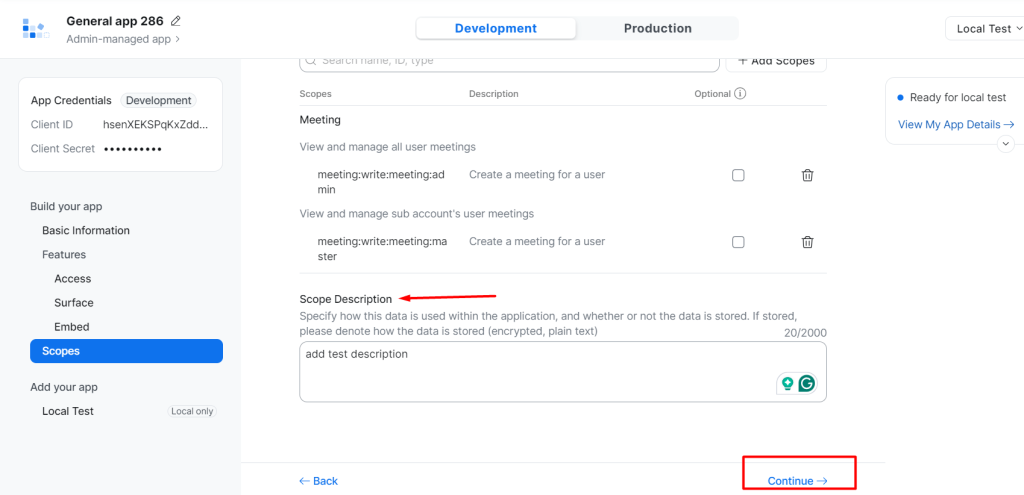
12) Now add a description for all the scopes that you already enabled and click on continue.
13) Now go to Eventin > Extensions -> Integrations > Zoom and click on the “Save & Connect” button. A new tab opens. Just agree on the condition and click on the “Allow” button.
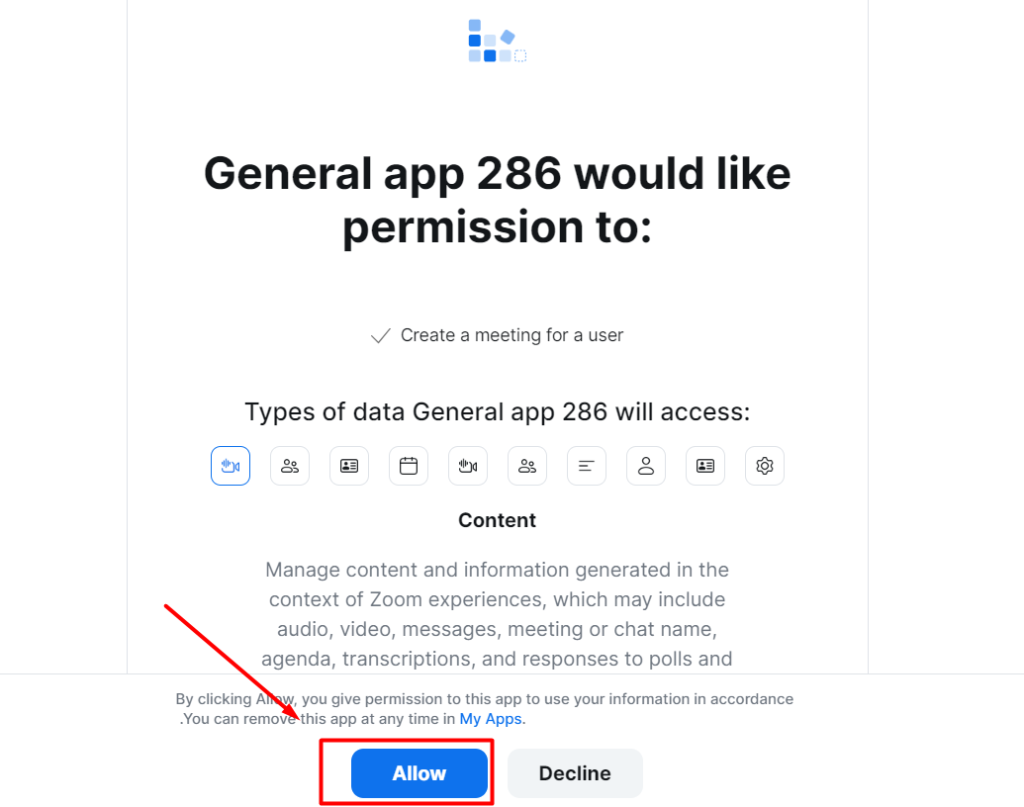
Finally, your Zoom is connected successfully.
Create Zoom Meetings #
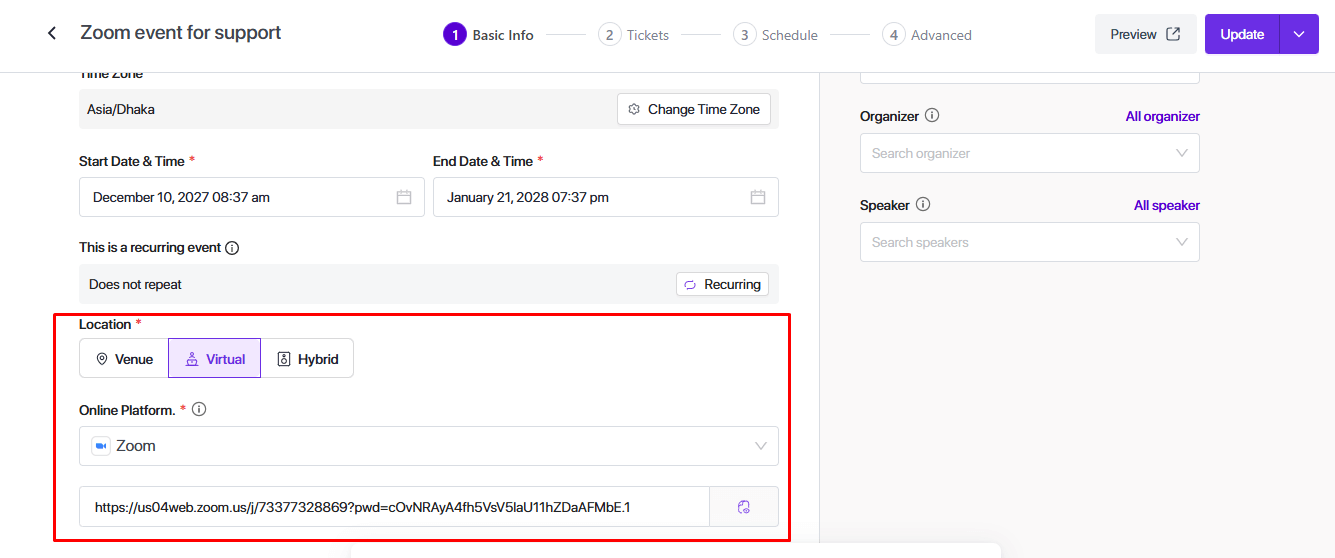
To create a Zoom link, go to Eventin → Events → Add New Event and enter the required event details.
Next, add the Location, select Event Type: Virtual, and choose Zoom.
Finally, save the changes, and the Zoom meeting link will be generated automatically.
Finally, you can send this link to your clients, and when the client purchases the Event, they will get the Zoom link with an event ticket.
Frequently Asked Questions (FAQ) #
Q1: Do I need a Zoom subscription to use Eventin Zoom integration?
👉 You can host regular Zoom meetings with a free Zoom account. However, for creating webinars, you must have an active Zoom Webinar Subscription, as required by Zoom.
Q2: Where do I enter the Zoom API credentials in WordPress?
👉 From your WordPress dashboard, go to Eventin > Settings > Integrations > Zoom, then enter your Client ID and Secret Key and save changes.
Q3: What happens if I enter the wrong API key or secret key?
👉 If your credentials are incorrect, you won’t get the Host ID to create a Zoom meeting. Please double-check and save again.
Q4: What is the Redirect URL in Eventin, and why do I need it?
👉 The Redirect URL ensures Eventin can connect with your Zoom account. Copy it from Eventin > Settings > Integrations > Zoom and paste it into the OAuth Allow List inside your Zoom App settings.
Q5: How do I add Zoom meetings to my events?
👉 When creating or editing an event in Eventin > Events, choose Online Event as the event type, select Zoom, and then save. A Zoom meeting link will automatically be generated and included with the event ticket.
Q6: Can I connect multiple Zoom accounts with Eventin?
👉 Currently, Eventin supports connecting one Zoom account at a time. If you need multiple accounts, you’ll need to switch credentials.
Q7: Will attendees automatically receive the Zoom link after registration or purchase?
👉 Yes! Once the event is created with Zoom integration, the meeting link is automatically included in the event ticket sent to attendees.
Conclusion #
With Zoom integration, Eventin makes it simple to manage both offline and online events in one place. By connecting your Zoom account through API credentials, you can easily create meetings, webinars, and conferences directly from your WordPress dashboard. Whether you’re running a small virtual workshop or a large webinar, Eventin ensures your attendees automatically receive the correct Zoom link, saving you time and effort.
By following the step-by-step setup process, you’ll have a fully functional Zoom + Eventin integration ready to power your online events smoothly.


