Twilio is a solution that will let you send SMS updates to your customers. This documentation will help you set up Twilio SMS for your WPCafe restaurant website by integrating with WooCommerce. Since WPCafe orders are managed by WooCommerce, Twilio needs to be integrated with WooCommerce to send SMS for order details.
🔹 NOTE: Twilio SMS integration is only for Food Ordering features, not Reservations. WPCafe uses WooCommerce to manage only Food Ordering, which is why the Twilio integration with WooCommerce lets you send SMS updates only for Food Ordering settings.
Required Plugins #
ShopMagic is a free WooCommerce SMS Plugin. It is an add-on to ShopMagic (which is also free). In order to send text messages from your WooCommerce store, you will need both ShopMagic and the ShopMagic for Twilio add-on.
Setting up a Twilio Account #
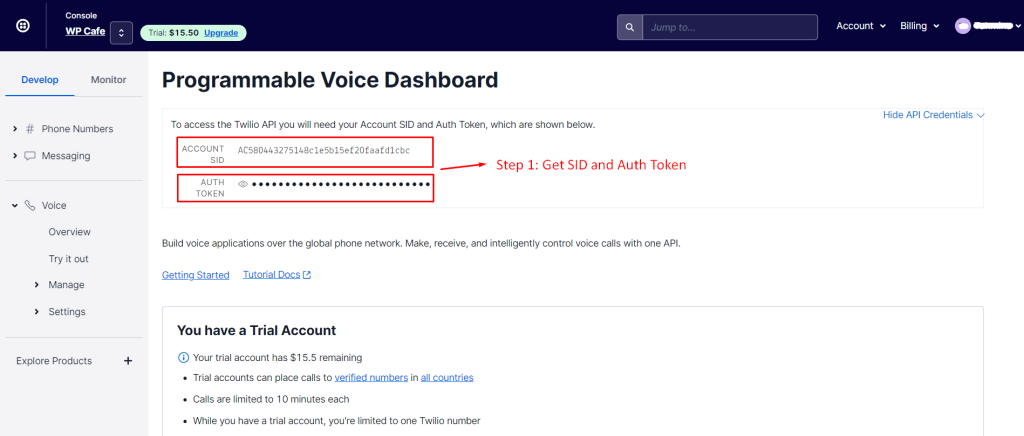
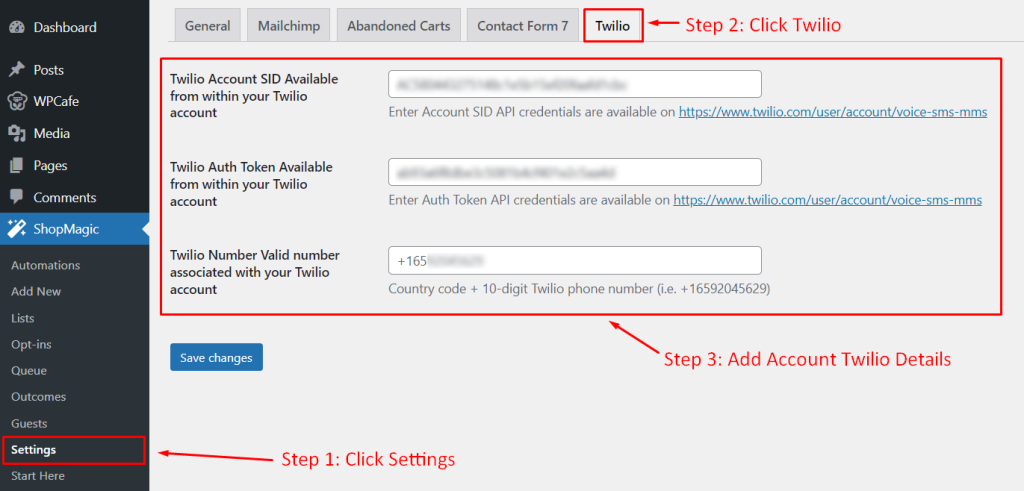
The first step is to set up SID and Auth Token. From your Dashboard, go to ShopMagic -> Settings -> Twilio. Here you will see the option to set up the following:
- Twillio Account SID
- Twilio Auth Token.
- Twilio Valid Phone Number
You can get this information by logging into your Twilio account details page.
Creating Automation to Send SMS #
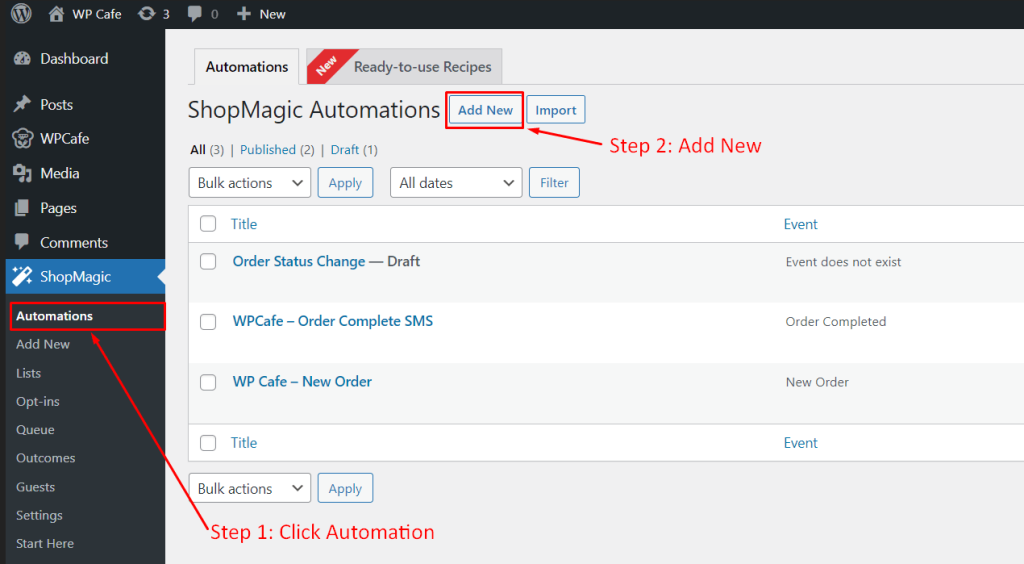
Once you have set up your account, you are ready to automate your SMS service. From your dashboard, go to ShopMagic -> Automation -> Add New. Here is a short summary of the steps for setting up automation.
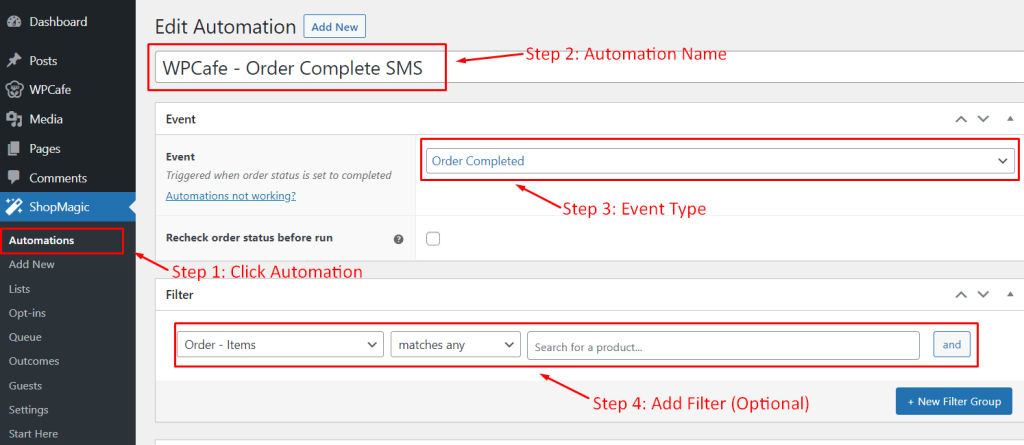
- Automation Name – Give your event a name that will help you understand what that event will do. (i.e., WPCafe – Order Complete SMS)
- Event – Select an Event for which you want to trigger an action (i.e., Order Complete)
- Filter (Optional) – If you want to set a specific filter for a specific type of customer, order, etc. (i.e., Order Items that include Beef Burger)
- Action – Choose an action that you want to perform. In this case, we will choose Send SMS with Twilio.
1. Set Automation Name #
Give your event a name that will help you understand what that event will do. In this case, let’s set the name to WPCafe – Order Complete SMS as an example.
2. Select Event #
Now you need to select an Event. Since this is Order Complete SMS, you can select Order Completed as the event to trigger an action for this example.
3. Add Filters (Optional) #
If you want to set a specific filter for a specific type of customer, order, etc. You can do that by adding a New Filter Group. Multiple filters can be added to one action.
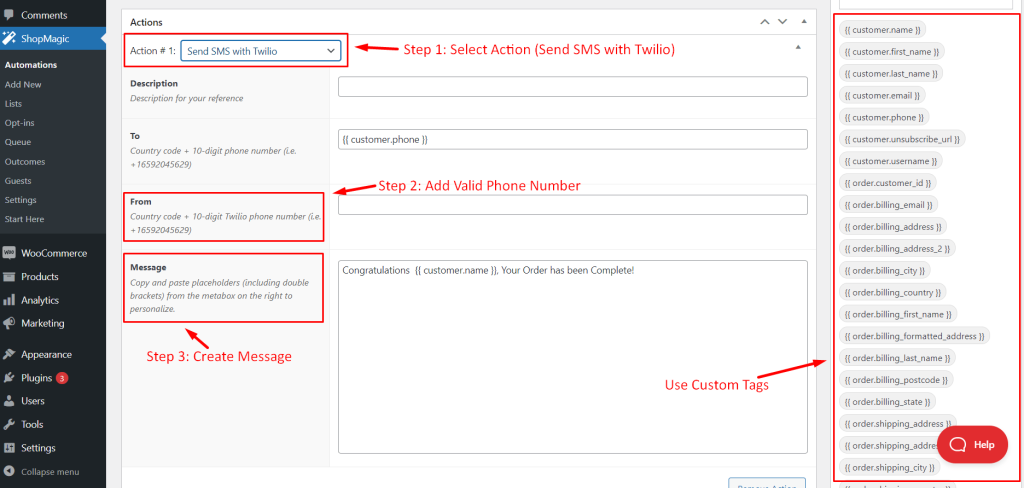
4. Actions Triggered for Event #
Now select an action that will be triggered when your event occurs. Here you can choose from multiple options, but for this purpose, select Send SMS with Twilio. Then you can fill up the Description, To, From, and Message fields with your message. There are a lot of custom tags too, which you can choose to use in your message fields. You can add multiple actions for one event.
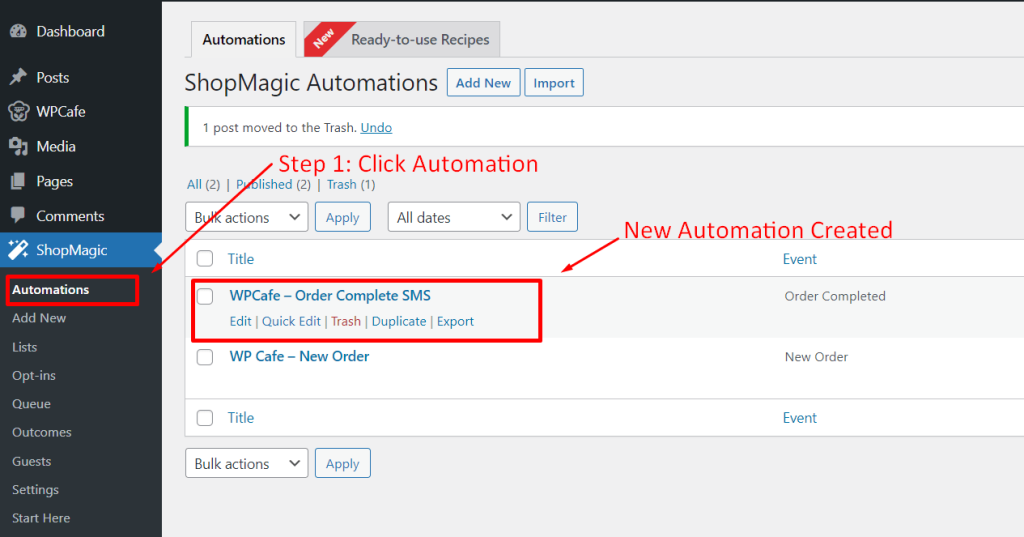
Automation Complete #
Once you publish your automation, go back to your Automation settings, and you will see your automation added to the list. In this way, you can create multiple automations for your restaurant website.
Use Cases for Twilio SMS Integration #
Now that you know the process of setting up, let’s go over some example use cases you can create for your restaurant website.
🔹 Send text messages for order status changes – With ShopMagic, you cannot only use standard WooCommerce order statuses but also custom ones e.g., Order Shipping.
🔹 Create automation for abandoned carts and recover them – Recovering abandoned carts is another free add-on that works great with ShopMagic for Twilio. Use it to notify your customers with SMS messages that they left something in the cart.
🔹 Notify customers about their subscription status. ShopMagic is integrated with the WooCommerce Subscription plugin. Thanks to it, you can notify your customers about any change in their subscription. For example, send text messages when a subscription is going to end or after successful renewal.
You can visit ShopMagic Documentation for more info ➔


