Event Schedule in WP Eventin Event Management plugin for WordPress #
Create Schedule #
To create a schedule, go to Eventin -> Schedule. Once there, click on the New Schedule button to begin the process of adding a new event schedule.
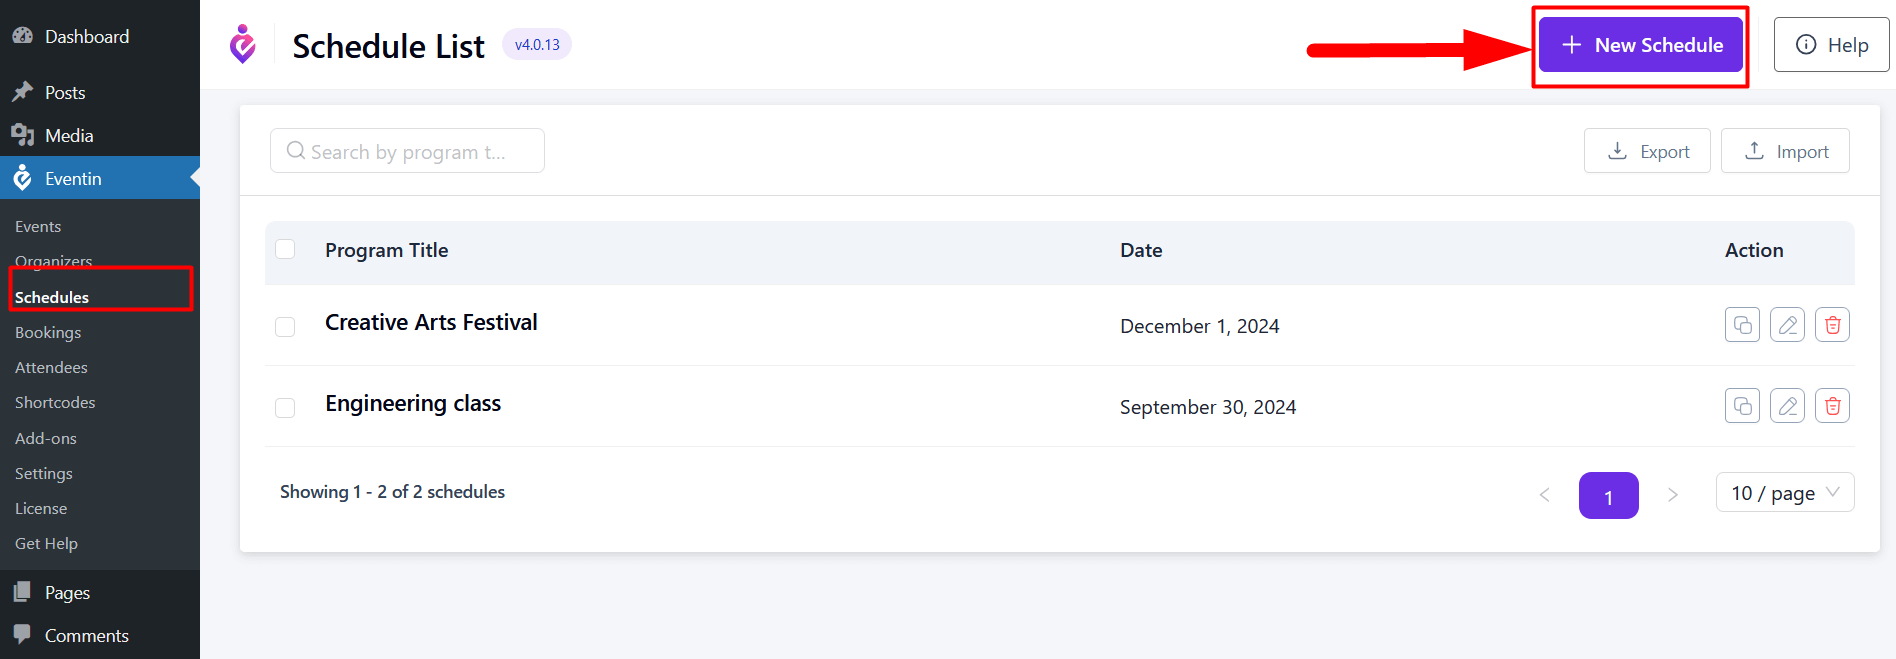
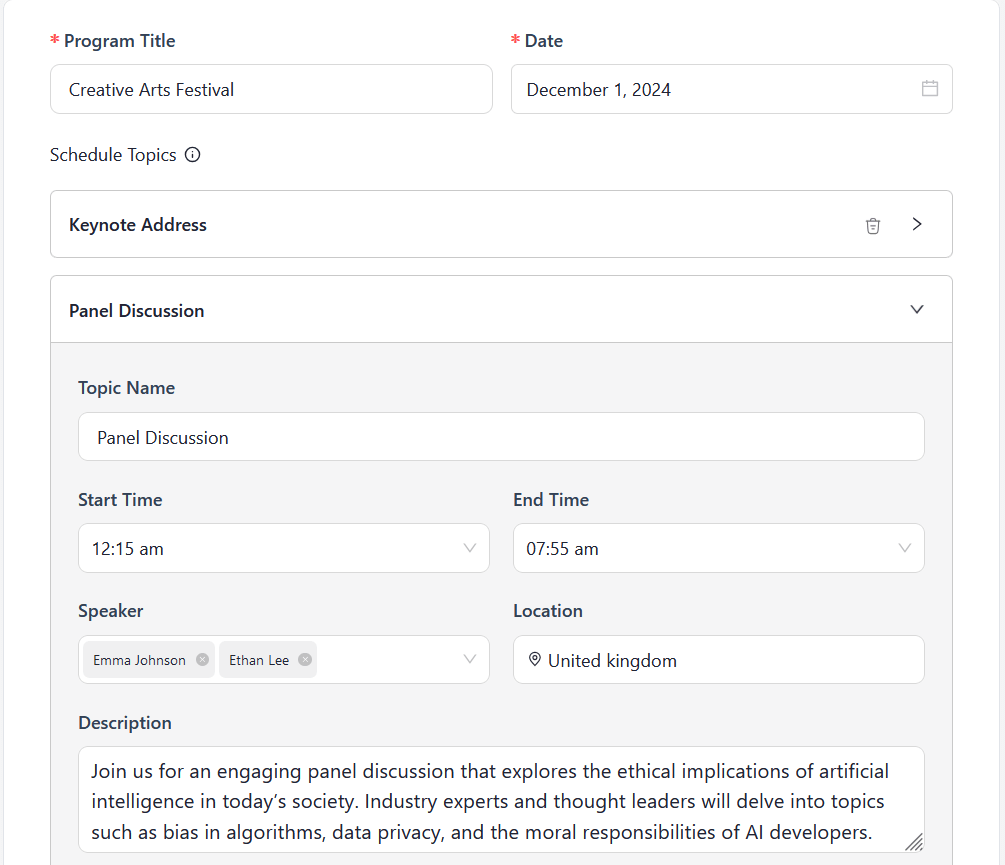
After clicking on the “Add Schedule” button, schedule form will open. Now, insert the Program Title and Date for your event schedule. This foundational information sets the context for all subsequent schedules.
Next, you will add multiple schedules. For each schedule, include the following details:
- Topic Name: Specify the name of the session or topic being addressed.
- Start Time: Indicate when the session will begin.
- End Time: Specify when the session will conclude.
- Speaker: Name the speaker or presenters for that session.
- Location: Provide the venue or platform where the session will take place.
- Description: Include a brief overview of the session’s content and objectives.
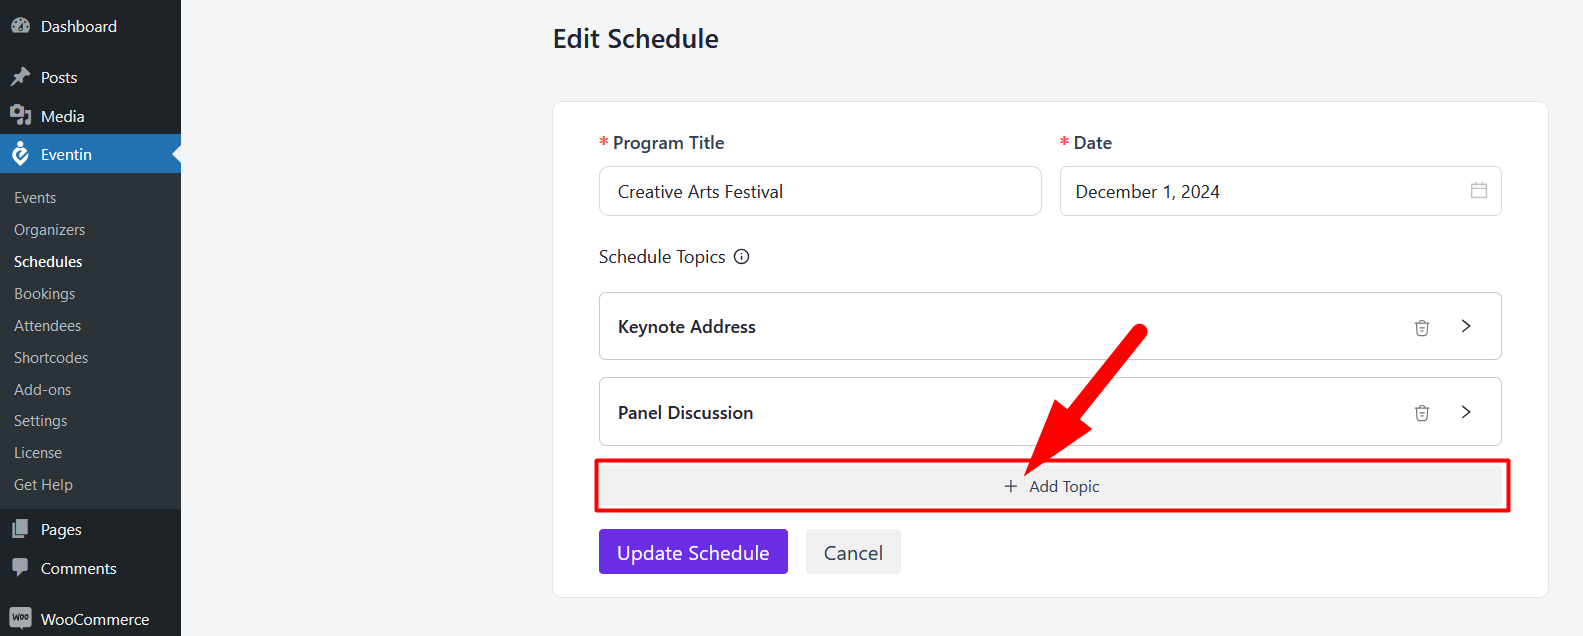
To add additional schedules, click on the Add New Topic button. This feature allows you to create multiple schedule topics with different timings, ensuring a comprehensive overview of your event.
Once all the necessary details are filled out, review the information for accuracy. Finally, click on the Add Schedule button to finalize your schedule.

Create schedule from Event #
Also, you can adding Schedule from the Event page.
Events -> Add new or edit Event -> Schedule and add new Schedule.
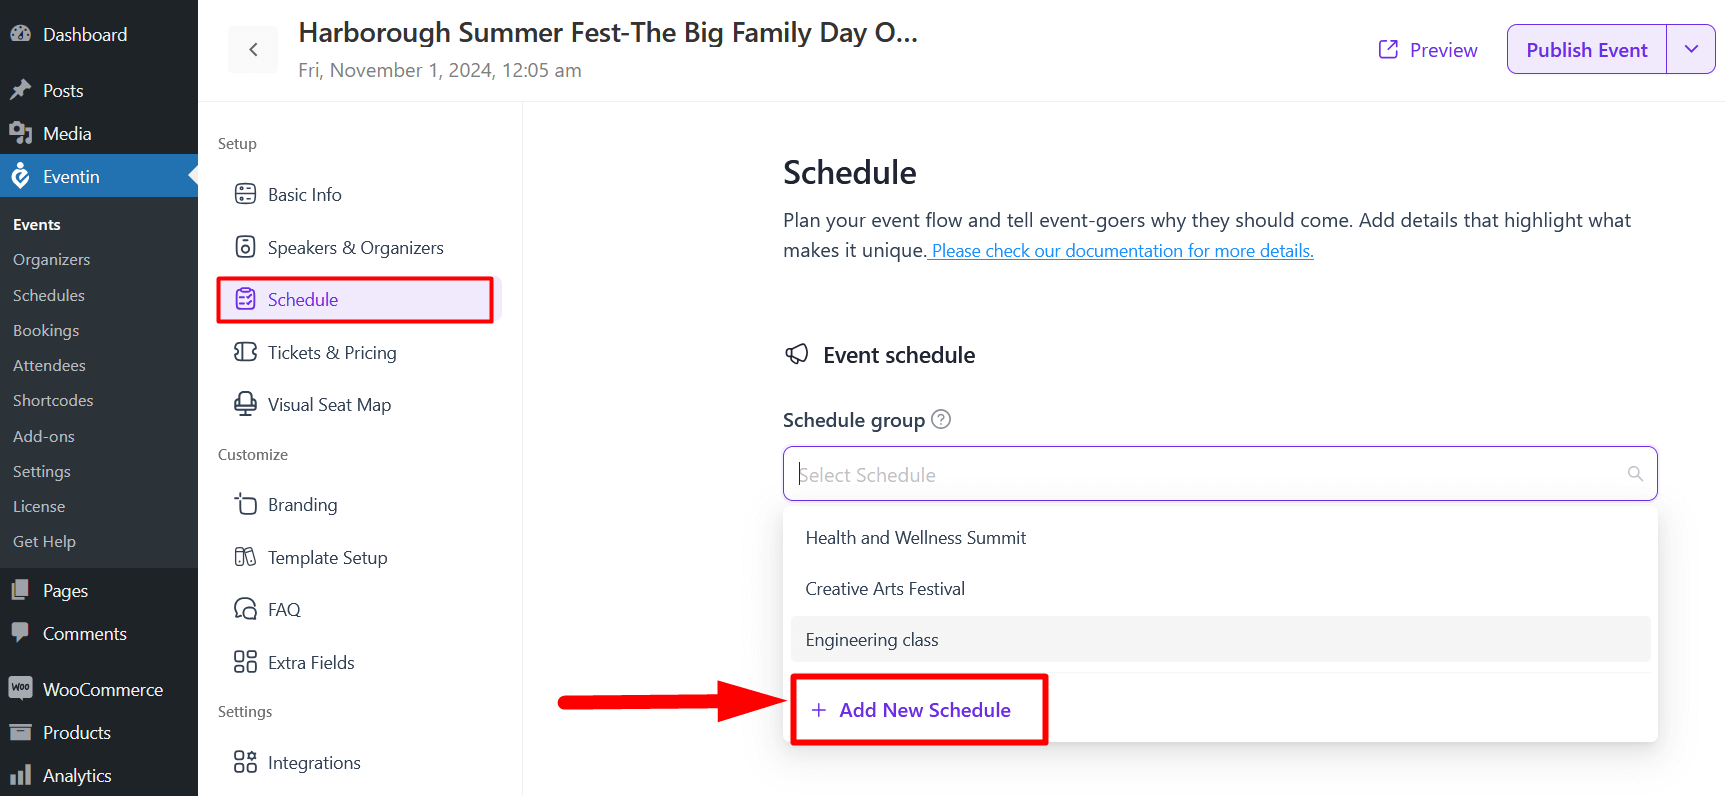
To add a schedule to your event, follow the documentation on “How to Assign a Shcedule on Events“
Export/Import Eventin Schedules #
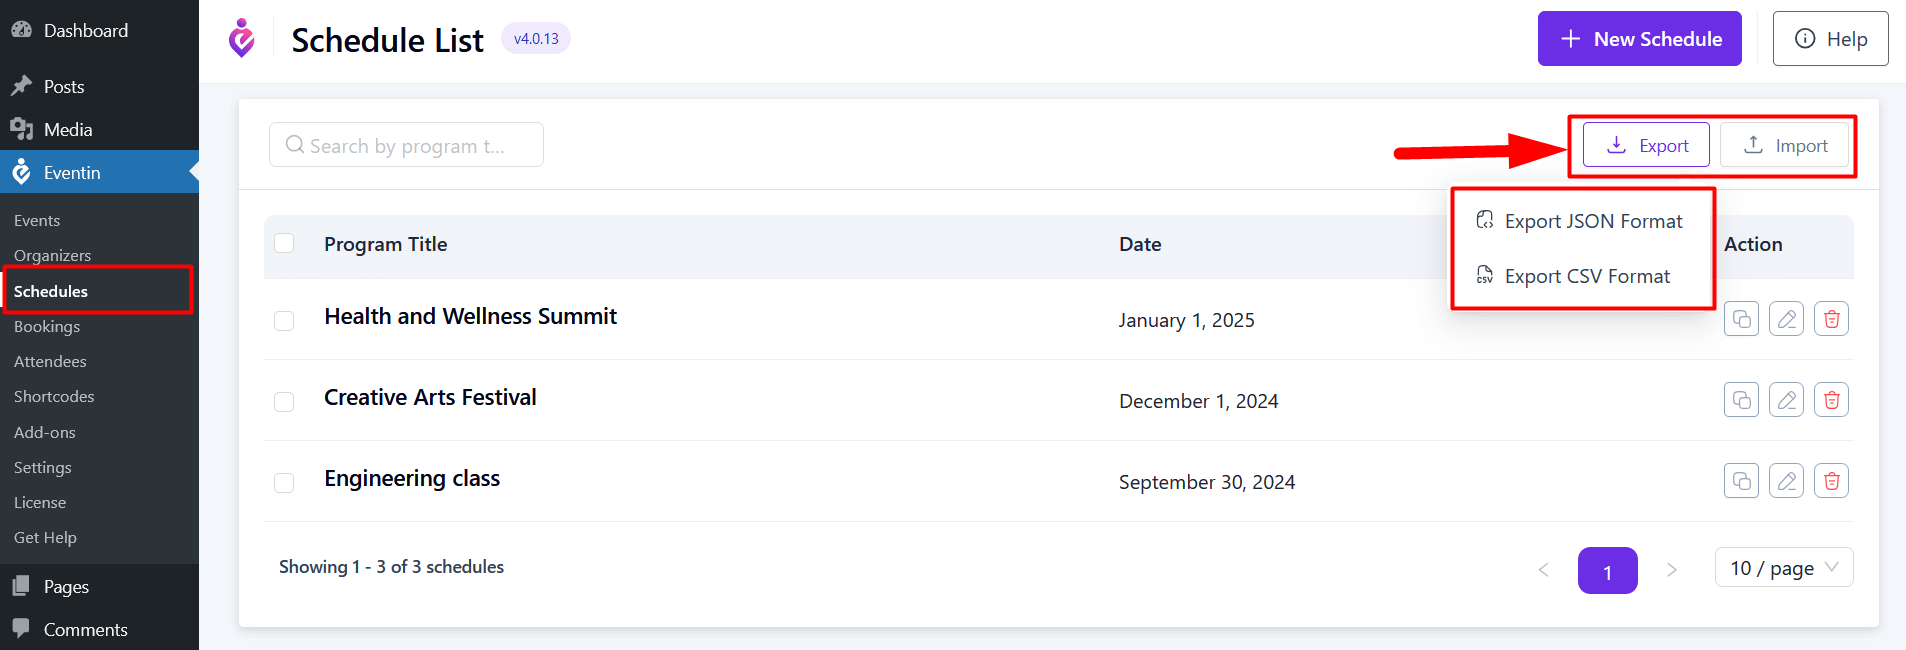
Eventin allows you to easily import and export schedules in two convenient formats: JSON and CSV. This flexibility ensures that you can manage your event schedule data efficiently according to your needs.
You can visit the links to view the schedule shortcodes and Elementor widgets.


