You can control users roles and permission in WPCafe in order to give specific access to users for the reservation. You can manage your reservation smoothly in more secure ways. With the user’s roles permission, you can get the following advantages.
- Give specific permission to any user group or a user
- Restricting users within specific capabilities
In order to set the ‘User roles and permission’, you will need to create users and then assign the permission. We tested and set the user roles with the ‘User Role Editor‘ and ‘Adminimize‘ or ‘Admin Menu Editor‘ plugins. However, you can use other available plugins to set user roles and permission. Let’s see how can you implement it on your website.
Required Plugin – 1) User Role Editor 2) Adminimize or Admin Menu Editor
Create Roles and Assign Permissions #
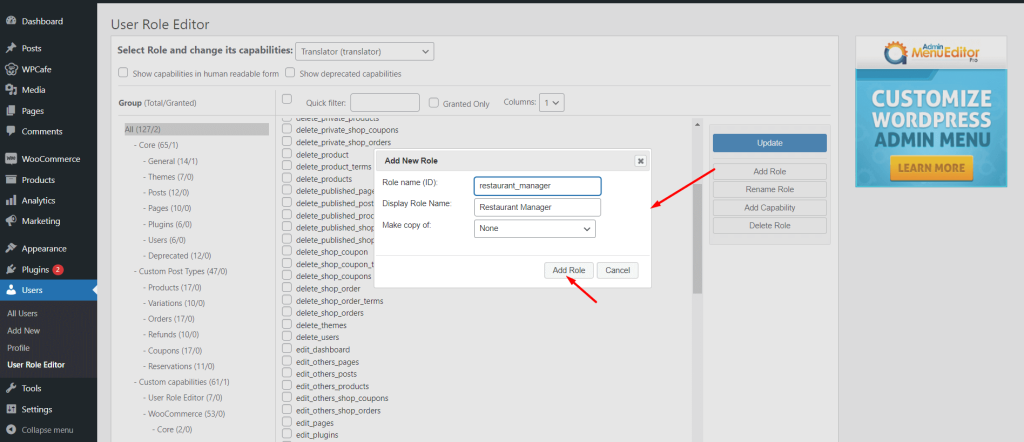
First of all, you need to install and activate the User Role Editor and Adminimize plugin. Then go to the Dashboard -> Users -> Users Roll Editor -> Click on add Role and insert necessary information for adding role.
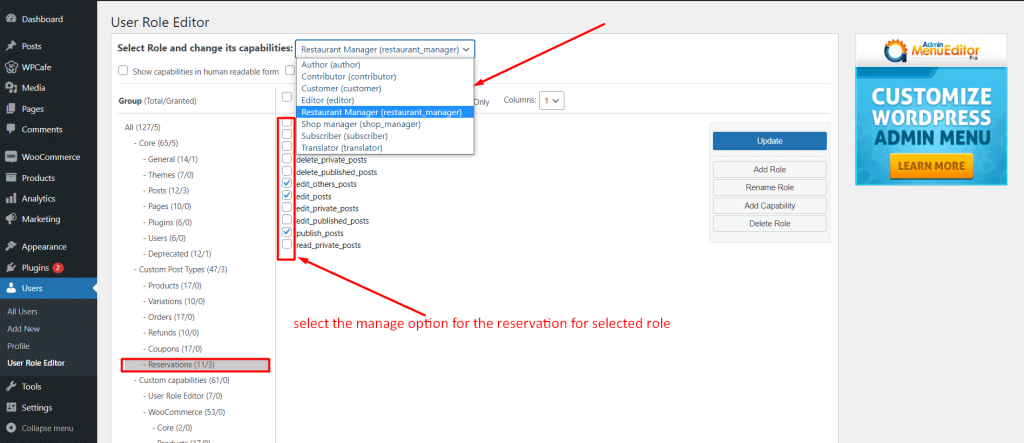
Then you need to select the role from the “Select Role” dropdown option. Now select for which feature you want to give permission to the user.
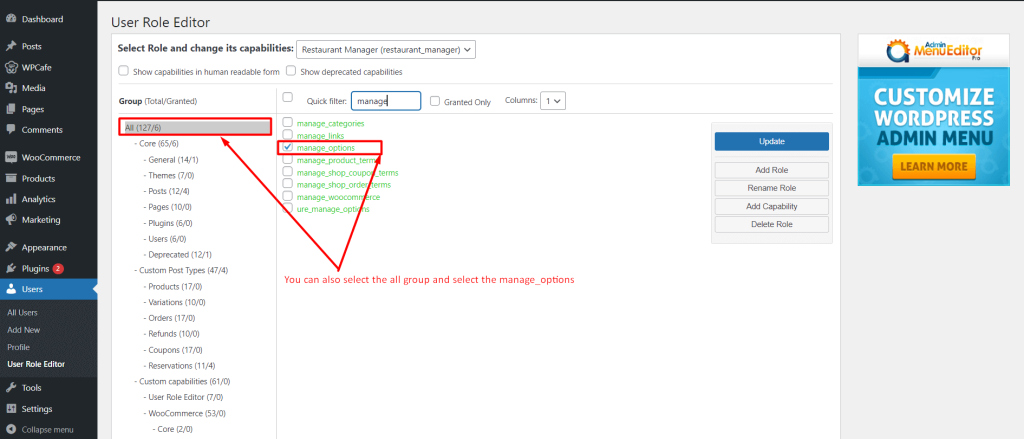
Then select “All” group -> check to mark the “manage_options” and click on the update button.
Now, go to the Dashboard -> Settings -> Adminimize -> Menu options. You can control which menu option you want to give permission for showing in the user dashboard. You have to uncheck the options that you want to show to the user.

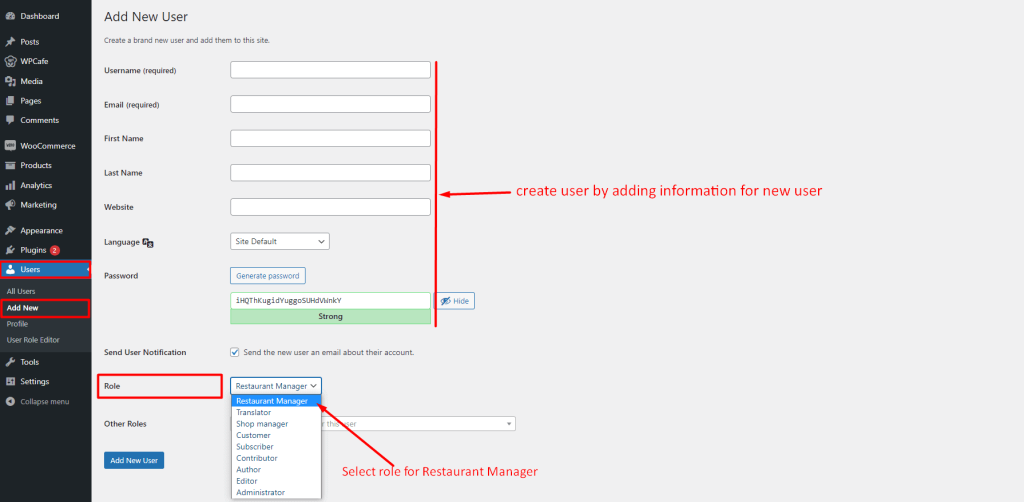
Create User with Custom Role #
Then navigate to the Dashboard -> Users -> Add New User and select the role that is created with the “User Role Editor”.
This is the final look at the user Dashboard. The user can manage the permitted option from their dashboard.