Enabling the Local Payment option allows customers to pay directly at the event venue. This is especially useful for attendees who prefer not to make payments online and want to pay for their tickets at the event gate.
Clients can also use Eventin’s online payment methods, such as Stripe and PayPal, alongside Local Payment. However, if WooCommerce is enabled as the payment system, Eventin’s native payment gateways cannot be used at the same time. WooCommerce provides its own payment gateways, such as Stripe, PayPal, and offline payment methods.
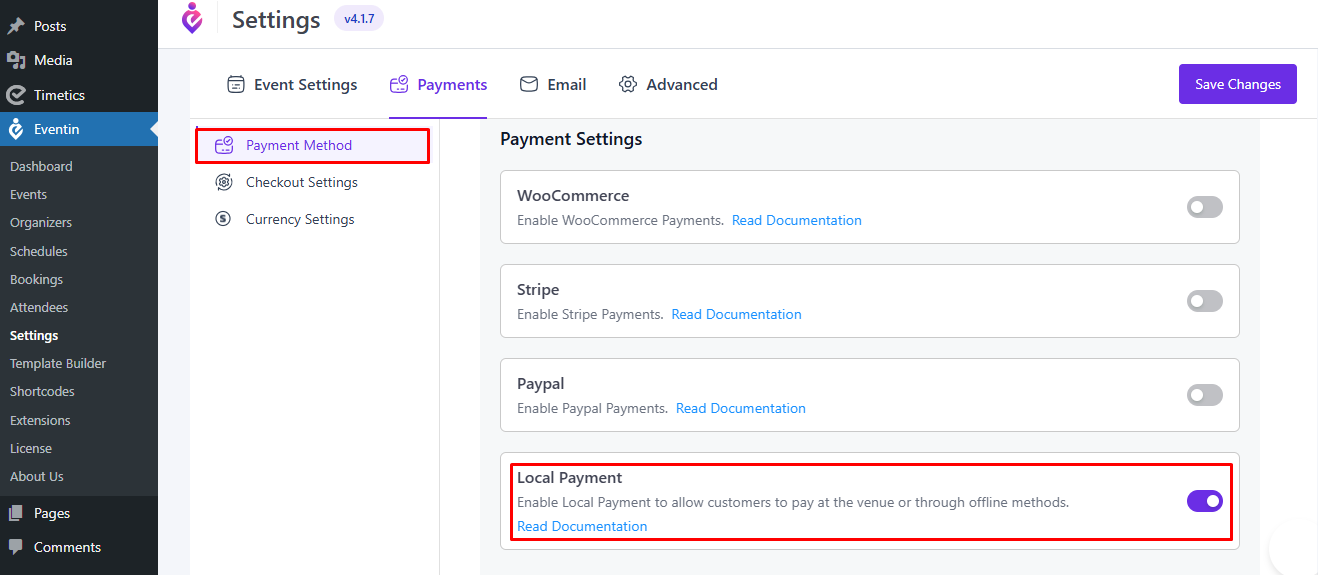
Steps to Enable Local Payment #
- Go to Eventin → Settings from the WordPress dashboard.
- Click on the Payments tab.
- Select Payment Method from the left panel.
- Find the Local Payment option.
- Toggle the switch ON to enable it.
- Click Save Changes.
How Local Payment Works #
Once Local Payment is enabled, customers will be able to select Local Payment during checkout and complete the payment at the event venue.
In this case, the order will initially remain in Pending status. After verifying the payment, the admin needs to manually mark the order as Complete from the dashboard.
After the order is completed, the attendee will receive a ticket email containing a QR code. At the event venue, the QR code can be scanned to allow the attendee to enter the venue.


