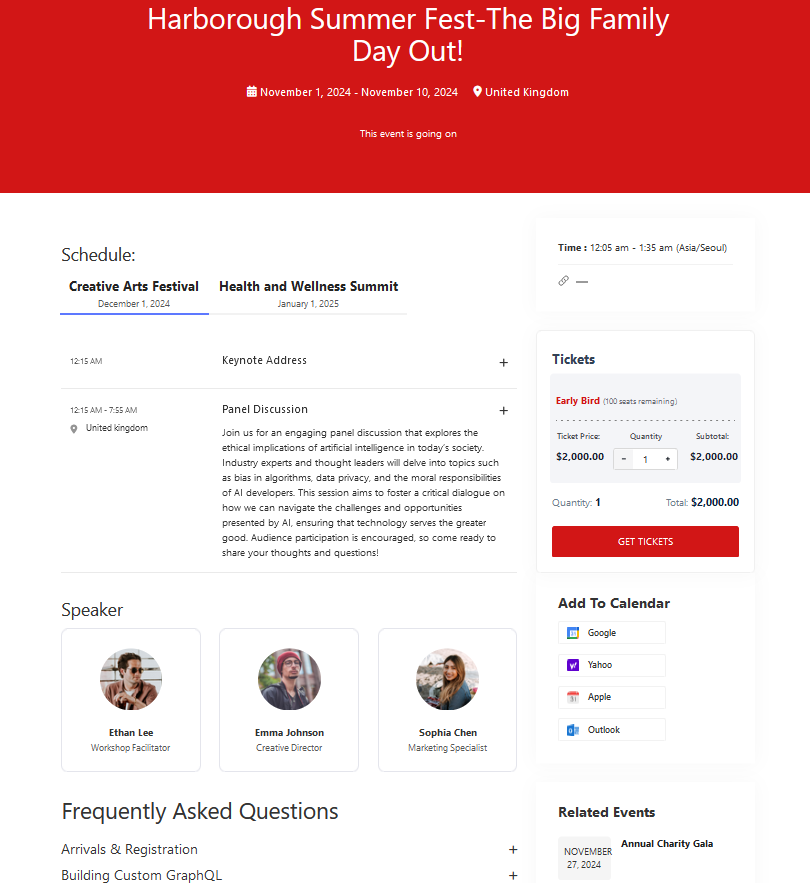
There are three ways to create a new event.
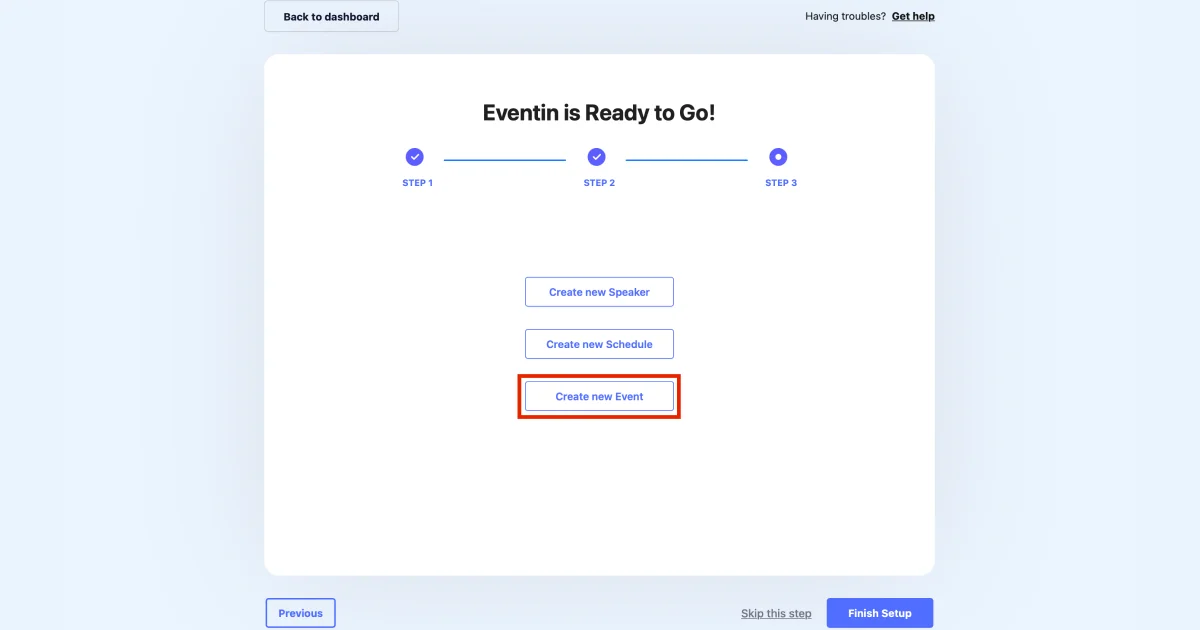
1. Form Onboarding Page
One from the onboarding page from your first arrival with the Eventin event management plugin for WordPress.
2. Using AI (Artificial Intelligence)
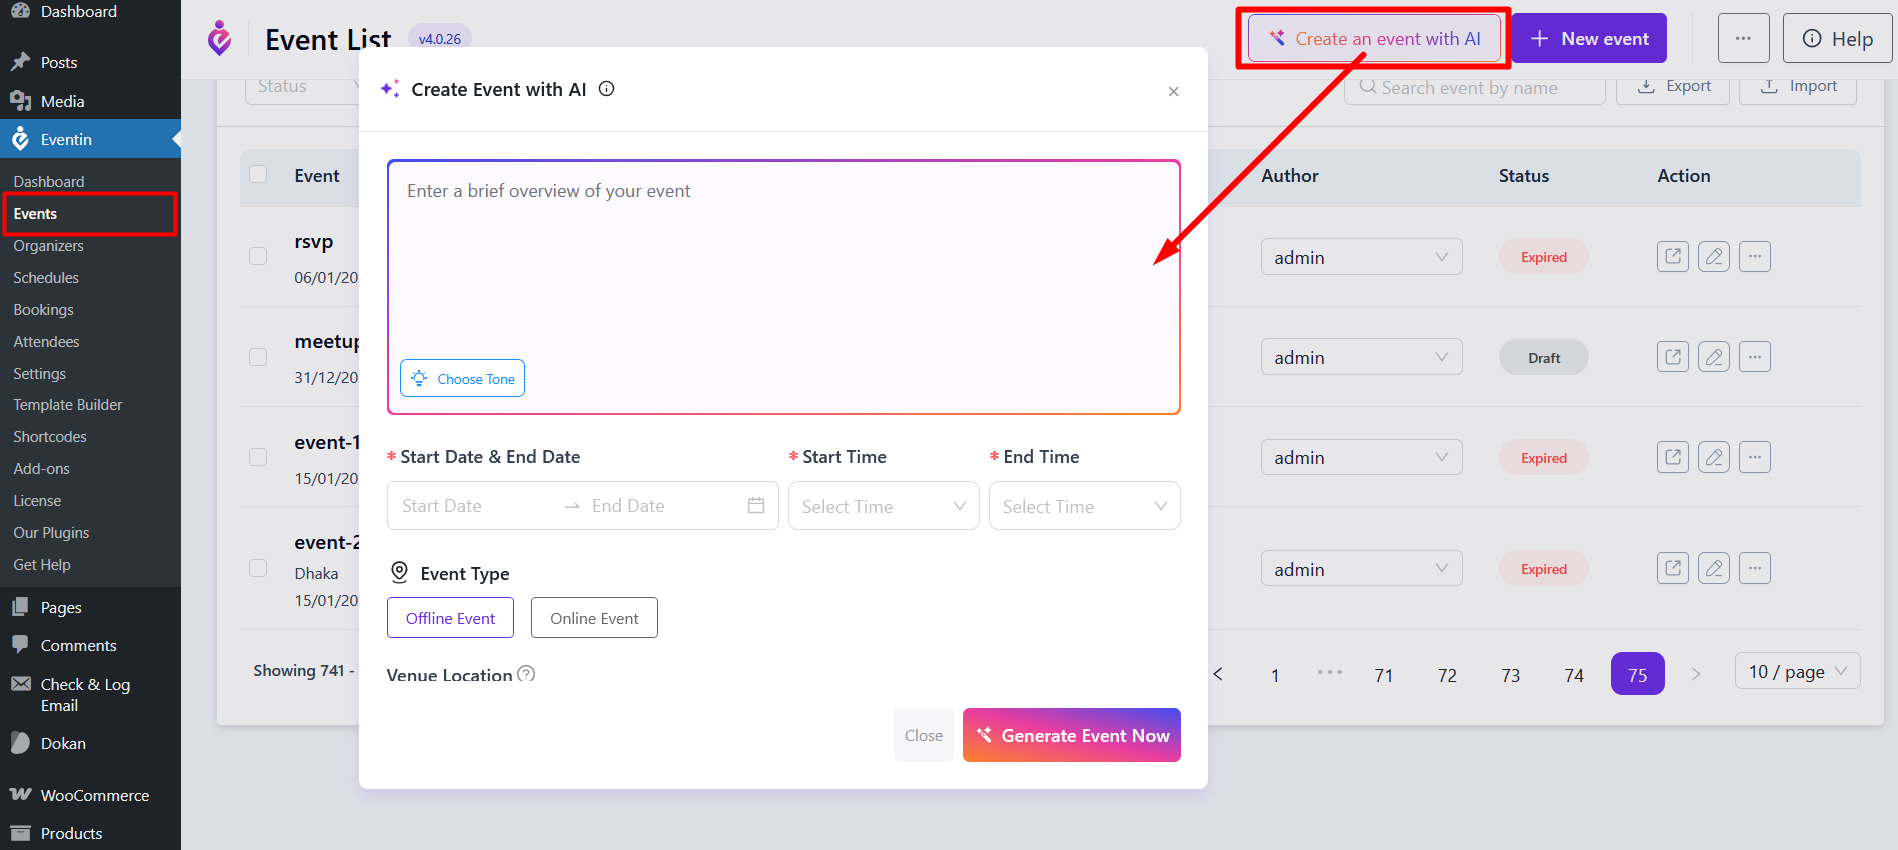
You can easily create your event using AI. Simply go to Eventin → Events in your WordPress dashboard. There, you will find the button to Create an Event with AI. From this point, you can use the AI tool to automatically generate your event details. To fully configure the AI feature, check out the documentation.
.
3. From the Events Page
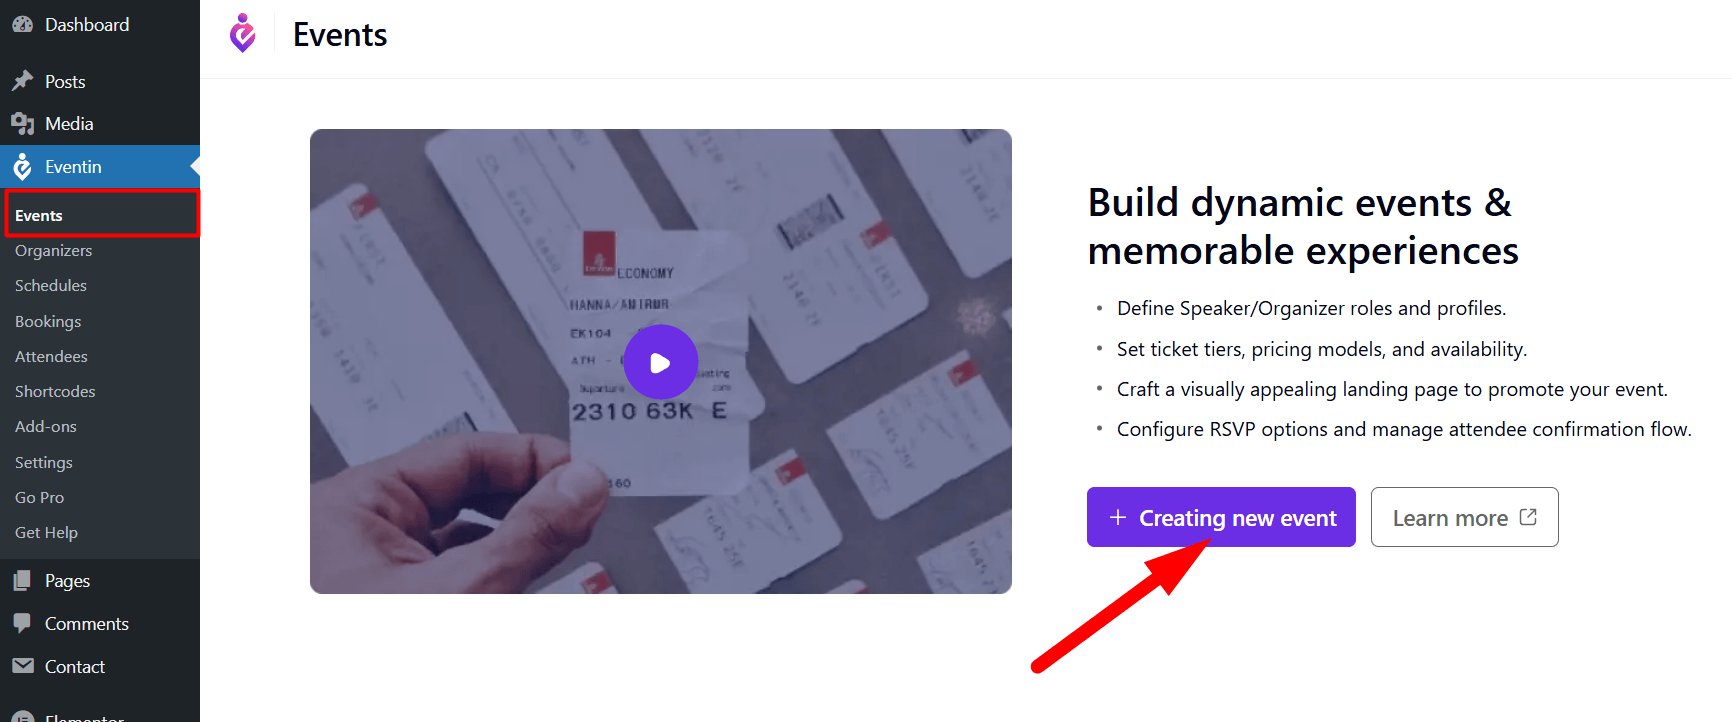
To create a new single event with Eventin Events, log in to your WordPress dashboard and go to Eventin > Events > Add New. You will then be directed to your unique event page, where you need to add details for your event.
Watch this step-by-step video guide to learn how it works:
Create New Event #
After clicking on the Create New Event button, you’ll be redirected to the following page. Now, considering your event, add Basic Information in the page editor. Here, you need to add your event name to the title, set the event type, Event date and Time and other basic information about your event.
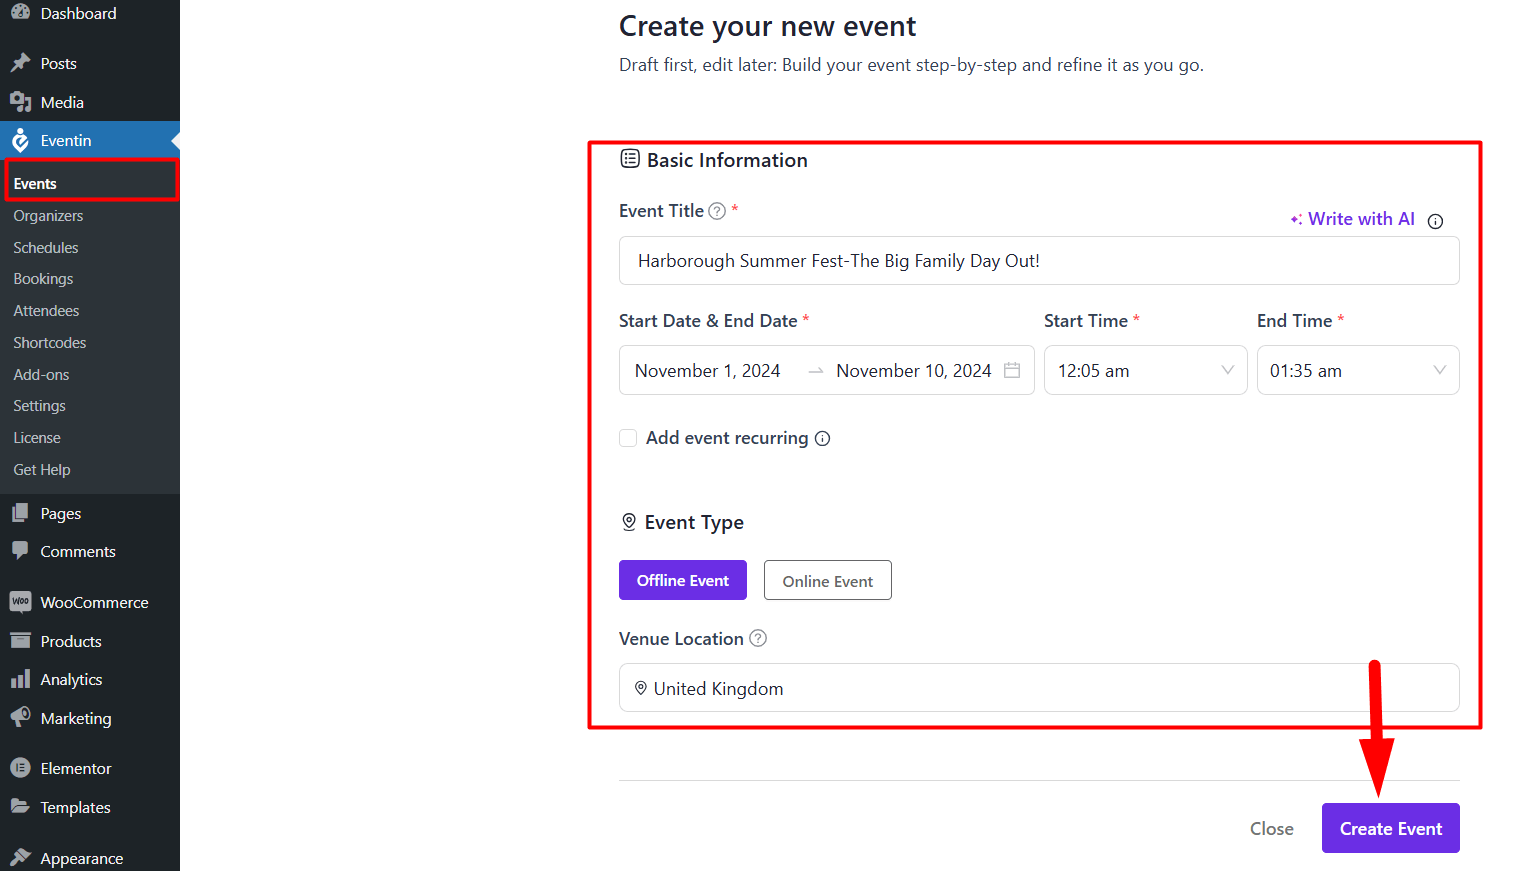
Once you are done, hit the ´Create Event´ button to proceed to the next step. Here, you can set up your entire event following the three steps- Setup, Customization, and Settings.
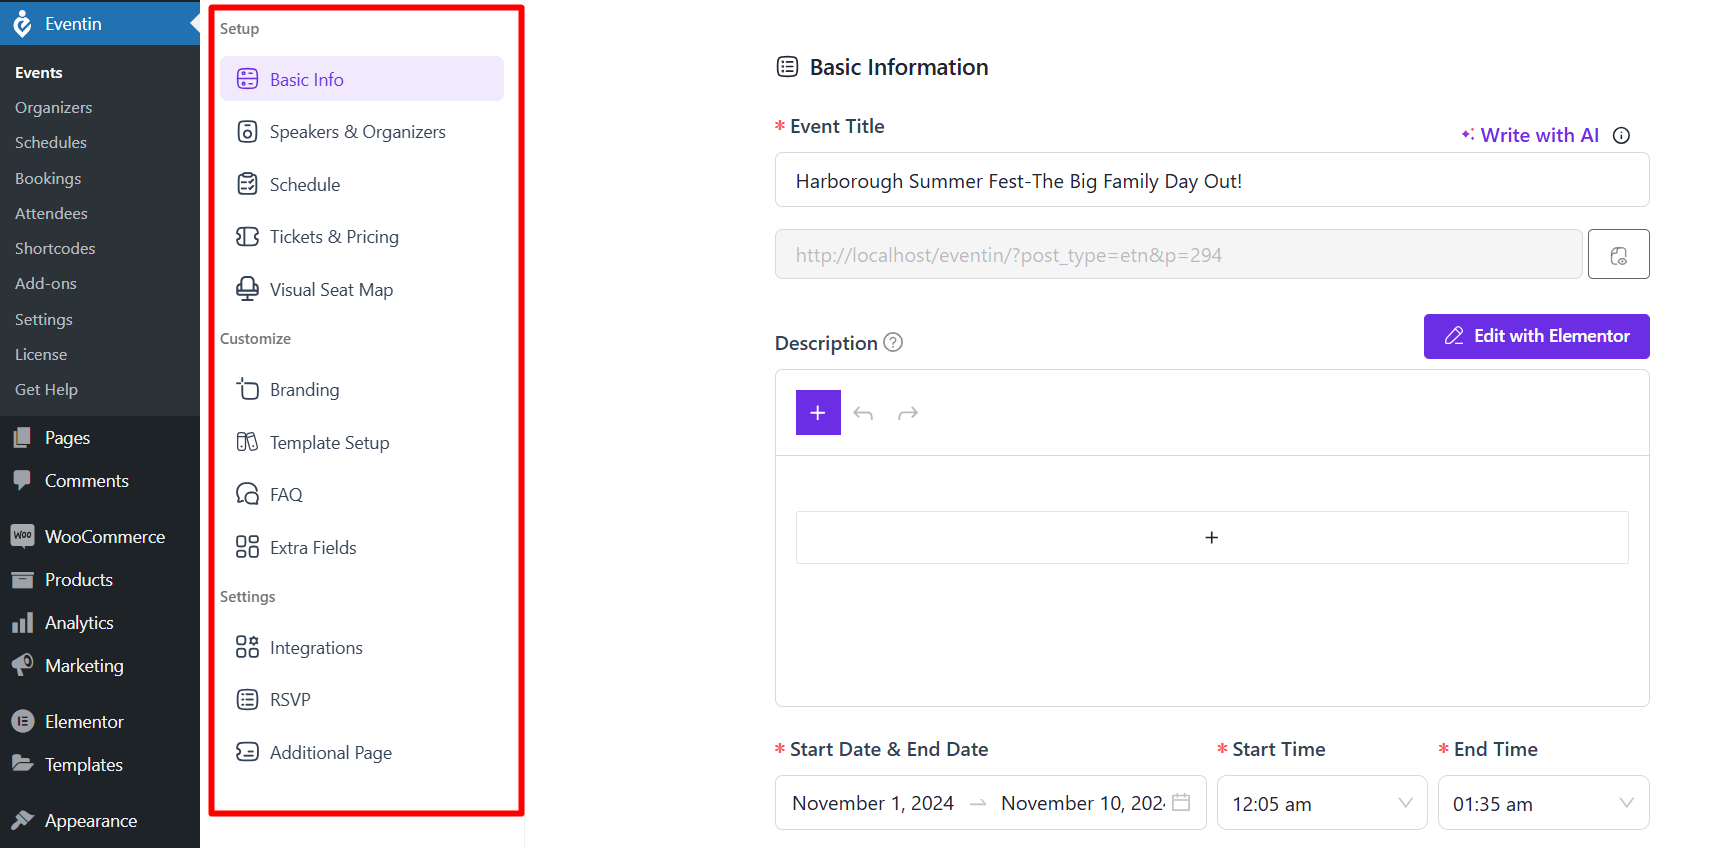
1. Setup #
You can add more data on the basic information menu, set speakers, and create an agenda, and Tickets for your event from this section as well.
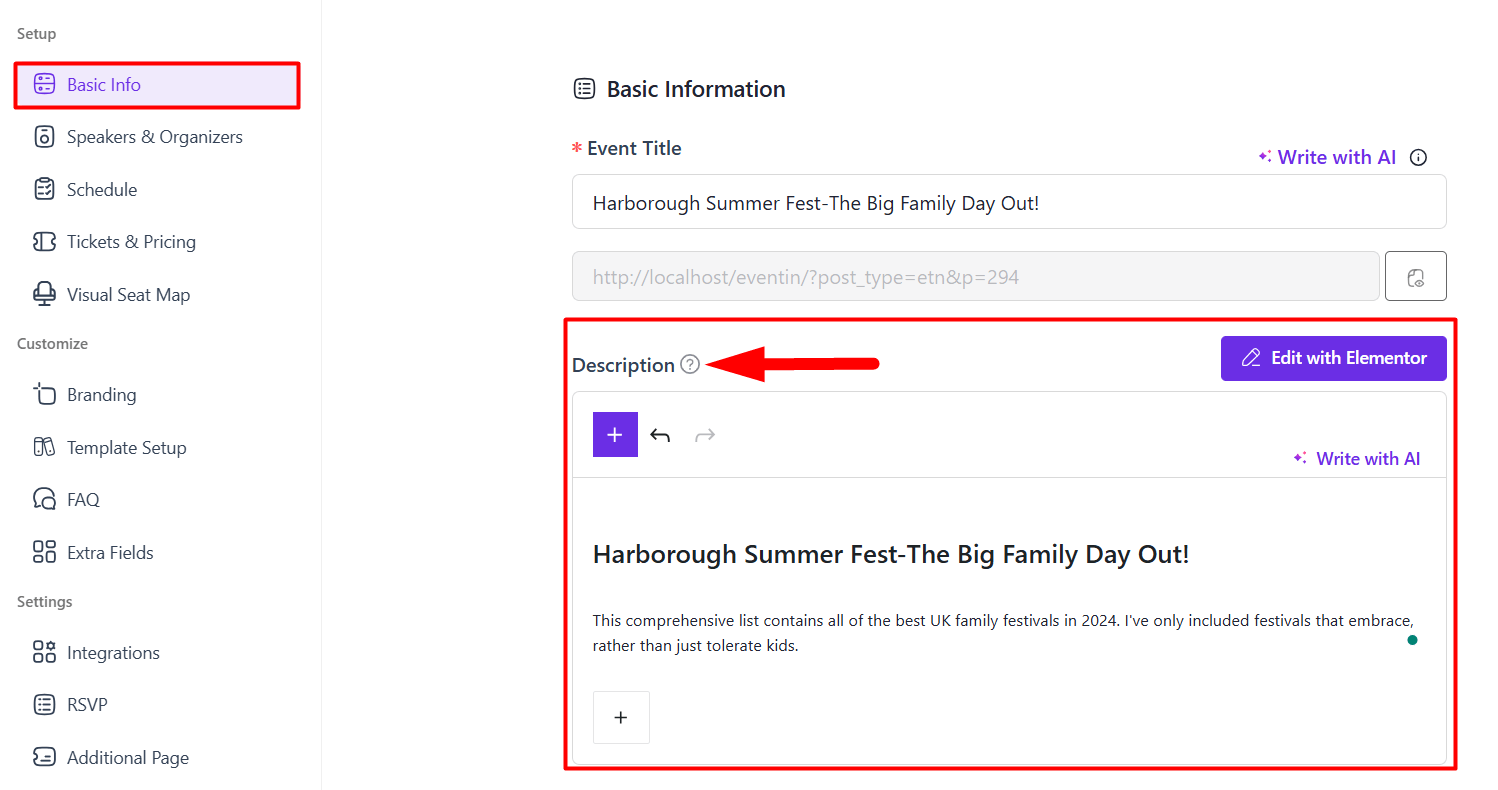
Let´s set the event description to attract more clients with detailed information. If you want to add content from Elementor, you may follow this Documentation.
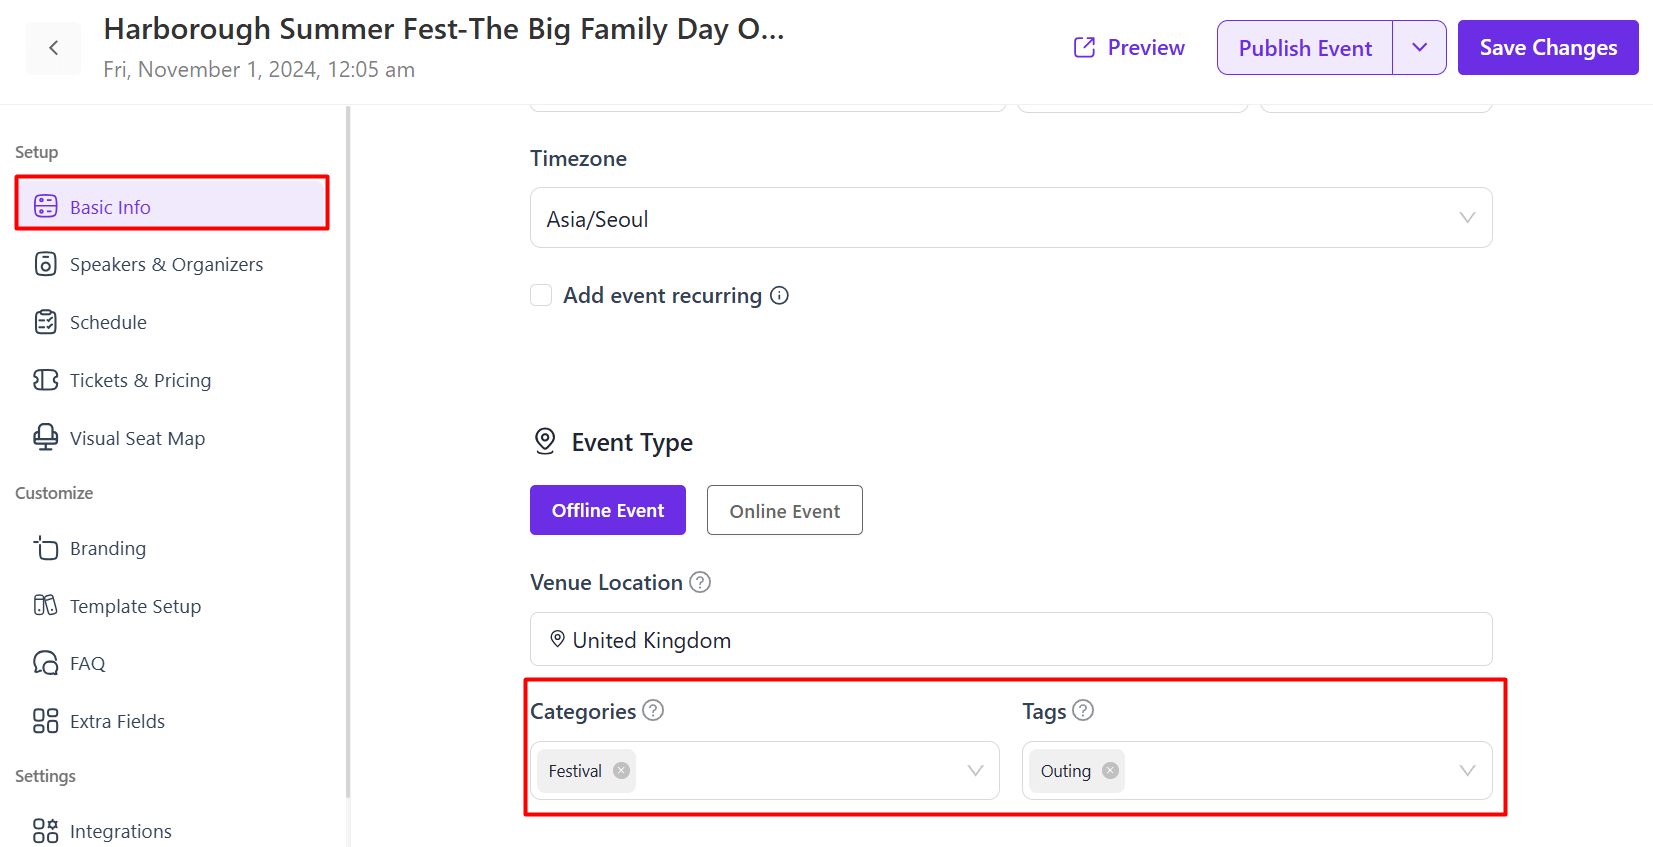
From here, you can also add event Categories and Tags to provide a powerful hook that represents what the event is about.
For creating the Categories and Tags, you may also check this Documentation.
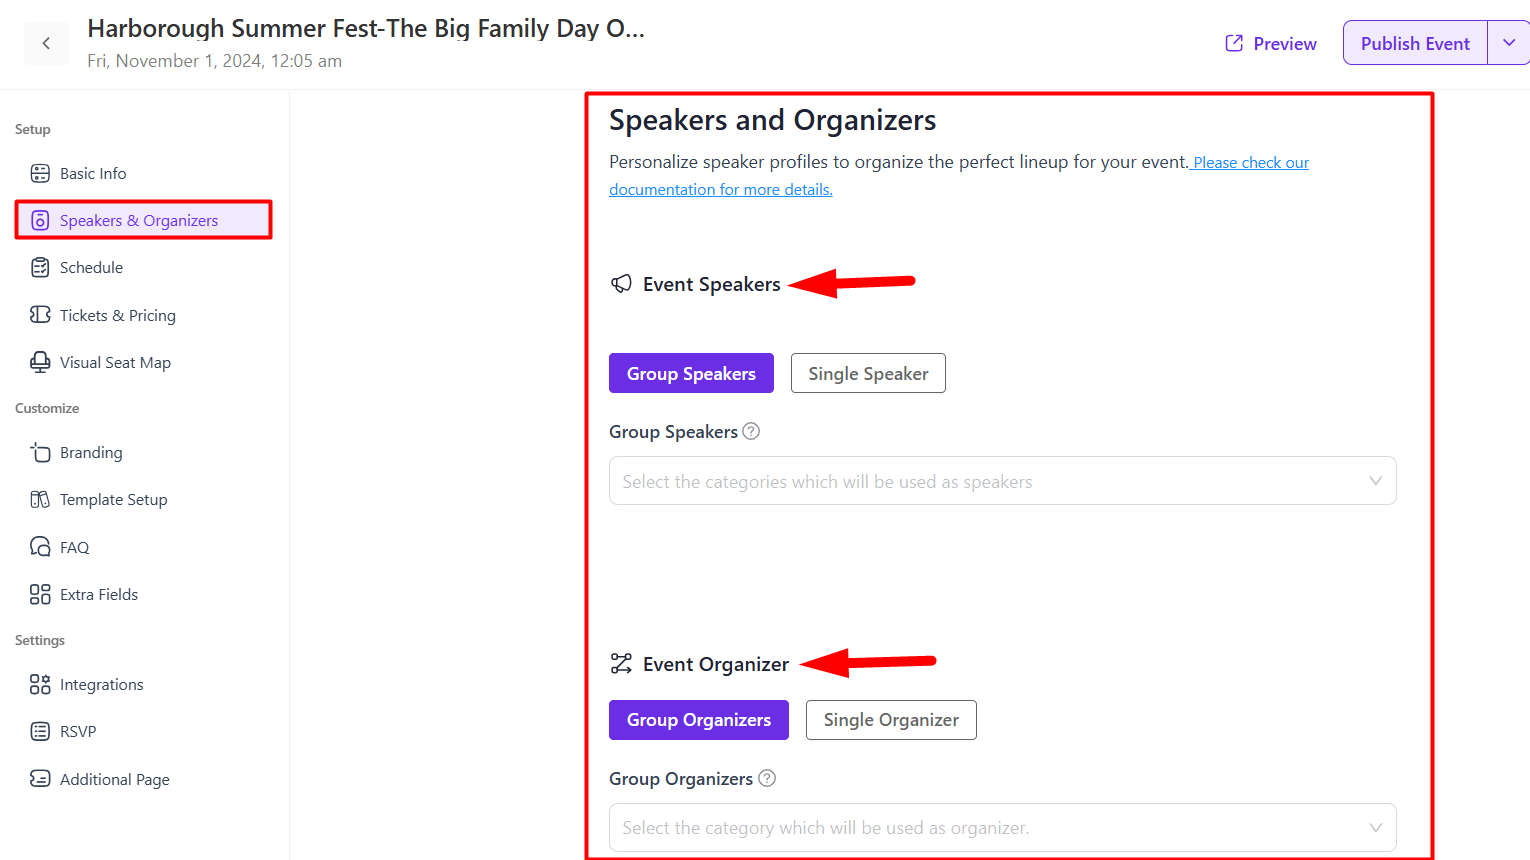
Speakers & Organizers #
In this section, you can assign and add speakers and organizers‘ information to the event page. You can select speaker and organizer groups or individual speakers and organizers.
For more details on creating a speaker and organizer, follow this Documentation.
Schedule #
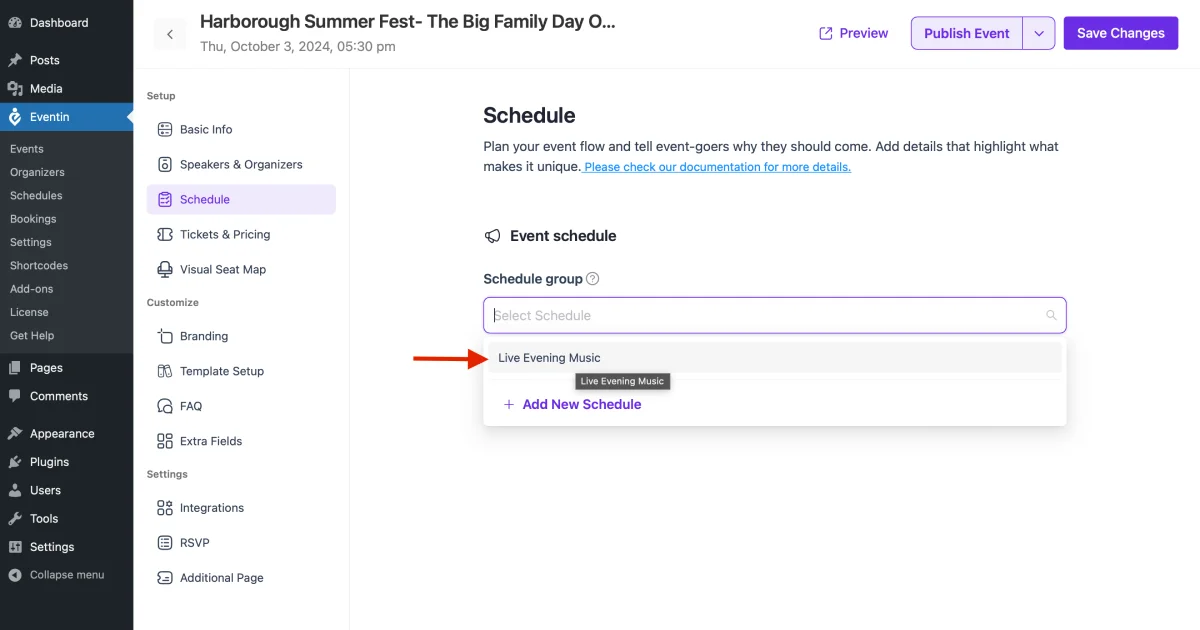
Now, select Schedule from the left menubar to set the event agenda.
For creating the event schedule, follow the Documentation.
Ticket & Pricing #
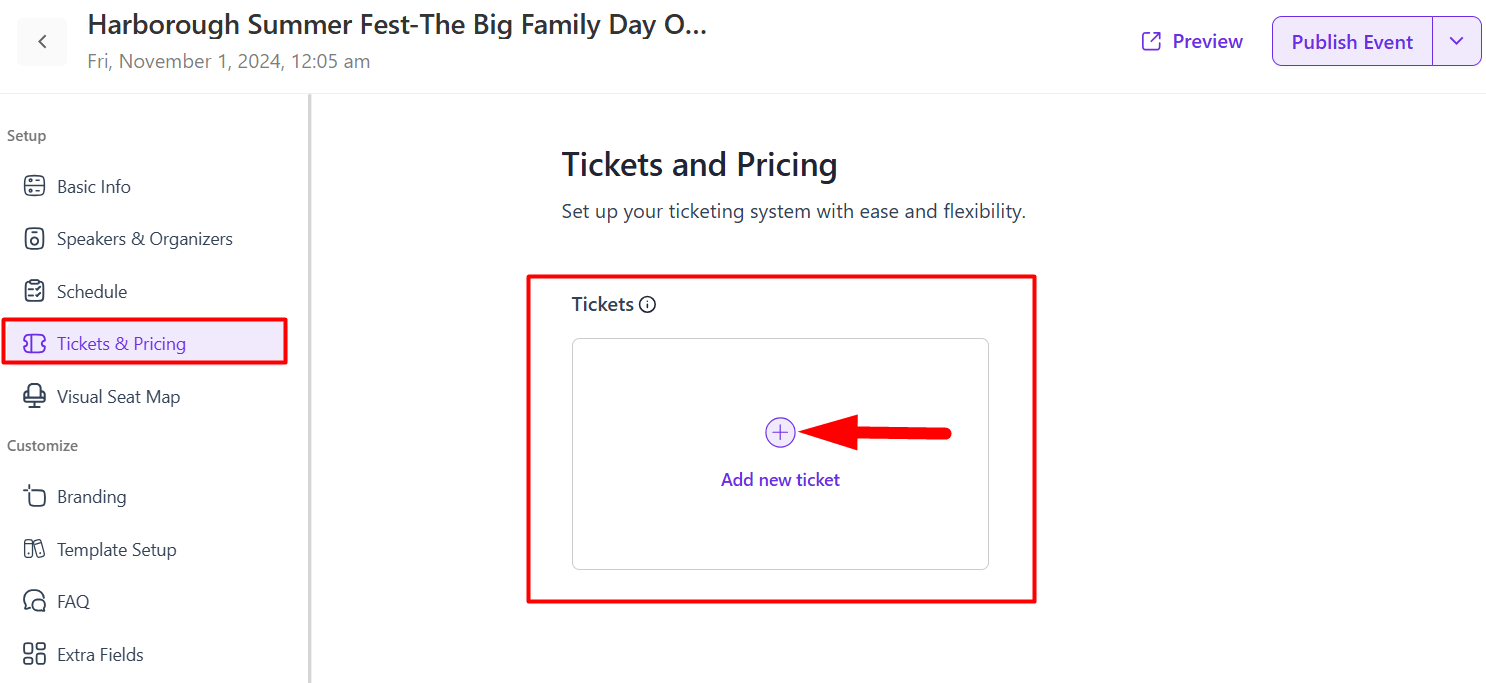
In this section, you can add multiple tickets and set their pricing for the event. To create new tickets, click on the ´+add new ticket´ box and add your tickets with details.
Follow the Documentation on how to create multiple tickets for your events.
2. Customization #
Branding #
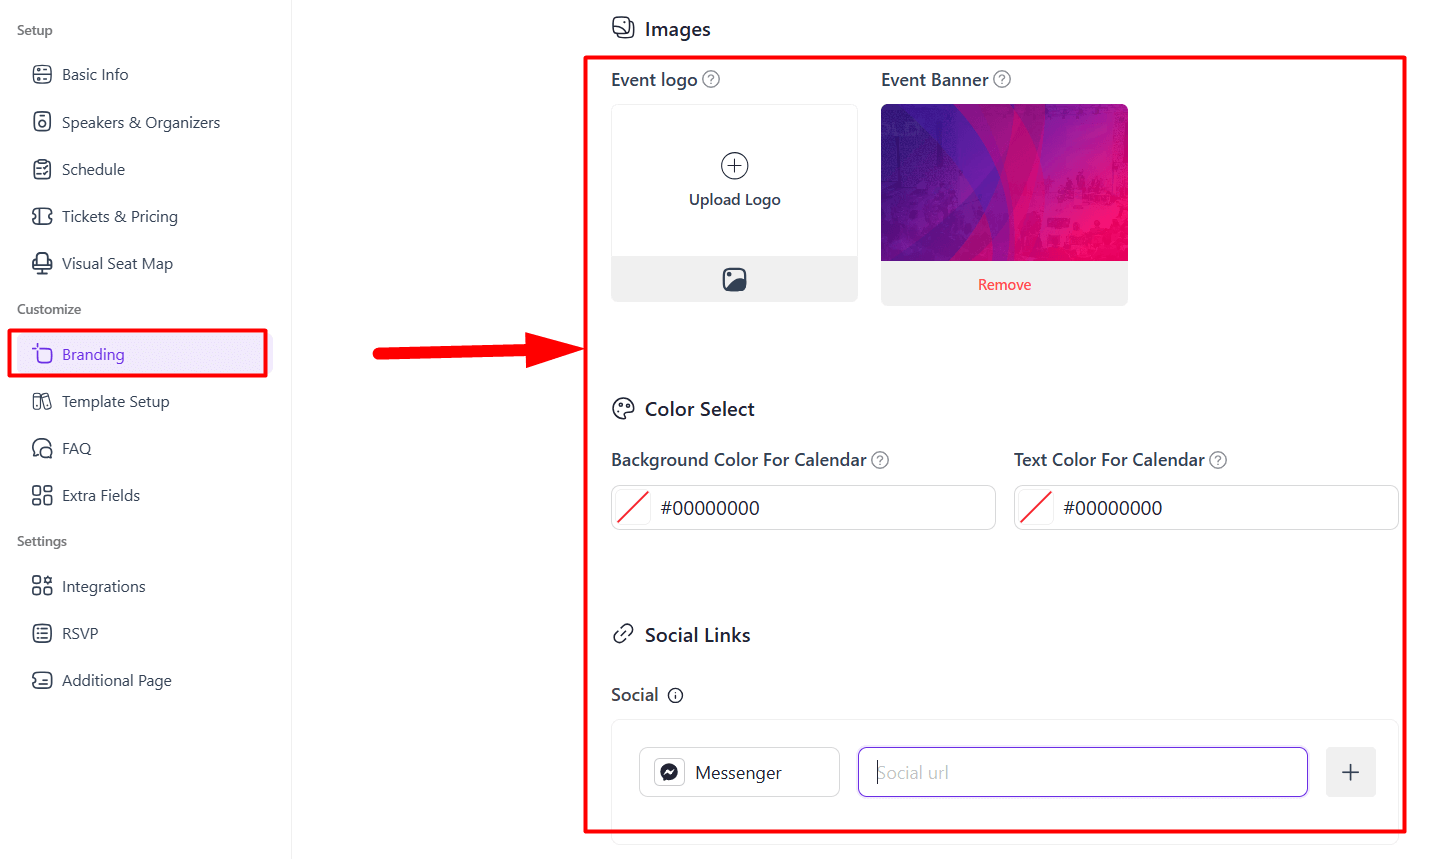
Here, add your event´s logo, banner, and theme colors, and add a personalized touch to the event. After adding Information, Save Changes.
Note: The Event Banner will function as a Featured image in version 4. Thus, there’s no need to include the Featured image in addition. So, the Event Banner will work everywhere instead of where you used the Featured images.
Template Setup #
Use the prebuilt event´s landing page and tickets template from the library. 👇
Eventin offers 3 types of landing page templates (1 template is FREE and the other 2, 3 for PRO users).
For all Template Settings, follow this Documentation.
You can also offer certificates for the attendees from this section. 👇
For all Template Settings, follow this Documentation.
FAQ #
Add the possible frequently asked queries and increase the accessibility of the event efficiently.
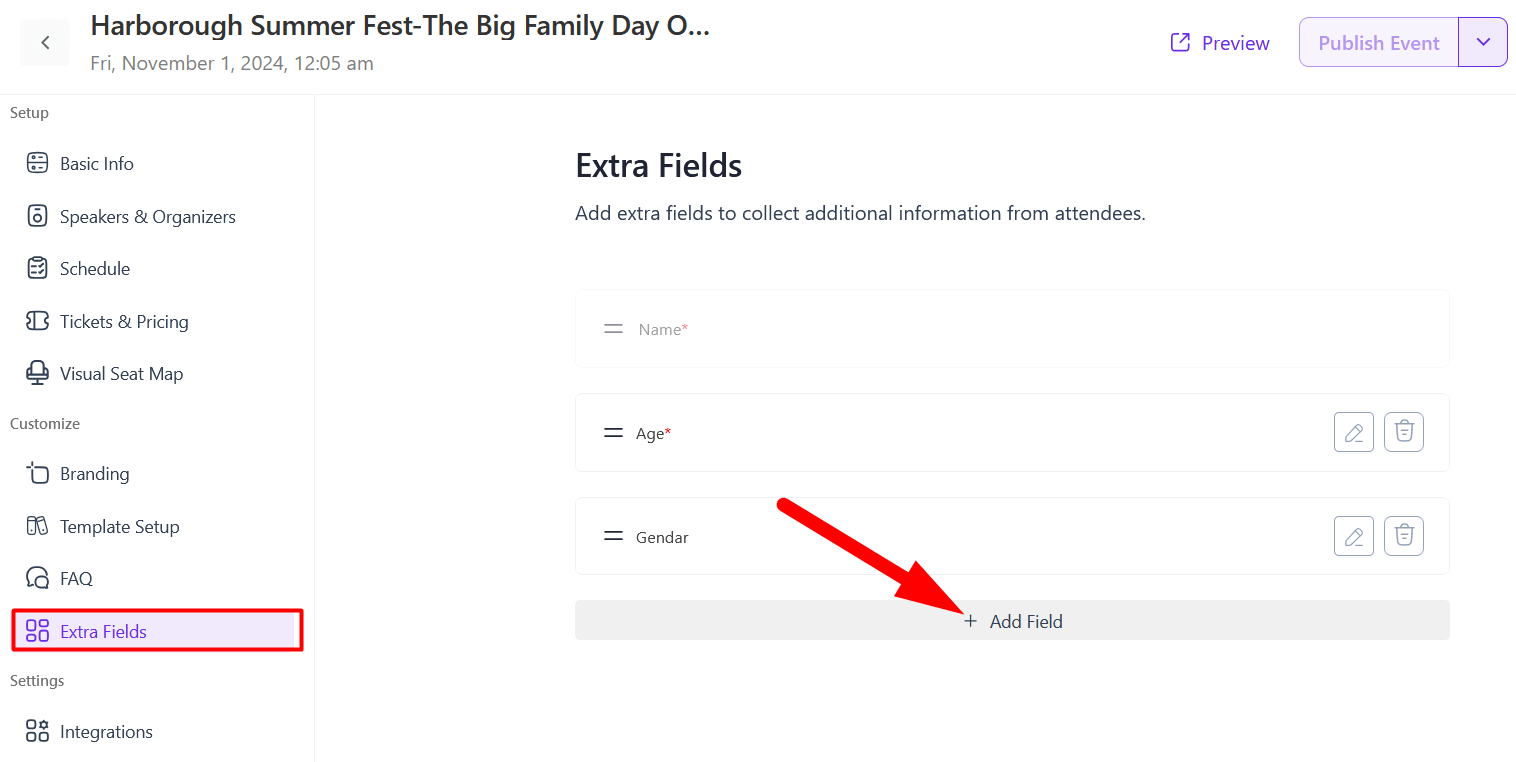
Extra Fields #
If you want to set your attendee’s extra information, then you need to add it from this section.
You can also set your attendee’s extra fields globally. Follow this Documentation for more details.
3. Settings #
From the settings field, you can add integrations, RSVPs, and even create additional event pages.
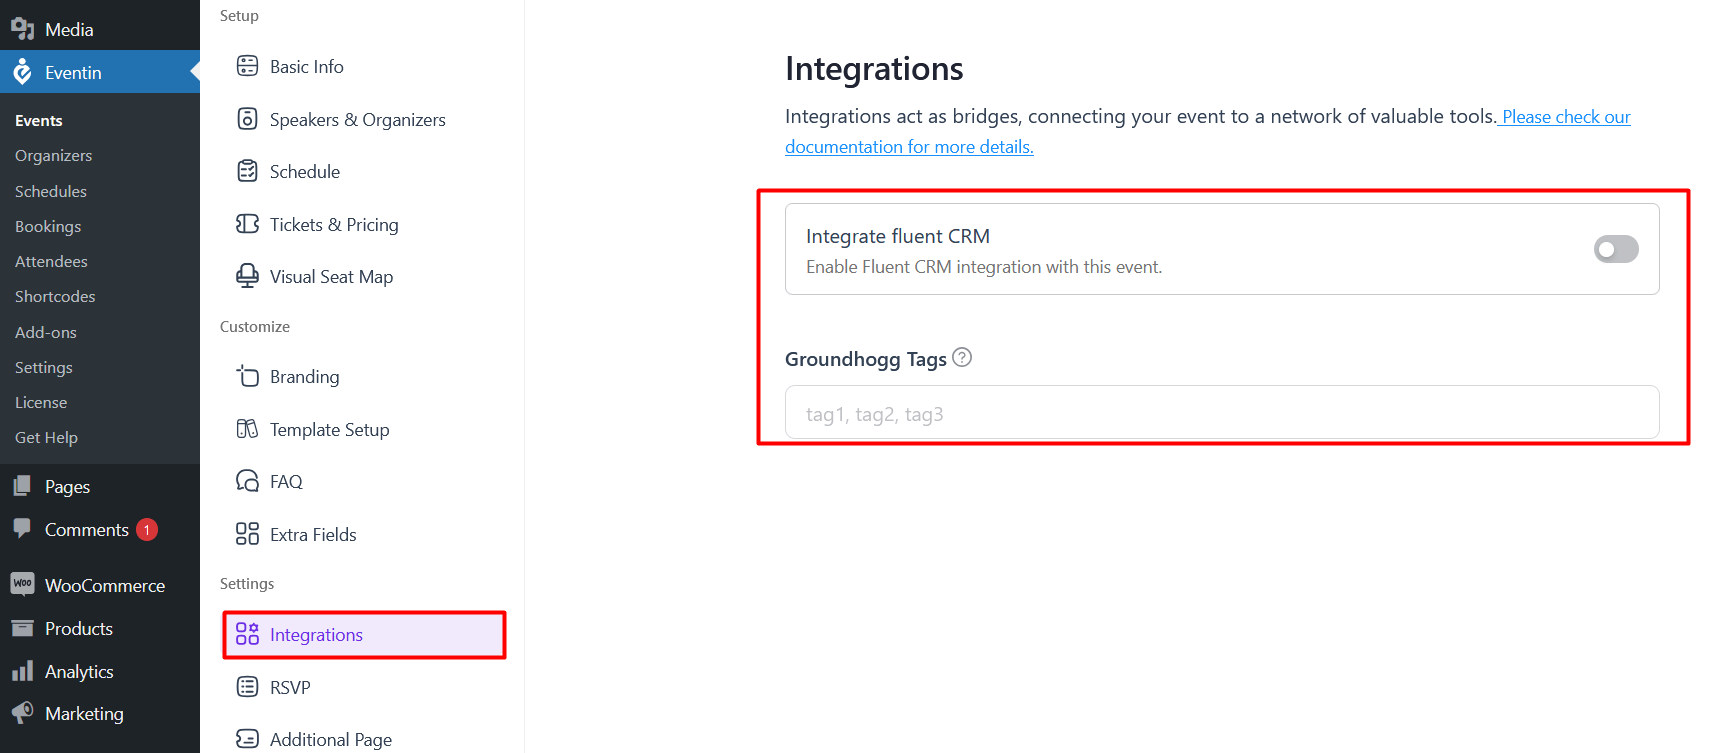
Integrations #
Here, integrate your event workflows with automation platforms like FluentCRM and Groundhogg Tags 👉
For connecting Fluent CRM with Eventin, follow the Documentation with details.
RSVP #
Enable ticket selling and distribution through RSVP. Enable the settings to display attendee lists from this section as well.
For RSVP enable, follow this Documentation.
Additional page #
Create and embed multiple pages for events like Social Media Wall, Photo Gallery, etc.
Now, you are all set up with your event site. Now, you can preview, publish, and update the event site whenever you want.
Event View from Frontend #
