How to Create Event Templates in Eventin
Benefits of Custom Event Templates #
Creating custom event templates in Eventin offers several advantages:
- Brand Consistency: Maintain a unified look across all event pages.
- Time Efficiency: Reuse templates instead of designing from scratch for every event.
- Customization Flexibility: Tailor layouts and styles to match event themes.
- Enhanced User Experience: Provide attendees with a visually engaging and well-structured event page.
- Seamless Integration: Utilize drag-and-drop builders for easy customization.
Accessing the Template Builder #
Eventin has introduced a new menu option for managing templates. You can access it by navigating to:
Eventin > Template Builder
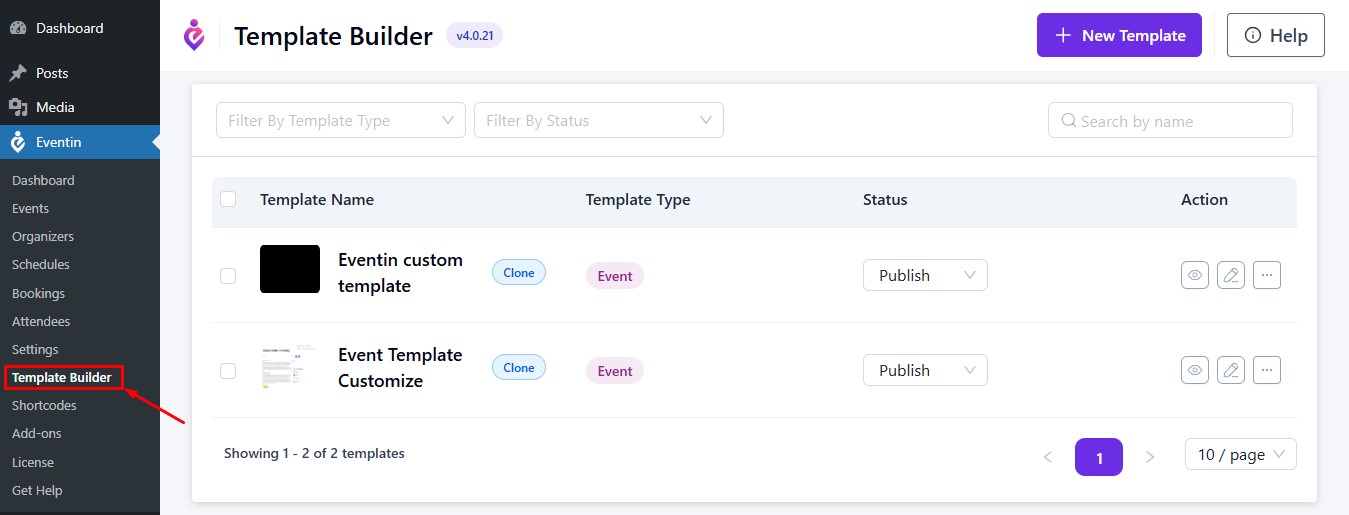
Here, you can create:
- Event Templates
- Ticket Templates
- Certificate Templates
Creating an Event Template #
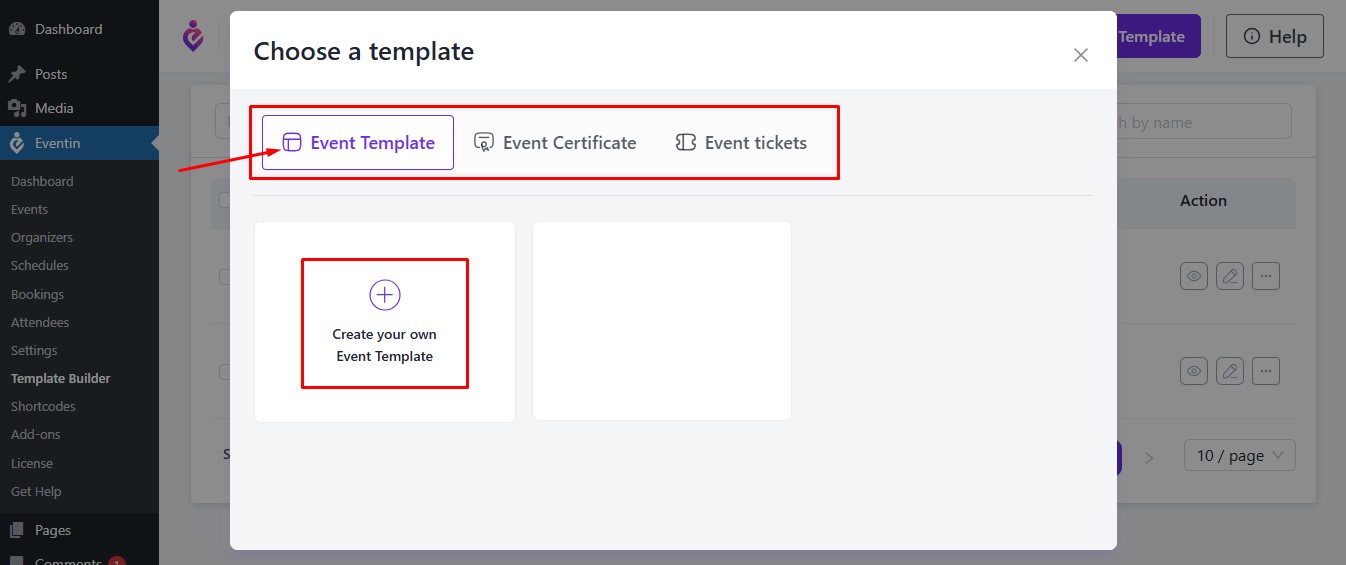
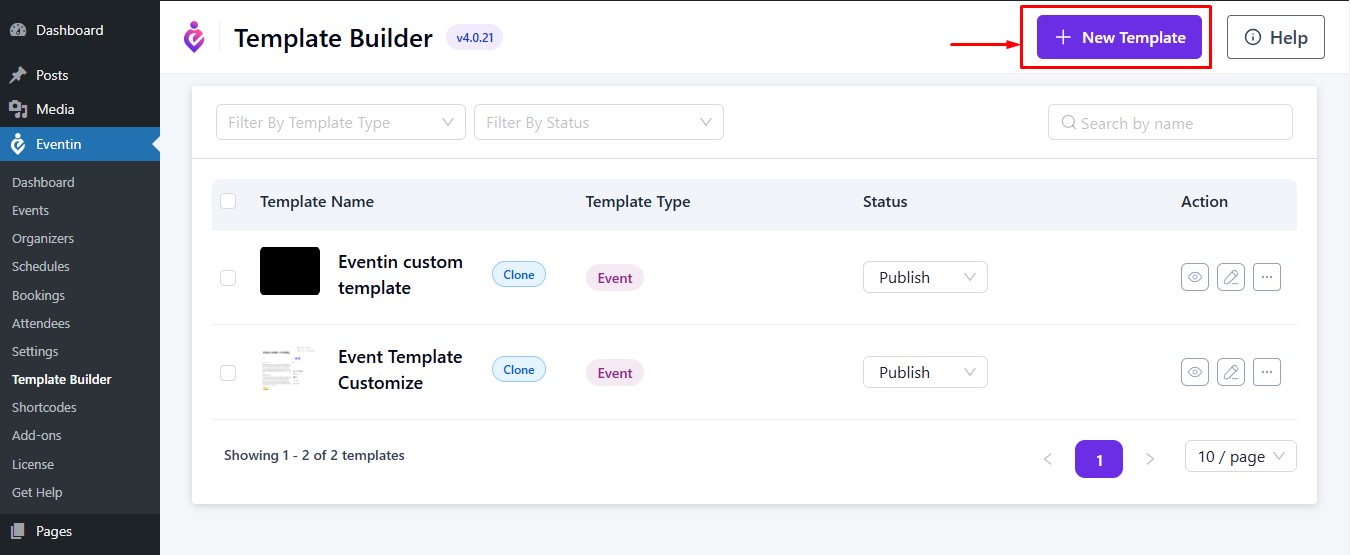
- Click on “New Template” to start the template creation process.
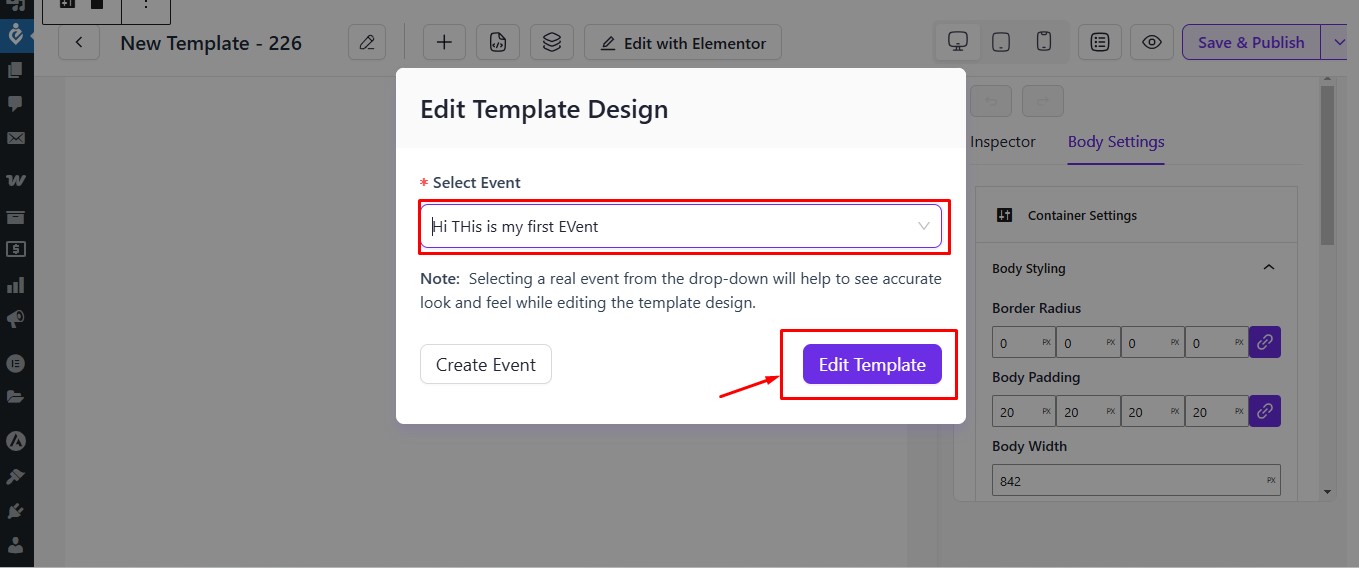
- Select the “Event Template” tab.
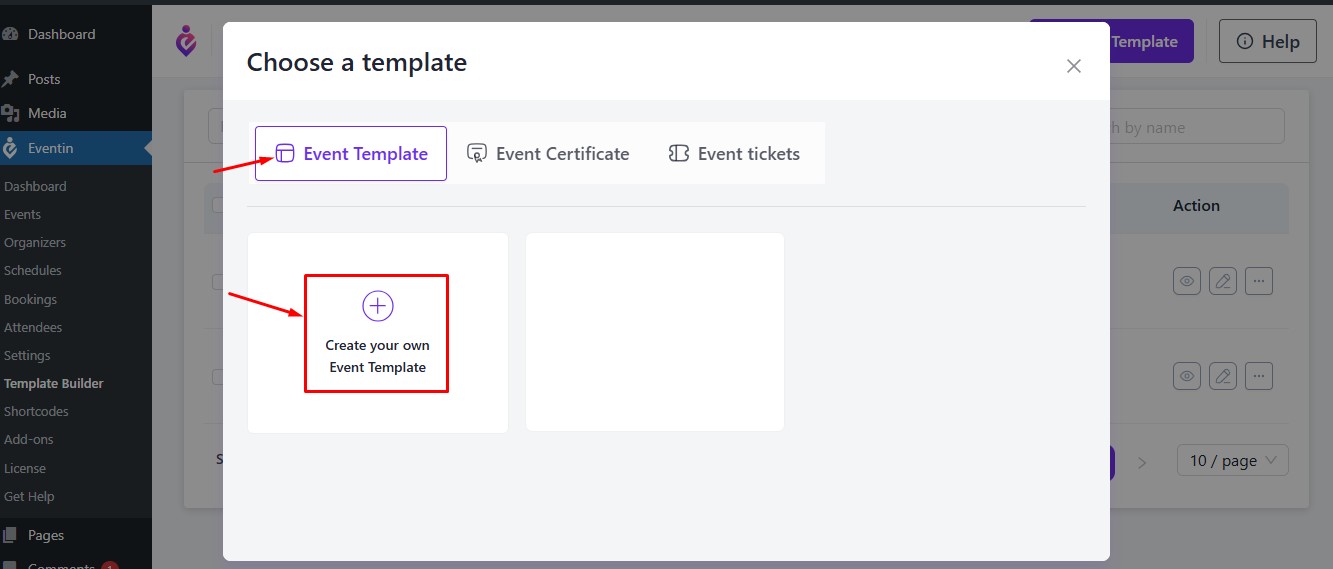
- Now you have to choose the event for which you want to create the template.
Designing Your Template #
- On the left side, you will find event-related blocks to design your layout.
- Drag and drop elements to customize the look of your event page.
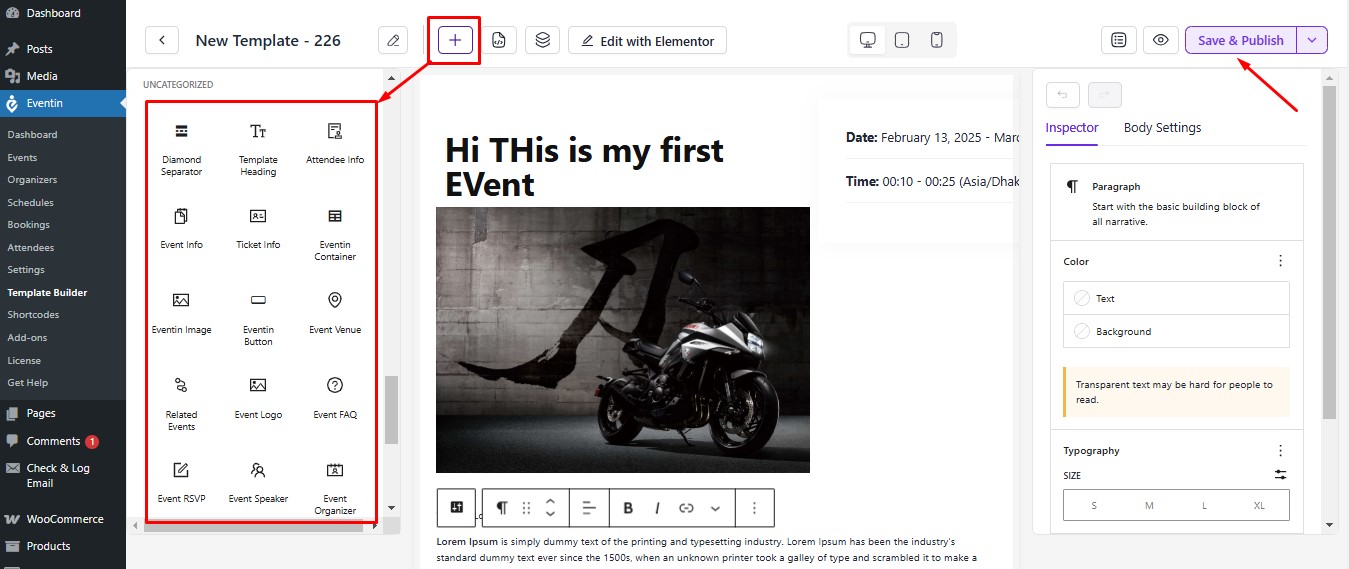
Utilize the widget section to access all necessary controls for styling and layout adjustments. A list of designing blocks is given below,
- Eventin Container
- Event Title
- Event Info
- Eventin Image
- Eventin Button
- Event Venue
- Related Events
- Event Logo
- Event FAQ
- Event RSVP
- Event Speaker
- Event Organizer
- Event Banner
- Event Date and Time
- Event Tag
- Event Category
- Event Schedule
- Recurring Event
- Event Description
- Event add to calendar
- Event Social
- Event countdown timer
- Buy Ticket
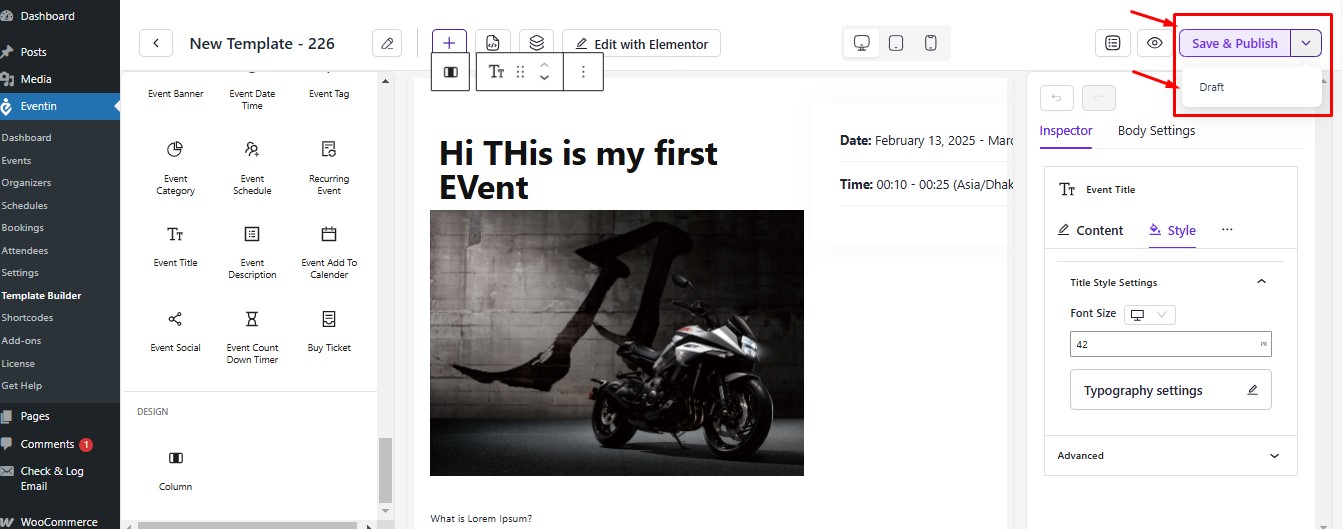
Publishing Your Template #
Once the design is complete, click on “Save & Publish” to save your template. If you want you can “Draft” the template for later improvements.
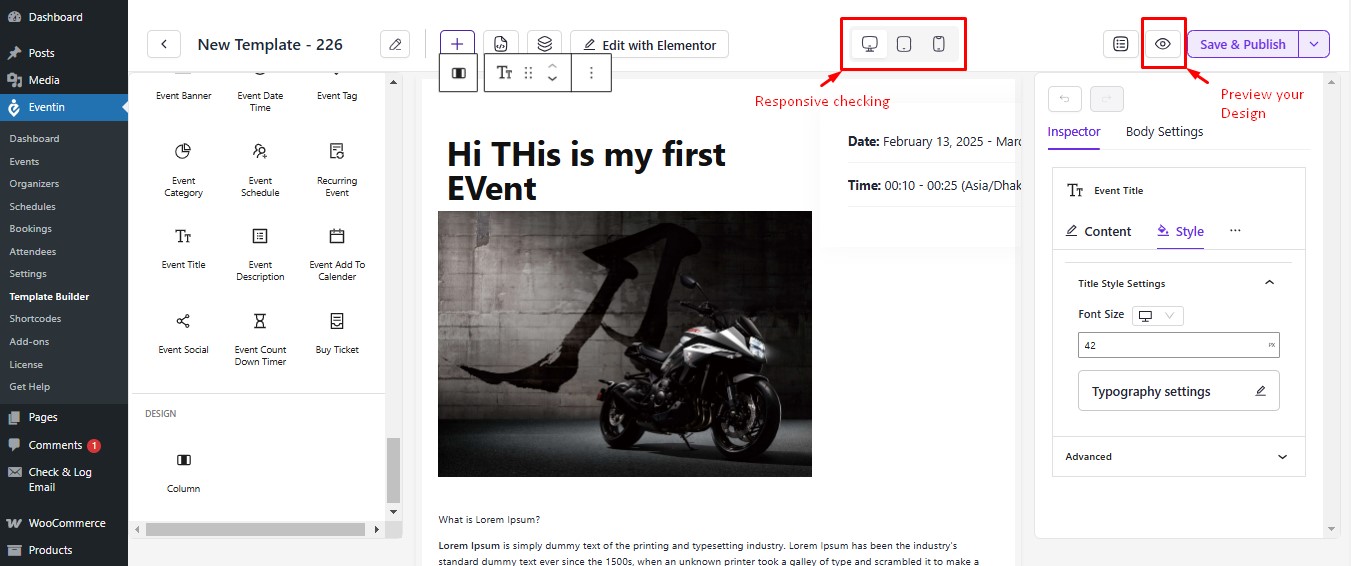
- Use the Preview option to check how your template looks before finalizing.
- Ensure responsiveness by utilizing the built-in responsive preview feature.
After publishing, your custom event template will be ready for use, providing a unique and visually appealing experience for your attendees.
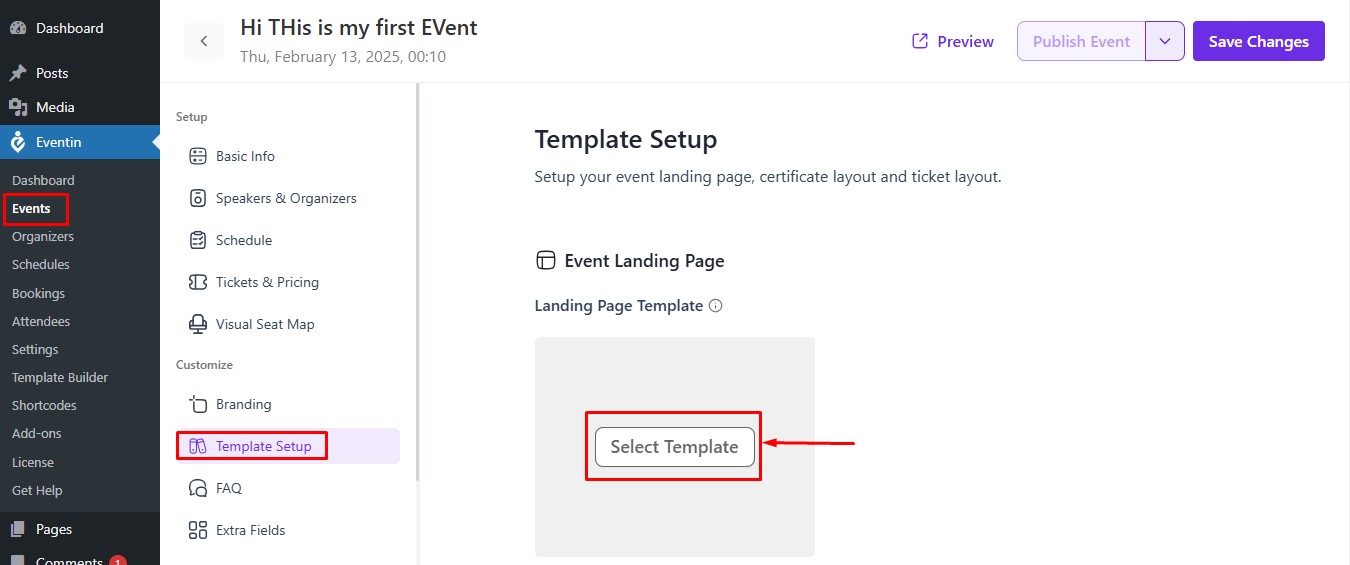
Using Your Template on Events #
- Navigate to Eventin > Events and select the event you want to apply the template to.
- In the event settings, locate the Template Setup option.
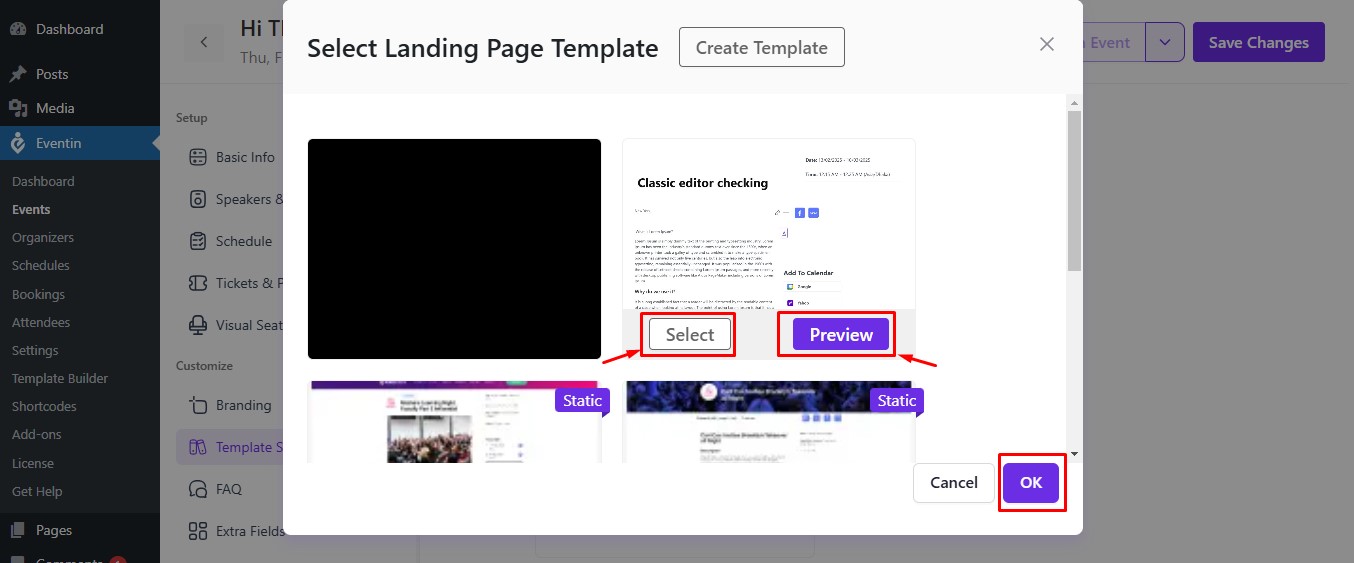
- Choose the custom event template you created from the select template option.
- Save the changes, and your event will now display with the selected template
Conclusion #
Creating and applying custom event templates in Eventin is a powerful way to enhance the visual appeal and functionality of your events. With the intuitive Template Builder, you have full control over the design, ensuring a seamless and engaging experience for your audience. By following these steps, you can efficiently create professional, branded templates that reflect the uniqueness of each event. Start designing today and make your events stand out!


