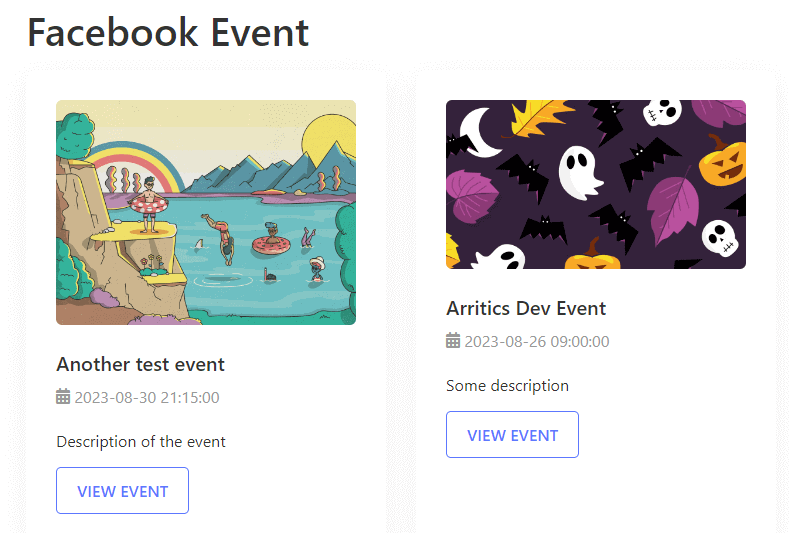
Facebook event integration allows the user to display all the events on the website that is created through a Facebook account.
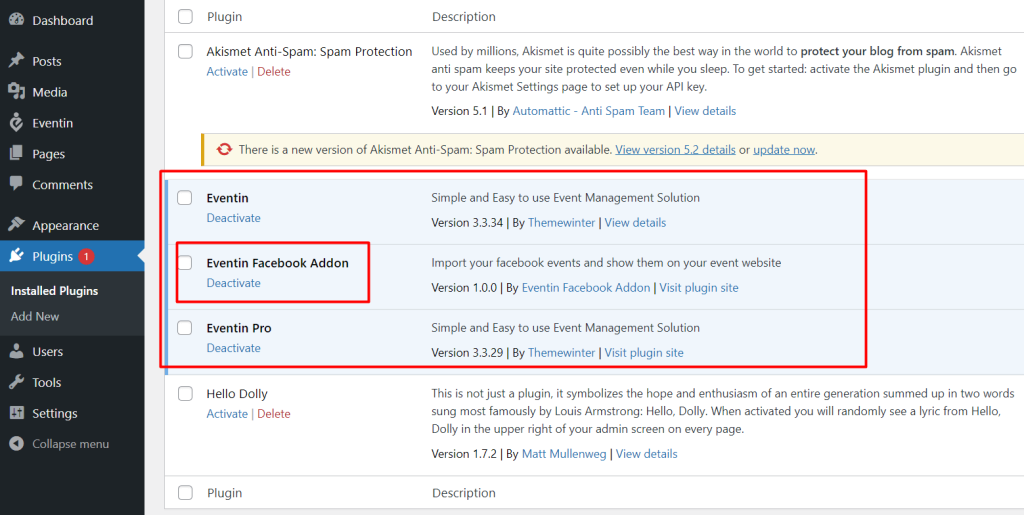
In order to use Facebook events, you will need to have the following plugins installed on your WordPress site:
- Eventin
- Eventin Pro
- Eventin Facebook Addon
Note: We provided the Eventin Facebook Addon with our Eventin Pro Plugin bundle.
Install Add-ons #
After activating the Eventin free and pro versions, install and activate the Eventin Facebook Addon from Plugins-> Add new.
Enable Module #
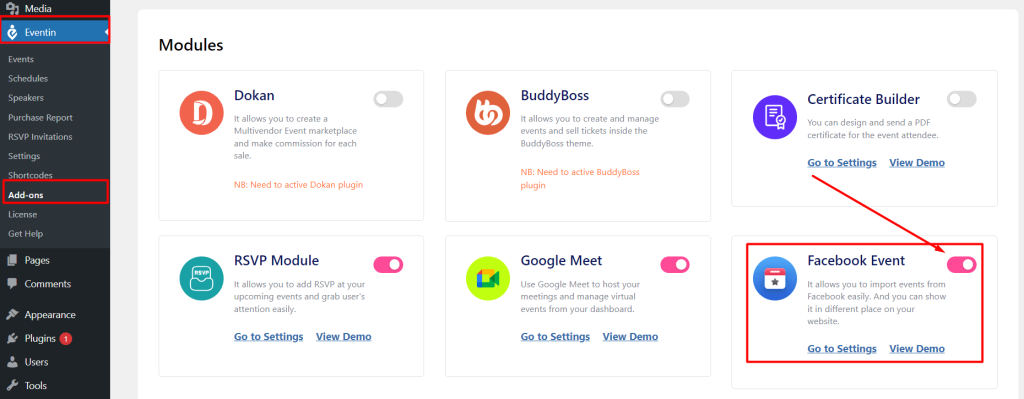
After installing and activating all the plugins, navigate to Eventin ->Addons and enable the Facebook Event.
How to get Facebook APP ID and Key #
Follow the below step for creating Facebook APP ID and APP key.
Step-1: If you have no Developer account then create a developer account for getting app options.
- Go to this LINK and Click on “Register as a Developer”
- In the first step “Accept the terms” and Click “Continue”.
- In the second step “Tell us about you”, select the appropriate section and click “Continue”.
- Now, Click “Done” and you can now create the application.
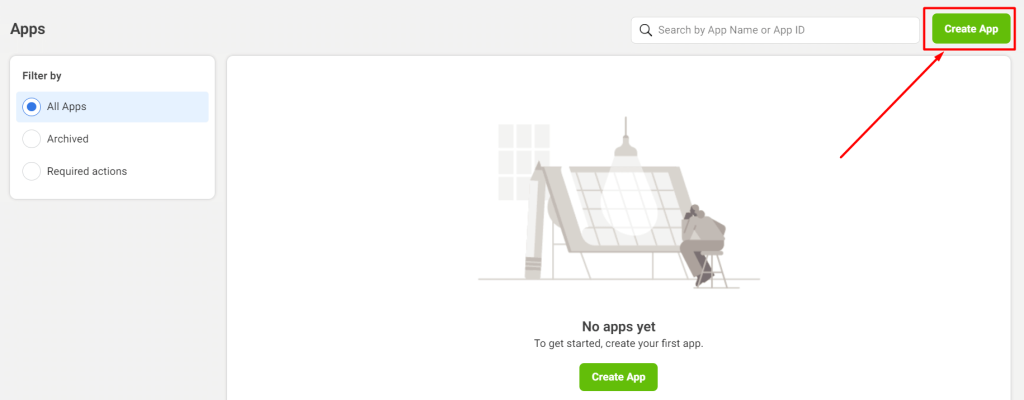
Step-2: Now go to this LINK and create a Facebook App from the “Create App” button.
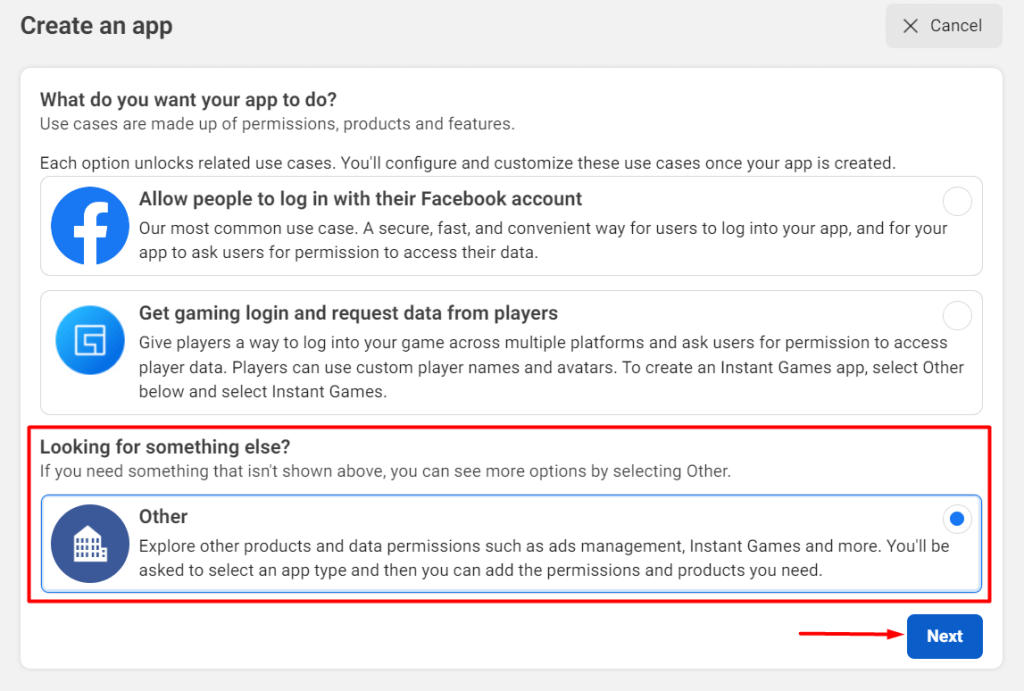
Step-3: Click on “Other Option” To Go The Next Step.
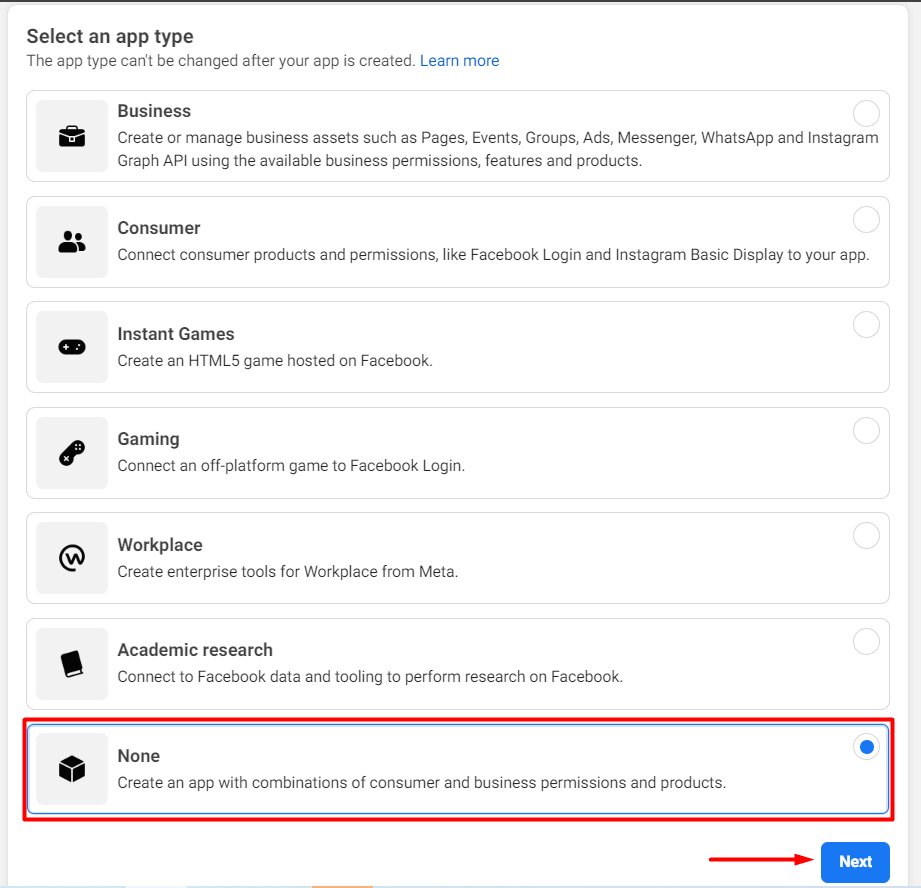
Step-4: Click on “None Option” To Go The Next Step.
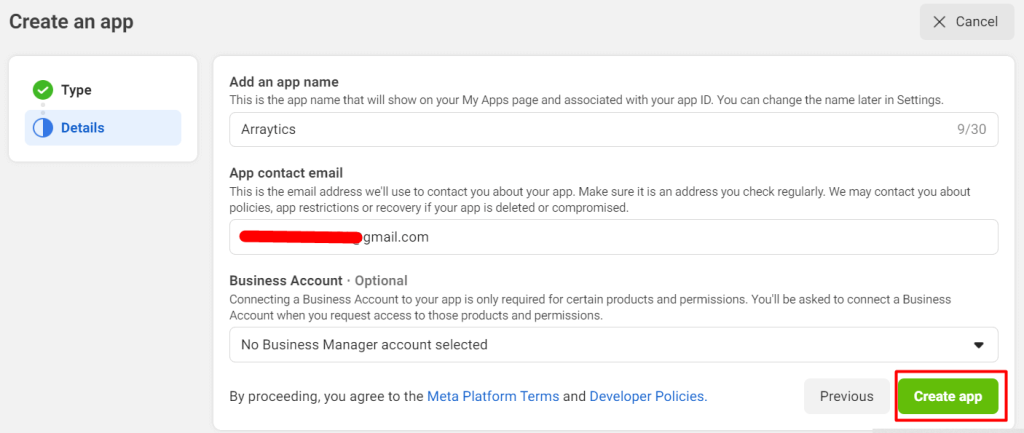
Step-5: Insert the APP Name & Contact Email and click on the “Create App ” button. Your app will be created.
Step-6: It will take you to the Facebook app dashboard. Now you need to add Facebook Login to your Facebook App. Select “Facebook Login” and go ahead. You can add by clicking on Product+ too.
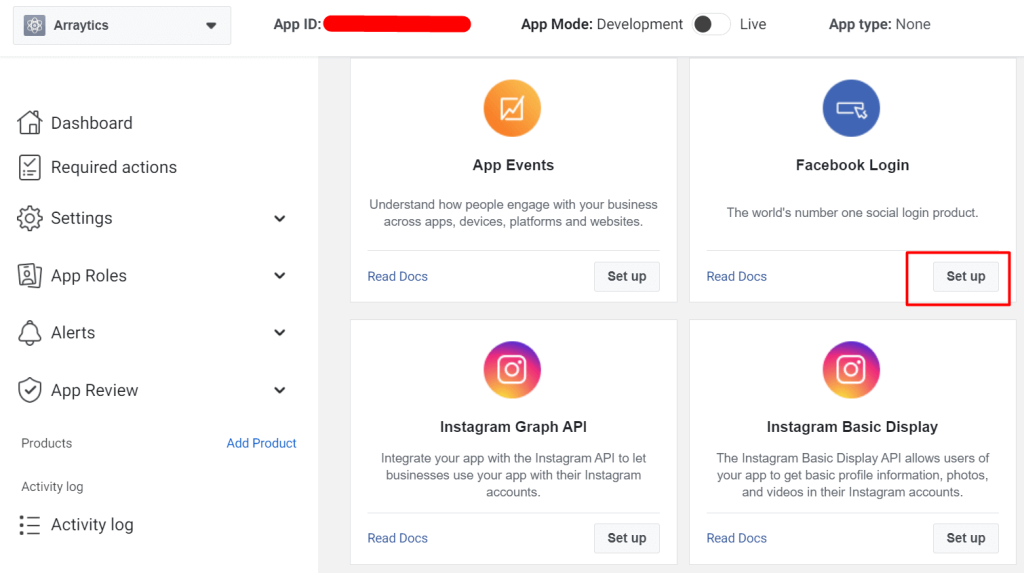
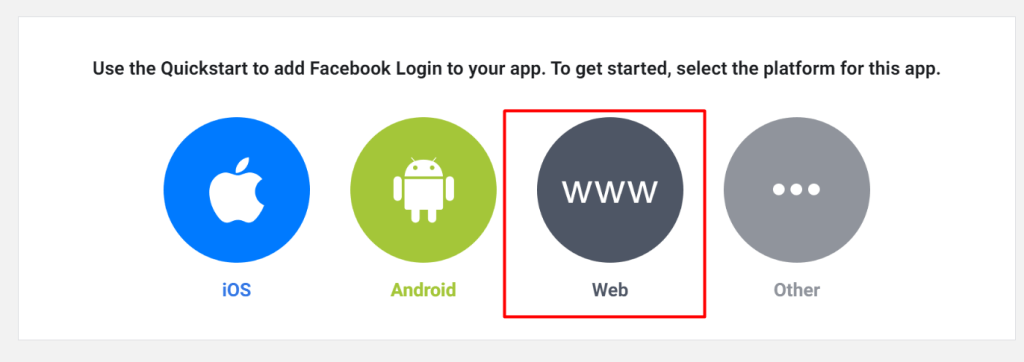
Step-7: When you click the setup button the below window will display and you need to select the web option.
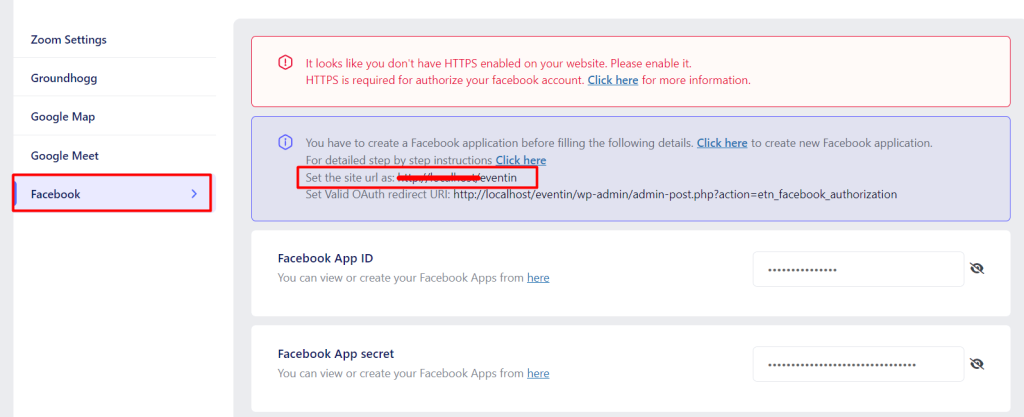
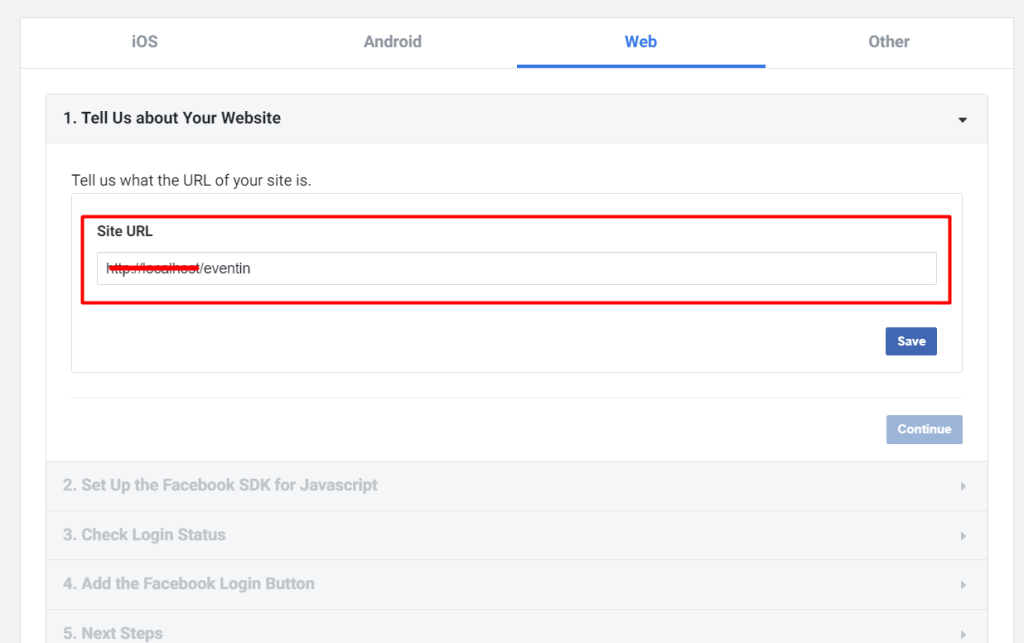
Step-8: After clicking the web option insert the website URL and save, and continue it. You will get the Site URL from the Eventin setting.
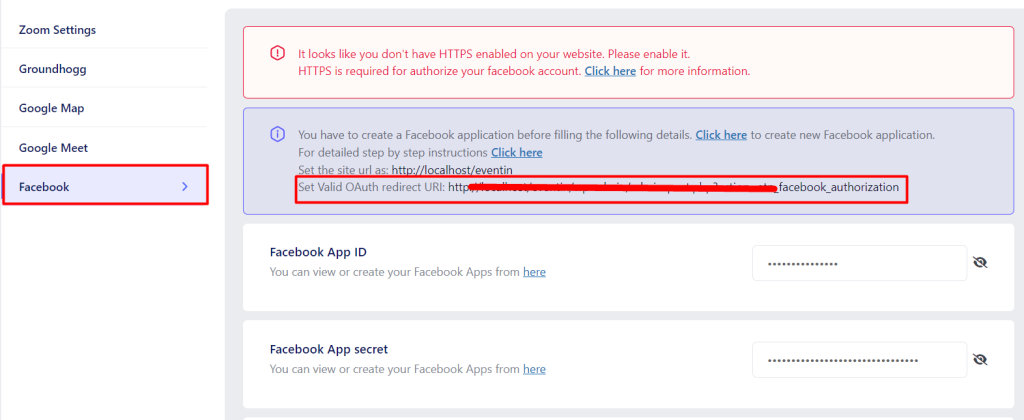
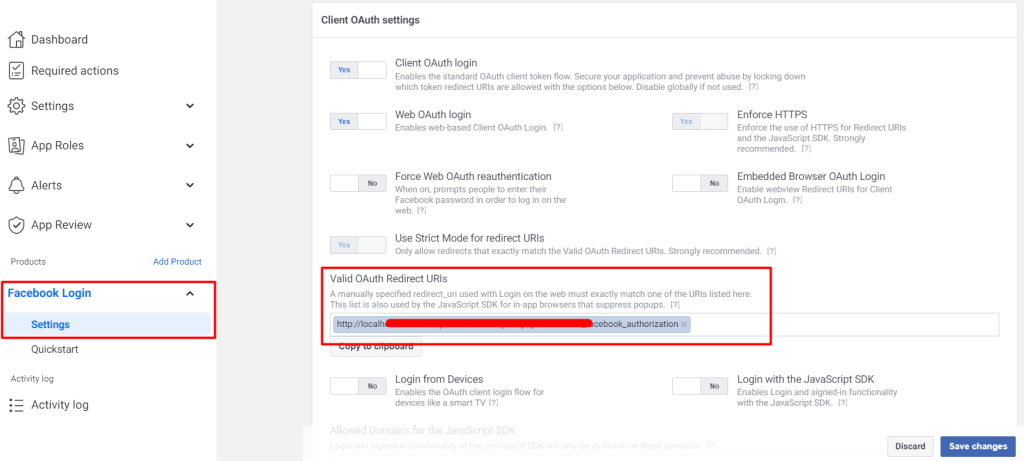
Step-9: Now go to “Facebook Login–> Settings” add “Valid OAuth Redirect URLs” copied from your site plug-in setting page and save changes.
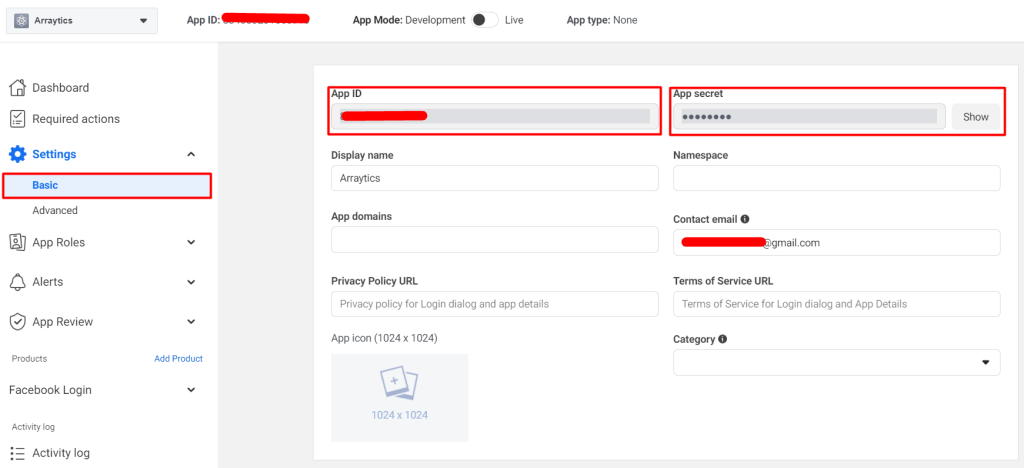
Step-10: Finally, navigate to Settings-> Basic Settings menu. Here you can see the Facebook “App ID & App Secret”. Copy the App ID and secret key and paste it on the plugin Settings.
Insert APP ID and Key #
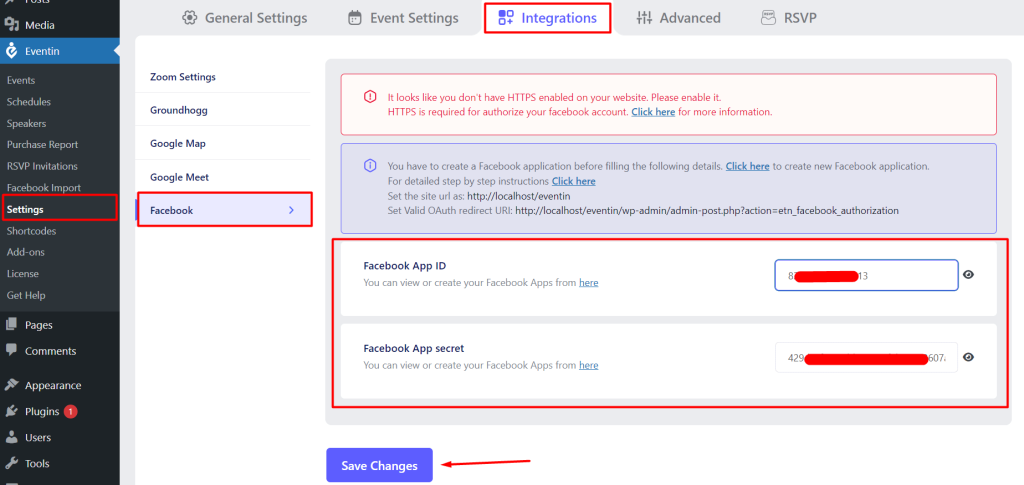
Navigate to Eventin -> Settings -> Integrations -> Facebook and insert the Facebook APP ID and Secret Key.
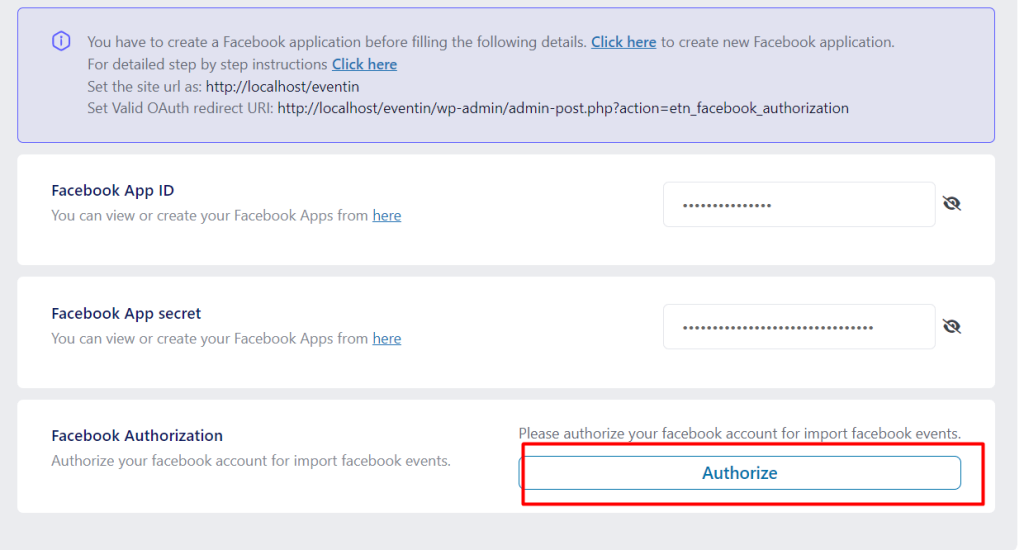
When you save the Facebook App ID and Secret key, you will see the “Authorize” button. Now, click on it to authorize your Facebook account to display Facebook events.
Now, Click on the continue button for successful authorization.
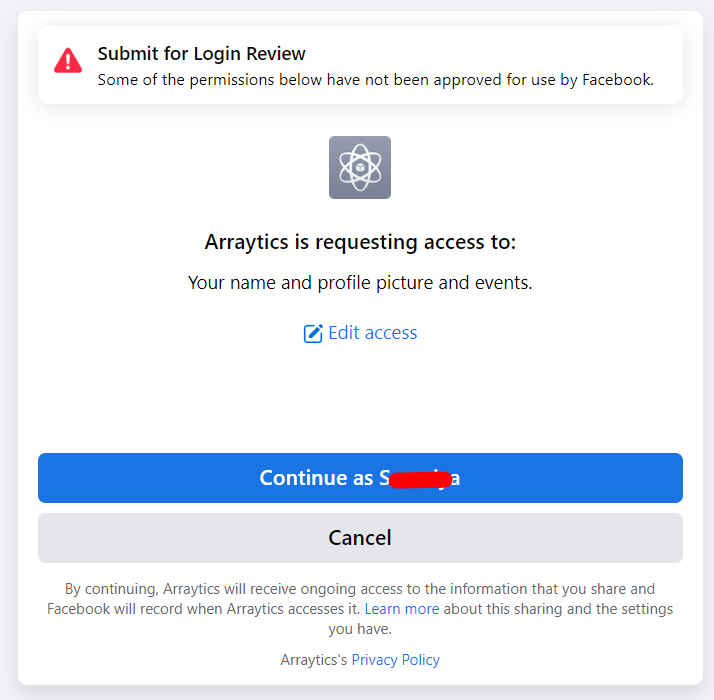
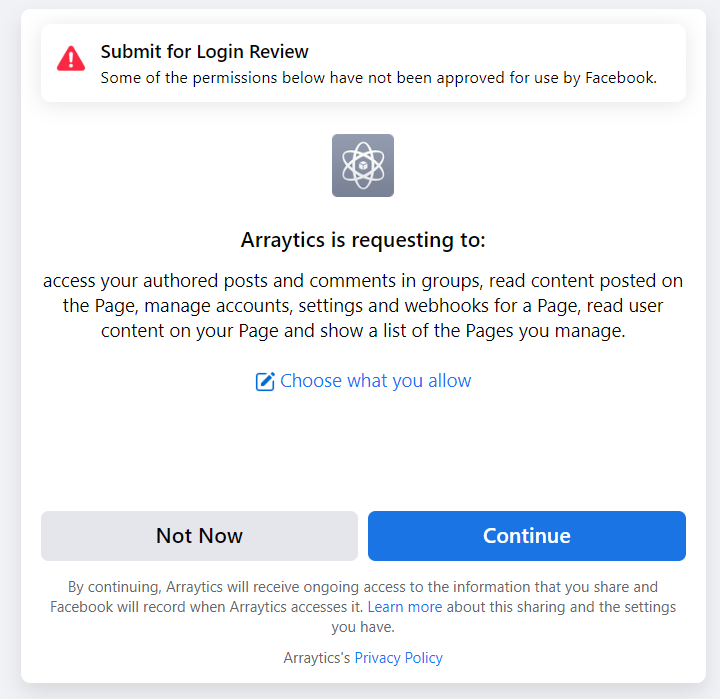
You can see the account is successfully authorized.
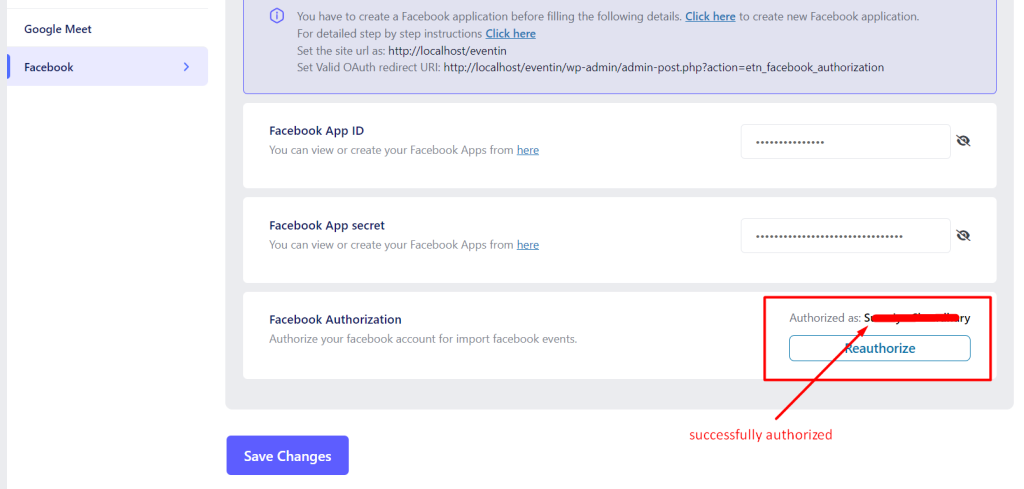
Import Event from Facebook #
You will get the event ID from the event URL on Facebook.
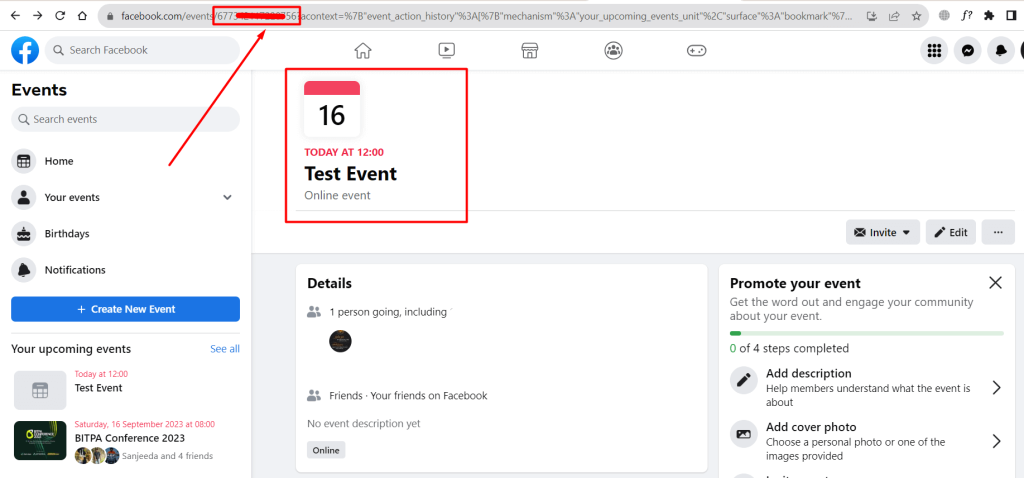
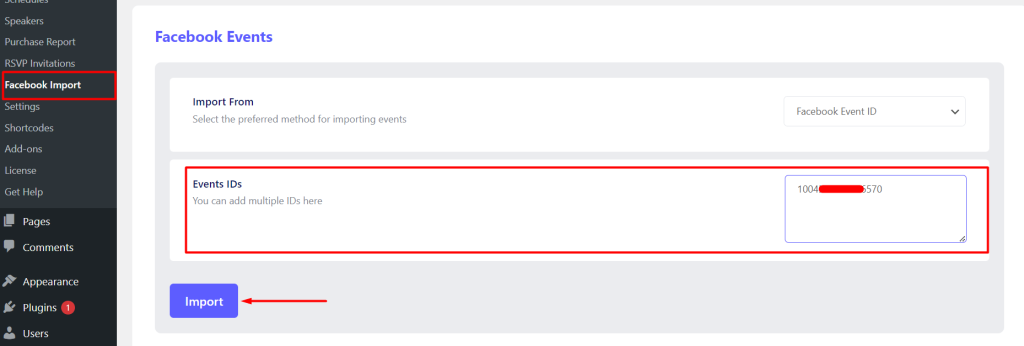
Navigate to Eventin-> Facebook Import -> Add New Event and insert Event ID. If you want, you can insert multiple event IDs here.
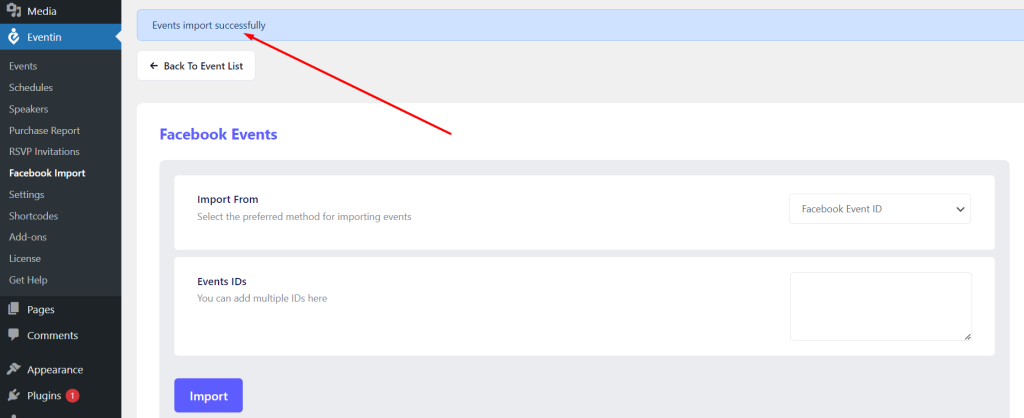
Now, click on the “Import” button.
You can also insert a Facebook page and Group ID for fetching all the events on this page or group.
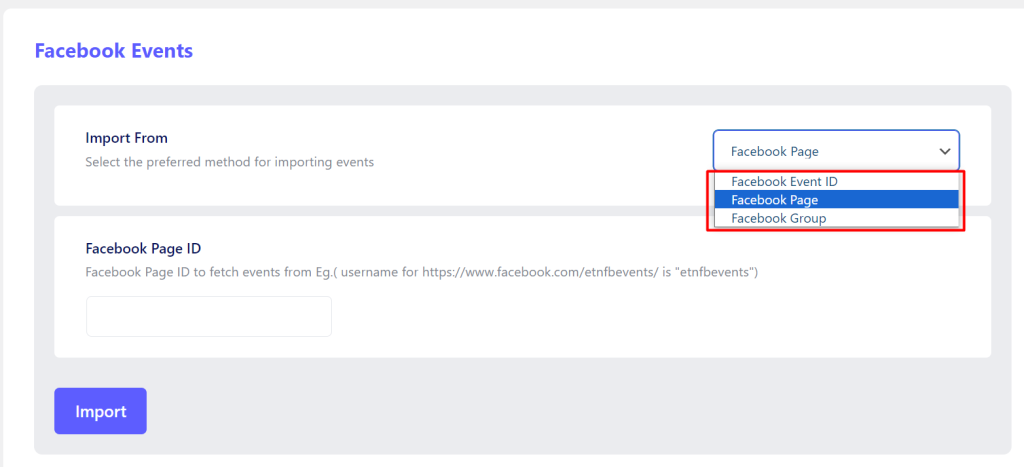
Note: You can fetch the public events of the Facebook pages or groups but personal account events are not fetched because Facebook doesn’t permit it.
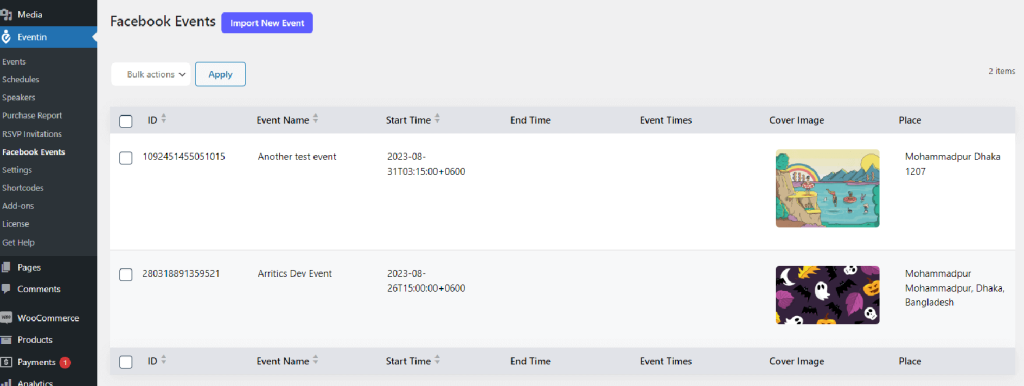
All the imported events are shown here.
Display Events on Frontend #
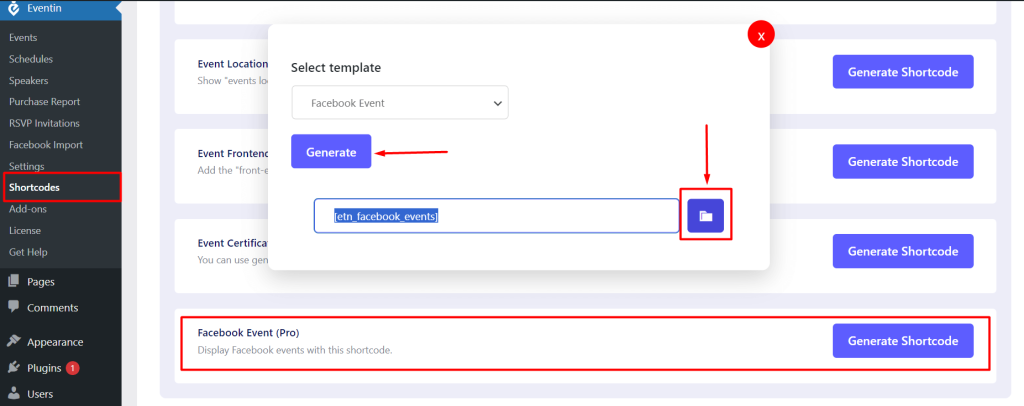
Go to Eventin -> Shortcodes -> Facebook Event (Pro) -> Click on “Generate Shortcode” and the form will be popup. Now click on the “Generate” button from generate shortcode and copy the code.
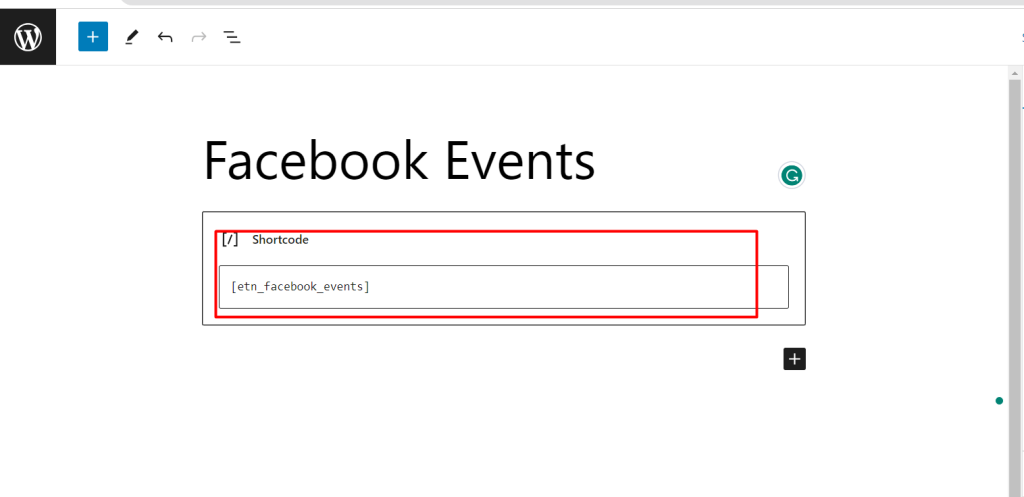
Create a page and paste the shortcode.
Front-end view:
