- Multivendor Support Notice:
- Step 1. Plugin Installation
- Step 2. General settings
- Step 3. Vendor Wise Food Menu Styles
- Step 4. Vendor Wise Food Menu Location
- Step 5. Vendor Wise Food Menu Discount (WPCafe PRO)
- Step 6. Vendor Wise Food Preparing & Delivery Time (WPCafe PRO)
- Step 7. AJAX-Based Mini Cart Support
Multivendor Support Notice: #
Important: Currently, we are providing Dokan multivendor support on wpcafe food menu only. Themewinter team is working to give multivendor support to pickup delivery, reservation, food with reservation and other modules. These compatibilities will be added in the future.
Step 1. Plugin Installation #
Prerequisites #
- WordPress Version: 5.2 or, higher
- WPCafe Plugin
- PHP Version: 5.6 or higher
- PHP memory_limit = 512M
- max_execution_time = 600
Installing and Activating Required Plugins #
You need to install 4 plugins to get the complete set of functionality for this addon.
From your dashboard, Install and Activate the following plugins:
- WPCafe Multivendor
- WPCafe
- WooCommerce
- Dokan
- WPCafe Pro(If you need pro features)
After installing and activating the plugin you have to save the permalink. go to your dashboard, click on settings. Then open permalink settings, select ‘post name’ and save changes
You can check out the documentation for these plugins to learn how to install them.WPCafe | WooCommerce | Dokan

Step 2. General settings #
WPCafe #
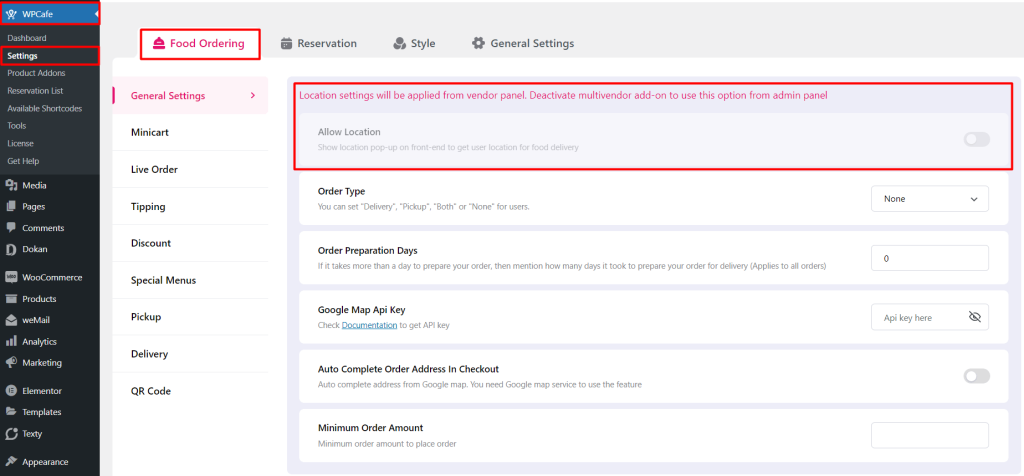
From your dashboard, go to WPCafe -> Settings and choose Food Ordering tab where you will find all the features to customize the Food Menu.
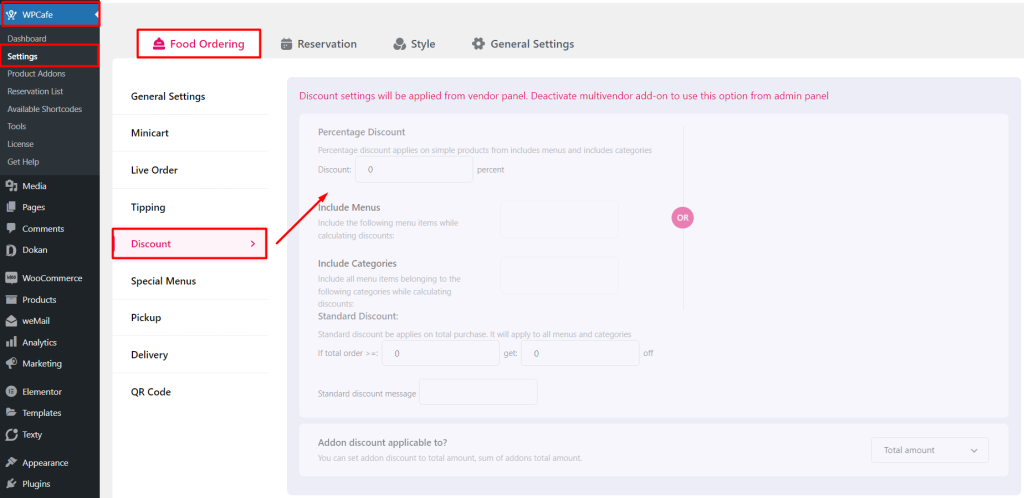
NOTE: When WPCafe Multivendor Restaurant Addon is active, Location settings and Discount Options are disabled from the admin panel. But don’t worry, vendors can choose their own Discounts and allow location from the vendor panel. Reservation and Order Time Management will still work globally from the Admin panel, not from the Vendor panel.
Check out WPCafe Documentation to learn more about its features.
Dokan #
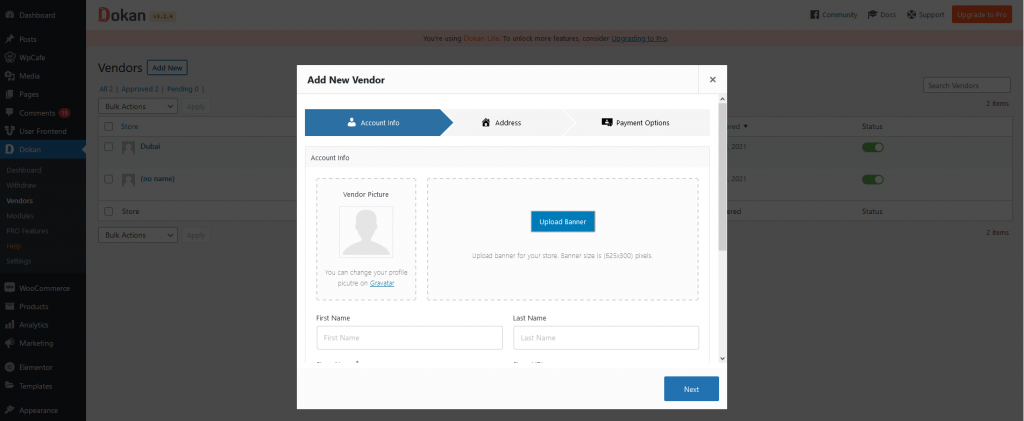
With Dokan, you can add multiple vendors to your page. Go to Dokan -> Vendors -> Add the necessary information then click Create Vendor.

Check out Dokan Documentation to learn more about its features.
WooCommerce #
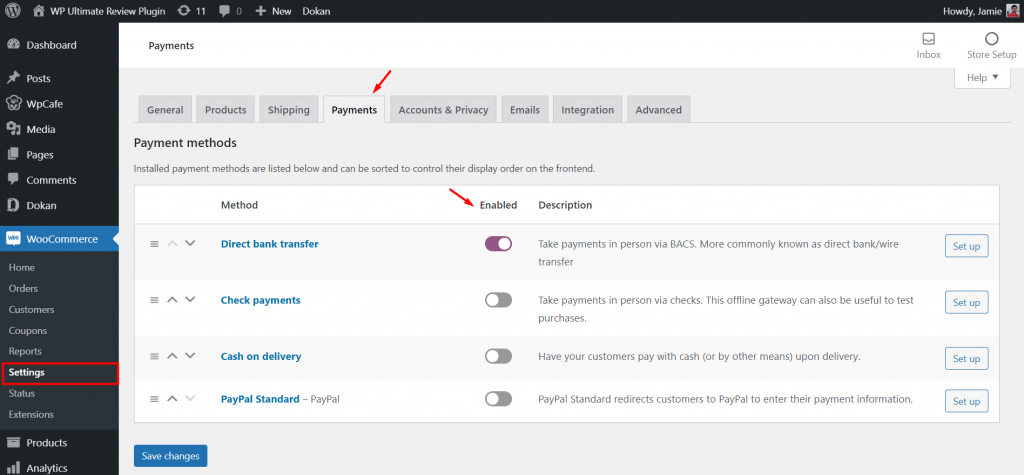
Get WooCommerce payment gateways for your site. Go to WooCommerce -> Settings -> Payment and enable your preferred payment method.
Check out WooCommerce Documentation to learn more about its features.
Vendor Dashboard #
Access your vendor dashboard by logging with your vendor account details. You can find the settings for WPCafe Food Menu.
Step 3. Vendor Wise Food Menu Styles #
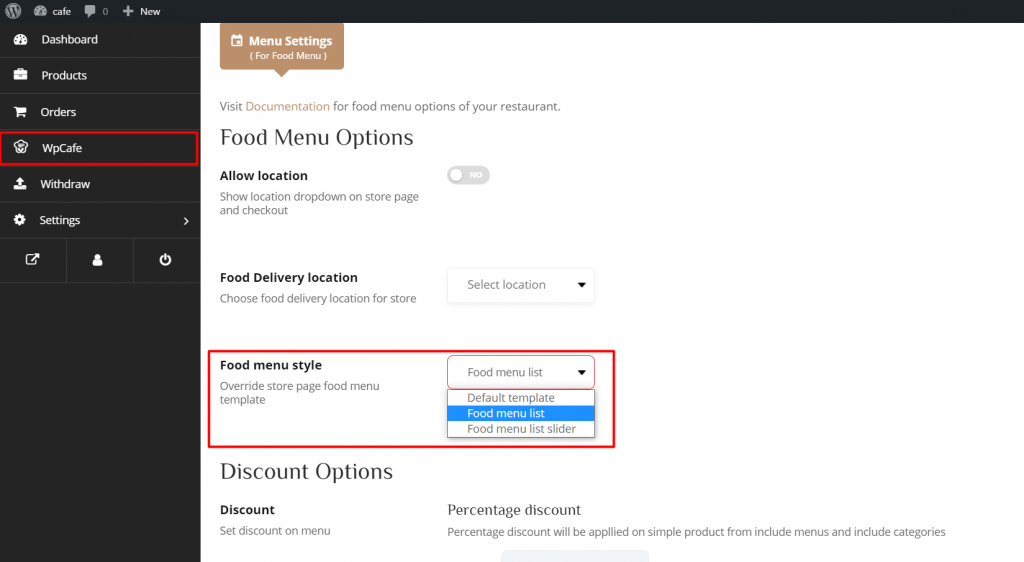
Vendors can choose the Food menu style according to their preference. Wp Cafe has two food menu templates for the vendor.
- Food menu list
- Food menu list slider
For selecting the food menu style, go to your vendor dashboard and select WPCafe-> Food Menu Style. Users who visit your site can view your chosen food menu style.
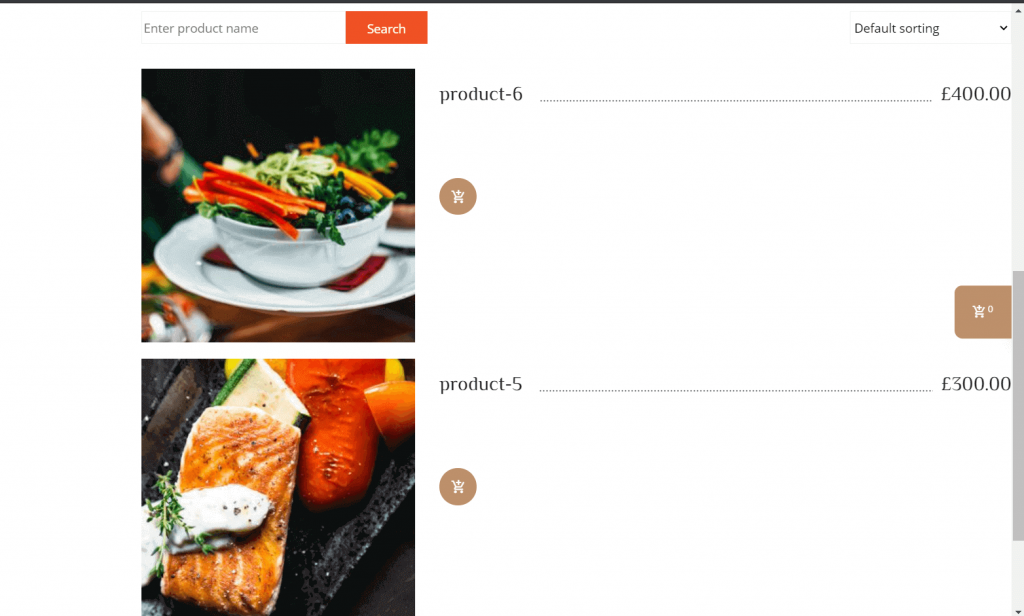
The preview of the food menu list style:
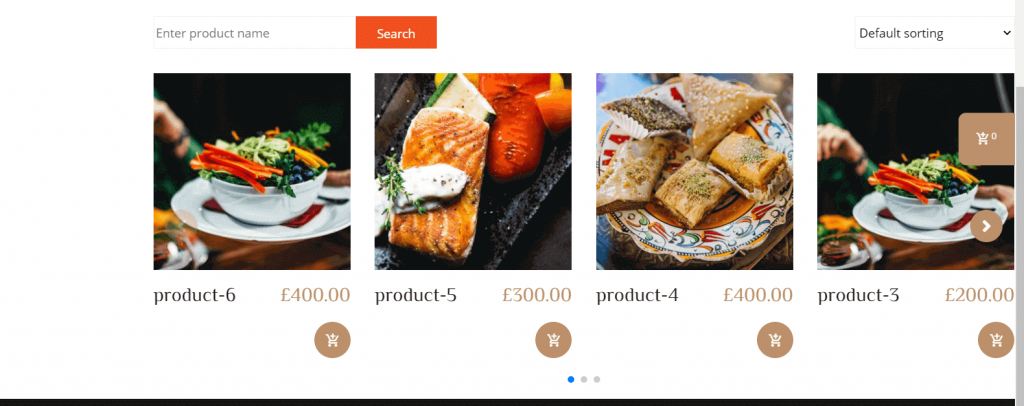
The preview of the food menu list slider style:
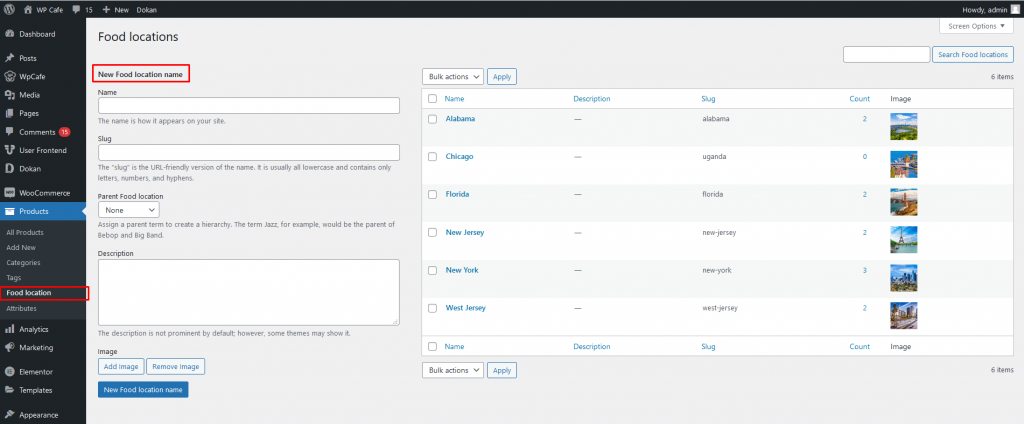
Step 4. Vendor Wise Food Menu Location #
Admin can choose specific locations for food availability and create a list. Go to Products -> Food Location and enter details for new food location.
Vendors can choose food availability locations only from the list created by the admin. From your vendor dashboard, go to WPCafe -> Food Delivery Location and set your location. Select Allow Location to show your location for your food menu.
Step 5. Vendor Wise Food Menu Discount (WPCafe PRO) #
Go to the vendor’s dashboard and click on the WPCafe menu. Under “Discount Options” set your discount (percent) and select food menus and food categories of vendors. Then save the settings.
Step 6. Vendor Wise Food Preparing & Delivery Time (WPCafe PRO) #
Set both food preparation and delivery time from the vendor dashboard. You can set the time while creating or editing any product, click on the input box and set the time.
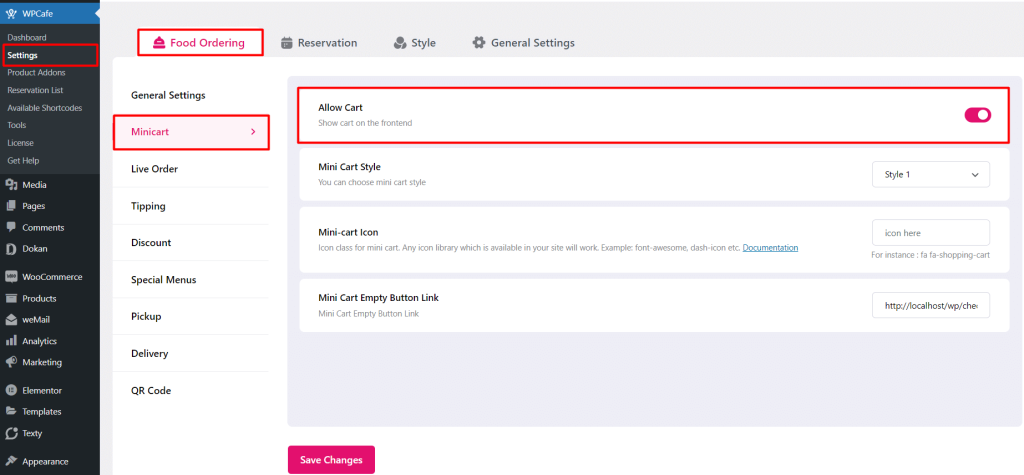
Step 7. AJAX-Based Mini Cart Support #
In order to enable the “Mini cart” feature, please go to WPCafe -> settings -> Food Ordering -> MiniCart -> Allow Cart -> Yes (click mini icon). You can change the cart icon, icon color, and product background color from the same settings menu.